
Likes
Comments
Share


@SEGA_Y_Griega
Follow
Genetics: O.G. Kush x Afghani
Yield: 300 – 400 g/m2 (600 W)
Flowering time: 8-9 weeks
Height: 100 cm
THC - Very very high
equipment used:
awning - Mars Hydro 4✖️4
light - Mars Hydro FC E 4800
fan - Secret Jardin 20w monkey fan
ventilation - Soler&Palau TD-350 Silent with temperature and humidity sensor
I am satisfied with the growth and development, the only negative is that it is impossible to keep the necessary humidity and temperature at the same time as the heater is on.

Likes
47
Share


@Wastent91
Follow
So are you guys okay? You know so much to me! My situation as a grower is growing and many possibilities are opening up for me for new fantastic projects, to which the first thing for me is the mega-passion that I have for these girls, who at the same time give me fun, well-being, social life, introspection, meditation, high if necessary, I would really do everything for her if I lived in a country where this is legal, but unfortunately I can't and you don't know how much I envy people in America who can freely grow and show their results on Instagram and many other social networks that I hate but in So if people follow you you can even survive this, this can't be done in Italy, I can only live on the sidelines and I'll be happy in my only experience of myself producing the best possible weed on the planet where I am! Apart from this rant, I wanted to say that the new grow box is the intelligent ventilation system that regulates the air in relation to the humidity and temperature in the box, I must say that for me it is a huge leap in quality that I am sure will also be reflected on my girls! Thanks for everything Mars Hydro you are my source of pride and happiness for trusting me that I can have the same professional home tools as anyone else on this planet who wants good and natural weeda! Mars hydro = excellent quality in everything! For now, the light is set to 50 x one hundred, we'll see later how the girls develop and we'll make some adjustments, thanks at the GHE for breeding this strain! Im hope this girl Will be a very good big Babe! Thanks for al! I appriciate all of yuor likes GD 4Life!🤣😝😼😉😺💖🧑🌾🌱🌿🌲💨


Likes
9
Share


@Krautbauern
Follow
After 35 days of vegetation we send them into Flower. They get 2 hours less light every day until we reached the day/night-cycle 12/12 hours.
we have noticed that they have already started their stretch. they grow 5-10 cm every day.
We water them with bio grow for the first time.

Likes
4
Share


@Ryno1990
Follow
Snow Panda fast flowering photo starting veg from seedling stage she grew weird as she is missing one side of her cotyledon leafs as they did not grow
The Snow Panda is starting t9 come along good at the ending days of week 1 of veg now in a 1 gallon pot
Likes
8
Share


@nevertheless
Follow
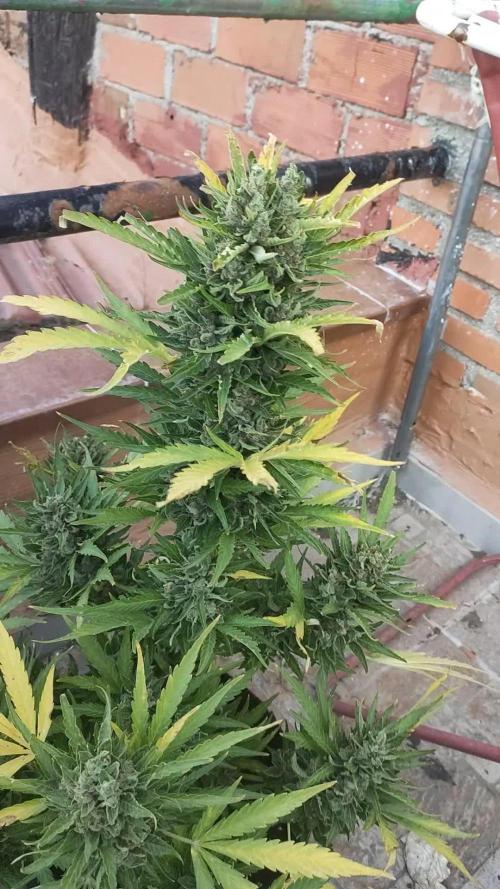
A good week overall! Started out a bit rough, as I noticed some yellowing on the oldest leaves. Unclear exactly what the issue is/was. I'm using soil with organic fertilizers, so over-nutrient seems unlikely to me (very little readily available nutrients, all slow-release, only two waterings up to that point). But some folks on different forums think it may be nutrient burn. Alternatively, it could just be lack of light on these leaves (they are very shaded) and touching the soil.
Regardless, while researching I noticed that my humidity was way down, hovering nearing 35%. The tent is in a dehumidified basement so this makes sense. Based on VPD charts this seemed non-ideal for the plant, so I added a small humidifier and a RH PID controller. Humidity stays around 55-60% now, which is a nice compromise between keeping humidity up in the tent and not fihgting the basement dehumidifier too much. I also drilled some holes in the container to help air out the soil faster... a DIY janky airpot :)
Throughout the rest of the week, LST ties were adjusted and heavily obscured leaves were pruned off. I also started pruning off bud sites that were pointing downwards, in an effort to reduce clutter and wasted resources.
All in all, she's looking pretty good. I'll probably flip in the next week or so. I would love to give it some more time to veg, but have a schedule I need to keep later this fall. This strain supposedly flowers in 6-7 weeks, so we'll see :)


Likes
19
Share

@420DeepGrow
Follow
📆 Semana 13:
La Permanent Jealousy XL Auto completa su ciclo en plena forma. Los cogollos están densos, cubiertos de resina y con un aroma complejo listo para el secado. Gracias al silicio de XpertNutrients, las ramas han aguantado el peso sin problemas. Tras el lavado de raíces y unos días extra de maduración, la planta está lista para cosechar en su punto óptimo.
¡Seguimos creciendo fuerte! 💪

Likes
10
Share


@Its_Fruz
Follow
Big bud stop 32 day
Overdrive start 33day
Terpinator 1 of 10 days 4ml/l all flowering phase
Likes
18
Share


@DogDoctorOfficial
Follow
Hey fellow green thumbs! 🌿💚 The day has finally come—our Auto Northern Dragon Fuel from Super Sativa Seed Club has been harvested! After an exciting journey, we’re thrilled to share the details of this incredible plant’s final stage. Let’s dive into the harvest report!
🌟 Harvest Details:
Day 75: Harvest Day
• Harvest Date: Day 75
• Harvest Method: Our beautiful Auto Northern Dragon Fuel was harvested yesterday. After weeks of careful nurturing, the time was right to bring in this amazing plant. 🌿🌼
• Preparation: Before hanging, we meticulously cleaned the plant, removing all leaves without trichomes to ensure a smooth drying process and to enhance the quality of the final product. 🌿✂️
Current Drying Process:
• Method: The entire plant is now hanging upside down to dry. This method helps maintain moisture levels within the buds, allowing for a slower and more even drying process. 🌿🔄
• Environment:
• Temperature: 18-22°C (65-72°F)
• Humidity: 50-60%
Maintaining these conditions is crucial for achieving a perfect dry and preserving the plant’s aromatic and flavorful profile. 🌡️💧
🌟 Plant and Bud Characteristics:
Auto Northern Dragon Fuel:
• Bud Structure: Dense and sticky, with an impressive trichome coverage. The buds are beautifully formed, showcasing the robust genetics of this strain.
• Aroma: Even in the drying phase, the rich and potent aroma is unmistakable. Expect a delightful scent that hints at the powerful experience to come.
• Trichomes: A thick layer of trichomes covers the buds, promising a potent final product with a great flavor profile. 🌿✨
🌟 Care Tips:
• Drying Process: Patience is key. Allowing the plant to dry slowly will enhance the final quality, preserving both flavor and potency. Ensure good airflow around the hanging plant to prevent mold and mildew. 🌬️💧
• Trimming: Once the drying process is complete (typically 10-14 days), it will be time to trim the buds. This is where we’ll shape the final product and get it ready for curing. ✂️🌿
• Curing: After trimming, curing the buds in jars for at least 2-4 weeks will further enhance the flavor and smoothness. This final step is essential for achieving the best possible smoking experience. 🍁
🌟 Genetics Spotlight:
Auto Northern Dragon Fuel:
• Characteristics: Known for its robust structure and dense buds, this strain has shown remarkable resilience and impressive bud development throughout the grow. The final product promises to be potent and flavorful, thanks to the thick trichome coverage and rich aroma.
• Harvest Expectations: High-quality buds with a strong aroma and potent effects. The slow drying process will ensure the best possible preservation of cannabinoids and terpenes.
🌍🌿 Fun Fact:
Did you know? 🌿✨ Drying the entire plant slowly helps retain more terpenes, which are responsible for the plant’s aroma and flavor. This method also helps preserve the potency and quality of the buds, resulting in a smoother and more enjoyable experience.
For all the in-depth action and detailed explanations, head over to my YouTube channel! 🎥✨ I’m sharing all the tips, tricks, and step-by-step guides to help you get the best results from your grow. This week’s harvest has been particularly exciting, and there’s so much more to explore and learn together!
👉 Join me on YouTube Link in my profile 👈
🌟 Conclusion:
Harvesting Auto Northern Dragon Fuel at Day 75 has been a rewarding experience. With the plant now drying, we’re eagerly awaiting the final product. Stay tuned for updates on the drying, trimming, and curing process, and get ready for a high-quality harvest!
Happy growing, and see you next time! 🌿💚✨
#SuperSativaSeedClub #HarvestReport #NorthernDragonFuel #PlantMagic #GardeningJoy #NatureLovers #PlantPower #InspireGrow #YouTubeJourney

Likes
8
Share


@zombikush81
Follow
hello to all I share with pleasure this fantastic variety, excellent structure, grows very vigorous. as regards lengthening in the first weeks not more than 50% of its size. this week I will make the last thinning. thanks to all the friends who follow me. make it grow


Processing
Likes
5
Share


@jardineiroBud
Follow
Need a microscope to check better tricomes. I'm in doubt if is ready or not


Likes
4
Share


Likes
16
Share


@sea_grower
Follow
[pt-br]
Início da semana: 15/outubro
Luz à 63cm de distância do vaso.
19/outubro ligado o ventilador interno.
Temperatura/umidade:
- 16/outubro: 26°C e 68% RH
- 17/outubro: 27°C e 62% RH
- 18/outubro: 26°C e 60% RH
- 19/outubro: 23°C e 60% RH
- 20/outubro: 23°C e 60% RH
- 21/outubro: 22°C e 65% RH
- 22/outubro: 25°C e 60% RH
Regas:
- 15/outubro - 400ml por planta com 0,5ml/L dos fertilizantes B52 e Grow A/B
- 18/outubro - 500ml por planta com 0,5ml/L dos fertilizantes B52 e Grow A/B
- 21/outubro - 500ml por planta com 0,8ml/L dos fertilizantes B52 e Grow A/B
Fim da semana: 22/outubro
Likes
11
Share


@sunshinegroww
Follow
Here we go the big girl its on fire so far so good big leafes happy times just doing her things

Likes
2
Share


@Kali_DC
Follow
Run off testing
Peach Sherbert OG - ph 7.1 / ppm 2800
Peach Sherbert OG #2 - ph 7.1 / ppm 2100
Mimosa x Orange Punch - ph 6.9 / ppm 3250
Mimosa x Orange Punch #2 - ph 7.1 / ppm 3700
Permanent Marker Auto - ph 6.8 / ppm 3750
Permanent Marker Auto #2 - ph 6.7 / ppm 4300
Glookies Auto - ph 6.7 / ppm 2000
Glookies Auto #2 - ph 7.0 / ppm 2500


