
Likes
Comments
Share


@Forrbiddenterpz
Follow
Seeds started to pop about 4-5 days after germination I got 100% germ on this run


Likes
2
Share


@lleuquino
Follow
Ya al día con las fotos. Empecé a fertilizar con vitamax pro. Las hojas laterales rotas con color marrón tienen quemadura por luz del led de apoyo, descarté sobrefertilización por que solo apareció en hojas superiores. La punta del cogollo central también se está quemando con luz por proximidad al led principal que lo tengo al máximo de altura.


Likes
25
Share


@SybDarret
Follow
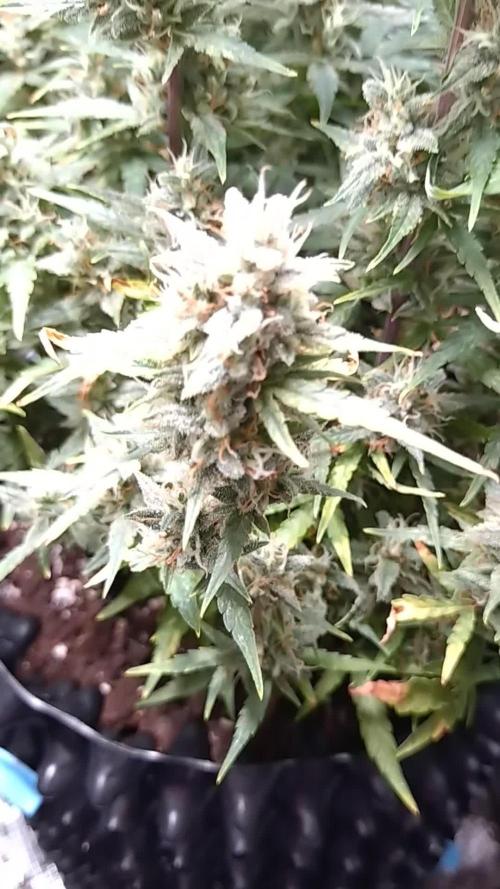
They are 46 and 60.5 cm
Both of them look pretty, each one is different from the other but they are beautiful 😍
Taller keeps beeing full of pistils, and the smallers that have green buds almost without pistils now is developing some kind of purple color on her leaves.
They have a strong sweet and critric smell, the strongest among my plants.
Watered yesterday with nutrients, i'm not sure if keep feeding them or not. I guess if i give them one more week (maybe cut them on feb 11) their colas may gain some weight, specially lower buds.
Added a video of each plant, i hope you enjoy 😺

Likes
7
Share


@South79
Follow
Just letting her do her thing. Pushing nutes higher no signs of stress or burn. Ppfd 700
Likes
3
Share


@jardinprimitivo
Follow
El sabado 10/8 se pasa temporizador a 13 horas de luz.
El domingo se sacan ramas bajas para hacer esquejes.
Se agrega trampa para mosquitas.


Likes
19
Share


@Sato_Growing
Follow
Watering this week 0.6-0.7 L per plant
Did some more Lst to my plants and the seem to luv it. Also did some pruning to help the lower brunches to catch up
Some of the plants started to flower already. Running 20/4 day/night.


Likes
13
Share


@High_Grade_Dadli
Follow
Seed production was a great success grow this stain was awesome didn't run into any major prob and the scent is off the chain can't wait to see how the new wave come out( follow the vaccine diary if ur interested to see the out come) #happy growing

Likes
3
Share


@BR1CK_SANCHEZ
Follow
Week 2 went smooth... Started to see 5-finger leaves showing so I lowered the lights and turned them almost all the way up. Installed a Co2 Dispersal Canister that should finish out veg. Wish I knew the ppm for the Co2 but I don't. Finna start LST this upcoming week


Likes
52
Share


@Salokin
Follow
Hi growmies,
She is developing alright, however I feel that she isn’t stretching enough. Maybe this will start now that she has started preflower, she was topped towards the end of this week, even though she is so stubby, as i want to guarantee that all colas receive the same amount of love from the plant. Even though she is growing super horizontal, I will still install a ScrOG; to be able to control her bushyness a little. Have also finally come around to channel off some air from one of my pumps into the reservoir.
Likes
3
Share

@PhinolaGreen
Follow
11. Woche
Wir kommen langsam auf die Zielgerade, denke noch 2 Wochen maximal, dann ist sie rdy. Ich werde diese Woche noch normal Düngen und sie dann zur nächsten Woche Spülen werde, damit sie noch ne Woche Nachreifen kann. Sonst bin ich wirklich zufrieden mit ihr 😊😌
Likes
12
Share


@chrisss
Follow
Day 57) nothing
Day 58 ) Fed ph”d recharged water, half a gallon
Day 59) nothing
Day 60) Fed calmag and bloom , lotta calmag cuz I see cal def
Day 61) nothing
Day 62) flush with 2 gallons of phd water
Day 63)
Likes
3
Share


@The_Lonely_Farmer
Follow
(9th feb) So these girls are now entering week 5 and with small space comes challenges as these girls have really started too lift off growth wise as you can see 2 of the girls icc are tall and the remaining shorter girls are toronjaz all happy and healthy...
still no defoliation I have chosen not too took these girls only a topping and leaf tuck here & there and wow they are loving life under aptus nutrients 🌱
They are thriving into this week where I will be tucking a few more leaves before flip in roughly a week or so time 🙏
Finally grow diaries has let me update with images and videos and I'll be updating my fastbuds diary tomorow too
These girls are sailing through each week and I'm really happy using aptus nutrients
I have topped 1/2 and all have responded great under aptus nutrients which I'm really loving using atm.
These girls will have another 2 weeks untill flip too 12 hours light but these aptus fed girls I expect too boom in flower 😍😅
We shall deal with that issue when it arrives 🤣
Happy growing! 💚

Likes
24
Share


@GrowGuy97
Follow
Day 99 F44 - I’m a little late on the update but this ladies are growing beautifully, this has to be the most resilient strain I have grown so far, with everything I thrown at them they still seem to be perfectly healthy & doing great! Can’t wait to see how this smokes, buds are finally start to fill out & get bigger! Thanks for following & happy growing friends!🙏🏼🌱✌️🏼

Likes
46
Share


@eldruida_lamota
Follow
Que hay familia, vamos con la quinta semana de vida de estas Candy Rain de Zamnesia, para el concurso POWER BUDS Plagron x Zamnesia CONTEST.
Vaya color verde que se están marcando, se ven bien sanas.
Esta vez regué con una aplicación de Sugar Royal, 0.8 ml x litro de agua, Alga Bloom 2 ml x litro y Power Bud 0.5 ml x litro, Green Sensation 0.5 x litro, por supuesto controlando siempre el Ph, que ahora mismo lo dejamos en 6.
Tragan alrededor de 0.8 litros por planta cada 48 horas.(3 riegos semanales).
La temperatura máxima está en 23.5 grados y la humedad está entorno al 55%.
Primera semana a 12/12 ya empiezan a marcar las preflores hembras.
Hasta aquí es todo, vamos viendo estas semanas como se forman y progresan nuestras flores.
Os comento que tengo un descuento y para que compréis en la web de Zamnesia de un 20%, el código es ZAMMIGD2023
The discount 20% and the code is ZAMMIGD2023
https://www.zamnesia.com/
Hasta aquí todo, buenos humos 💨💨💨

Likes
79
Share


@Hou_Stone
Follow
2 Gran Jefa au 53ème jour de floraison. 45G de bourgeons sec et effeuillés
J'ai commis des erreurs durant cette culture et je n'avais malheureusement pas la possibilité de m'en occuper comme je le voulais.
Je vous suggère de ne pas reproduire mon dosage pour les nutriments(+serait mieux) et ma fréquences d'arrosage(moins d'eau et + souvent serait mieux).
Je compte modifier certaines choses pour ma prochaines culture en espérant améliorer le rendement 👌
Merci pour votre visite les amis 💪
Likes
80
Share


@Mrs_Larimar
Follow
February, 14th.
Strawberry Cough is doing fine
No big Actions taken
Just keeping them Happy in watering with Beneficals, and
spraying with " Fast Plants Spray"
Girls are 12 Days old, and these are nice Seedlings. very Promising

Likes
10
Share


@Mr_Ewell
Follow
9 weeks from sprout. Week 3 in flower.
Everything's going smooth.. i think. Had degrees up mid 90s for a couple days and plugged in the ac. My bedroom is cold as fuck now which has my closet ranging from 77 at night to 81 during the day. I really don't want any colder than that. They are starting to smell jus a little more these past three days. At first i didn't smell them unless i touched em for the most part.
Ppms staying between 2000 and 2300...
Playing the damn waiting game.
I got some free time tomorrow. Maybe ill take some of them close up glam-style shots of some buds starting to form.

Likes
21
Share

@Mrs_Larimar
Follow
HAPPY 420
Today iam entering the SEEDSMAN 420 Growoff with the Following strain
the FATSO GMO f1 automatic.
All will start Indoors under SANlight Flex 25, and move Outdoors.
Only one Plant stays indoors, to see the performance under best Conditions
because my Outdoor Garden is hard^^
So i started with letting them soak, and then the seeds will move under a humid Kitchensponge
unil i see a sweet Taproot.
then they will go into the Final Pot, filled with lovely TerraPreta mj mix
the grow will be supported with Biotabs fertiliser
Breeder Information
Fatso GMO F1 Auto is a feminised hybrid strain that is the result of crossing two autoflowering strains,
viz. Fatso Auto and Cotton Candy Auto. This Cali-derived, slightly sativa-leaning,
easy to cultivate strain will please growers with its big yield, solid THC content and its sweet, candy and fuel palate.
Fatso GMO F1 Auto will grow well both indoors and outdoors. It has an above-average resistance
to mould but will still benefit from good ventilation, especially where humidity levels are quite high.
Resistance to plant pests and other pathogens is excellent. While plants will remain quite short at around 100cm
or less indoors, they can grow a little taller, reaching a height of 130cm, outdoors in open ground.
The entire cycle is completed in a maximum of 75 days from germination through to harvest
and although yields are said to be average this is still pretty impressive for an autoflowering strain.
The combination of high resin production and high terpene levels make Fatso GMO F1 Auto a very good strain from which to make cannabis extracts.
The terpene profile is sweet and funky with savoury scents of Skunk with pine and floral notes.
The taste is like sweet candy with hints of fuel. THC production is high, reaching 24% while CBD is low. The effect is uplifting and well-balanced.
