
Likes
Comments
Share


Likes
35
Share


@rhodes68
Follow
9/3 Day 50 of the grow
I cannot complain at all,reduced the nuet list to what they are getting from here out
9/5 Everybody always takes pics of their plants at their best thought it might help to see otherwise, well here they are at their worst.
Dried out intentionally as part of last stage of flower, like to get them conditioned for drying. Five minutes later all happy again after the water.
Fed Bio-Grow/Bio-Bloom/Karo syrup as a boost to bio
9/7 Re-adding Big Bloom (Fox Farms) to nuet mix, plants seem to be missing it and I agree. Once a week at 3 tps/gal
9/8 Fed each .75 gal full nuets
Moved Becky and Ceila towards edges to lower light to them. Seem very sensitive to it but the other two are just soaking it up so moving them into the center.
Pics later at lights out.
Greatly preferring the dark leaf pheno (Anna and Deb) over the light leaf (Becky and Ceila), Have two of each and the first grow was also dark leaf.
Plants are more compact, drink a little less, easier to maintain, and I think will end up producing at least as much as the larger sativa leaning plants.
Some defoliation on all
Changing nuet list add Fox Farm Happy Frog Cavern Culture 1-12-0 for the P think thats the nuet hole, three tablespoons top dressed one time application... for now.
See how it goes

Likes
9
Share


@TiRobotProds
Follow
Nous somme à la 6ème semaines de floraison tout se passe comme prévu les bourgeons continuent de gonflés les paramètres sont excellents 24 degrés en température 55% en hydrometrie.
- L'ajout de RQS guano a redonner un coup pouce à la plante les bourgeons ont sacrément gonfler aimer et regarder par vous même. Cet semaine sera aussi la dernière irrigation avec nutes. Ce run est l'une de mes préférée.
Léger carences en azote post-stretch cela es dû a un faible apport de celui-ci mais rien de grave cela indique les derniers semaine de vie de cette dame le rinçage sera simple et éfficace.
L'odeur quelle dégage es fortement fruité cela sent le 🍬 🍬. A plus pour d'avantge d'informations.👍🏼

Likes
5
Share


@BasedBuds_89
Follow
Had a great week, this baby is almost ready to chop. Two weeks at the most.

Likes
7
Share


@Nikkov
Follow
What's up guys
let's go to a week passing by, right?
and I'm happy that they have resined a lot, it's a shame they didn't develop better but due to the heat and low humidity this cycle they didn't grow much but I'm already improving in the next cycle and we'll see what happens. =D
Likes
6
Share


@The_Doctor_Green
Follow
Hola a todo el mundo!!🙌😃.
Espero que anden bien amigos!, yo ando con poco tiempo (créeme que me encantaría poder cultivar y vivir de esto😅, pero esta complicado), a lo que este diario se refiere, he trasplantado a una maceta de 10 litros, hice podas y he regado con fertilizantesy agua, con un ph de 6 -6.1, aun no he chequeado drenaje, pero en esta semana lo haré, seguro ya la pase a floracion.
Nos vemos la próxima semana! Y si lees esto y no me sigues, en instagram, ayudarías siguiendome( es gratis seguirme😅😉).

Likes
21
Share


@Chubbs
Follow
Fastbuds Week 4
Original OG Kush Auto
The 3 of these are staying on the shorter/bushier side. All in all showing amazing growth, good node spacing, and a nice rich shade of green while showing no issue of nute burn. I've given only water up to this point so around week 4 I like to give them a good feeding of a molasses tea (1tsp of molasses/per gallon of water) is what I do and they seem to enjoy it. Until next week Happy Growing.
Likes
12
Share


@ZzTooRightOGzZ
Follow
She doing so good after the lst I did earlier this week.
Topped her towards the end of week 3.
Likes
30
Share


@420DeepGrow
Follow
Gracias al equipo de Anesia Seeds, Marshydro y XpertNutrients sin ellos esto no seria posible.
💐🍁 Captain Future:
Nuestros criadores en Anesia Seeds están siempre en busca de nuevas dimensiones en la genética del cannabis y están comprometidos a ayudar a dar forma al futuro de la cría de cannabis. Después de que nuestra Future # 1 fuera probada varias veces por encima del 37% de THC y se convirtiera en un éxito entre los dispensarios, teníamos claro que el viaje no podía terminar aquí. Después de numerosos intentos, encontramos el socio ideal para mantener o aumentar la potencia y llevar la experiencia de sabor al extremo.
Esta variedad Premium puede cultivarse tanto en interior como en exterior. En el interior, las plantas tienen un tiempo de floración de 10 a 11 semanas y deliever rendimientos de 500-600g por metro cuadrado, al aire libre una planta puede producir hasta 800g
🚀 Consigue aqui tus semillas:
https://anesiaseeds.com/es/product/captain-future/
💡FC6500: Eficiencia líder en el mercado: la lámpara de cultivo LED FC-E6500, que ostenta un estatus líder en el mercado, es una solución rentable con un PPE de 2,8 µmol/J y un rendimiento máximo de 2,5 g/vatio. Ofrece un PPF alto de 2026 umol/S y es adecuada para una cobertura de vegetación de 1,50 m x 1,50 m y una cobertura de flores de 1,20 m x 1,20 m.
Iluminación versátil y uniforme.
https://marshydro.eu/products/mars-hydro-fc-e-6500-730w-commercial-led-grow-light/?gad_source=1&gclid=Cj0KCQjw1qO0BhDwARIsANfnkv9IIrYSbmJqz8PqpJOIyWwJfp5bc3SGJgUV68USLQ4tjmXDYwoBuAsaAue3EALw_wcB
🚥 MarsHydro ADLITE UV/IR/RED:
Para lograr un crecimiento óptimo de las plantas y maximizar los rendimientos es un arte simple que depende en gran medida de las condiciones ambientales adecuadas. Reconociendo las limitaciones de la iluminación natural y las soluciones de iluminación tradicionales para satisfacer estas necesidades únicas, lanzamos ADLITE. Estas luces especiales UV, IR y roja están diseñadas para llenar áreas del espectro, proporcionando las altas longitudes de onda que las plantas necesitan para un crecimiento y desarrollo óptimos.
🚀 Consigue aqui tu Adlite:
https://marshydro.eu/collections/adlite-supplemental-lights/
🏠 : Marshydro 1.50 x 1.50 x 1.80, carpa 100% estanca con ventanas laterales para llegar a todos los lugares durante el grow
https://marshydro.eu/products/diy-150x150x200cm-grow-tent-kit
🌬️💨 Marshydro 6inch + filtro carbon para evitar olores indeseables.
https://marshydro.eu/products/ifresh-smart-6inch-filter-kits/
🍣🍦🌴 Xpert Nutrients es una empresa especializada en la producción y comercialización de fertilizantes líquidos y tierras, que garantizan excelentes cosechas y un crecimiento activo para sus plantas durante todas las fases de cultivo.
Consigue aqui tus Nutrientes:
https://xpertnutrients.com/es/shop/
Semana 13:
Última semana de lavado de raices antes del corte final, ha quedado un cogollo central enorme, lleno de resina y con un olor apestoso, la dureza de estos es desmesurada.
Tanto XpertNutrients como Marshydro han hecho un trabajo increíble, con los Adlite he notado un incremento en la resina y tamaño de las flores.

Likes
18
Share


@HonneyHouse
Follow
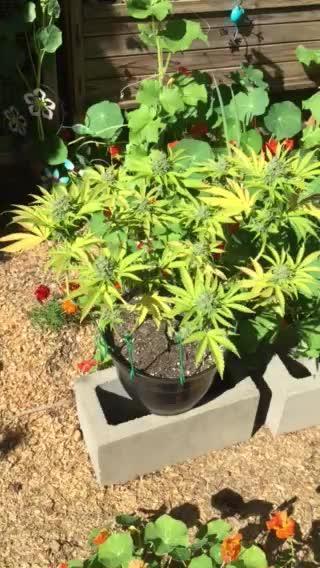
week 4.. amazing blooming.
The rain has stopped. The Dry season has come! Maybe one or two rain storm, but nothing to wory...


Likes
54
Share


@BudXs
Follow
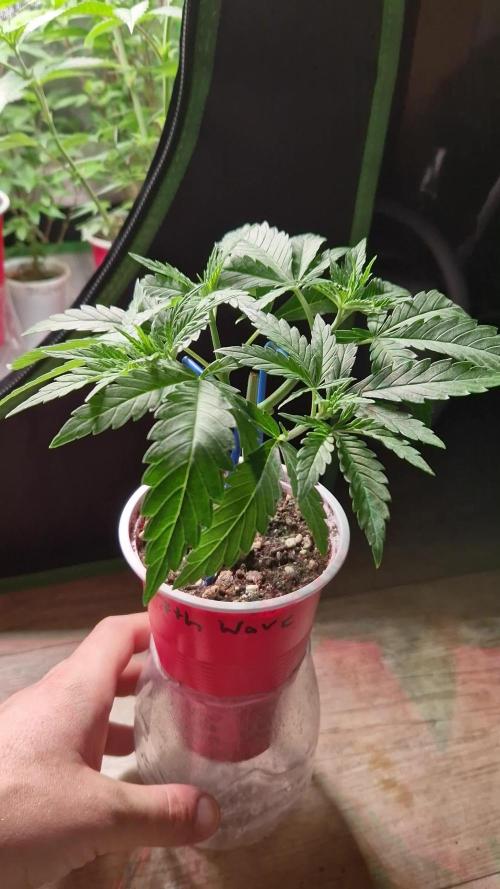
Solo cup challenge continues to press along. Not much change, plants are in veg, growing and healthy. Still a few weeks before the flowers start so I hope to get a bit of size going before it does. Having fun and really like looking at the other entries in this contest.
Check out WildeWeed, Butterstotch and BeanswithPork, silky, larimar, fireman

Likes
4
Share


@homerjgangia
Follow
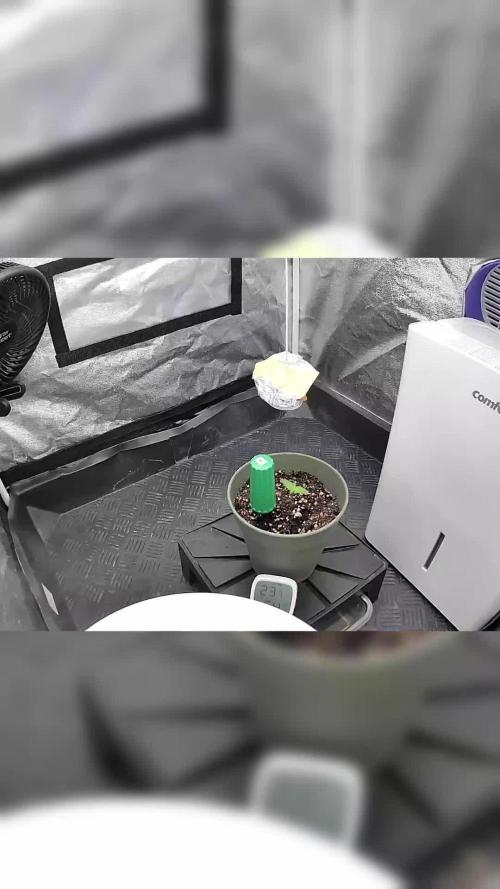
Mikromachine Auto
Brand Kannabia
Genetics Northern Lights x (AK-47 x Critical) x Ruderalis
Flowering Type Autoflowering
Flowering Time 10-11 weeks from seed to harvest
THC 15%
CBD Low
Height (Indoor) 60-70cm
Height (Outdoor) 85-150cm
Yield (Indoor) Up to 600 gr/m²
Yield (outdoor)Up to 600 gr/m²
Sex Feminized
📆 23.04-25 (Day 1 )
💬 just borned
💦 6.5
🍼 0.5L
📏 0.5cm
🌡️ 25c°
📆 24.04-25 (Day 2 )
💬 👽
💦 6.5
🍼 0L
📏 1cm
🌡️ 25c°
📆 25.04-25 (Day 3 )
💬 👽
💦 6.5
🍼 0.5L
📏 1cm
🌡️ 25c°
📆 26.04-25 (Day 4 )
💬 👽
💦 6.5
🍼 0L
📏 1.5cm
🌡️ 25c°
📆 27.04-25 (Day 5 )
💬 👽
💦 6.5
🍼 0.5L
📏 2cm
🌡️ 25c°
📆 28.04-25 (Day 6 )
💬 👽
💦 6.5
🍼 0L
📏 2.5cm
🌡️ 25c°
📆 29.04-25 (Day 7 )
💬 end of firstweek... Amazing💪👽
💦 6.5
🍼 0.5L
📏 3cm
🌡️ 25c°
Equipment: Unbeliveble
Masterseeds 100W (veg-bloom)
Masterseeds growbox 0.25x0.25
Plagron (Veg & Flower)

Likes
18
Share

@TrickzGrowz
Follow
Das toppen hat Sie super vertragen. War anscheinend genau der richtige Zeitpunkt.

Processing
Likes
16
Share


@Naturalist
Follow
Topped Gelato #1 twice on different stems on days 52 & 56, Gelato #2 on day 56
Started feeding 4ml Foliage-Pro & a dose of Zyme on day 54.
Color & health seems to be back on track.

Likes
15
Share


@Messypies
Follow
will post some drying pics here and do a full summary when trimmed and fully harvested
Peanut butter cookies has been flipped into flower. Lightly defoliated and lst'd for the stretch. Haven't done as much training as I would have liked but the plant is more of an experiment than anything else.


Likes
33
Share

@HinduGod
Follow
WOW LATE ON DA UPDATE HAVE BEEN BUSY WITH OTHER PROJECTS!!!! DIS PLANTS BUDS ARE LOOKING VERY VERY FROSTY!!! IT SMELLS VERY VERY GOOD!!! HARVEST WILL BE DONE ON DAY 80!!!!😎
PLEASE COME AGAIN!!!!
Likes
10
Share

@WeedleyScott
Follow
Das wird wohl die letzte Woche, ich schaue mal wann ich ernte. Ich denke ich werde ab jetzt auch nicht mehr gießen damit die Erde etwas trocknet und die Pflanze etwas stressed. Ich werde auch 1-2 Tage vorher das Licht aus lassen.
Aktuelle Werte:
VPD: 1.6
Humidity: 54%
Temp: 31°C
DLI: 50
1055 PAR


Processing
Likes
3
Share


@Dunk_Junk
Follow
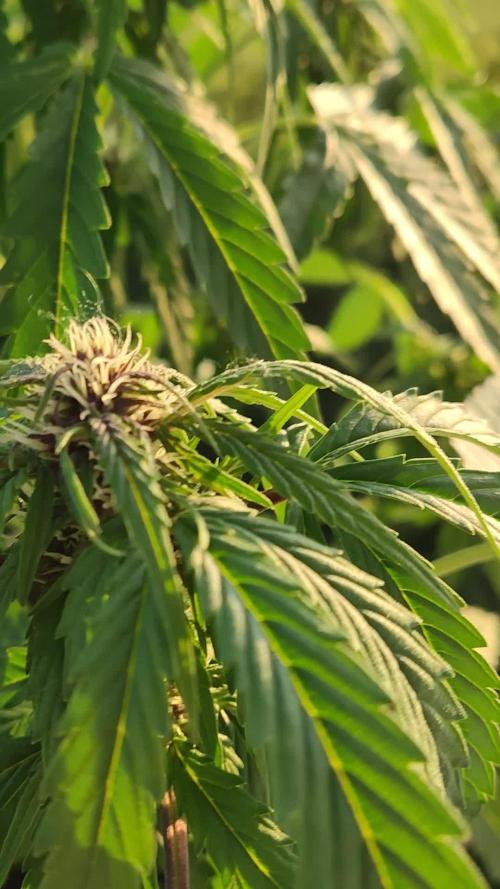
She's getting closer to the end. More orange pistils. Still a few weeks away though.

Likes
170
Share


@nonick123
Follow
Día 54 (10/03) Riego 1,25 Litro H20 + Wholly Base 2,5 ml/l + Solid Green 2 ml/l + Early Flower 1,25 ml/l de Gen1:11
TDS 1033 PPMs - pH 6,51
Día 55 (11/03) Defoliation time!
Con la increíble ayuda de @miyaguiokpolilla, @dogdoctorofficial y @growwithflow420 hice la defoliación recomendada exactamente después de 21 días cambiada a 12/12
Consejos de defoliación
- Elimine menos del 20% de las hojas de abanico y solo las hojas de abanico
- Retirar el tercio inferior de la planta, incluidas las ramitas.
- Retirar las hojas en forma de abanico dirigidas hacia el interior de la planta.
- Retire las hojas de abanico que dan sombra a los futuros cogollos.
Día 56 (12/03) Esperando algo de estrés tras la defoliación... Han crecido 2 centímetros en 24 horas 😍🚀
Día 57 (13/03) Riego 1,25 Litro H20 + Wholly Base 2,5 ml/l + Solid Green 2 ml/l + Early Flower 1,25 ml/l de Gen1:11
TDS 1043 PPMs - pH 7,0
Las plantas muestras una ligera deficiencia de CalMag. Voy a subir el pH a 7.0 en este riego para mejorar la biodisponibilidad
Día 58 (14/03) Siguen con su crecimientos, los cogollos formándose y las hojas de azúcar empezando a llenarse de resina
Parece que la corrección de la deficiencia de CalMag ha sido muy efectiva! No hay más manchas y las plantas no paran!
Día 59 (15/03) Como mañana me voy a Spannabis 😍 voy a adelantar 1 día el riego reduciéndolo a 1 litro
Riego 1 Litro H20 + Wholly Base 2,5 ml/l + Solid Green 2 ml/l + Early Flower 1,25 ml/l de Gen1:11
TDS 1080 PPMs - pH 6,57
Día 60 (16/03) Spannabis time! 🚀
Día 61 (17/03) Spannabis time! 🚀
💦Nutrients by Gen1:11 - www.genoneeleven.com
🌱Substrate PRO-MIX HP BACILLUS + MYCORRHIZAE - www.pthorticulture.com/en/products/pro-mix-hp-biostimulant-plus-mycorrhizae
Likes
253
Share


@Ju_Bps
Follow
Hello growmies 👩🌾👨🌾🌲🌲,
👋 Girls still beautiful, the end is close, flush started.
Need a couple of days to be ready 👍
💧 Give water each 2/3 day
2 l Water + Flash Cleaner (3 ml/l)
PH @6
💡Mars Hydro - FC 3000
50% 28 cm
Mars Hydro Fan kit
Setting 9
Have a good week and see you next week 👋
Thanks community for follow, likes, comments, always a pleasure 👩🌾👨🌾❤️🌲
Mars Hydro - Smart FC3000 300W Samsung LM301B LED Grow Light💡💡
https://www.mars-hydro.com/fc-3000-samsung-lm301b-led-grow-light
Mars Hydro - 6 Inch Inline Fan And Carbon Filter Combo With Thermostat Controller 💨💨
https://www.mars-hydro.com/6-inch-inline-duct-fan-and-carbon-filter-combo-with-thermostat-controller
Anesia Seeds - High Mars 36% THC🌲🌲
https://anesiaseeds.com/product/high-mars/