
Likes
Comments
Share


@Unkraut
Follow
got hermies in flower week 2...tried to remove most but it seems they spread their love already....found seeds on all other plants :( plant still looked great and got a great yield!


Likes
5
Share

@Bobbo94
Follow
Other wedding glue has been chopped. Last one here, slowly it is maturing compared to the others. Solo cup grow started. Will start a diary on those as well. Wedding glue auto by fastbuds is a truly amazing strain. One of my favorites

Likes
1
Share


@Ninjabuds
Follow
It's amazing to think that this tiny sprout will one day be a beautiful, vibrant weed plant. I've nicknamed it Soap Tiny, and it's such a joy to watch it grow! Right now, it's just a few delicate leaves poking out of the soil, but I can't wait to see it reach its full potential. I have a feeling this little plant is going to bring me so much happiness.


Likes
17
Share


@Scoobiedoo
Follow
Day 42
350ml plain rain
Well sh*t - prob moved to next set lower fans - to be expected - don't take leaves off a sick plant! anyhoo - only took 5 off - so:
Def got calmag probs - overfed that - def got potassium prob - Q is still "Over or Underfeed" A is still F knows
Mitigating factors are [A] that she has a lot of flower and could be crying out for nutes [B} I did misread nutes and for first 6wks was overfeeding in conflict w premix soil [C] Stardawg had exact same nutes schedule and is NOT showing signs and [D] mycorrhizal addition to soil caused probs in bot Forbidden Runtz and Stardawg - so it could be chemlock - which would be the worst coz flush only solution and I don't flush!
pH 6.9 rH 45-55 Temp 22-27C
Solutions:
1] H2O diet for wk and monitor - check - (day2: lower leaves further displaying calmag/potassium/phosphorous signs)
2] Nitrates to solve potassium - top dress may help - but again, I think I've overfed in conflict with soil premix, so...
3] Calmag burn is almost certainly overfeed - minimize and monitor that when nutes reintroduced
<< OK - basically I must have a chemlock because I have overfed but almost as importantly - the watering schedule [I water every morning under 24hr] does let the soil dry every day - some plants can handle it - Stardawg can as well as Big Bud - FR can't. So Will give her double H2O for cpl days and see. Will also pH adjust - she is in range for everything for absorption but nit if getting repeated daily chemlock - so might as well pH adjust if semi-flushing >>
<< Decision >>
Right, I have got some serated edge tip burn in next level fans - these being last indica factory leaves - those of the lower level I left on are sick as and will come off, but leaving everything else on.
She didn't seem to mind the flush - put gallon through in two goes (one was her daily water) - not much leaf twisting - buds looks good and I think that is the point ... they're doing fine from the over nute - but the veg material not so.
Going to repeat flush tomorrow am but only 1/2 gal and leave her to dry out and then back to her h2O diet till Day 7 [tomorrow am will be day 3]
btw flush pumped rH up to 60 so had to leave doors open all day 😕
<<<<<<<<<<<<<<<<<<<<<<<<<<<<<<<<<<<<<<<<< AAAAAARRRRRRRGGGGGGGHHHHHHH 😞😠>>>>>>>>>>>>>>>>>>>>>>>>>>>>>>>>>>>>>>>>>>>>
Just been going over leaves after defoliating and found.... spider mites .... not nutrient based and not WPM thank the stars. Referring to the grow diaries collective - need advice
Well - defoliated heavily - now know - it is wk 2/3 flowering and I was holding off on defoliating Just in Case it was chemlock BUT now I know I would be removing the most infested leaves - I went nuts and did a full sativa stage defoliate - irony is if I did it straight away this might not have happened.
Gotta give props to BraveHeartGenetics - genius solution and will be borrowing my friends little handheld vacuum - she is a clean freak so will be perfect, Wind power very clean solution. Video in honor of BraveHeartGenetics - I need a joint now.
Day 43
Well the spider mites are def under control. Vacuumed plants. was fine - used a dyson handheld with wide hose so could get whole leaf in without it flailing around against sides and getting damaged. Got her hands to the sky for first time in ages - good to see. Hopefully the defoliation also helps get her back in the groove - now know it's not totally nutrient based - that said of course mites screw with transpiration and chlorophyll levels so you know - not great - but hopefully over.
Further to this I added a fan and a dehumidifier w 600ml capacity -should be enough to make the climate tough for mites.
The last 24hrs can go screw themselves, but got some great advice so grateful as 😊
No water and suspended flushing - she looks happier
I will still keep theH2O diet going and of course check for mites regularly
Day 44
350ml plain rain water. Hands to the sun! omg she hasn't looked this good in wks! thank the stars 😅
Day 45
300ml plain rain - - pic she's a bit droopy but she's still having transpiration probs and has just been watered - she'll manage
Day 46
300ml plain rain
she still looked a little forlorn so I got the loupe out and sure enuff - more beasties.
<<SO>> Got my vacuum out and cleaned the nozzle - it is an unregulated (sssshhh not v green) 1700W monster about twenty yrs old -
Vacuuming your Bud
[METHOD]
I found it necessary to go at the buds from the side as well as top down (don't vacuum from underneath even though that's where the beasties are - I didn't even try - you will damage the plant)
The nozzle was big enough to encapsulate a whole bud and it's leaves - so I repeated this motion [ahem] 1/2 dozen times and moved onto next bud
I vacuumed every bud in this manner
After, I checked known sites with my loupe I saw no mites - but some larvae still there
So I vacuumed all again in same manner
After final check I saw no larvae - I'm sure there are some remaining
[RESULT]
Leaf damage - very little - any heat/nute damaged tips got frayed, but the leaf veins / structure / stomata - underside leaf hairs / trichomes / pistils - no damage at all. OVERALL health condition of plant after vacuuming compared to as found: 9/10 AMMNDMNT << 6/10 >> FEED HER AFTER!
Very few mites on plant & bonus: all the leaves are now conveniently 'hands to the sky'. OVERALL effectiveness in removing mites: 8/10
[CONCLUSION]
I think the plant thoroughly loves this - provided it is not a routine affair, it is left in it's healthy pose - with most of a parasite removed.
That said, I think it is a process that requires repeating, like a course of antibiotics; twice a day for a number of days - or spaced over several days between vacuuming, perhaps in accordance with / dictated by... spider mite life cycle.
Finally - I know it sounds counter intuitive but DO use a POWERFUL Vacuum - The handheld Dyson 300 Whilst ok, just didn't do as well as my full size 1700W - result being I didn't significantly affect the mite numbers - thus a waste of time
8 hrs later she is looking fine - will repeat tomorrow
Day 47
No vacuuming today - ADDED CONCLUSION - I f you have to do this - FEED her afterwards - with maybe a protracted dark spell
She is looking so sick - the upside of the leaf damage you can't see but also expect she robbed her leaves of nutes as she has got lock out
Going to put her in the dark for a bit - got photos will update after
She had 3:1000ml Big Bloom 2:1000 Tiger Bloom Grow Big 1:1000 Calmag in 400ml plain rain water
Day 48
No watering to day
She actually looks good - checked her over for mites again - all clear - in evening thought maybe even a bit more color to her - maybe just lights were dimmed lol
Likes
3
Share


@mad_scientist
Follow
Plants have been drinking water for 2 full weeks and are ready for harvest. I am trying to take photos with the HPS and it's so difficult. I may need to invest to a filter..

Likes
6
Share

@NSABND
Follow
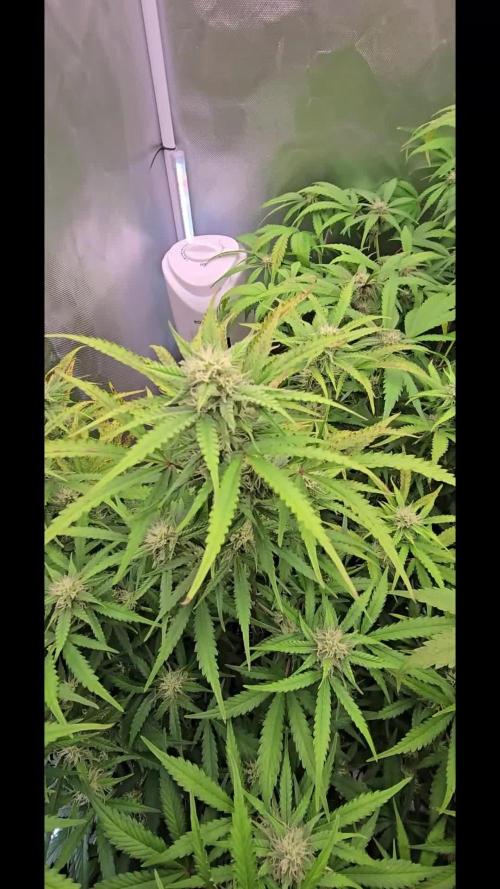
Day 50 😍welcome to week 7 😃👌
Day 51 i like the colorchange 😍🙏👍
Day 52 everything seems to ok 😃🙏👍
Day 53 and a long weekend 😎🙏👍 after 3 weeks a new SF SE3000 has to build in 💪😃👌
Day 54 after 4 weeks with SE1500 LED i upgrade today to SE3000 from Spider Farmer 💪😃👌
Likes
5
Share


@VeeDro203
Follow
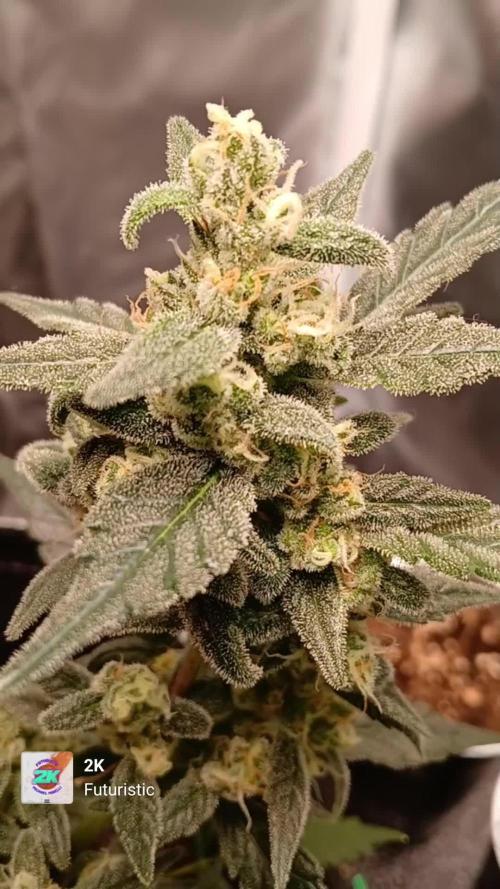
Well! We are looking great! I filmed one time and it paid off! Will be doing more branches next run. (LONDON POUND CAKE)
anyway got some good dark purple coming in strong!!


Likes
32
Share


@midEastern
Follow
Started flowering.they are ready and healthy.
Gave them just 6ph water and next watering tomorrow is gonna be huge dose of N as first 2 weeks they grow monsterous.
I keep em low and bend alot.lots of shoots begin to form as i
topped again about 10 days ago
Likes
16
Share


@Willy_Balls
Follow
Doing great.
Bottoms cleaned, waiting for a day or two to do a major defoliation.
17.11
Vast defoliation. All the bottom leaves and mids. Left around 4 top fan leaves
On every branch.
19.11
Plants recovered perfectly, light is back to 100% . Unfortunately my Bluetooth app for mars hydro stopped working. Light cannot pair anymore with the app.
Also irrigation is changed to vegetative crop steering.


Likes
3
Share


@franc
Follow
the mother plant and clones complete their cycle, the leaves begin to fade and change color shades, and the buds have gained maximum density. very fragrant sound from the box, the mother plant and clones have different smells and external differences, the clones have smaller inflorescences than the mother, as well as different shades of flowers and leaves.

Likes
248
Share


@mcflow
Follow
Yielded way more than i thought! Great strain, i planted the seedlings in their final pot right away and it worked like a charm! Had a little problem with gnats but the nematodes i used made that problem go away really fast. The smell of the buds are awsome, im looking forward to smoking some


Likes
2
Share


@RebelSeedBank
Follow
🚀 LCG x Vitamin Z PHENO HUNT just started!
Dropped 40 regular seeds from CHA_netics on wet paper towels 💧 and hit 100% germination already 🤯
Goal of this diary: hunt down 2–3 elite keeper females – Cup-level only 🏆 with that insane Lemon 🍋 + Cherry 🍒 + Candy 🍭 + Gelato profile and perfect structure for a packed SOG table.
This first week I’m tracking:
🌱 Early vigor & uniformity
⚡ Speed of taproot explosion
👃 First stem-rub aromas
Only the strongest and loudest plants move to the next round – everything else is cut from the team 🔥
Follow the ride if you love LCG / Z / exotic candy terps and want to see what monsters come out of this 52-seed LCZ × Vitamin Z project by Mr.LCZ / Rebel Genetics 🤝🌈
*************************************************************************************************************************************************************
🚀 Arrancamos el pheno-hunt más serio del año con Lemon Cherry Gelato × Vitamin Z by CHA_netics.
Germinadas 40 semillas regulares con método de servilleta húmeda 💧 y 100% de éxito desde el día 1 🤯.
Objetivo del diario: cazar entre este lote 2–3 hembras élite, nivel Cannabis Cup, con perfil terpeno lemon 🍋 + cherry 🍒 + candy 🍭 y estructura perfecta para SOG en 1,2 × 1,2 m.
Esta semana se evalúan 👇
🌱 Vigor inicial
📏 Uniformidad del lote
⚡ Velocidad de salida de la radícula
Solo las plantas más fuertes pasarán a la siguiente fase… el resto se queda fuera del juego 🔥
Bienvenidos al inicio del proyecto Mr. LCZ / Rebel Genetics – LCZ Supreme Line.
*************************************************************************************************************************************************************
Likes
4
Share


@KhaVigga
Follow
-LST is doing great,she adapted and responded well to any kind of lightly stress
-i started to use a full tea spoon of molasses every water and she seems to enjoy it.

Likes
30
Share


@LeafTucker
Follow
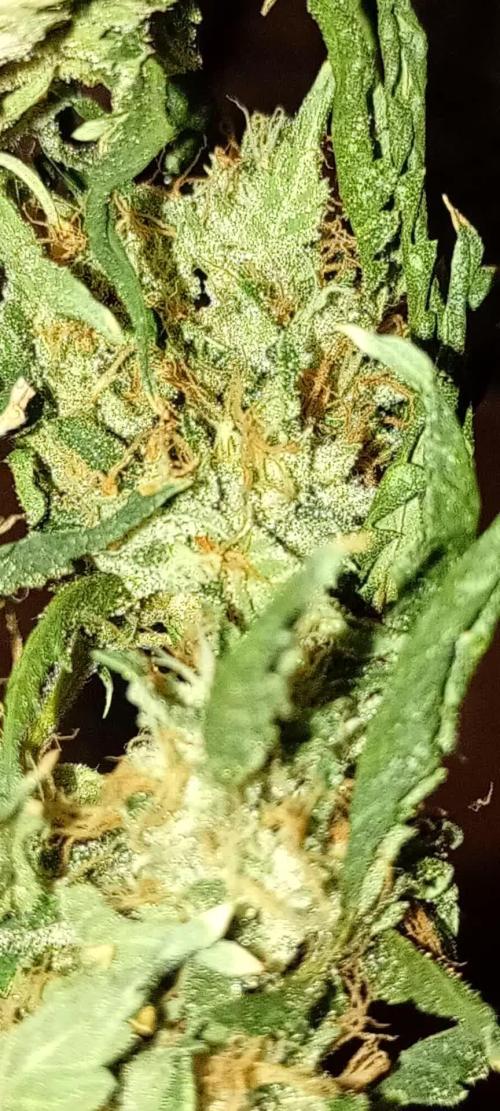
Fastbuds Blue Dream'Matic at 9 weeks. While initially I thought I had a toxicity, she was beginning to Autumn. I was never able to get her to 20ml bloom because I held off because of the perceived problem. She is still swelling daily. Her Trichromes have begun to Amber so she will be getting pH water for a week then just tapwater before harvest. At this point she will come down at 76 days which is mind-blowing to me. She has a citrusy smell with a strong skunky(?) undertone. I am really excited at this point, and can't wait to share harvest photos. Thanks for following along!
Likes
3
Share


