The Grow Awards 2026 🏆 


Likes
Comments
Share
@B4niTa
Follow
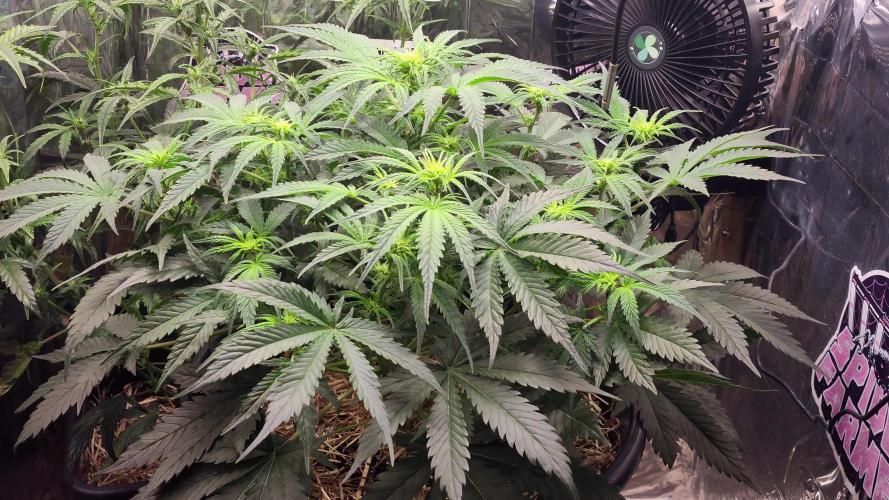
Overall she is very easy to grow, resistant to training, but I didn't expect to grow so tall😂

Likes
13
Share
@WeedFlin
Follow
Retiro las primeras hojas que salieron que se quedaban sin fuerza/luz abajo y se estaban pochando.
Avanza lo que parecía sequedad, ahora tiene mas pinta de hongo (mildiu). Corto las 4 hojas afectadas.
Amanece reforzada y sin rastro del hongo.
Apliqué la solución para curarla a pesar de ver mejoría. Parece que crece bien pero sigue desarrollando una especie de manchas al final de las hojas grandes

Likes
38
Share
@DudeGrowsWeed
Follow
Baox got a transplant this week. Gave them just a little Recharge this week, I'll be increasing the dosage next week. So far they are both looking like happy and healthy little girls. 👍
Likes
4
Share
@knnabisgrower
Follow
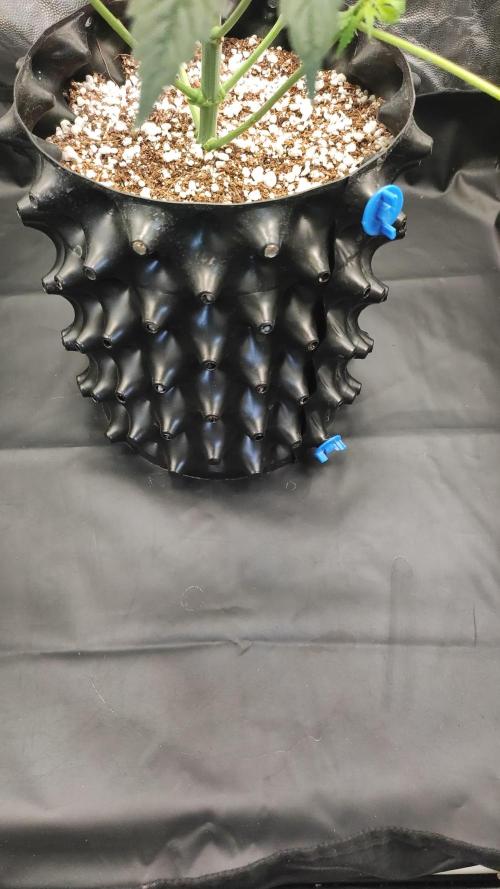
En la tercera semana hicimos un nuevo trasplante, esta vez a una maceta de 4 litros.

Likes
7
Share
@wunderbaer
Follow
Found Budrot in the mainbud… Damn it! Cut the whole mainbud and let the dmaller ones which looked fine. Wish me luck…

Likes
Comments
Share
@Forgotten_souls
Follow
Start these by mistake, wasn't quite prepared or set up correctly, these are being grown in a two by four budget
Likes
Comments
Share
@SpliffDoc
Follow
Saying rhat this girl had a rough start she really is impressing me.
Bare in mind this has NEVER been topped or trained and just look at the shape of her a real woman.
She is getting bulkier by the day and those little buttons are starting to stack.
Let's goooooo
Update Day 40, she is getting maaaaaasive.🤣🤣She has had to be moved to take centre stage, the guava can shine in the background now. What a plant this is, ill be buying alot more of these seeds. Bar removing a couple of leaves blocking sites she hasn't been trained, topped or anything. What a plant fast buds have on their hands here 👏 👏
Likes
18
Share
@CanadianFillmore
Follow
Not much to report, DS1 is the bigger of the two, both smell nice, very frosty and lots of purple. Will update in 7-10 days with initial smoke report and dry weight.
Thanks for checking out my grow! 👽🌳🔥💚
Update 01/26 - dry weight is 141 minus a few grams for smoke test. I don't find divine storm to be very potent, has a mild taste of earth, wood and nutty.
Likes
10
Share
@AsNoriu
Follow
Day 0. Got new setup : aka light and tent from Mats Hydro and went for small grow off ;)
Great AMS strain, loved the taste
Ts1000 great light with dimmer for insane low price.
Solid durable Mars hydro tent, tested not one.
Day 2. Girls could not loose shell, so streched a bit, helped with fingers before photo shoot;)
Happy Growing !!!


Likes
5
Share
@Godsgrace
Follow
14th day from planting. Calmag also, A+B up to 450ppm. The problem with the air temperature in the box has not yet been resolved.

Likes
10
Share
@TiRobotProds
Follow
J'ai pratiquer sur elles la défoliation extrême qui consiste a enlevé les grosse feuilles nourricière pour permettre une meilleure penétration de la lumière et de la circulation de l'air voyons ce que cela va donner au prochain épisode growers.
Likes
4
Share
@KannaGrowing
Follow
Ya estamos casi listos para cosechar.
Estamos regando con agua y solo lo estrictamente necesario para mantener hidratadas nuestras plantas.
Tambien hemos reducido al 50% la potencia de nuestras luminarias LazerLite Pro 720w.

Likes
16
Share
@DWCGreenGrower
Follow
Still waiting on the replacement phone for my ph meter but I'm tired of waiting so I order one just to have as back up. Everything still looking good. I just wish I could have had my ph meter for the whole grow. Let me know what y'all think.

Likes
16
Share
@Sur_cannabico
Follow
Gran variedad, de fuerte y notorio aroma. De sabor dulce y fresco y bellas flores ❤️
Ideal para aliviar el estrés y la falta de apetito 🖐️🏻
Likes
10
Share
@SinSemillaWhisperer420
Follow
These Phenos came out very strong all the way around. Buds glisten beautifully in the light from enhanced trichome production especially on Pheno 3. The colors range from lime green to red hairs contrasting beautifully as well. I would def. grow this potent pungent strain again.

Likes
5
Share
@Subbe
Follow
I had to defoliate the very Bushy short super critical. She has a ton of Budsight/preflower on her they were all just drowning in leaves . Did that Yesterday. 9/4 .
So far she took it well . And all those budsights are now exposed to beautiful light. But lets see during the week if she Will get any set back the Lil Girl


Likes
15
Share
@Siriuz
Follow
I think she is all set now
But I could have waited one more week
But I ran out of soil foxfarm ocean forest
And some other stuff which makes me
Recycle this pot and transplant red poison auto who is right now flowering very fast and good so it is the end for sweet Gelato our first sweet Gelato from sweet seeds
Thanks a lot guys for helping me out. Thanks a lot grow diaries for all your support blessings and lets get this girl harvest alright my dudes will be uploading more content soon at the mean time we will be showing you the bud quality against Quantity and hopefully you will see how STRESS this girl was for an auto we know now that they are good for LST and HST better than any other techniques and just some auto like the ones you mix with thai Legendary genetics will grow very fast and recover very good reason why its better to apply fimming to autos that can run fast over recovery because without that gap you Cant use those techniques since the plant wont allow you its genetics are going to get STRESS and wont yield as much as it is supposed to
But other than that is the real fact that this lady was under phlizon lights 600W
And sadly we found out those are not
Full spectrum lights so we are
Very eager to join contest and try to win
With the support of the whole community
So we can continue to grow and show
The world ah educational and real
Pot smokers team all active in all social networking to point out this is love
For all the world back and forth
Thanks a lot please join me
Please like share Comment
Leave your thoughts
I do appreciate every single one
Hope you guys have a happy growing and happy harvest as well
Enjoy SuMMer will come soon
Are you ready?
Likes
207
Share
@SwissKush
Follow
Day 92 - monster shrubbery - 12 hour light schedule @ 50% intensity both lights.
a. the buds are growing even more and the smell is intense
b. The bud's leaves are shedding, I am pulling many sugar leaves to keep for hash
c. she has slowed down drinking alot to only 3L over night, this might be the last week
Day 93 - trichomes are 90% white
a. having hard time finding many clears or many ambers, she is in peak THC production at the moment
b. wonderful production this plant has made! it is very heavy
c. took her out of the tent for the first time, defoliated many old fan leaves
d. buds are turning blue! the 5.5 PH flush water is working!
Day 94 - looking great!
a. the final white pistils are trurning brown, we will have no white pistils when I harvest this
b. the resin production is still so high, the buds are just caked in milky white trichomes
Day 95 - growing well, still drinking water
a. just have a few more pistils that need to turn red/brown, a few whites
Day 96 - maturing nicely
a. going the distance, this plant will not stop creating resin!
b. trichomes are mostly milky white
Day 97 - buds are looking really frosty!
a. tomorrow will be last day of flush, day 99-101 will be lights off without any water in the tank, will stress her hard
Day 98 - last feeding/flushing day and last light day
a. will not add any more water to the DWC, will pump out what is in there
b. she will get one more day of light, tomorrow starts the 3 days of darkness!
Likes
76
Share
@Canna96
Follow
Hey now, this week went pretty good, the buds are about done bulking up, and just waiting on the trichomes, I was really hoping she would be about ready, but I think she needs another week to week and a half total. The buds are rock hard, and super sticky. I have no clue what she will yield because the colas are not that thick, but there are definitely alot of them. I plan to squeeze her into rosin, and hopefully I can break the 25% mark for the first time with her, but we will see. Thanks for stopping by, I hope you enjoy the videos, Happy Memorial Day Family, Stay Safe and Blaze On!!!