Likes
Comments
Share
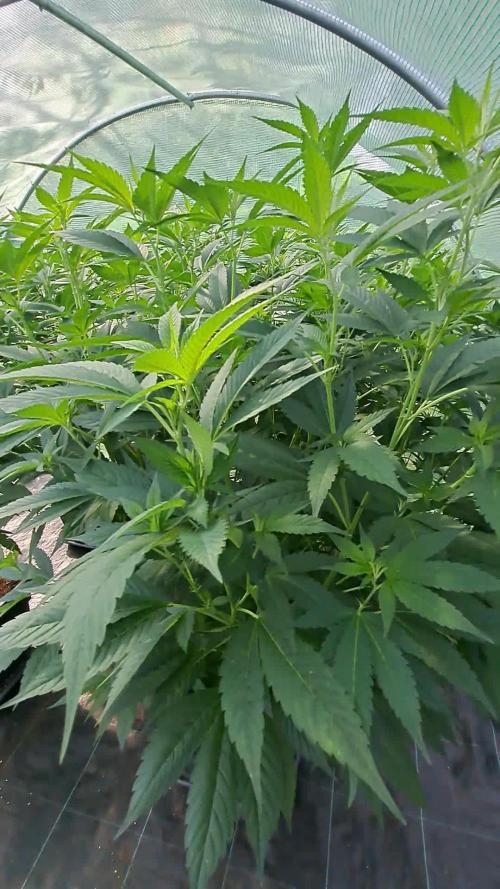
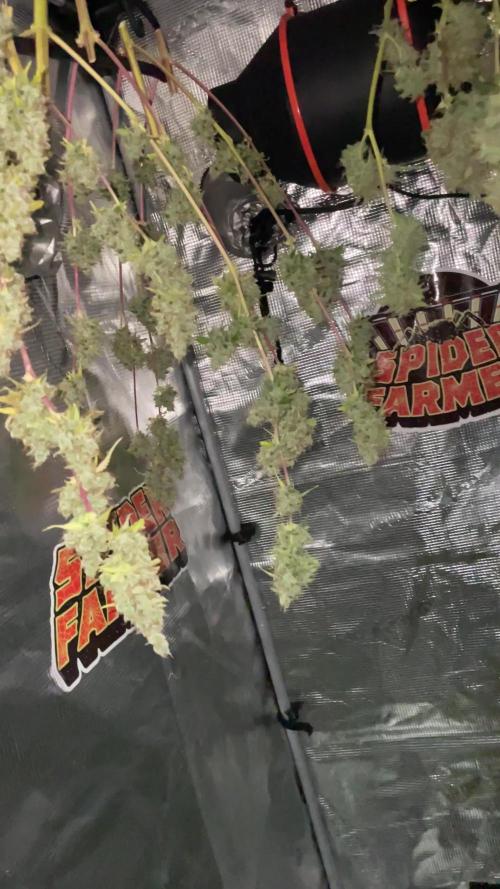
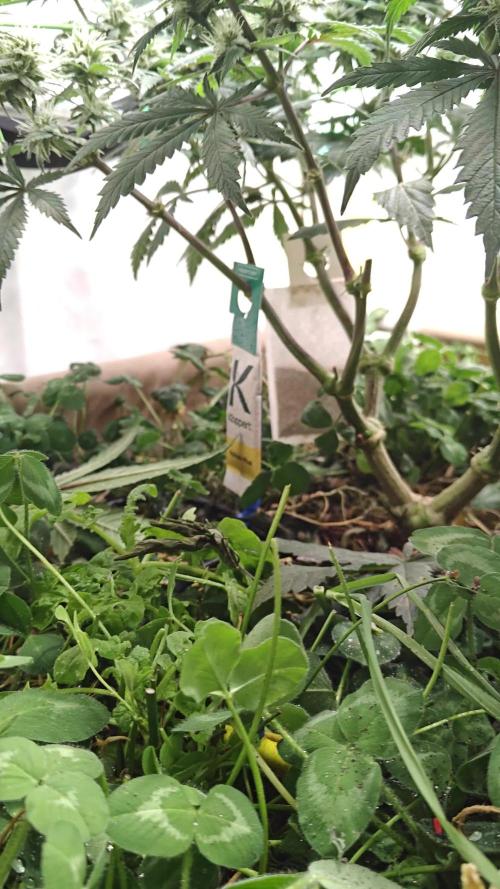
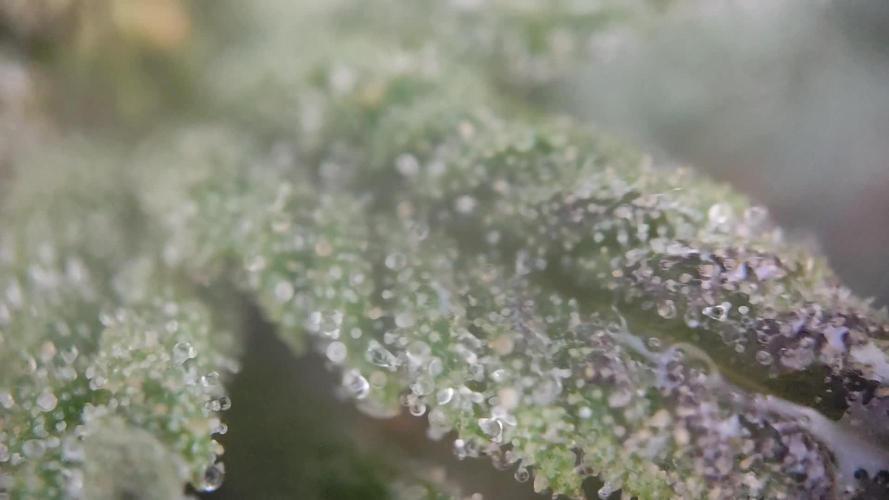
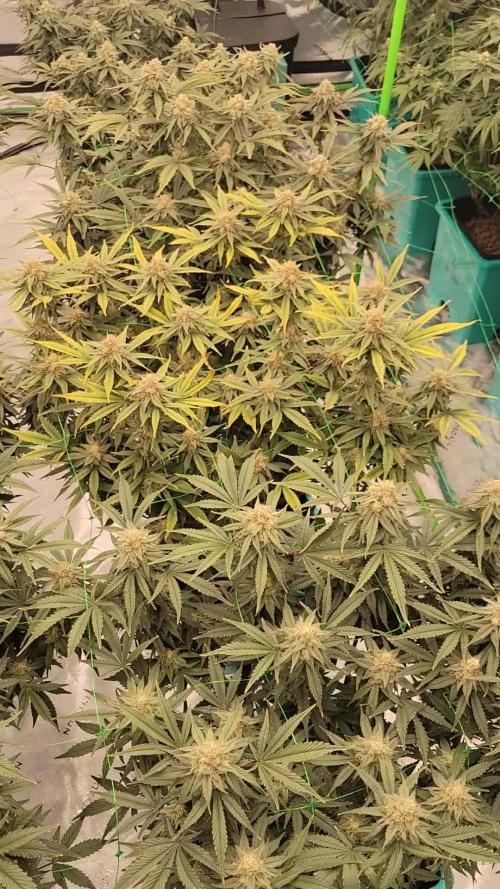
As the plants are ripening and getting closer to harvest, I'm continuing to lower ppm levels while managing bucket water levels and ph. We're exactly at day 56 of flower (5/5/23) on Cinco de Mayo. The PBCRbx reflects a flowering time of 60-63 days, so no more nutrients at this point. I'll continue to monitor Trichomes through next week (i.e., week 9 of flower). Once I see more amber (approximately 20-25%), I will begin a 2-3 day flush with straight RO water. At that point, she is ready to come down. The last bucket change between week 7 and week 8 strictly followed GH's recommended dosage. That bucket change out brought an end to the ph swings she was beginning to experience. After the change out, the balance between water consumption, nutrient uptake, and ph is spot on. Specifically, while plant is up taking water, ph and ppm have maintained stability. She's looking and smelling incredible. Man those ETHOS beans are the bomb. There is a learning curve with DWC - no lie - but I've enjoyed the experience. That said, and if I had dialed her in from the start, she would have produced even better. Gratitude and thanks to ETHOS!
Likes
20
Share
# La germination c'est bien passé la graine était foncée et tigrée. Elle a sortit son germe dans le verre d'eau et c'est enraciné en +/-96h avec un petit peu d'aide. 💯 Jusqu'à présent Zamnezia seeds 🌱🌱🌱 # 08/14: zamnezia ma fait cadeau de 3x3 graines pour essayer leurs variétés. Donc un grand merci à zamnezia ! Je n'ai mit que une graine de GSC auto zamnezia seed à germer aujourd'hui pour ce qui est de la méthode de culture j'hésite encore car je viens d'acquérir un waterfarmer de chez GHE: un système par percolation. Enfin j'ai +/- 5 jours pour me décider ! D'ailleurs si quelqu'un a des conseils à mes donner quand à l'utilisation d'un système hydroponique par percolation, je suis preneur ! Great day at the growdiaries.com communauté 🌞🌱🌱🌱🌞 À peine à 7 heures après l'avoir mise dans le verre d'eau que la voilà déjà au fond du verre d'eau. 💦🌞🌱😜 08/15: depuis 24h dans le verre d'eau Hr: 70% T°: 23°C et toujours rien aucun germe, l'effet loupe du vere ma permit de voir que la graine s'ouvrait comme un moule, le germe devrait pas tarder à sortir. normalement d'ici 24h le germe devrait être apparent. normalement je met +/- 5 jours pour faire germer une graine! j'hésite encore quand à l'utilisation du waterfarmer car je doit tamponé les billes d'argiles aisi que que le rockwool chose que je n'avais pas anticipé, pour le rockwool ça semble plutôt simple: trempé 24 h dans une solution ayant un ph entre 5.5 et 6 pendant +/-48 heureus (merde j'ai oublié d'ajouter du root juice et du canna start à ma solution). Pour les billes d'argilles ça deviend plus compliqué faut les nettoyer et les tamponer meme celle de chez plagron (je suis très étoner qu'ils n'aient pas tamponés eux même leurs billes destinés à de l'hydroponique. en faisant deux trois recherche j'ai trouver des billes déjà nétoyer ayant un ph bas mais pas précisé sois disant près à l'emplois. on verra ça demain à l'arrivé du colis. dans tous les cas si je n'utilise pas le waterfarmer, j'utilserai un pot en geo-textile de 15L (lightmix/coco/perlite/humusLombric/guano/trichodermas) 3 portions de lightmix pour une de coco et d'humus, le reste lire la notice :D 23:03: je vois le radicule sortir fébrilement grâce au verre "nutela" 😂 qui ont un fond qui à un effet loupe , le waterfarmer sera pour le prochain plant :(, lesson a retenir, se documenter avant de faire quoique soit! 08/16: la graine à germer 💚 et la graine s'entre-ouvrait je voyais le vert/blanc des cotelydons dans l'ouverture. Je l'ai directement planter dans sont pot de 15L. 08/17: no news. Patience les amis 💂‍♂️💂‍♂️🌞 08/19: la voilà qui arrive fébrilement ✌️. D'ici ce soir elle devrait être droite ou presque :)#1
Likes
5
Share
Don't have a lot of time these days to take pics so I'll sum things up. CO2 got outta control and the plants took tf off literally. The video is around middle of week 3, I had to flip at week 4 BC I literally ran out of room and I had to constantly defoliate.
Likes
Comments
Share
26/06 Sie wächst großartig. Die Buds entwickeln sich und bekommen langsam Trichome. Man kann erkennen, dass Sie anfängt zu purplen. - - - - - - - - - - - - - Dünger wurde bisher nicht zugegeben.
Likes
Comments
Share
Wachsen ziemlich schnell und sehen gesund aus 👌🏽
Likes
26
Share
@Growbody
Follow
Meine lieben Freunde und Freundinnen, Brüder und Schwestern im Geistigen und Tatkräftigen, herzlich Willkommen zum Greenhouse Summer Outdoor Grow 2026. Der erste Strain des Outdoor Grows den ich Euch vorstellen werde ist die Purple Lemonade FF von 2Fast4Buds, eine 60% Sativa die laut FastBuds etwas nebulös als eine Kreuzung aus purple und citrus Cali Genetik beschrieben wird. Egal, sie soll sehr fruchtig und zitronig schmecken und könnte schöne Farben bekommen. Außerdem soll Sie eine kurze Blütezeit haben. Hier ist die URL: https://2fast4buds.com/de/seeds/purple-lemonade-fast-flowering#description Der zweite Strain der im Set mit dabei ist, ist die Mimosa x Orange Punch fem. von Barney's Farm, die ihre Genetik und den Taste bereits im Namen trägt, eine 65% Indica, die laut Barney's "ein wirklich sensationelles, zitrusähnliches und mandarinenartig-süßes Aroma" haben soll. Auch sie könnte interessante Farben bekommen. Hier die URL: https://www.barneysfarm.de/mimosa-x-orange-punch-552 Last but not least, der dritte Strain ist die Chocolate Sherbet fem. von Grower's Choice, eine 70% Sativa, deren Eltern Chocolope x Sunset Sherbet sind. Auf den Geschmack bin ich schon jetzt gespannt, cremiges Haschisch. Mit bis zu 240cm könnte sie die größte im Greenhouse werden und würde dann bis zur Decke wachsen. Hier ist die URL: https://www.growerschoice.nl/de/chocolate-sherbet.html#description EDIT: Nachdem die oben aufgeführten Pflänzchen nicht so recht loslegen wollten, habe ich mich entschlossen, fertige Stecklinge von Hanfgarten aus Österreich dazuzubestellen. Die Stecklinge kommen in die Mörtelwannen, die selbst gezogenen kommen in die bereits bewährten 15 und 20 Liter ROOTiES. So kann ich die auch mal direkt in die Sonne stellen. Der erste Steckling ist die Blueberry von Hanfgarten, eine 80% Indica, einer Kreuzung aus Afghan Indica x (Thai Sativa x Mexican Oaxacan Sativa), die nach 8 Wochen Blüte Mitte Oktober fertig sein soll. Außerdem soll sie fruchtig, beerig und süß schmecken. Auch hier gibt es eine URL: https://www.hanfgartenshop.de/blueberry.html Der zweite Steckling ist die Runtz, ebenfalls von Hanfgarten, ein Hybrid aus Zkittlez × Gelato, die auch nur 8-9 Wochen Blüte hat, mal sehen. Wenn sie ein ähnliches Aroma hat wie die Wurlz bin ich happy. Die URL: https://www.hanfgartenshop.de/runtz.html Der dritte Steckling ist die Super Lemon Haze, eine 80% Sativa von Greenhouse Seeds, deren Genetik von Lemon Skunk x Super Silver Haze stammt. Mit 9-10 Wochen Blüte steht sie wohl mit am längsten im Greenhouse. I💖Haze und hier sind die URL's: https://www.hanfgartenshop.de/super-lemon-haze.html https://shop.greenhouseseeds.nl/feminised-cannabis-seeds/1-seed-pack/super-lemon-haze/?variation_id=604 Auch dieses Jahr gibt es wieder etwas Neues: Mir ist vor einigen Wochen im Baumarkt ein Foliengewächshäuschen begegnet. Die Aussicht, meine Schätzchen immer im Trockenen zu Wissen, lies mich sofort (also sofort nach einem Recall mit meiner Liebsten) zuschlagen. Danach war nur noch ein teilweiser Umbau unseres Gartens nötig, einen kleinen Weg anders verlegen, ein Fundament ausheben, Bordsteine zersägen, 2 Zentner Beton verbuddeln, Löcher bohren, verdübeln und verschrauben ohne das der Beton ausplatzt, einen haufen Astwerk vom Wein opfern und viel Rasen neu anlegen, das war's schon fast. Neu: Sind auch die zwei 90 Liter Maurerbottiche, in denen sich meine Pflanzen wohlfühlen dürfen, 4x soviel Platz wie im letzten Summer Outdoor Grow. Zur Drainage habe ich Rheinkiesel 9-18 verwendet. Da drauf kam mein altes Erdmischungsrezept mit frischem Kompost von Piluweris, Lehm, den die Wühlmäuse ständig in unserem Rasen aufwerfen und Sand aus'm Kieswerk mit gaaanz viel Staub drinne, praktisch Gesteinsmehl. Auch hier gab's was Neues: Hornmehl zusätzlich, hatich früher schon verwendet und ganz vergessen. Der erste Sack Sonnenerde Hanferde wurde mit der oberen Schicht meiner Mischung vermischt. Der zweite Sack kam dann blank obendrauf. Neu: Für mich ist auch die angewendete Keimmethode noch neu, die Samen zuerst in einem Marmeladenglas mit temperiertem Wasser mit Zusatz von Wasserstoffperoxyd keimen zu lassen. Das ist jetzt das dritte Mal, dass ich diese Methode anwende. Der Vorteil daran ist die superschnelle Keimung, der Keim schaut tatsächlich bereits am nächsten Tag aus der Schale und nach ein oder zwei weiteren Tagen haben sich die Keimlinge von der Samenschale befreit. Das weitere Vorgehen bereitet mir noch Probleme. Ich verwende immer noch die SmartStart Plugs von Zamnesia die ich praktisch halbiere, also von oben nach unten einmal Mittendurch. Dahinein lege ich jetzt den Keimling und klappe die zwei Hälften dann zusammen und pflanze den Plug in den Topf. Neu: In die Wannen kommen zusätzlich Gäste als da wären erprobte und neue sowie überwinterte Chilisorten, verschiedene Basiliken oder -kums, Weiße Melisse, Roter Klee, paar Blumen und so. Tag 29: Heute hat es 33°C und ab morgen wird es heiß mit 36°C und das bleibt die ganze Woche so. Die Blumen im Greenhouse bekommen jetzt mehr Wasser. Tag 31: Die Nematoden von Oere Bio-Protect sind da. Als erstes habe ich die PC-Nematoden gegen Schnecken im ganzen Garten ausgebracht und die nächsten 4 Tage Abends mit gut 100 Litern Wasser den ganzen Garten feucht gehalten. Keine Schnecken mehr zu sehen. Das ist sehr erstaunlich, wir wohnen am Ortsrand, hinter unserem Garten sind nur Obstwiesen und ein Bach und von dort wandern sonst die Schnecken ein. Tag 35: Innerhalb und Ausserhalb des Greenhouse sind Marienkäferlarven auf der Jagd zu sehen. Die Marienkäferlarven haben sich von alleine hier angesiedelt, vor ein paar Wochen sind hier einige Marienkäfer herumgeschwirrt, offensichtlich mit Erfolg. Tag 36: Die drei Grazien haben sich an den Stecklingen ein Beispiel genommen und beginnen plötzlich zu wachsen. Eins kann ich versprechen: It will take a very, very long time 😃 Schön das du es bist, der mich begleitet 👍😎
Likes
113
Share
Week one is working well.The girls are taking the light very well,I thought I'd over done it but they loved it. 75percent and eventually 100 on the 7th day. Height is around 60-70cm. IM GOING TO LOVE THIS GROW THX 420FASTBUDS https://growdiaries.com/grower/420highlifecouple https://youtube.com/channel/UCKvjJ_S8nRI2wTc4cx_O1KQ https://myfastbuds.com/?a_aid=616a33e294e50 With every order you will get a free seed Join the community on GROWDIARIES It’s a awesome place to meet cool people, document your grow and learn a lot from fellow growers, happy growing 😊🌱
Likes
2
Share
@JWick
Follow
Final week with all the girls, I found mold in two plants, approx. 1-2 gram I must throw out.
Likes
220
Share
These had a pretty good life. I actually only fed NPK the one time . Germinated them in a Zambeza propagator, i really recommend getting one of those propagators, they're reusable and really take the heat off those first days when you're sweating. Pooped them into their plugs they sprouted out strong, germinated 5 kept 3. transplanted them no problem. Veged these for 4 weeks, then they shot up. during veg they stretched out a bit early on i should have been giving some specialised micro i had on had but for some reason on the other i didnt. They needed extra support for their first three weeks, so i decided to LST them around week 2. Two camping hooks one anchor for the main stem and one to keep the plant down. Once i dialed in my lamp to plant distance they benefitted by slowing down on the stretch a bit. they all took to LST extremely well, bushing out and creating an nice even canopy. They pushedout these thick indica leaves, one of my plants was a lighter colored leaf pheno, the vertafort one. The Six Shooter genetic really stretches, if just off the top of my head it seems that the plants quadrupled in size over an 8 week period, completely eclipsing their neighbours and creating a thick dense canopy throwing shade down below. Each turned into a bush with three or more mains sticking out the top by week 6. IThe results start to look real pro around week 8. Before that though I hadn't been defoliating. This and simple lack of light means that I had loads of undevellopped colas. If I'm honest I should have tried to harvest in stages but by colas. Anyway these kind of grew like a gorilla glue but with much different and much better flower structure. The plants started pushing out flowers and pistils and preflowers etc early, but then took a while to gear up towards towards getting fat. The flower branch out in a spiral pattern up and down the main and secondary colas evenly, creating this misssile shaped colas, but they branch out once sometimes twice, which means less branch to nug ratio than a gorrilla glue by a full multiple. They started smelling like lemons around the time they were fattening up. Then they started getting buff, really little by little, what did rippen rippened evenly. Some colas was basically waste especially the colas stuck on the sides of the tent and some of the colas where for some reason or another there was no light there due to the dense canopy. Truly a BEAST OF A PLANT, HIGH POTENTIAL, great BRANCHING, if you look carefully each plant has more than a dozen colas, Timed it so the harvest was on a day the plants were chock full for plain water after ten day's worth of additive aided flushing. hung to dry slowly in the tent, got it around 55RH inside the buds over 12 days then trimmed and jarred in miron glass with boveda 62. The trim was a great experience, took a while but not that long because the flowers were so nice in the way they are. you do have to trim every sugar leaf one by one though if you're doing it by hand, broke these sizzors that @Mrs_Larimar sent me because of the resin lol. so I pull these plants out my tent and I just kinda look at them and they're basically dark green because of all the sugar leafs, i'm thinking to myself "shit i messed up this isnt even that frosty". well, what i found out is every time i clipped one of those trademark long sugar leafs off it revealed absolutely resious white frost. That's what can keep someone motivated. ! Once jared, if there's boveda in your jar, you dont really need to burp it daily, or even weekly i just let it sit there, obviously i've been smoking it and following the cure, let me tell you this one needs longer to cure than you're used to maybe, at least two more weeks of cure after a slow dry. Four weeks after the chop , it's a strong weed ! Didn't smell all that loud, but I have a 1300M3/H exhaust so... i'm not surprised. I will say though that my neihbour said she could smell weed even when I wasnt home and she could smell weed in the corridor, from the times I was trimming and basically every time I open my jar. Gonna need a new carbon filter for the next grow. I retired my lightbulb too. Hard to put my finger on the taste because the smoke is so smooth, and when i saw GD had a tag for Woody, i knew right away this was that taste i felt. I will say this though, cure this correctly, dont rush, dry it real slow, then cure it, citrussy tastes, usually those will evaporate, leaving this distinguished terpene heavy hitter much better tasting. So what can i tell you, this weed is white weed, so frosty. Bag appeal is great too, this strain pushes out pistills like no other, maybe even more than the gorilla glue. that means this is a chill weed right? One of the phenos I grew had more pistils than the other two. Mr. B's did, but i dont know if you can really tell from the close ups, i'll try to put some more pictures up. I got two maybe three phenotypes in terms of taste. Mr. B’s is much pine-ier than the others, and when the joint goes out and you light it again, it’s even more piney … I’m actually really happy about that reminds me of white rhino from the east coast back in the day but way piney-ier than that even. When you smoke the other phenos the smell is incense and the taste is really really smooth & woody. Sometimes I find different after tastes on the exhale like coffee, pepper, and maybe sweet/fruity sometimes too depends on the pheno I'm toking on. It is LOUD THOUGH, always have a spare filter on hand IT’S NOT WORTH IT get it ! Well at the end of my first grow, i'd like to quickly review all of Bulbi's own : Bulbi"s Own Early VegMicro: Fine green powder with calcium and all the rare metals in it. I didnt use it ! Damn, next time I'll amend my soil with it like i did this time on the FBT1 Bulbi's Own Cal Mag : Organic fine white powder with calcium and magnesium, i used it in the feed and sometimes as a spray. I didnt know how much to put in because these things dont come with instructions so i ended up putting 1/4 doses most of time. The correct amount should have been 2.5G/L. Bulbi's Own Flower Micro : Organic fine beige powder that I used mixed in with the sulfur. I think this one's a keeper, really helped my plants make it through the stress of bottom feeding and all that heat. Bulbi's Own Mag Sulfur : Organic fine red powder that I used mixed in with the Flower Micro I used this one in my spray too , to great effect, in my opinion Bulbi's Own Beneficials Trio : This was the base beneficials mix I had, you need to put 7.5 to 15g/l , watch out for clumps, use at the night fall, or when still dark. Bulbi's Own Anti Afid : I threw it in there i think just in time to protect my plants when I intentionally overwatered when I went on my trip. There were some white flies that emerged, because... well that's what they do isnt it. but there were just a few of them and they ended up flying around wierdly, and within four days, no more white flies, didnt even use yellow sticky tape ! You mix this one with the trio for even more effect. I used these in a spray I think , also. Bulbi's own Anti-Worm : This one is more directed against larvae, and can be combined with the base trio. I was weary of using it, but I'm glad i did to give my soil matrix that full spectrum of biological protection. Bulbi's own Humic Acid : This one i loved, looking back I'm regretful not having used it more. the dry humic acid is a great experience, the quality of it was impressive, clumps would seperated into more clumps ad infitum the feed slowly turning completely ink black. definituely using this once a week from now on Bulbi's own Amino Acids : this one is just amino acids, maybe next time I'll use it at the same time as the humic acid, but I'm not 100% on that. What i did do was spray the top layer of the soil with amino acids when I accidently ran into some issues from spraying kelp all over the place. So in that sense it's an absolute life saver and a must to have on hand. Bulbi's Own Kelp Extract Concentrate. Loved this one too haha, so thick, and green, check out the video of when i pour it lol. Worked great, raises the pH some so be careful, i used this one as a sprat aswell to get those plant growth hormones pumping during the seeding and veg stage. Bulbi's Own CO2 : well part of what I set out to do was to test the CO2 theory. Like roots do absorb CO2 but at a lower efficiency than leaves say 15% vs. 85% the theory being enriching your water or feed with CO2 would ultimately benefit the plant. So i enriched water with these ceramic based co2 tablets, because CO2 is a soluble gas, it stays in water. Then i fed the plants in this manner in the feed and also as a spray. The idea behind that was that co2 enriched water would come in direct contact with the plant allowing for absorption of some quantity of CO2 through the leafs. Someone explained to me that these are actually old school techniques. Well I know i started late and didnt follow a regular schedule like i wished for but the plants didn t die, or show any immediate negative upon innoculation, so what can I say? I'm doing this again, perhaps. Only problem is that these things are really a pain to pH correctly General Hydroponics Dry pH Down : GREAT PRODUCT, hard to find but amazing – not registed on GD for some reason I still have to make my bubble hash so any advice welcome ! 🚀
Likes
1
Share
Likes
19
Share
Let’s go Day 85 from seed !! This has been another great week ,ladies are coming close to the finish line an looking so beautiful!! This week we will continue flushing on these 3 ladies an jump em into there 48 hrs of darkness on Friday or Saturday will see ! Let’s have another great week ,, peace love an positive vibes to all y’all Keep them eyes peeled for next weeks update !! Cheers 😶‍🌫️💨💨💨💨💨🤙🏻
Likes
10
Share
@Naujas
Follow
great!!! the girl has gained momentum in growth:) she looks small, but she really has a lot of branches :) So far everything looks really good!! :) good luck to everyone.
Likes
2
Share
Likes
92
Share
Week 5 Veg Report: SCROG Netting, Massive Leafs & Precise Data Mastery! 🌱 Girls Growing Stronger Than Ever! 🌱 This week has been truly epic in the grow room—so much so that it’s time to bring in the SCROG net! With the canopy expanding and the younger ones still working to catch up, the SCROG net will help me achieve that perfect, even canopy. A well-placed SCROG not only ensures better light penetration but also gives the smaller plants a chance to spread out and thrive alongside their bigger sisters. Now, let’s dive deep into the SCROG method. The Screen of Green (SCROG) technique is a grower’s secret weapon for maximizing space, light efficiency, and yields. The concept is simple but powerful—train the plants to grow horizontally along the net, forcing them to expose multiple budding sites instead of just a single cola. This way, the canopy spreads evenly, improving light distribution and air circulation throughout the tent. As the plants grow, I’ll gently weave their branches through the screen, ensuring they fill every square inch of space. The end goal? A sea of buds all basking in equal light! 💪 Huge Leafs Everywhere! 🌿 One thing that’s really catching my eye this week is the size of the leaves—they’re HUGE! Honestly, they’re so big I couldn’t resist a little fun, so I made myself some fashion accessories: leaf earrings and a cap from the Super Sativa Seed Club Green Papaya! 😂 And, of course, I captured the moment. But seriously, large leaves at this stage are a great sign of healthy, robust plants. These “solar panels” are hard at work soaking up all the light, driving photosynthesis, and fueling growth. So, what does it mean when your plants are showing off big, luscious leaves? It’s a clear indication that they’re happy, healthy, and thriving in their environment—big leaves mean lots of energy being produced and stored for future bud growth. Exactly what we want! 💧 Precision Feeding with Aptus Nutrients 💧 This week, I took a deep dive into my Aptus nutrient lineup and shared a video explaining how each product affects the water’s pH and TDS. Using the AMP-3 Precision Meter, I’m getting real-time water readings and keeping everything dialed in perfectly. Let’s break it down: • pH: 5.83 • TDS in solution: 445 ppm • Water temperature: 25.2°C The Aptus products are incredible for balancing nutrients without throwing off the pH or TDS too much. I’m fine-tuning my feedings based on these readings to make sure the girls are getting exactly what they need. The precision I’m able to achieve with the AMP-3 is mind-blowing—I get immediate feedback on pH, temperature, and EC, allowing me to make real-time adjustments and ensure the perfect environment for nutrient uptake. 📊 Environmental Mastery Thanks to TrolMaster 📊 Speaking of control—let’s talk about the TrolMaster system! Between the DSH-2U Humidity Station and all the other sensors, I’ve created the perfect environment for my plants. Here’s where we’re at this week: • Temperature: 26.2°C • RH: 70.6% • CO2 levels: 775 ppm • VPD: 1.0 kPa • PPFD: 423 Thanks to TrolMaster, I can monitor and adjust these metrics in real time, and the best part? I can do it all through the TM+ Pro app, even while I’m lounging in my green papaya leaf hat! 😆 Whether I’m checking the CO2 levels, adjusting the lights, or fine-tuning the humidity, it’s all in my hands with just a tap of my phone. Talk about convenience! 🌱 P.S. – Inline Sensors: Heavy-Duty Precision 🌱 Now, let’s talk about the heavy-duty players in this game—the (PCT-2) Heavy Duty Inline EC/Temp Sensor and the (PPH-2) Heavy Duty Inline pH Sensor. These bad boys are connected directly to the AMP-3 Precision Meter, and they’ve been absolutely crucial in giving me the most accurate readings on my water and nutrient solution. The PCT-2 keeps me informed about the electrical conductivity and temperature of my solution, which is key for monitoring how well my plants are absorbing nutrients. Too high or too low, and we’re asking for trouble, but this sensor ensures I’m always in that perfect range. The PPH-2, on the other hand, is all about maintaining the perfect pH balance. A fluctuating pH can mean nutrient lockout or deficiencies, but thanks to this sensor, I get a constant read on my pH levels, so the plants are always in their sweet spot for optimal nutrient absorption. Together, these inline sensors allow me to run a super-tight ship—every drop of water and nutrient is dialed in to perfection, keeping the plants happy and healthy! Shout Outs! As always, huge thanks to TrolMaster and ThinkGrow LED for the amazing gear, to Aptus Holland for their top-notch nutrients and Pro-Mix for the best soil i have used so far. Big love to the seed banks, the amazing Grow Diaries community, and all my followers—you guys make this journey so much more exciting. Don’t forget to catch up on my social media, Instagram, and YouTube for real-time updates and exclusive content! Stay tuned for more—next week is going to be epic! DogDoctorOfficial Discount Codes so you can save big on your next check out 💚💚💚 Kannabia - DOGDOCTOR 30% off SeedsmanSeeds - DOGDOCTOR 10% off CannaKan- DOGDOCTOR 15% off terpyz.eu - DOCTOR 15% off The Neutralizer - PORKIT5-DOG 15% off Growers Love to you all 💚💚💚