


Likes
Comments
Share


@Roberts
Follow
Critical x animal cookies has grown into the nutrition now good. She did get topped today and roots pruned. She has been doing okay beside the nutrition burn early on under the Hortibloom Solux 350. She should start making some decent progress now with growing. Thank you Hortibloom, and Ripper Seeds. 🤜🏻🤛🏻🌱🌱🌱
Thank you grow diaries community for the 👇likes👇, follows, comments, and subscriptions on my YouTube channel👇. ❄️🌱🍻
Happy Growing 🌱🌱🌱
https://youtube.com/channel/UCAhN7yRzWLpcaRHhMIQ7X4g

Likes
15
Share


@Ciore
Follow
La verdad que no puedo decir Nada en negativo sobre esta chepa para mi Royal Queen Seeds es unos de Los mejores Banco de semilla por un error mio la sourdiesel se quedó pequena, però ha hecho su trabajo muy bien y a sido fuerte a resisti mi error.
💯💯💯💯💯💯Royal Queen Seeds

Processing
Likes
10
Share


@Barcelona_Farmers710
Follow
Empiezo lo bueno Farmers pasamos a la preflora... este cultivo probaremos Delta 9 para probar aumentar la resina!👌🏻
Likes
4
Share


@m0use
Follow
***Sponsored Grow*** = Medic || https://medicgrow.com || Grow = ***Sponsored Grow***
This plant has been doing great, when I am in working with it it releases lovely peppery notes into the air. It has a super short compact structure I'm curious to see what it will be like in stretch.
Still giving them a 2:1 or 2.5:1 grow vs bloom nutrient. Its helping with some of the pink stems from last week. Feeding strength is up .2 point to reach 900ppm or aorund 1.8EC will leave it here fro the remainder of Veg. Prob will do for 2 more weeks then flip to flower as I just topped them and want to give them some time to recover.
NPK ratio of 7-7-14 1:1 equal parts grow/bloom.
Grow=8-4-15
Bloom=6-10-14
Boost=1-15-30 "not yet used it yet"
Also took some clones from the plants as well, took two main cuttings from each plant, forgot to do the one so its not shown in the first video up the updated clone pics later in the week. If any of these impress me then the clones will go outside and grow there all year for a extra special harvest. Or I'll give them out to some friends and family maybe a little gorilla gardening project, but I will wait before getting ride of them all as I'm still kicking my self in the ass over the Blue Cindy loss. really liked that plant and wish its clones I gave out where still aorund.
Lights doing well. The V1 spectrum is good on the medic grow mini sun-2's 240w. No issues so far, dimmed at 80% till flower is initiated then up to 100%, Will test out 13/11 I think as the schedule to give them some more photons for an extra hour vs 12/12
.
Till next week.
***Sponsored Grow***
Official Website:
https://medicgrow.com/
+
https://seedstockers.com/
Facebook:
https://www.facebook.com/medicgrowled
+
https://www.facebook.com/SeedstockersBarcelona/
Twitter:
https://twitter.com/medicgrow
+
https://twitter.com/seedstockersb
Instagram:
https://www.instagram.com/medicgrow420/
+
https://www.instagram.com/seedstockers_seeds
YouTube:
https://www.youtube.com/channel/UCNmiY4F9z94u-8eGj7R1CSQ
+
https://www.youtube.com/channel/UC4GiFYrIWeNtwtXjcivCmfw
Growdiaries:
https://growdiaries.com/grower/medicgrowled
https://growdiaries.com/grow-lights/medic-grow
+
https://growdiaries.com/grower/seedstockersofficial
https://growdiaries.com/seedbank/seedstockers

Likes
13
Share


@NordicClosetGrower
Follow
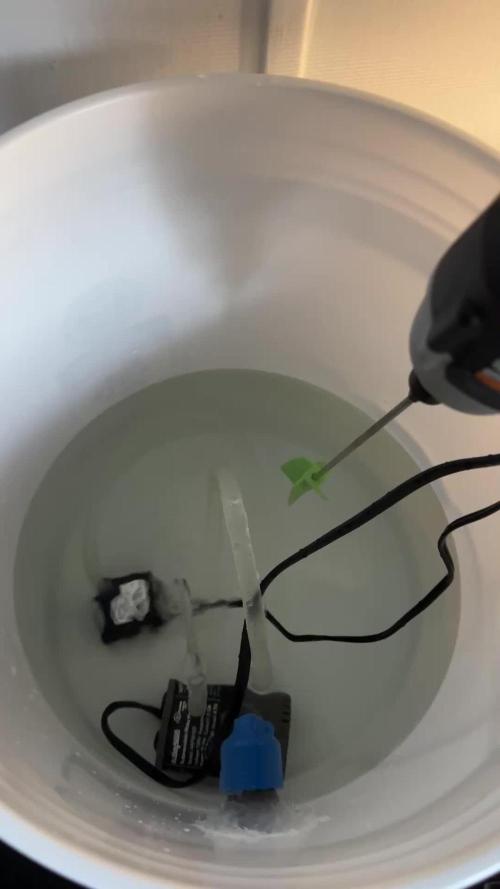
Finally received a couple of humidifiers to test from the local shop. These shitty low cost humidifiers will not really do, I can only have them on non stop until the water runs out. If I connect them to a sensor that switches them off, it won't go back on because it doesn't have a mechanical switch, I have to press on each time.
Still, let's see if this helps my poor dry leafs a little bit

Likes
Comments
Share

@AkatsukiVirtue
Follow
Another week of things going well!
I dialed in my automated watering system by sealing the port where the 1/2in tube connects with the output outlet with an FDA approved silicone gel. Wanted to get the FDA sealant since anything else would leak chemicals into the watering reservoir.
Tested and no leaks detected!
I also found out that there are these sweet quick connectors you can get from Amazon. The nice thing about this is that it makes my watering system modular. I can disconnect the tube feeding into the tent by pushing the quick connect tab and addressing the bucket without dealing with tedious connects and disconnects. All I need to do when I’m ready to reconnect the bucket, I just push the line from the bucket into the quick connector.
Additionally, I started using .25 ml (25%) of compost tea along with .25ml (25%) of silica. I think I will need to up the dose next week to 50% strength for both.
I will do a transfer to the 1 gal pot in 2 weeks!

Likes
37
Share


@Master_weeda
Follow
Bonjour à tous les padawans et les maîtres jedis
La semaine 4 va être décisive pour cette demoiselle car je vais pratiquer sur elle un main-lining et un LST
Je précise que le main-lining n'est pas recommandé pour les autofloraisons car son cycle de vie prédéfinie ne lui permet pas de ce remettre pleinement. Cela aura forcément un impact sur son rendement, pour des raisons esthétiques et un espace de culture restreint je n'ai pas d'autre choix.
Pour ce main-lining j'ai attendu le jour 24 et l'apparition du septième noeuds.
Une fois le main-linning terminé je pratiquerai la technique du LST ce qui me permettra d'avoir une canopé plus homogène donc une meilleure pénétration lumineuse et par conséquent un meilleur rendement.
Vous pouvez voir une vidéo de mon main-lining qui détaille la manière dont je procède pour réaliser cette technique.
Petit rappel et explications sur cette technique:
Le main-lining a toujours été une technique très populaire parmi les cultivateurs, puisqu'avec des ajustements simples pendant la première étape de croissance, vous vous garantissez des récoltes plus que productives. Il s'agit de faire pousser la plante de façon verticale et symétrique afin de profiter au maximum de la lumière et de l'espace, des aspects très recherchés dans les cultures d'intérieur. En guidant les branches avec des cordes et une série de tailles initiales, vous établirez des patrons de croissances vigoureux pour vos plantes.
COMMENT METTRE EN PLACE LE MAIN-LINING
En partant de la graine, attendez que votre plante ait au moins développé 5 nœuds. Lorsqu’ils seront formés, taillez la plante au niveau du troisième nœud. Retirez tout ce qui s’est développé en dessous du troisième nœud(Moi j'enlève que le premier et garde le deuxième et troisième). Cela formera le Y ou le T initial que vous recherchez. Permettez à votre plante de se remettre de ce stress imposé durant quelques jours avant de passer à l’étape suivante.
Votre plante comporte désormais deux pousses principales(ou 4 si vous gardez le deuxième noeud). Ces dernières devraient être attachées avec du fil ou de la ficelle(ou du fil de fer). Cela dirigera la croissance de manière horizontale. Faites bien attention en attachant les branches, ne les brisez surtout pas. Soyez doux.
Une fois que la plante s’est un peu développée, vous vous retrouverez avec 4 tiges principales. Vous pourrez répéter ce processus autant de fois que vous le souhaiterez, accédant ainsi à de plus gros rendements. Rappelez-vous tout de même que plus vous répéterez ce processus, plus la période de croissance sera longue.
Sauf pour les autofloraisons car étant donné le temps additionnel qu’il lui faut, le main-lining n’est pas compatible avec les variétés à autofloraison. Les autofloraisons ont des cycles de croissance très rapides, et d’ici à ce que la technique soit mise en place, la moitié de leur développement sera déjà passé. Cela pourrait potentiellement endommager les récoltes et cela influe sur le rendement
Dès que vous aurez produit la quantité désirée de séparations, il ne sera plus qu’une question de temps avant que des têtes uniformes commencent à apparaître. Une légère défoliation régulière durant le cycle de croissance vous permettra également de vous assurer d’une distribution égale de la lumière, et empêchera votre plante de gâcher de l’énergie avec de grandes feuilles superflues. Retirez ces feuilles dès qu’elles commencent à prendre trop de place.
Que la force soit avec vous 💪

Likes
18
Share


@Ganja_Victoria_Aus
Follow
Cheese and Mexican are a bit behind the other Lady due too the training, strain gentecics traits. This week hopefully blueberry and GDP will depart the greenhouse. 🥦


Likes
5
Share

@Chriscannabis
Follow
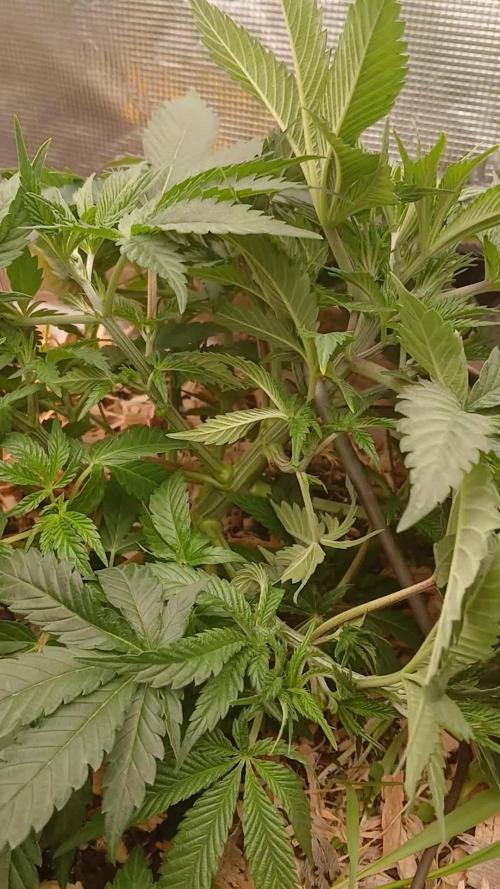
Low maintenance . I love my set up i love this living soil. I must thank my brother and fellow White mountain cultivator. Jeff!!! Yes Jeff. He is the homie that hooked up the permanant marker and the pineapple O.G.. with out that awesome muthafucka right there. I wouldnt be here chasing .well creating my dream!!! He bought the seeds i told him what i was planning and well here we are. I already know that going to living soil. Quite frankly i had no clue what that was
Likes
18
Share


@eldruida_lamota
Follow
Que pasa familia, vamos con la octava semana de floración de estas Tropicana Cookies Fast Flowering, de FastBuds.
Los ejemplares tienen muy buen color han crecido muy uniformes y las flores están terminando de madurar.
El ph se controla en 6.2 , la temperatura la tenemos entre 21/24 grados y la humedad ronda el 50%.
Se quitó la alimentación esta semana solo estuvieron agua y la próxima semana igual.
Mars hydro:
Code discount: EL420
https://www.mars-hydro.com/
Agrobeta:
https://www.agrobeta.com/agrobetatiendaonline/36-abonos-canamo
Hasta aquí todo, Buenos humos 💨💨💨
Processing
Likes
5
Share


@Ensign420
Follow
Week 02 Introduction
This week has been a bit of a struggle. Had my first experience dealing with slime and brown algae. But I think adding enzymes and increasing the beneficial bacteria helped to fix the issue. Also experienced nutrient burn for the first time. My nutrient solution strength got as high as 671 PPMs. So backed it down to about 430 PPMs during the end-of-week reservoir change. Also cut Hydroguard (expired?), CaliMagic, and Superthrive from this grow. Now she's still stunted, but is starting to recover. Hopefully...
[START OF WEEK 02]
Day 01 - Monday - 08/10/20 - Total Days: 008
-----------------------------------
- [0830]: Still looks a bit yellow. But getting larger!
--- Solution strength was at 248 PPMs.
--- Just topped off with a bit of distilled water
--- PH went up to 6.1 so PH'd down to 5.8
--- Ran the top feed for a bit to wet the hydroton.
- [2130]: She's looking even more yellow now.
--- Even the new leaves are really yellow.
--- Decided to add more base nutes.
--- Added 4ml of Sensi A
--- Added 4ml of Sensi B
--- Now at about
--- Solution Strength went up to 304 PPM.
--- PH was at 6,
--- Also raised the water level a bit more.
--- I really hope it's a nutrient deficiency and not an over-watering issue.
--- Please live!
Day 02 - Tuesday - 08/11/20 - Total Days: 009
-----------------------------------
- [0830]: Looking less droopy. But still yellow.
--- Decided to do a reservoir change.
--- 4.5gal of distilled water
--- 8ml of Sensi Grow A
--- 8ml of Sensi Grow B
--- 8ml of Voodoo Juice
--- 4ml of B-52
--- 4ml of CaliMagic
--- 4ml of Hydroguard
--- 4 drops of Superthrive
--- PH'd down to 5.8
--- Solution strength: 302 PPM
--- Since I didn't want to risk over-watering the rockwool, I did not to do a top feed, may do one tonight after the sleep cycle (lights are still set to go off at 10am and back on at 4pm).
--- As I was doing a reservoir change, I noticed that the tubes and bucket were a bit slimy. Didn't really stink or anything. Is this normal? Maybe due to the Hydroguard and Voodoo Juice?
--- I hope she gets better soon!
- [2215]: Getting larger! But still yellow.
--- Also can see a root growing through the net pot! Tiny little thing but it's there! Will have to start dropping water once more appear.
--- After looking over a few DWC diaries using AN nutes, seems like my solution strength is still too low. Most around this stage average around 500 PPMs with about 4ml per gallon.
--- Top fed for a minute to wet the top of the hydroton.
--- Solution strength went down to 263 PPM.
--- Added 8ml more of Sensi A
--- Added 8ml more of Sensi B
--- Now base nutes are at 16ml for 4.5 gal of water.
--- PPMs went up to 411.
--- Still lower than 500 PPMs, but that's okay.
--- PH was at 6. Not sure if I should adjust PH using AN nutes. So going to not ajdust unless PH goes above 6.1.
Day 03 - Wednesday - 08/12/20 - Total Days: 010
-----------------------------------
- [0830]: Looks like more root growth!
--- She still looks yellow. But leaves are perky.
--- PH was at 6.2 so lowered down to 5.8.
--- Solution strength was at 394 PPMs
--- Since roots are still growing, I decide to lower the water level a bit. Now water level is a bit below the net pot.
- [2200]: Root is getting longer!
--- Slime is returning. Not sure why.
--- Solution strength: 357 PPMs
--- PH: 6.1
--- Decided to add an enzyme along with more beneficial bacteria to hopefully cure the slime.
--- Added 16ml of Sensizym
--- Added 5ml of Hydroguard
--- Added 8ml of Voodoo Juice
--- New solution strength: 430 PPMs
--- New PH: 6.1
--- Top fed for a minute.
--- This slimy residue is really freaking me out! I hope the added enzymes will help eliminate the slime.
--- Going to do a full reservoir sterilization/nutrient change over the weekend. Please survive until then girl!
Day 04 - Thursday - 08/13/20 - Total Days: 011
-----------------------------------
- [0930]: I think the enzymes worked! There is little to no slime now!
--- Although I think the root was also dissolved in the process. It's now just a little stub sticking just below the net pot. The enzyme is also suppose to dissolved dead roots too but guess that root was too weak? Not sure what happened there. But I think the slime is cured!
--- Solution strength went down to 395 PPMs. Decided to add more base nutrients.
--- Added 8ml of Sensi A
--- Added 8ml of Sensi B
--- Added 4ml of B-52
--- Solution strength went up to 598 PPMs.
--- PH was at 6.1
--- As long as the PH is between 5.5 and 6.3, I'm not going to use PH Up or Down. But still will monitor PH levels.
- [1715]: Checked up on her after her nap and shes looking alive but stunted. But no slime!
--- Decided to add some sugars to help maintain the enzymes and beneficial bacteria.
--- Solution strength was at 587 PPMs.
--- PH was at 6.2
--- Added 8ml of Bud Candy
--- Solution strength went up to 671 PPMs.
--- PH also went up to 6.3
--- Lowered water level a bit to hopefully promote more root growth.
--- Top fed for a minute.
--- She is getting bigger, but still looks yellow.
Day 05 - Friday - 08/14/20 - Total Days: 012
-----------------------------------
- [0915]: Leaves look a little burnt on the tips. Still no slime.
--- Going to back off on the PPMs to hopefully fix the nutrient toxicity.
--- Solution strength was at 632 PPMs
--- PH was at 6.3
--- Added/Removed water until PPMs were at 536.
--- PH was still at 6.3
--- Raised water up a bit, then top fed for a minute.
- [2200]: Looking better. Still yellow though.
--- Solution strength: 514 PPMs
--- PH: 6.5
--- Added PH down.
--- New solution strength: 518 PPMs
--- New PH: 5.2
--- PH was kind of high. So decided to PH down. Had to use quite a bit to bring it down. But eventually got it to drop down to 5.3. A little low, but so far, the PH has always gone up so wanted to start it really low.
--- Ran the top feed for a minute to re-saturate the top of the hydroton.
Day 06 - Saturday - 08/15/20 - Total Days: 013
-----------------------------------
- [0830]: She looks stunted. leaves are still yellow.
--- Solution strength: 514 PPMs
--- PH: 5.6
--- Top fed for a minute.
--- Not sure what to do at this point. Going to do another reservoir change soon. Hoping she lives until then.
- [2145]: Looking pretty much the same.
--- A bit of slime has returned. Since I've been diluting the nutrient solution, the enzyme ratio has dropped. So I guess this is expected.
--- Also noticed that slime build up was on the air-stones. Never really checked the stones so not sure how long that has been there. Looks brown too, which can't be good.
--- Going to do an H202 sterilization of the system (minus the net pot) tomorrow so did not add anything.
--- Lowered the water level to below the net pot.
--- Then top fed for a minute.
Day 07 - Sunday - 08/16/20 - Total Days: 014
-----------------------------------
- [0900]: STERILIZATION DAY!
--- Decided to skip today's night cycle for a deep clean.
--- I'm hoping that skipping a night cycle won't be too stressful.
--- Temporarily moved her to a new bucket.
--- Used about a half of gallon of straight distilled water to flush out the net pot.
--- Drained the system and wiped up all the brown sludge. Also removed the air stones and cleaned up all the goo.
--- Filled the system with 2 gallons of distilled water and at least 30ml of food grade hydrogen peroxide (35% strength).
--- Yea its a lot, but since I'm not going to sterilize the system overnight, I went with a really high doseage. Basically I kept adding until I started to see little bubbles start to form.
--- Then I ran the water pump.
- [0915]: Boiled the air stones in tap water for about 10 min. Then reconnected them to the airlines.
--- I let the air stones and hose soak in the sterilization solution for about 5 minutes so the peroxide can absorb into the stones. Then ran the air stone to help mix and agitate the solution.
--- Occasionally, I'd repeat the process of turning the air pump off for a few minutes to let the stones soak.
- [1000]: Covered the top two row of holes of the net pot with some aluminum tape. Hopefully this solves the light leaking in through the hydroton.
- [1200]: Used an old toothbrush and scrubbed the pump clean. Then drained the system.
--- Refilled with more distilled water and peroxide. Again added a lot.
--- Ran system again to sterilize even more.
- [1530]: Drained the system and refilled with distilled water to rinse.
--- Ran the system for a few minutes, then drained and rinsed again.
--- Did this a few more times over about an hour.
- [1630]: Added 4 gallons of fresh distilled water.
--- Added 15ml Sensi Grow A
--- Added 15ml Sensi Grow B
--- Added 12ml of B-52
--- Added 16ml of Voodoo Juice
--- Added 16ml Sensizym
--- Solution strength was at 430 PPMs
--- PH was at 5.6
--- I was going to add Hydroguard, but I think the bottle is expired. Since 2017 or 2018!? I think Hydroguard is good for up to 2 years from the date on the bottle or 6 months after opening. So not going to use from now on. I wonder if this could have contributed to the slime build up.
--- Also removed the CaliMagic and Superthrive too. Going to only use AN products to eliminate the chance of incompatible nutrients.
--- Placed her back in the bucket and top fed for a minute.
--- Here's hoping for the best. Going to let it ride until morning! Please feel better!
[END OF WEEK 02]
Likes
Comments
Share


@Another_One
Follow
Ok so it was 12 week One day a strong wind arose.And she was practically pinned to the ground


Likes
Comments
Share

@Borberad
Follow
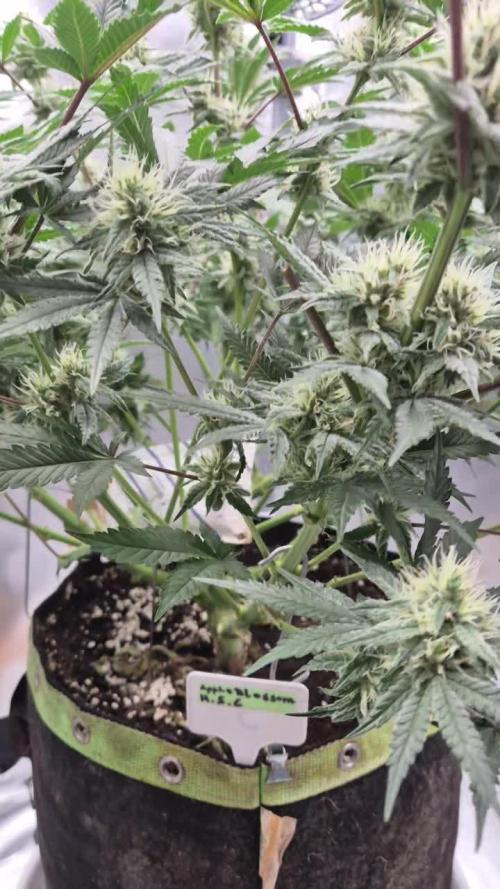
Wahrscheinlich vorletzte Woche!
Messwerte der Bilder sind aus dem durchgelaufenem Wasser (Drain).

Likes
16
Share


@Johan2
Follow
Still some noticeable stretch
Not at all thirsty . Only 2 liters in 5 days ?
Deciding on when to defoliate this week
Very thin branches/ will need to prop up I think
Likes
12
Share


@Staffedition
Follow
Привет друзья. Моей растихе сегодня 34 дня.
Начал применять LST технику на 19 дне и продалжаю применять её через день, а 18 августа добавил ДЕФОЛИЗАЦИЮ
С 20.08 ДЕФОЛИЗАЦИЮ делаю каждые 3,4 дня
С 20.08 применяю технику LST каждые 3,4 дня
На сегодняшний день влажность 63%
Растение растёт хорошо. генетика радует.
Всем мира и добра!
#Smail_Seeds
Likes
6
Share


@mangojuus
Follow
Theyve recovered from the heavy defoliation last week. Think ill avoid further defoliation as ive only found mixed opinions of it.
Day 31: trained them some more arnthey were sticking out the pot on one side. Tucked away some leaves as well.
Day 34: added some coffeground to the soil and tucked away some more leaves. Tied down some more brancjes as well that were sticking way outside the pot. Im afraid the smaller one is stunted as it hasnt grown in weeks. It did sprout 2 days after the other one as i had buried the seed too deep.

Likes
7
Share


@Uncle_Cabbage
Follow
The 1st week was kind of nerve racking wondering if I did the right thing by popping the seed straight into the soil. Luckily 🍀 everything went smooth, with an exception of me having to leave for a couple of days. I’ll show you an update on how that went on my next post for week 2. Keep your fingers crossed 🤞 for me and please send any advice you guys and gals have in mind. Again this is my first time growing I could use all the advice I can get! 🙏
-Uncle Cabbage
Likes
5
Share

@AestheticGenetix
Follow
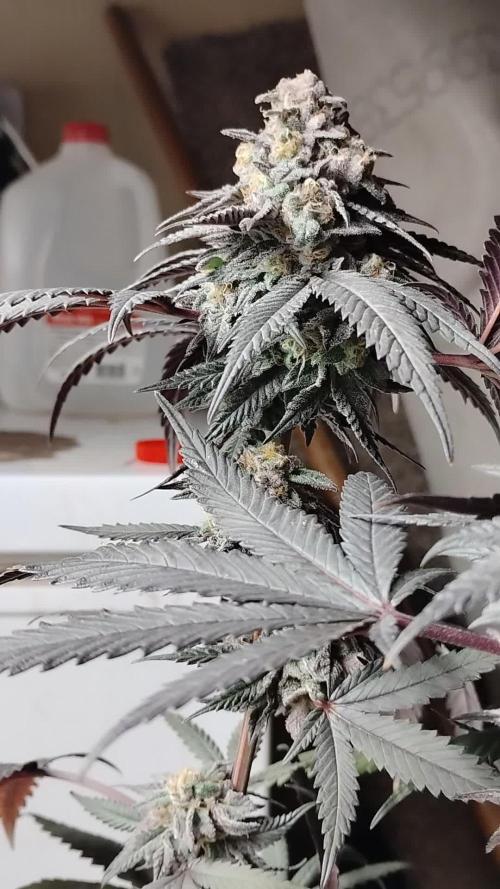
Plant is doing great in the 1 gallons with the vivosun drip irrigation. Will be harvesting probably at the end of this week.
She's at day 56 as of this update. I didn't post any updates for the first few weeks of flower.
Likes
5
Share


@wheedtobeus420
Follow
Day 75. She’s huge and in the dark ice flushing. She smells amazing. I can not wait! 🎂🎂🎂🎂 we also added another meet Mortimer
