




Likes
25
Share


@Hempface86
Follow
Today is day 61 and she is maturing nicely.. trichomes are still mainly clear but this girl's had orange hairs for a while now.. interesting how some get orange hairs quick and then some hairs never turn orange.. Sensible Seeds thank you very much for the opportunity to showcase your genetics I will say this is a good one she smells very good she has a nice sweet smell to her.. Sensible Seeds has an amazing website and more different strains than you could wrap your head around.. definitely check them out I hope all is well God bless and happy growing ✌️😎
https://www.sensibleseeds.com/
Likes
7
Share


@DarkOG
Follow
8ª Semana da Floração
- FFJ (6ml) + FPJ (3ml)
Aplicação de Sal amargo pra deficiencia

Likes
1
Share


@Elguacho420
Follow
Buenas a tod@s!!, bueno pasamos la segunda semana de floración de las red cookies gelato, de momento no tengo problema excepto algunas hojas amarillas, le baje la dosis de los productos e intento mantener una temperatura y humedad adecuada, hay días y días, de momento respondieron muy bien y están creciendo rápido y muy bien, hay una más avanzada q las otras pero bueno, ya florecerán 😅.. algún herror mio. Ya vamos viendo q tal desarrollan más adelante.... Buen finde para tod@s y buenos humos... 🇦🇷🤝🏻🇪🇦👍🏻💨💨💨
Likes
13
Share

@Jessi576
Follow
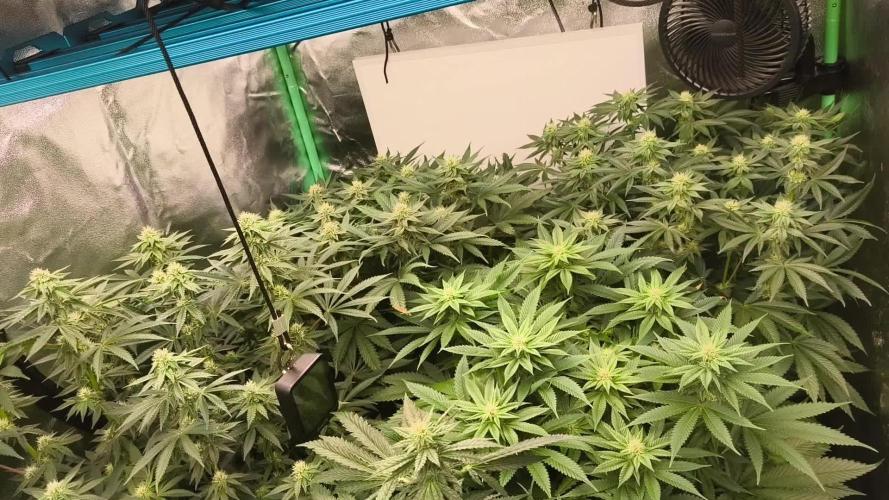
👉 Week 4 Bloom👈
👉 Week 13 Overall 👈
👉 12.01.2026 - 18.01.2026👈
👉 Days overall : 81-87👈
👉 Days bloom: 22-28👈
👉 Update 12.01.2026:
The plants got a "day 21 bloom leave reduction + lollipopping".
Check the pictures :)
👉 Update 12.01.2026:
The plants doing pretty good.
Check the pictures :)


Likes
7
Share


Likes
5
Share

@in_a_few_weeks
Follow
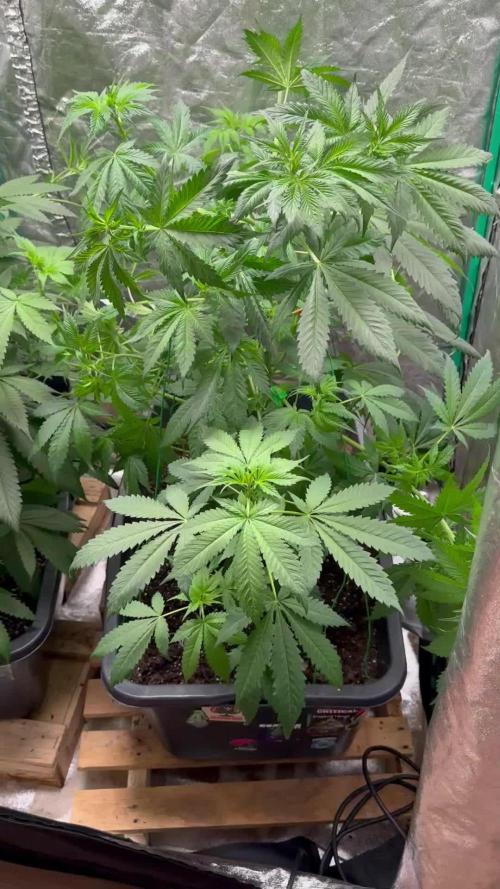
Bending and cutting. Now on 12/12. In a few Weeks we will see how big the buds are.
Likes
14
Share


@MWHomegrow
Follow
Vegetationswoche 6
Tag 50: Heute wurden unten die ersten Triebe rausgenommen , welche es nicht über die Lichtgrenze kommen und insgesamt eine etwas größere Entlaubung, um noch mal schön Licht an die kleineren Triebe zu lassen.
Dann noch je 2l ph 6.1 Wasser in die Bewässerungsbasen pro Pflanze.
Tag 51: heute in Vorbereitung auf einen Kurzurlaub je 3l Wasser mit ph 6.2 ins Reservoir 😊
Tag 52: Urlaub
Tag 53: Urlaub
Tag 54 Rückkehr vom Urlaub,Ladys extrem gewachsen(65cm) Alle 3l Wasser mit ph 6.3 und 0,5ml/l Calmag gegossen und Wechsel in die Blüte 😊
Ende der Vegetation

Likes
3
Share

@InsideAz
Follow
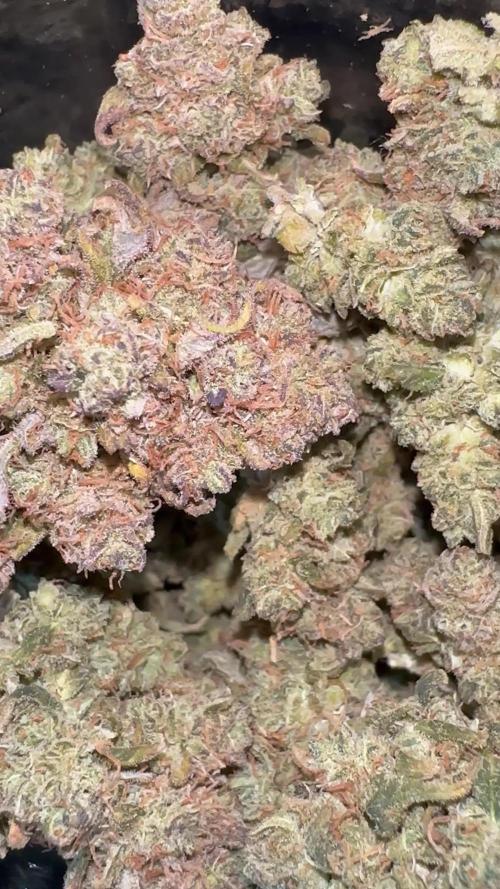
It’s been over a month of cure and I’ve been dipping into the stash frequently. Love this strain as a mid day smoker or even morning times. It produces a strong but not overpowering cerebral high allowing you to go about your day as planned, just in a better perspective. Very creative enabling and hyperfocus inducing. Smells very sweet and berry like, seems strain review for a few more details
Likes
2
Share

@youdan
Follow
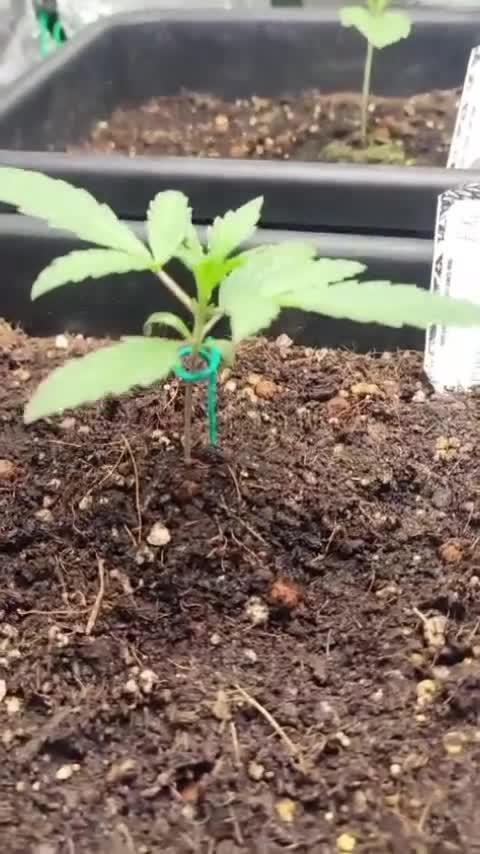
siamo nella seconda settimana e tutto va velocissimo, prossima settimana iniziero l'allenamento, vorrei poter fare 8 apicali perfetti sperando di farcela.

Likes
5
Share


@Selness
Follow
Cal Mag da fat crystal foi adicionado 2g/L
Açucar Refinado foi adicionado 0,5g/gal
Essa semana algumas das plantas demonstram uma deficiencia de CalMag.
Vou estar adicionando 1x por semana por mais 2 semanas, e parar 2 semanas antes de colher
Mas tudo ta indo bem até agora, o Fungus Gnast que tava no ambiente foi controlado. As plantas estão com um crescimento otimo, e completam 60 dias de vida entre os dias 14/01 e 18/01, acredito que mais 4 semanas e estará pronto para colher!
Likes
101
Share


@Ferenc
Follow
Day 58, 11th of November 2020:
I set the lamp 15 minutes shorter to switch off earlier so they receive 11:45 of darkness. I would like to imitate the nature when longer nights come with time till the 4th week (when they will receive 13 hours darkness a day 15 minutes minus 4 times = 1hour) so every week 15 min longer darkness for 4 weeks and then back to 12/12 to have bigger buds from the 4th week....
Wao. Well, all good hopefully they will stop growing soon but the strech is not that much thanks for the trainings such as topping and LST....
Pistils are started appearing so they she the sex I think one more week to go and they will settle down concentrating on bud development.
What to say every 2nd day is fertilization with the mix and ratio above now we are waiting.
Anything else? Well just look atbthe pictures and decide what you think. I am pretty sure they look cool LOL.
This Gleato Zamnesia is very promising I really like the smell already she is nice but all of them I mean I am in love with all so. Kalinia Asia is nice and I am so excited for the Sweed Seeds ones the red girls OMG :)


Likes
19
Share


@JoeGrowsGas
Follow
Overall a good harvest yielded pretty well for how short they were and how short it’s grow cycle was so needless to say rhe nugs density made up the weight nugs lookin good!
Likes
3
Share


@carlitoshaze44
Follow
Día 6 de diciembre ,tenemos una amanecida de gran niebla que se mantuvo en la mañana con ello una alta temperatura en la noche del cultivo amaneciendo este a 90% de humedad
Después del encendido de la luminaria y colocar dos pequeños humificadores de usar y tirar..en dos horas ,la humedad se mantiene bien.
55%
En el día de antes de ayer se le aplicó un buen riego.
Día 7
Humedad en el cultivo de un 60%
Hoy le e metido otro riego con todos sus nutrientes de vegetación y metiéndole un poco de floración
La EC 1100
El ph 6
Un ventilador dejó de ser oscilante para quedarse fijo.. hahaha meteré otro en unos días más grande y oscilante .
Likes
49
Share


@masterofsmeagol
Follow
MAY 17th I'll water the 10th planet again tomorrow. Things are going amazing! I topped one of the blueberry cheeses and fimmed another. I'm not seeing any stress. If they seem good I'll hst some of the others. This doing ONE thing at a time helps figure out problems. It's 75 right now but it was 39 this morning.
UPDATE: IT STARTED FUCKING SNOWING TODAY. Forecast looks good and others are putting plants out. I'll hold off. They'll go to the garage soon for hardening off. Looking at other diaries I had much bigger "clones" but they always come full of problems (see last year). These plants are the healthiest ivecever grown. I'd rather have a healthy plant half the size than a clone with a bunch of issues. Tomorrow I'm planning to wash my stakes and grow bags. I'll get the palletts in position and move my cage. I also am considering either putting a small pvc cover on my cage or finding a way to attack something to the trellis system for heavy rains. If anybody has ideas I'm all ears.
5/18 DIDN'T WATER TODAY. Soil was dry but the pots were heavy. I could feel some moisture through the drain holes. I think it would've been alright either way but I'm erring on the side of caution. I'll check again later in the day. I topped one and fimmed anotger of the blueberry cheese. The purple punch is quickly catching g up to her sisters. I HAD to add a small ring around one of the purple pounce plants as it was WAAAAY lighter than the others. It's possible it could've gotten less water than the others last time due to its positioning. I'm also considering adding silica next feeding. So much left to do before they go outside. Oh and it was fucking snowing here yesterday! May 17 and it was snowing middle of the day. Morning temp wad 31 this morning so I'm staying cautious and making sure I have all my ducks I'm a row before I go outside. I'm also weighing options to either add a pvc hoop on top of my cage or look into protecting plants individually come late fall with our horrible weather. I'm leaning towards the pvc top. I think that would greatly help things.
UPDATE: Went back over at four and everything's looked great. Leaves praying to the sun. Topsoil is dry as fuck but I can still feel a little bit of moisture through the drain holes plus they have a little heft left to them. I plan on watering tomorrow and see how that goes. I wanted to add silica but I'm afraid of changing to much or raising the ph of the soil.
5/19 Found out that my scale will actually weigh the three gallon pots! I don't have an empty one to fill with dry soil to compare though. WATERED everything today. Topsoil was totally dry. Some plants had some heft to them. However I last watered on the 15th so I decided to cut back on the amount of water and see how that goes. Instead of the full 28oz powerade bottle I gave them a little over half. I tried for approx 16fl Oz per plant. Everything is looking great. Other than the little runt. I don't know whatcthecdeal is with that one bit it may get given away or culled. I also FIMed a purple punch.
UPDATE: Went back over around 11 and boy weren't the plants looking good. I'm moving my cage and sanitizing my pallets tomorrow. I sanitized my grow bags. I vleaned them with the baking soda and water and a scrub brush but since I had that problem with fusarium last year I then soaked them in a h2o2 solution for 20 mins before rinsing them off and letting them dry. I am so stoked for this season. Wondering about the pvc top and whether it's necessary 🤔. I have TONS of heavy equipment (well dad does) but the smallest thing we have is a backhoe and a bulldozer neither which I'm to inclined to use to move big plants. I thought that since the door to that garage is large enough to drive a front end loader in than if I could find a way to make my pallets mobile I could bring them in if storms are coming. I worry to much. I also got rid of anything that could gave spires on it. Ilk need to wash my plastic trellis netting and the bamboo as well but better safe than sorry.
5/20 Plants are still growing like weeds and are the ones I HST are recovering nicely. Soon they'll go out to the garage and spend their days outside in the sunshine and their nights inside the garage while I harden them off. Having trouble uploading stuff right now.
5/21 Topped two blueberry cheese and one purple punch. Plants are still doing great. We are getting close to go8ng outside in tye forever homes in smart pots ranging from 10gal to 50 gals. I still need to sanitize the pallets but this week I plan on hardening these girls off fully.
5/22 I weighed a couple of the plants and they were different. I think I got a couple 7lbs one that was 6 something and a heavier one that was 8. Looks like I've found the right amount. I plan to water tomorrow. They'll be moved in the next couple days to the garage and I'll let them fill the 3's before they go in their final homes. Plants are recovering from HST great. Still getting cold nights here. Honestly if I didn't have a major life event happen they'd be outside hardening off now
5/23 Watered everything with approximately 18oz of water. I am either going to move plants outside today to indirect sun (even though they've handled full sunlight from an open window) in the garage and keep the light going for a little longer. They need to fill their pots before they go in their forever homes. I've got some work to do but it will pay off.
EDIT: Cage has been moved to its new home. A huge pallet takes up most of it but I have littler ones that will fit in. I just haven't had a chance to disinfect these. I'm probably going overboard but I'm not fucking around with that fusarium or other any pathogens this year. I'm going to use the systemic organocide once I go outside. It's going to rain tomorrow amd might be cold but I still move the plants to the garage in the morning.

Likes
23
Share


@goeser
Follow
Now we are in week 8.
Plants stopped growing.
I will let them grow two more weeks and then I will at least harvest two of them.
Depending on the trichomes I will keep the other two for 4-5 weeks more, because I will be away ... traveling
lets hope that the sun is coming out again and that the buds get bigger and bigger in the last two weeks.
BTW I stopped giving any type of nutrients, just water.
Processing
Likes
23
Share


@drzoidberg
Follow
man these fastbud plants are awesome getting nice color on the gg#1 think it is getting very close to kull time for a couple of these girls the smell is amazing did not take pictures of the sour hound #2 because it is not flowering but she is in the videos

Likes
4
Share


@Growstopher
Follow
4.21.25
3rd week of veg tie down method going good. Definitely going to have plenty of space for light.
Hoping to get couple more weeks of veg in before she’s flowers! Time will tell very soon!
Thanks for checking out grow
Likes
9
Share


@OrihimeDelta
Follow
Nothing notable this week. The ladybugs continue to have a grand time. LST is continuing well, and it’s looking nice and bushy!