
Likes
Comments
Share


@DisTentAint4Campin
Follow
She is jumping out the gym sorry couldn't get a shot of her alone my tent is a little crowded shoving her ass into flower tomorrow so excited 😆

Likes
13
Share


@CanabisLoverHobbyGrower
Follow
Great week,.. put some real size on and can honestly see the buds growing daily, check and feed in a morning and at night and can visibly see a difference,.. ones gone purple ones stayed green but both look healthy, really happy so far, roll on next week 👌

Likes
33
Share


@DutchFarmer
Follow
This pheno looks better then the one advertised!
She is not done yet so fingers. crossed she swells up
If you want to support us, take a look at our new diaries and if you like them remember to like, comment and follow us 👍 It will be appreciated! ❤️
Would you like to join our cannabis community?
A chance to win some RQS beans and merch hosted by RQS
💚🍀💚
Please check out my Youtube!

Likes
60
Share


@SooSan
Follow
12/12 + 68 jours
Vu qu’il y a 16 plantes mais que sur growdiaries on ne peut mettre que 8 variétés j'ai divisé en 2 diaries pour le bas de la tente
1️⃣
🏠 90x60x90
☀️ FC-E 4800 => puissance a 70%
🍁
1x Black Bomb / Philosopher Seed
2x Amnesia Lemon / PEV Seeds
1x Blueberry / PEV Seeds
1x Blueberry / 00 Seeds
1x Wappa / Paradise Seed
1x Dark Phoenix / Green House Seed
1x Quick Sherbet / Exotic Seeds
1x Mango Cream / Exotic Seeds
1x Banana Frosting / Sensi Seed
1x Hindu Kush / Sensi Seed
3x Fast Mix / Sweet Seed
📎 https://growdiaries.com/diaries/122084-grow-journal-by-soosan
📎https://growdiaries.com/diaries/124052-grow-journal-by-soosan
2️⃣
🏠 30x60x50
☀️TS1000 => puissance a 70%
🍁 4x Quick Sherbet - Exotic Seed
📎 https://growdiaries.com/diaries/122080-grow-journal-by-soosan


Likes
5
Share


@RoyColt
Follow
Always R.O Water
Watering the plant 3 times for per week
1st Watering with nutriens.
2st Watering with nutriens.
3st Watering with only R.O water & CalMag

Likes
52
Share


@Salokin
Follow
The High intensity was to strong (clearly my fault) in the beginning which stunted her overall stretch, she however still delivered super dense, terpene and trichome loaded buds.

Likes
6
Share

@Growbody
Follow
Herzlich Willkommen zu meinem Growbericht der Black Runtz Automatic von Zamnesia Seeds.
Die URL für den Strain findet Ihr hier:
https://www.zamnesia.com/de/11159-zamnesia-seeds-black-runtz.html
Für den Grow verwende ich die 9 Liter doppellagigen Stofftöpfe von ROOTIES. Sie haben sich bei meinem letzten Grow gut bewährt.
Auch die Smart Start Plugs von Zamnesia werden wieder verwendet, dieses Mal ohne den Samen vorher einzuweichen.
Und die Erde und der Dünger von BioBizz findet wieder Verwendung.
Tag 51: Die Black Runtz von Zamnesia Seeds streckt sich immer noch mehr als 1 cm am Tag. Sie wächst dennoch etwas kompakter.
Tag 53: Die Blüten haben eine guten Zuwachs. Auch bei ihr wurde nur der Hauptstamm gebogen.
Schön, dass du dir mein Tagebuch angesehen hast. Bis bald. ✋😎

Likes
5
Share


@ChitownCannaChica
Follow
Easy to grow— smells like citrus gas.
Really enjoy this smoke and the plant.


Likes
12
Share


@KalooNie
Follow
Cleaned up all the center and bottom growth to get those long, thick colas! Little plant only has 7 main shoots because one was just in the way... Switching them to full bloom nutes on week 3 of flower 😊
Likes
13
Share


@valiotoro
Follow
Hello everyone 😎
Week 7 of flower for the Amnesia HazZzzze🤯
All the tops buds are ready✂️
3 different pheno🤩
Purple : the smell is citrusy & earthy very strong!🍋
Green : tropical 🤤 it reminds me the Pablo Escobar !
Max 2 more weeks & finito ✔️


Likes
18
Share


@Rinna
Follow
Still staying strong, had to cut off a bit of bud rott here and there but she’s surviving so far 👌🏻 really happy with how she turned out

Likes
17
Share


@Sergio_721
Follow
16 days from birth the temperatures unfortunately with the lights on are still high but I don't think the girls are suffering very well despite a sudden irrigation that almost broke them
Likes
21
Share


@NSABND
Follow
Der Start in Woche 8 ist regnerisch und bewölkt bei kühlen Temperaturen und hoher Luftfeuchtigkeit 😳
The start of week 8 is rainy and cloudy with cool temperatures and high humidity 😳
Day 62 "Haircut" for "Hilde" 😏😉
Likes
24
Share


@Wicked_Stix
Follow
Had a lot going on this week so the plants didnt get any care or maintenance at all other than just checking on the water level a couple times. They need some major defoliation which I wanted to do this week but procrastination is the vibes currently. Will probably get some done next week.... the plants are looking good and most of them are bushing out pretty nice. They dont seem to be stretching as much as they normally do by this time, but they are transitioning to flower. Will probably do a flush and water change soon since they haven't had one in over a month. I'm just anxious to see some frosty buds at this point.

Likes
5
Share


@prebiancagrower
Follow
So, I start the harvest last week, but didn't get time to post here, first were the top bud, and this week I got the rest of the plant, it is a good strategy as the lower buds could develop a little more!
Amazing growth! I am very happy with the wield, it was my 3 growth at all and my first LST! Great results!
Thank you all for the support! Now I will stop for 3 months, going to Africa for a little bit! :-)


Likes
33
Share


@bigbubsofcheese
Follow
Good day to all that see this
super skunk is coming on nicely
no really changes to the garden a net is now down just to stop buds falling over . still hoping for good things

Likes
14
Share


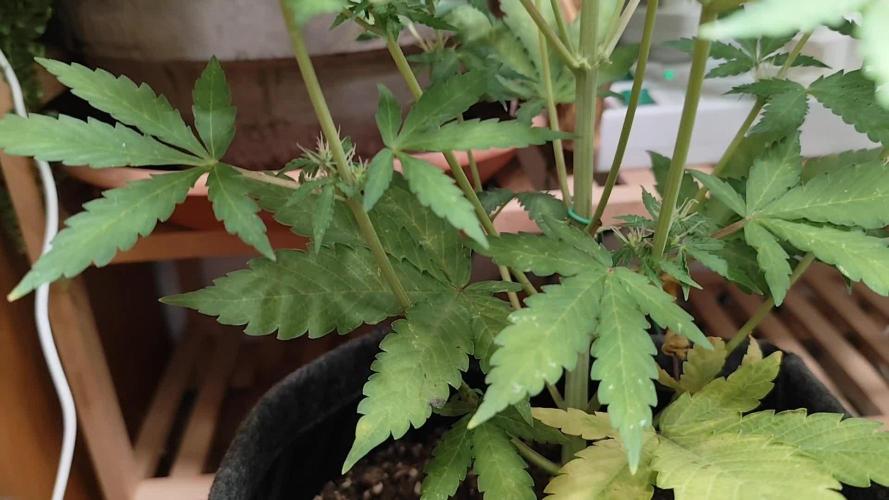
@Sadhus
Follow
Une des 2 en retard a redémarrer, la 2eme toujours bloqué et petite , elle grandit pas , les autres par contre sa pousse a vu d'œil je vous laisse voir la différence entre la semaine dernière et cette semaine ou pile 7 jours se sont écoulés, ph 5,78 ec 1,57 , tripart et plagron , amélioration de l'humidificateur d'air ! Et amélioration du vent avec un gros ventilateur oscillant, 30 min on 30 min off pour bien agiter les plante pour simuler le vent et renforcé les branches , amélioration de l'extraction et intracteur d'air avec filtre , passage de diamètre 120 a 200 pour l'extraction et a 150 pour lintracteur, fini les odeurs !
Likes
2
Share


@Ninjabuds
Follow
Bubble og they seem to be over taking my little seedling tent almost half the seedlings I have are bubble og. I don't plan on keeping them all I'm only going to flower either 6 or 8 of the 12 seedlings. They all have a very uniform apreance and height. They are growing better than early early seedlings. Not fast or anything but health growth now. They all have very dark leaves might have some black leaves at harvest
Last grow I overwatered and had to toss them because growth got stunted and a bunch if fungus knats got to the soil. This time I'm trying promix potting soil wish I had tried promix hp but the store close by isn't a hudro store and that's what they had. So this time I'm being very cautious with the watering I'm only useing a spray bottle I'm currently giving 45 spray per solo cup every few days when it dries out. This promix soil seems to hold water decent so the 45 spray there is 0 water coming out the bottom the cup yet. Here soon I think I'm going to double the amount of spray to 90 and start letting the soil get dry dry before watering again. Probably will hold off on any nutes quite yet.
I'm going from 24/0 to 20/4 light schedule this week. There getting to the point they won't strech as much is 4 hrs of darkness and I'm rasing the light intensity a little it's been around 150 I'm upping it to around 175. Most likely by the end of the week I'll probably be pushing 200 or close. Hopefully I can get them into the big tent soon
At this stage I like to alternate having the fan blowing on them I feel it gives them time to recover and get stronger instead of wind stress. Also every few days I will turn the plants so they are facing away from the light making them grow back towards the light I fell it makes them stronger