


Likes
62
Share


@SimpleGrow
Follow
Hello and Welcome back 🌱
It‘s now 7 days ago since I put them in Water to Germinate and now it‘s their 5th day of growing. Yesterday, they got their first 4 hours of darkness and now i‘m slowly going down to 18/6 light schedule. I admit, the environment was sometimes very off due to experiments with VPD and leaf temperatur but I think I can dile it in correctly for this growing stage and beyond (hopefully). I was trying to see what happens if I stress them a little and hoped they would grow faster but they 100% didn‘t like it. They heat up pretty fast when the Air is too hot and dry because the roots are not developed and the plant is not established enough. An established plant can stay outside in the heat of the sun and still have cool leaves.
So my environment for this stage is as above (27°C,70%RH). Light at 15000 Lux (≈370 ppfd) a little high but I‘ve noticed some stretching and I asumed they wanted more light and I really don’t want any more stretching. My media comes without nutriens so i feed little amounts of it every time they dry out enough. This is a Indica dominant strain so I asume they will stay fairly smal. Btw. If anybody wonders if CO2 bags work, check out the Video I uploaded.
They are still seedlings (not really in Veg yet) and so i‘m treating them as such for the rest of the week. Root developement is now the top priority wich, if you didn‘t know, is better in a smal pot first because they are more likely to develope secondary roots but we’ll see. I heard It‘s like topping just underneath the plant. When they are ready to be transplanted I most likely will take the first three.
Update: I did all the preperations for Transplant bc I was worried about root bound. I took Nr. 4 out and washed it as carefully as I could to expose the roots. Some of them got stuck on harder peaces of dirt and got ripped off. But it looks like alot of secondary roots developed instead of just one long taproot, wich is nice. I assume i can transplant them in the next few days.
I rearanged the plants according to the Lux reading, wich is highest in the middle so the bigger plants (Nr.1 and Nr. 3) went to the sides. Maybe Nr.1 got the „smal“ genetics and it’s not anything environmental.
thanks for following along this far and happy growing!
Update: hey guys so yesterday I noticed, that the roots are coming out of the bottom. They were trying to get to the bottom of the three pots 😭 i had to do an emergency Transplant wich went very bad because they were stuck in the little pots. I don‘t think i‘m going to use these kind of pots anymore because they were not easy to get out. I even dropped Nr. 3 but luckily nothing bad happened.
After the transplant both Nr. 1 and 2 were already ready to get more light. But Nr.3 was turning away from the light and the leaves were hanging down. So to lower the stress and encourage root groth I redusced the amount of light to a minimum and lowered the Temperature and highten the RH. This seemed to work well because the leaves were purking up again. The next day after 6-7 hours of darkness they are doing fine again but i‘m going to give them a little longer to establish themselves in the new pot. I changed the light schedule to 18/6 since I had to give them more darkness yesterday. I hope everything goes smothly from now on.

Likes
10
Share


@DedeLirante
Follow
They are developing well and the smelling started to be a bit strong with gas terpenes from both strains.
I'll keep following the EC and their development to ensure they won't have any blocker.
Day 42 - 15/05/2025
🌞 ~900ppfd
⏫🌡️~28°C
💧~49%
📏 40cm distância
3 day later the soil got dry, what it seems the watering cadence based on the pot size. They are going very well.
After talk with some friends and reviewing the plant status, I decided to keep follow the nutrient schedule and keep looking at them.
Mango Cream and Strawberry Cola 1 stopped stretching and should started the bulking phase, that's why the smelling is so strong.
On Strawberry Cola 1, I just remove some leafs that were covering the other branches. I, literally, removed 5 leafs.
Watered with 3L of RO water with 4ml of Athena Bloom B + 4ml of Athena Bloom A + 4ml of Athena CaMg.
EC 1.9
EC Run Off 5.8
PH 6.0
On Mango Cream, I did some defoliation removing the big leafs on the bottom, that was nothing receiving light and probably consuming plant's energy. Then, they can concentrate on the top canopy.
Watered with 3L of RO water with 4ml of Athena Bloom B + 4ml of Athena Bloom A + 4ml of Athena CaMg.
EC 1.9
EC Run Off 6.1
PH 6.0
As Strawberry Cola 2 is one week later than the others. So, it seems going to finish the stretching bloom phase.
As Mango Cream, I did some defoliation removing the big leafs on the bottom, also some ones in the middle, that wasn't receiving light and ambushing the middle overlapping the middle nodes. Then, they can concentrate on the top canopy.
Watered with 3L of RO water with 4ml of Athena Bloom B + 4ml of Athena Bloom A + 4ml of Athena CaMg.
EC 1.9
EC Run Off 5.9
PH 6.0
The defoliation on them also was done to improve the air circulation because my tent increased 1,5-2,0C. degrees with the season changing. Hopefully it can help to reduce a bit.
As the previous EC on them were between 5.1 and 6.1, it means that they are ok, consuming the nutrients and not blocked by high EC. Happy news!!
Day 45 - 18/05/2025
🌞 ~900ppfd
🌡️~26°C
💧~49%
📏 ⏫45cm distância
3 day later the soil got dry and they are going very well.
I'm keeping the strategy this week in order to levelling the EC on them. Seen they sucked a bit their development and some burns started to show on the leaf points, I decided to flush them a bit to correct the EC and continue the nutrients schedule correct.
I flushed them with 6L of RO water with PH corrected, each one. They reduced the EC to 2.0~3.4 and I added another schedule nutrients solution.
All water schedule below is after the flush.
Mango Cream
I watered with 1L of RO water with 2ml of Athena Bloom B + 2ml of Athena Bloom A + 2ml de Athena CaMg + 2ml of Athena PK.
PH 6.0
EC 1.9
EC Run Off 5.3
Strawberry Cola 1
I watered with 1L of RO water with 2ml of Athena Bloom B + 2ml of Athena Bloom A + 2ml de Athena CaMg + 2ml of Athena PK
PH 6.0
EC 1.9
EC Run Off 4.9
Strawberry Cola 2
I watered with 1L of RO water with 2ml of Athena Bloom B + 2ml of Athena Bloom A + 2ml de Athena CaMg + 2ml of Athena PK
PH 6.0
EC 1.9
EC Run Off 4.5
I also did some defoliation on Strawberry Cola 2 to improve that light penetration and air circulation.
Day 48 - 21/05/2025
They definitely are in the bulk phase. The smell is crazy.
My flush strategy was successful and they are eating like a monster now and without any bad signals. Happy with the correction results.
I also increased the watering volume.
Mango Cream
I watered with 3,5L of RO water with 5ml of Athena Bloom B + 5ml of Athena Bloom A + 5ml de Athena CaMg + 4ml of Athena PK + 5ml of Athena Cleanse.
PH 6.0
EC 2.0
EC Run Off 2.8
Strawberry Cola 1
I watered with 3,5L of RO water with 5ml of Athena Bloom B + 5ml of Athena Bloom A + 5ml de Athena CaMg + 4ml of Athena PK + 5ml of Athena Cleanse.
PH 6.0
EC 2.0
EC Run Off 2.7
Strawberry Cola 2
I watered with 3,5L of RO water with 5ml of Athena Bloom B + 5ml of Athena Bloom A + 5ml de Athena CaMg + 4ml of Athena PK + 5ml of Athena Cleanse.
PH 6.0
EC 2.0
EC Run Off 2.8
I did a slightly defoliation on the bottom leafs to improve air circulation.
This week is working in progress and should be update asap due the plants development.
Cheers!🍁🔥

Likes
9
Share


@Kirsten
Follow
💜 BLACKBERRY MOONROCKS 💜
We had a bit of a slow start, but she has done really well and greened up nicely now.
She is still short, so I'll be interested to see what her final shape will be.
I have a full tent, so I'm considering letting the plants in this grow, grow up as I've got plenty of head space but very little horizontal space.
Anyway, this is what I fed this week:
26.6.25:
I watered with 2L of dechlorinated water PH'd to 6.4 and containing the following nutrients per 2 litres;
♡ 1ml Ecothrive Trace
♡ 1/4 Tsp Ecothrive Biosys
PH: 6.4
PPM: 380
Thanks for stopping by 💚✌️🍃😊🌱

Likes
10
Share


@420DeepGrow
Follow
📆 Semana 6
Los cogollos continúan aumentando de densidad y comienzan a mostrar su forma definitiva. Los cálices se hinchan con mayor rapidez, la producción de resina alcanza un nivel muy elevado y el aroma se vuelve mucho más intenso y complejo. En muchas genéticas empieza a apreciarse una ligera reducción en la aparición de nuevos pistilos.
La planta mantiene un consumo elevado de agua y nutrientes, aunque el crecimiento vertical ya ha finalizado por completo. El amarilleo progresivo de las hojas más viejas puede hacerse más evidente mientras la energía se dirige al engorde y la maduración de las flores.
⚡ EC: 1.9
💧 pH: 6.2–6.5
🌡️ Agua: 21°C
🌫️ Humedad:50–55%
💡 Intensidad: 1000–1100 PPFD
🔥 Nota de cultivo: La prioridad es mantener unas condiciones estables para favorecer la máxima densidad, producción de resina y expresión de terpenos. Evitar excesos de fertilización y cambios bruscos ayudará a completar un engorde uniforme.
¡Seguimos creciendo fuerte 💪!


Likes
8
Share


@High_Grade_Dadli
Follow
Well I having been laggin with update but I think am up to speed now...well u kno the fitess of the fitess must survive....still been having so water lag issue with the older one so finally decided to change the pot but she still managed that bit of stress good well see what happens in the rest weeks to come.....the other two are 6 weeks this week ...the one that got hst not by choice the crown is barely hanging on have some tape holding it managed to push a seed....this strain seem to be very resilient.....look at dem resin and this is jus the 2nd week of flower....until next time happy growing
Likes
2
Share


@Chubbs
Follow
What up Fam,
Week 1 update on these beautiful little ladies. So far germination was a dream, and now they're starting to get there first set of leafs which is cool to see. I did do my first hand watering the other day and probably fed a little to early as I'm seeing a couple burt tips on the leafs. Or it could have been spraying ipm which I've had to do every 3 days since planting. One of my bags of soil where infested with Fungus knats so been trying to get rid of them without being to evasive. All in all though glad to start the first run in the new room and get it all dialed in. Happy Growing.

Likes
26
Share


@TrickzGrowz
Follow
Servus Moin!
Die Permanent Melons macht sich mega. Die ganzen Triebe gehen richtig ab und wollen sich Strecken. Bin gespannt wie viel ich nächste Woche wegschneiden muss.
Likes
17
Share


@MasterKush714
Follow
HEY GANG UPDATE!!!!!!!!!!!!
SOOO the girls are looking great I'm super pumped on these 2 girls
I've been doing nutrient feeds one on one off so basically alternate
nutrient feedings, looks really great stepped up water feeding to one gallon
of water per plant, but other then that things are progressing really great keep
it going growmies!!!!!!!!!!!!!!!!!!


Processing
Likes
9
Share


@Nookandplant42o
Follow
Earlier watering was fed with nutrients, and my temperature is not low so I should go with minimum to medium quotas with more water avoiding burns, without much runoff mixing with soil compounds and mycorrhizae for better performance I know they need a calcium magnesium for better performance the problem is money I will continue with the use of salt Epson the option I have at the moment, direct sulfur in the soil mix has helped me hear a noticeable change.
watering ph 6.2 solution temperature 20 ° - 0.50 g of large white microreceptor 2 days earlier sprayed with ppm-free water via leaves - lights off to serve as a cool-down shower is great for stomata .
Simple led panel added as main light source 260watts being divided to 3 plants in the fullspectro tent model, did not get much difference in temperatures compared to HPS, is more the same spectro ratio and UV to reach more directly in the trichomes and terpenes. Moc medium leaves look more like Indica while larger leaves bring one more sativa a set a nice strong sweet smell, I prefer to conclude in the end the true tone I feel, she drinks more water than others the soil is easier to drain So I see in her an ability to take more quotas of nutris, slowly being able to take if necessary always try to avoid burns ...

Likes
15
Share


@Siriuz
Follow
Check out the videos guys, she is flowering real good even tho we are not using any special nute like big bud for example, but i really want to try it soon, hopefully!
Still she is doing great and im happy to have her!
How are you doing growers whats up!?
Dont forget to leave a comment
Any suggestion is welcome!
We are happy to learn new things alwas,
Thanks for the support happy growing everybody
Enjoy the footage thanks to Siriuz
Likes
8
Share


@Barham64
Follow
Beginning a 2 week flush, just tap water from my bathroom.. nothing special lol smell is getting very dank


Likes
16
Share


@Mrg7667
Follow
Slight light burn on a couple plants had to raise the LED. On the off week Light seems to be allot more effective at civering the space although the plants did not take well to the spectrum/heat adjustment so the first two days i had to ween the light on a couple hours at a time. I could tell when they needed a break because they woukd physically get droopy once they got over whelmed eventually they got used to it tho!

Likes
36
Share


@TheCannaProphet
Follow
~ Auto Skywalker Haze®️ by Dutch Passion ~
Skywalker Haze x Auto Amsterdam Amnesia
Well friends, here we go on another 'canna-venture' together cultivating Dutch Passion's Autoflowering version of their outstanding Skywalker Haze along with three other incredible autoflowers from Dutch Passion that I'm running separately, so buckle up and hold on! This will be a wild ride for sure!
I've wanted to grow this strain for some time now and finally have an opportunity to see what I can do with it, and I've germinated two so double the fun!
"Auto Skywalker Haze has a very pungent and fruity aroma! The incredibly firm and frosty buds give off a strong lemony, yet sweet, haze-like scent. The citrus and haze notes are clearly dominant.
The combination of the fruity, sour, pungent citrus-dominant terpene profile with the more pungent, spicy haze character makes this a strain for real enthusiasts.
The buds are completely covered in trichomes and in addition to providing a high cannabinoid profile. It also gives a true taste explosion. The terpenes are in abundance and they provide an exceptionally strong fruity haze taste. " **
"Auto Skywalker Haze is currently Dutch Passion's most potent autoflower with THC levels over 25%! 26.2% to be exact! This makes this strain even stronger than most of the photoperiod seed strains currently available worldwide.**
"The feminized Skywalker Haze is a cross of our original and classic Skywalker variety, which consists of a cross of Mazar x Blueberry which in turn is crossed with an Amsterdam Amnesia from the Amsterdam underground scene.
By crossing this photoperiod Skywalker Haze genetics with Auto Amsterdam Amnesia, Auto Skywalker Haze was created." **
"Auto Skywalker Haze produces robust and stable autoflower plants. This Sativa dominant cannabis strain is known for strong and sturdy plants that can take a beating. Most ladies grow into large plants with a real Sativa appearance.
These phenotypes can grow quite tall with wide and long branching, thin leaves and elongated Sativa buds. These phenotypes usually take a little longer to mature. The flowers, which are completely covered in crystals, may have a tendency to foxtail slightly, but that doesn't take away from its true beauty. These buds also become a lot more compact than you might expect from the Sativa appearance.
There are also phenotypes that remain just a little more compact and tend more towards the hybrid side. These mostly Skywalker-dominant phenotypes grow very hard and compact buds, sometimes reaching as thick as a Coke bottle.
All plants have a good flower-to-leaf ratio and trimming the plants is relatively quick. Some plants can even be picked completely by hand and are ready really quickly. The small sugar leaves are also completely full of resin and trichomes, so you don't necessarily have to be very precise. If you want use it, then you have excellent trim to make your own hash, oil or other cannabis concentrate.
Auto Skywalker Haze generally has a short internode distance. The flowers can grow nicely together and completely fill the branches from top to bottom with sticky buds.
Most Sativa-dominant plants usually have a little more space between the buds. This lady can also stretch a lot. Outside we have seen occasional plants that have reached a height of more than two meters in the open ground. That is very exceptional for an autoflower."**
"Auto Skywalker Haze generally takes about 12 weeks from seed to produce fully mature plants ready for harvest. There are two phenotypes of Auto Skywalker Haze that take a little longer, around 13 to 14 weeks.
These are really worth the wait! During the last few weeks the buds get a lot thicker and heavier and the potency continues to increase. Outdoors, Auto Skywalker Haze takes an average of between 12-15 weeks to fully mature." **
**Credit- Dutch Passion.com
______________________________________________________________________________________________________________________________________________________________________________________________________________________________________________________________________________________________________________________________________________________________________________________________________________________
~THE SETUP~
~ Grown in 15L Gronest geotextile pots filled with Mother Earth Grow 70/30 Coco/Perlite with Xtreme Gardening Mykos added.
~ Seeds were germinated directly in the medium without any 'pre-soak'
~ Seeds were planted three days before the Full Moon (Waning Gibbons) and sprouted within 72hrs, on the Full Moon.
~ Feeding will be by Lotus Nutrients (first time using)
~ 24hr light cycle while germinating
~ 20/4 light cycle after first leaves appear.
~ 4x8 Gorilla Tent
~ HLG 650R w/ 30w Supplemental UVA Bar controlled by a Trolmaster Hydro X controller set for a 15min Sunrise/Sunset simulation. (also a HLG Blackbird for additional side lighting if necessary)
~ Supplemental co2 controlled by an AutoPilot APC 8200 co2 controller
~ AC Infinity Cloudline T6 with Controller 67 using a Terrabloom 6x24" carbon filter
~ De-Humidifier and Humidifier when needed.
~ 14k BTU IdealAir portable A/C unit plumbed into tent for temperature control.
~ BlueLab testing instruments
~ Two Hurricane 18" oscillating fans
~ Two 6" Clip-on fans
~ Two 10" floor mounted fans
______________________________________________________________________________________________________________________________________________________________________________________________________________________________________________________________________________________________________________________________________________________________________________________________________________________
As a cannabis grower, I recently had the pleasure of growing two Dutch Passion Auto Skywalker Haze plants indoors. This hybrid strain is a cross between Skywalker Haze and Dutch Passion Auto Ultimate and is known for its strong cerebral effects and uplifting high. In this report, I will share my experience growing Dutch Passion Auto Skywalker Haze and provide some 'High Humor'.
~Growing conditions~
I grew my Dutch Passion Auto Skywalker Haze plants indoors in a 4x8 Gorilla tent. I germinated both seeds directly in the Coco/Perlite medium and both sprouted within 72 hours!
The growing environment was kept on point with the help of an AC Infinity Cloudline T6 exhaust fan coupled with their Series 67 Bluetooth Controller along with two 18" Hurricane fans, two floor mounted 8" fans and a 6" clip on fan providing ample air movement.
Also crucial to this grow was the supplemental Co2 via a 50# tank regulated by an Autopilot APC 8200 Co2 Controller that I set to keep the tent at 700-1200ppm's throughout the run.
Tent temperature's ran between 68-78℉, humidity was kept between 40-60%. I used a lighting schedule of 20/4 for the entire grow with a pair of HLG 650R's that also have supplemental UV bars attached. The exception being the last three weeks, where I added 4 hours a day of UV, and cut the cycle back to 19/5 for a week, and then finally to 18/6 for the last two weeks.
I used Lotus Nutrients for the first part of this grow but became concerned when I noticed that I was getting yellowing I used starting on the #1 plant going from the bottom up indicating to me that their was a problem with the nutrients. Let me say that I'm VERY OCD when it comes to the PH/EC of what I feed my babies, following all of the recommendations from Lotus, but continued to see the yellowing progress. I then switched to Dutch Pro liquid nutrients and within two feeds I could begin to see a noticeable difference in the #1 plants color and overall health! As I continued using the DutchPro nutrients the #1 plants health, vigor and color continued to dramatically improve all the way up until harvest. I can honestly say the I believe switching to DutchPro nutrients saved this grow from a possible dramatic failure!
~Flowering time~
My Dutch Passion Auto Skywalker Haze plants had a flowering time of 93 days from seed to harvest for the #2 plant and the #1 in an unbelievable 113 days! The #2 reached a height of 23" and produced yield of 116g, while the giant #1 plant came in with a whopping 279g total yield and grew to just shy of 40" tall! In addition to all the tasty flowers that these two plants provided, I took the 'sugar trim' from them and ran it through my sift screens resulting in a 24 gram mound of sift on the first sift!
And now for some 'High Humor':
~Growing Dutch Passion Auto Skywalker Haze was a bit like being a Jedi, except instead of using the Force, I used Coco/Perlite and DutchPro nutrients.
~ My Dutch Passion Auto Skywalker Haze plant was so big and beautiful, it could have been featured in the Millennium Falcon's garden.
~When it comes to smoking Dutch Passion Auto Skywalker Haze, it's like taking a ride on the fastest ship in the galaxy - it's a real trip.
In conclusion, the Dutch Passion Auto Skywalker Haze was one of my all time highest yielding and longest growing autoflowers to date. It was a very easy strain to grow, and it only required minimal care and attention to ensure that it grew to its full potential. Cultivating these two Dutch Passion Auto Skywalker Haze plants indoors was a great experience that resulted in two beautiful and high-yielding plants. Smoking the buds provided a strong cerebral high that was uplifting and energizing. I would highly recommend this strain to other growers looking for a relatively easy to grow variety with strong effects. May the Force be with you as you embark on your growing journey... May all your days and grows be Blessed! 😎🙏❤️
References:
Dutch Passion. (n.d.). Auto Skywalker Haze. Retrieved from https://dutch-passion.com/en/cannabis-seeds/auto-skywalker-haze
Leafly. (n.d.). Skywalker Haze Strain. Retrieved from https://www.leafly.com/hybrid/skywalker-haze

Likes
2
Share

@JVKdopegrow
Follow
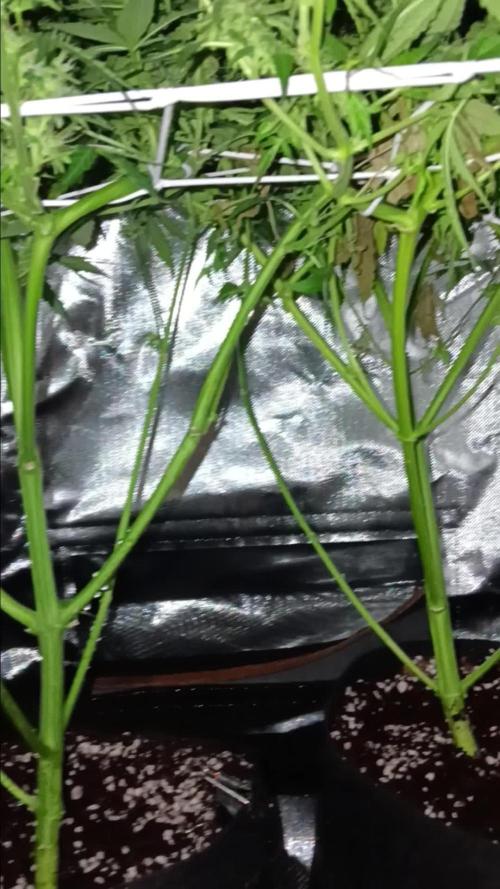
My girls are in their expressive beauty phase. Multi colored pistils, light green calyxes swelling, and frost showing on the sugar leaves. The heat has some minor foxtail effects. I added a second level of netting for support.

Likes
37
Share


@TheIceCreamParlour
Follow
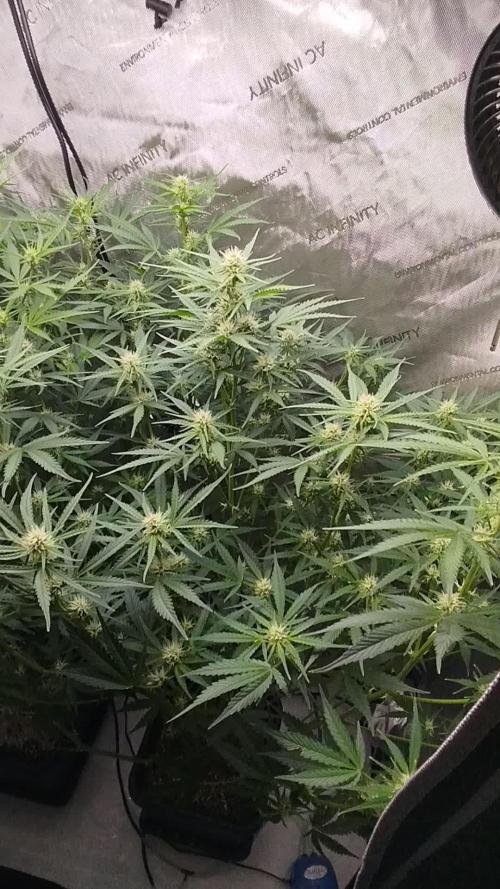
Hey guys, it's been a great journey but I've finally hung my Stardawg out to dry! Yesterday was their last day totalling 8 weeks on flower. Realistically they could have benefited from a further week because the lower buds are somewhat underdeveloped but then I would risk losing the preferred sweet high smoke of the top buds. With this being my first attempt it's been a great learner not only for how to care for the plants but also the environment. As soon as these went into flower and started stretching I knew that putting 6 in a 2.4 x 1.2m tent was a bad idea. They just got so big which is the cause of the lower sites not being as good as the top colas. Despite that I'm really happy with the outcome and I'm hoping ive got 30oz+ of real good quality nugs. All of the top colas have turned a gorgeous violet colour too which you can see on the pictures and I absolutely love.
For my next grow I've gone with 6 fastbuds strains which hopefully will go under a scrog.
Check back next week for the harvest and weigh in!



Likes
4
Share


@GanjaFarmer101
Follow
Smooth trim. heat outside is too much now - plant 2 got a little bit longer (about 3 or 4 days)
Both really resinous and super fast grows.
Likes
2
Share

@CaveGanja
Follow
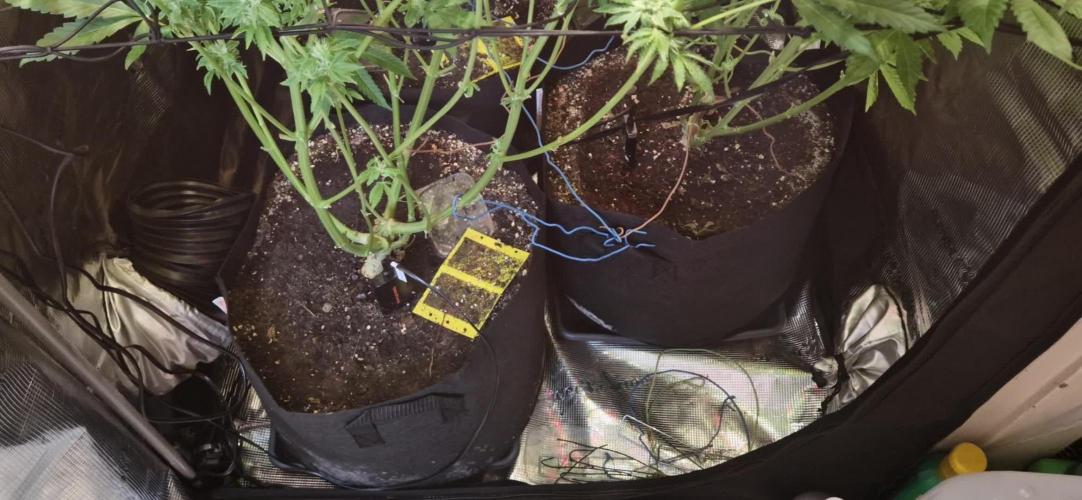
Every day i open the tent the only thing i think is pls dont let me spot budrot.
Plants donig well i have 3 fans on max lvl and my dehumidifier 24/7 runnig.
I use less fertilizer.
last week i forgot to turn on 2 fans for 24h gives me the bad feeling you f*** up but still all seems fine.