
Likes
Comments
Share


Likes
10
Share


@Cocogrow1234
Follow
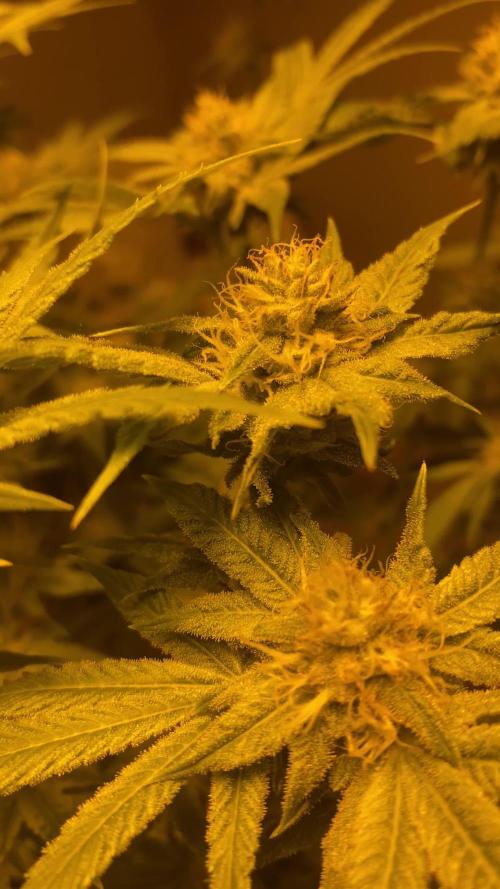
Week 4 flower : everything’s looking nice still got the lights about 7-9” from top of canopy without any issues . The humidity has gone up to 50% in day and I can’t really get it any lower I’ve already got a dehumidifier so don’t want to get another one . I would like to lower to 40-45% and lower for last 2 weeks but can’t see that happening .
I’ve started the pk from end of week 4 (day 28 )at 1ml per litre this took my ec to 2.2 I will see how it goes and maybe up it to 1.2-1.5 and I’m going to use the pk for 7-14 days then I will start the flush
I also lowered the silicone to 0.5ml per litre
3x blue cheese plants are on the left but has spread over
and 1x sunset sherbet on the right
Likes
3
Share


@Gefjon_Grow420
Follow
we transplanted the little ones in a bigger pot and a little bit more light also , the little freak is still alive and growing alittle bit slower than the rest but i will keep it as long it grows and who knows

Likes
6
Share


@MNGrowBro_Angel
Follow
This is the Fastest Grower out of 4 Different Strains This Is Definitely a Great Start
Processing
Likes
13
Share


@TrueNorth
Follow
-Strain: Cream Cookies - Fast Buds
-Tent: 5x5 Gorilla Grow Tent
-Lights: Budget LED Grow Lights 2 x 250 Watt
LED Full Spec/Red Spec mixed boards
-Light Cycle: 18/6
-Soil: Fox Farm
-Air Circulation: AC Infinity Cloudline T6 Inline Duct Fan
WECLOME BACK GROWMIES! Week 12 here with our CREAM COOKIES by Fast Buds!
February, 09, 2020 (DAY 78) - YOO GROWMIES! Welcome to week 12 of our CREAM COOKIES! week 6 of flower to be exact! She is so thick it blows me away, i remember how affraid and sad i was when it wasnt working out in the beginning but like everything else in life with patients you will see progress and growth, and you to will succeed. She is stacking and thickening out more daily and im so happy.
purple hues in the buds are appearing and it looks great, trics are everywhere.
February 12, 2020 (DAY 81) - WHAT UPPPPP!!!! here we are folks another update. the purples are getting so VIBRANT!!!!! think she is getting flushed starting this weekend. this will be the last feed then its onto that FLAWLESS FINISH by ADVANCED NUTRIENTS. hopefully im making the right choice......maybe another week wouldnt hurt....


Likes
100
Share


@AsNoriu
Follow
Day 111. First is ready, second week behind, third maybe even 3 weeks behind ....
Plus they are LEAFY ,!!!!
Trim jail ...
Wet trim for all of them - no doubts !!!
Day 115. Still hanging, slowly drying and result should be decent at the end ... A week more I guess, very humid in UK ...
Day 118. First trimmed - 175 g. Other is chopped ! One still grows ...
Day 136. Chop day for the last one !!! Long run ....
Happy Growing !!!

Processing
Likes
51
Share


@Silverback_Guerilla
Follow
12/28 - 1/3:
Another busy week with life...
Last fed on Sunday 1/3
The plants are all budding up well and frosting over quite early!
I am hoping to remove the smallest three plants from this closet and move them into the tiny tent in the next couple of days..flushing the autos in there today (1/3). That will hopefully give the bigger girls a little room to spread their wings.

Likes
24
Share


@Ganjaman19
Follow
Vegetation over end of week 8 I'm really happy with how these look I've ended up with 8 I'm happy to put into flower they are all different strains and range in size from 90cm to 120cm the strains are
Barney's farm
Wedding Cake
Pink Kush
Mimosa Evo
Runtz Muffin
Divine seeds
Divine Indica
Opium
Anesia seeds
Banana Kush
Pink Starburst
The feed I've used is great I really like this range and would recommend it to any grower and its all I will be using along with the Monkey Nutrients range these for me are the best European and UK Nutrients well worth anyone's money
I will be defoliating and lollipopping them soon so I can get as much exposure as possible
Also some of my cuttings have rooted so I can help my friend out I switched to Clonex rooting gel and have had some luck so I'm really happy (see pics)
Thanks for the help along this journey and thanks always to my sponsors
@HydroproWashington
@anesiaseeds
@Divineseeds
@monkeynutrients
See yous all next week with some better photos of each plant before and after some much needed defoliation
Peace out


Processing
Likes
9
Share


@Tokologo
Follow
Day 78 plants are now going to grow outdoor.
Clones coming along nicely.
This week I'm giving the mothers a chance to get used to outdoor grow.
Day 84, mother enjoying the sun, got 91 clones from the first 3 batches.


Likes
16
Share


@Ganjagrandaddy
Follow
Day 50 flowering. Despite my punishment with the calmag she is doing well considering. I dont doubt she could have been a hell of a lot bigger and would have been a big yield. She is covered in buds that her branches cant keep up now. she looks a little of a tangle with the way I have to support her now and any handling of her leaves my fingets tacky as hell. I did find a little budrot to deal with too which is a concern for the harvesting time now. Hard to keep the rh down with the uk weather at present and a dehumidifier is on my list now.
All in all another week for her will give me some lovely sweet smoke when she is done. Trichs are still showing quite a few clear so she is good to go on

Likes
18
Share

@Growbody
Follow
Herzlich Willkommen zum Ende meines Growberichtes der Membrana Hyper Autofem von VIP Seeds.
Die URL für den Strain findet Ihr hier:
https://www.vip-seeds.com/membrana
Für den Grow verwendete ich den großen 15 Liter WideVersion Stofftopf von ROOTIES. Bei meinem ersten Grow mit den ROOTIES kam nur die 9 Liter Version zum Einsatz, da haben die sich gut bewährt.
Auch die Smart Start Plugs von Zamnesia wurden wieder verwendet, dieses Mal ohne den Samen vorher einzuweichen.
Und die Erde und der Dünger von BioBizz fanden wieder Verwendung.
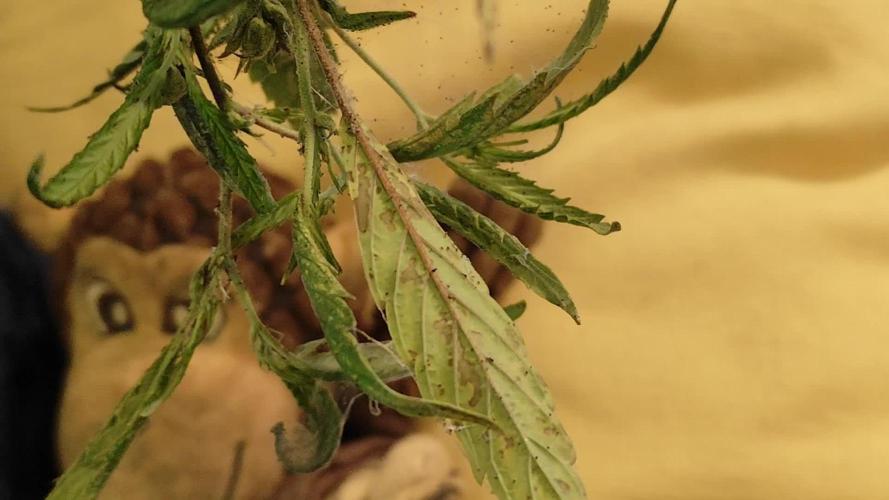
Tag 134: Die Membrane Hyper Autofem von VIP-Seeds hat massiven Spinnmilbenbefall.
Vielen Dank, dass du dir mein Tagebuch angesehen hast. Es tut mir sehr Leid, dass ich dir kein besseres Ergebnis zeigen kann.✋😎

Likes
55
Share


@Xpie77
Follow
Red Wine was a joy to grow. Very easy plant that not need a lot of nutrition to eat. Smell is out of this world, cant pinpoint because Ive never done Red Wine ever... But its fruity and a hint of berries. From Seed to flower it took 11 weeks. Thats a fast growing plant

Likes
2
Share


@DrBud420
Follow
02.11.'24
After 5 days of drying, this little girl who was a little bigger than a meter gave 950 grams and a little bit of popcorn...this picking was 870 and a little bit of popcorn, and 4-5 weeks ago during a storm, one branch broke, which yielded about 100, but let's say 80 for sure, a total of 950 grams of beautiful, huge, potent buds


Likes
Comments
Share


Likes
26
Share


@iiTzToasty
Follow
More indica leaning than I personally like. Definitely a late afternoon nighttime smoke. Have about 4gs of larf I’m making hash out of; she is very resinous.

Likes
76
Share


@Silky_smooth
Follow
Start of week 6 everything is going great training advances at a good rate and she looks very lush and green
