
Likes
Comments
Share


@HippyHemulen
Follow
Weather is starting to get warmer finally and now we can see she start growing little bit. Nothing issues or anything just little bit worried if she start flowering like in next week cause its already 3 weeks veg to autoflower. 😊

Likes
78
Share


@Roberts
Follow
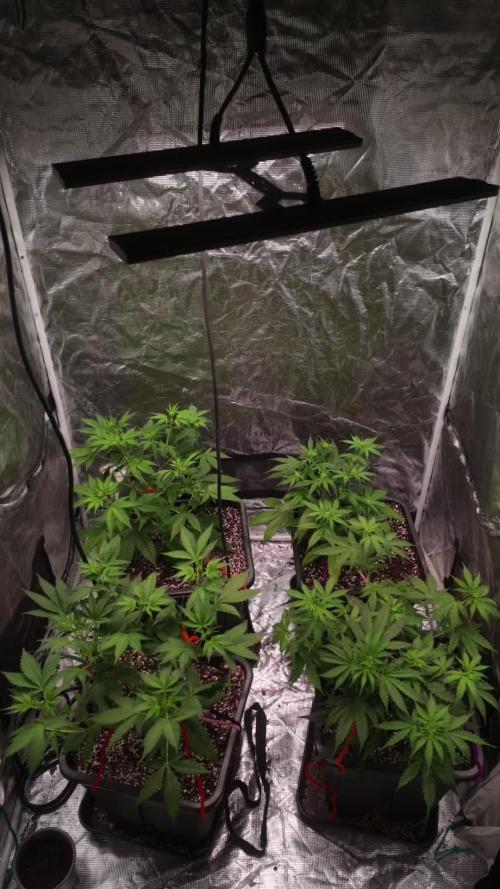
Pure Ice cream is growing great under the Spider Farmer G5000/UVR40 lights, in the Athena blended line nutrition. I think she started to get light stress or burn. So I kinda adjusted her to not be right under it so close. She has a sweet creamy smell. Cokas are looking good, and frosty. Just waiting on her to bulk more. Thank you Spider Farmer, Athena, and Pure Instinto Seeds. 🤜🏻🤛🏻🌱🌱🌱
Thank you grow diaries community for the 👇likes👇, follows, comments, and subscriptions on my YouTube channel👇. ❄️🌱🍻
Happy Growing 🌱🌱🌱
https://youtube.com/channel/UCAhN7yRzWLpcaRHhMIQ7X4g
Spider Farmer Official Website Links:
US&Worldwide: https://www.spider-farmer.com
CA: https://spiderfarmer.ca
UK: https://spiderfarmer.co.uk
EU: https://spiderfarmer.eu
AU: https://spiderfarmer.com.au
G5000 Light Amazon Link:
amzn.to/4643esa
UVR 40:
https://www.amazon.com/dp/B0BR7SGTHS
Discount code: saveurcash (Stackable)

Likes
36
Share


@TerpTurtle
Follow
watering with liquid karma, bud candy with a touch of molasses inbeween feeding
ending the week adding some fox farm Cha Ching transitioning from beastie bloomz
Likes
43
Share


@2x2growing
Follow
As I am writing this I have just trimmed and jarred my second grow🤠
I managed to pull 203.9 grams. Nearly half a pound off 1 plant, which I am extremely proud of😁
I haven’t smoked her yet as I don’t want to spoil the experience. I’ll wait a good 3 weeks to a month before enjoy this lovely lady.
I did unfortunately find a couple undeveloped seeds. She must have thrown nanners early on which I thought was odd because I didn’t even flower for 9 weeks. I guess she just really wanted to come down quick. So I can’t be too mad at her about that.
Overall, for my second grow I couldn’t have been happier with the results. Everything went better in every way and I know I can do better next run:)
Thanks for stopping by✌️💚

Likes
36
Share


@rhodes68
Follow
9/14 Week 3 - She is looking fine, bit lighter in color than we are used to seeing but solid genetics here folks
Feed staying as is twice a day 10% runoff
Still have not decided on training yet she is growing very indica so not a big concern yet
9/16
Bulking up
Decided we will be pony tailing this plant soon she seems to have the build for it and being the lowest of stress training appeals to us
9/17
Gave her a little Recharge Kangaroots and Fish Shit with her feed just on principle
9/18 Training is already bringing the six secondary branches up, will continue for a couple of days of so till they fully up.
Ponytail on for 5-6 hours a day


Likes
6
Share


@pzwags420
Follow
On day 3 -4 of 5 seeds have germinated!
On day 4 all 4 seedlings were fed 500 ppm veg nutes.
On day 5 seedlings were transplanted into 4" nursery pots with myco. I watered them in with 600 ppm of feed. Ppfd 450-500.

Likes
35
Share


@DutchFarmer
Follow
She has returned with two 2 tops
Lets hope she gives me sativa dreams ! 💤 😴
She is so strong 💪 and stable im impressed with Kannabia Genetics !
I LOVE YOU KANNABIA GENETICS! 😍😘
Check out my Cannabis Community, please👇like👇, follow, comment, and subscribe to my YouTube channel👇. ❄️🌱🍻
https://www.youtube.com/@DutchF4rmer
Join our cannabis community community for weekly giveaways 👌
(Discord Server)
https://discord.gg/VMu6rH4a7V
It will be appreciated! ❤️
Happy Growing 🌱🌱🌱

Likes
49
Share

@masterofsmeagol
Follow
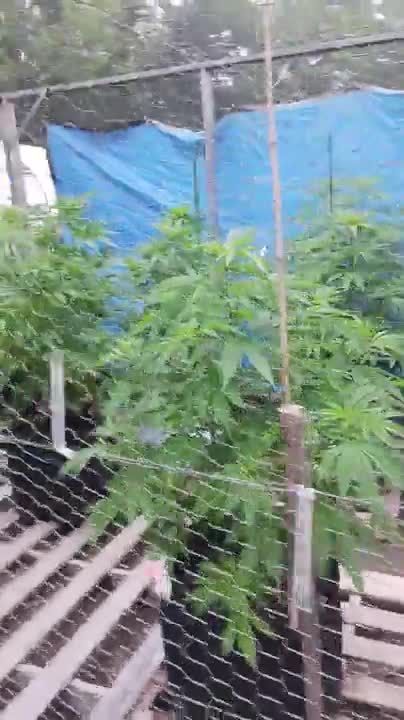
7/4 SUN was poking out a little bit. Plants loved that little feeding and seen to he noticeable larger this morning. I'm considering starting the nutes. At least the organic ones as well as upping the water intake I've been scared to water with all this rain and my experience last time. I plan on applying BT this afternoon and doing some work on the bottoms of the plants. I also saw a chipmunk in my cage so I have some spots in my fence that need to be patched. I know I can't compare this year to orher years as these are seeds and all the other years were clones. I CAN say for certain that my plants are healthiest they've been out of any of my journals. Previous plants were much larger but I was fighting numerous fungal, pathogens and pests at the sane time. Ear wigs would've lollipopped most buddies by now but I've seen no sign of them. I'm going to apply more poison where they were and add some rat traps inside the cage for the chipmunks. Once I fix the cage I think I'll be good.
UPDATE: Went back over and fixed the holes on my cage from high winds. I found an old wire trap or cage and just cut sections and ziptied them to the existing wire and to the structure thus covering any open holes. I'll need to put lathes aroubdvtge outside because if a rodent REALLY wanted in they could get in. My belt had been wearing thin but I use shit until it breaks (yesterday the heal came off my shoe lol) so I was working hard sweating my nuts off and my belt gives out totally. At least ive got the major stuff done. I took a few videos too. I'm imagining it was this little bit of sun that gave these plants that boost of growth but I'm wondering if the added nutes had anything to do with it. Bags weren't light and I could feel moisture in the soil so I didn't water. I'll check again tomorrow morning. Since I didn't see many plants or even leaves for that matter with damage I decided to hold off ob the BT and the plant doctor. Only time will tell if that was the right decision.
7/5 Plants look fantastic. I see a few more holes in leaves sporadically amd I'm hoping it's pillars. I've seen lots of lightning bugs on my camera though and grasshoppers are abundant. Not one growth shoot has been chewed (knock on wood) which is what the earwigs had always done. I watched a video from last year and by nowcthey had lollipopped all lower leaves. It may not be the best weather growing season wise but despite the rh consistently in the 90's I still don't have pm or fungal pathogens. Need to get the BT out. Didn't water as we've had all that rain. I'll water either tonight or tomorrow morning. Sunny high in the 90s low is 66. Tomorrow looks good too.
UPDATE WENT BACK OVER AROUND FIVE. IT WAS 88 DEGREES SO I WANTED TO CHECK THE GROW BAGS. THE POTS ARE FINE. IT WAS HUMID AS HELL. ONE PLANT WAS SLIGHTLY DROOPY BUT VERY LIGHT AND DRY. I FOUND TWO OTHERS THAT SEEMED LIGHTER THAN THE REST BUT HADNT DROOPED. I MIXED TWO GALLONS OF WATER WITH 1TSP KANGOROOTS AMD PHED IT CLOSE TO 6. I FED THE 3 PLANTS THAT WERE SUPER DRY LIKE A HALF GALLON AND SPRED THE REST OVER THE OTHER EIGHT PLANTS. THEY WERENT DROOPING BUT THEY WERE VERY DRY. I PLAN ON A FULL WATER TOMORROW. I WOULDVE DONE IT TODAY IF THE TEMPS WERENT SO HIGH. ITS RAINED A MONTH STRAIGHT SO I HAVENT HAD TO WATER. I MADE A COUPLE VIDEOS BUT I'LL HAVE TO UPLOAD TOMORROW.
7/6 Another super hot day. I hefted the pots and they still had some weight but I could tell they were dry. This rain has messed up my watering schedule. Well it made it so I didn't NEED to water. These are big plants now. I need to get a schedule to stick too. They're going to probably need a gallon a piece at least. I'm still nervous watering. Right now I'm just reading the plants. I added .5tsp kelp me/you to 1 gallon of water to help with heat stress. I fed an additional two gallons to the garden this morning including the two container plants in the back. They were dry on top too but I know they have water deeper down. Next watering I'll be more consistent and try to give them there 10%. It's great having the bags elevated. I can finally see when I start getting run off. I could even measure the ph of it instead of relying on that meter. Ill check the ph when I go back over. Still a few 🐛 holes but they are few and far between. I really don't want to spray for such a small problem but if I cant find them at night that's what I'll do.
UPDATE: Another 90 degree day. I went back over and gave the garden a gallon of water as they were dry and it didn't rain. Tried to use a soil ph meter to check ph. First couple were 6.4, 6.5 then I got 7.3 and I accidently dropped it. Then I got somethings that were high eights and even one 9! Obviously the Meter shit the bed. I'll lower the ph of the water slightly when I fully water tomorrow and I'm going to measure the runoff.
7/8 I must've messed up the journal again as the dates are off. GAVE PLANTS A FULL WATERING. Each girl got a gallon. I couldn't upload my videos this morning as I had to break up a fight. 3 on 1. Didn't give me a chance to put the videos up. I'll take some stills then I can upload them. I took stills and they all uploaded but didn't fucking save. I'm nit going to keep trying to upload if it's not going to. Noticed a few more holes in leaves and one skeletinized leaf so I need to either spray the bt or something more versatile. I'm putting more poison around the cage and de between the bags. I'll go check things out tonight. Sick of writing a book and uploading to just hace them disappear
7/9 Did a quick video today. Noticed the bags were fairly light despite the plants being soaked amd the pallets wet. I was pressed for time. I gave two gallons to the entire garden. I hope that will hold them over until tomorrow. I'll need to up how much water I give them. Going with a gallon and a half next time. I see more pillar spots and a moth took off when I shook the plants this morning. So I'm gonna have too apply the BT. I figure if I go over before dark tonight I might be able to see aju nocturnal insects around. Luckily my dad feeds the birds and they are always there. I think they help with pests.
UPDATE IT WAS A LITTLE COOLER TODAY BUT MICH MORE HUMID. I WENT AROUND SIX TO MAKE SURE THE GIRLS WERE OK WITH WATER AND TO GIVE THEM A TREATMENT OF BT. I WENT THROUGH THE GARDEN ANDCGOUND THREE LEQVES TO DEFOLIATE AND LITERALLY A COUPLE LEAVES ON TWO PLANTS WITH PILLAR HILESM WHEN I ARRIVED TWO BIRDS FLEW OUT. A HORNET CAME IN WHILE I WAS THERE. THIS DO LESS APPROACH SEEMS TO BE REALLY WORKING. I DODNT SEE NEARLT ENOUGH DAMAGE TO WARRANT SPRAY8NG MY EXTREMELY HEALTHY GIROS WITH ANYTHING. ILL KEEP AN EYE ON THEM AND CLEAN THEM UP A BIT. I DO NEED TO INSTALL THE VERY8CAL TRELLIS FOR SUPPORT. THEYRE PRETTY HEALTHY THOUGH. ONE PLANT IS ABOUT AS WIDE AS IT IS TALL. STILL......PLANTS ARE EXPLODING AND ITS GETTING TIGHT IN THERE. I NEED TO GET THE TRELLIS UP THOUGH.
7/10 I went over and was planning to water. Plants were wet and it's raining. Top of the medium was moist but the bags were light. ONE bag was super light but seeing that we are having showers all day and an additional half inch of rain coming tonight so I didn't water them. Especially since they looked great. Decided to to spray BT yet as the damage is so small and i think the birds have been taking care of the pillars for me. Now I'm wondering if I should've gave that ONE plant a little bit of water but it will be find. Did a video. I'm being careful not to over water. Last year this is when all my buddies were devoured by earwigs. And no senescence like the years before. I think it was hust those earwigs. I haven't lost shot for leaves. Even the stalks are bright green and look amazing.


Likes
18
Share


@Ultraviolet
Follow
Green light is radiation with wavelengths between 520 and 560 nm and it affects photosynthesis, plant height, and flowering. Plants reflect green light and this is why they appear green to our eyes. As a result, some growers think that plants don’t use green wavelengths, but they actually do!
In fact, only around 5 – 10% of green light is reflected from leaves and the rest (90 – 95 %) is absorbed or transmitted to lower leaves [1].
Green wavelengths get used in photosynthesis. Chlorophyll pigments absorb small amounts of green wavelengths. Light that doesn’t get absorbed is transmitted to leaves that are shaded out from direct light. This means that leaves at the bottom of the canopy get more green light than leaves at the top. A high proportion of green wavelengths compared to other colors tells lower leaves that they are being shaded out, so they are able to react accordingly. Lower leaves may react by opening or closing their stomata or growing longer stems that help the leaves reach brighter light [1, 2, 3].
When it comes to growing cannabis, many cultivators are interested in the quality of light used for the flowering stage. In many plants, flowering is regulated by two main photoreceptors: cryptochrome and phytochrome. Both photoreceptors primarily respond to blue light but can also respond to green, although to a lesser extent. Green can accelerate the start of flowering in several species (although cannabis has yet to be tested) [1, 4, 5]. However, once flowering has begun, it’s important to provide plants with a “full spectrum” light that has high amounts of blue and red light, and moderate amounts of green, in order for photosynthesis to be optimized.
Green light mediates seed germination in some species. Seeds use green wavelengths to decide whether the environment is good for germination. Shade environments are enriched in green relative to red and blue light, so a plant can tell if it is shady or sunny. A seed that senses a shaded environment may stay dormant to avoid poor growing conditions [1]. Some examples of plant species where researchers have documented this response are: ryegrass (a grass that grows in tufts) and Chondrilla (a plant related to dandelion) [1, 6].
Although green wavelengths generally tell plants NOT to germinate, there are some exceptions! Surprisingly, green wavelengths can stimulate seed germination in some species like Aeschynomene, Tephrosia, Solidago, Cyrtopodium, and Atriplex [1, 6, 7].
Of course, light is not the only factor affecting seed germination – it’s a combination of many factors, such as soil moisture, soil type, temperature, photoperiod, and light quality.
When combined with red and blue light, green can really enhance plant growth [1, 8]. However, too much green light (more than 50% of the total light) can actually reduce plant growth [8]. Based on the most current research, the ideal ratio of green, red, and blue light is thought to be around 1:2:1 for green:blue:red [9]. When choosing a horticultural light, choose one that has high amounts of blue and red light and moderate amounts of green and other colors of light.
Not many studies can be found about the effect of green light on cannabis growth or metabolism. However, if one reads carefully, there are clues and data available even from the very early papers.
Mahlberg and Hemphill (1983) used colored filters in their study to alter the sunlight spectrum and study green light among others. They concluded that the green filter, which makes the environment green by cutting other wavelengths out, reduced the THC concentration significantly compared to the daylight control treatment. It has been demonstrated that green color can reduce secondary metabolite activity with other species as well. For example, the addition of green to a light spectrum decreases anthocyanin concentration in lettuce (Zhang and Folta 2012).
If green light only reverses the biosynthesis of some secondary metabolites, then why put green light into a growth spectrum at all? Well, there are a couple of good reasons. One is that green penetrates leaf layers effectively. Conversely red and blue light is almost completely absorbed by the first leaf layer.
Green travels through the first, second, and even third layers effectively (Figure 2). Lower leaf layers can utilize green light in photosynthesis and therefore produce yields as well.
Even though a green light-specific photoreceptor has not yet been found, it is known that green light has effects independent from the cryptochrome but then again, also cryptochrome-dependent ones, just like blue light. It is known that green light in low light intensity conditions can enhance far red stimulating secondary metabolite production in microgreens and then again, counteracts the production of these compounds in high-intensity light conditions (Kim et al. 2004). In many cases, green light promoted physiological changes in plants that are opposite to the actions of blue light. In the study by Kim et al. blue light-induced anthocyanin accumulation was inhibited by green light. In another study it has been found that blue light promotes stomatal opening whereas green light promotes stomatal closure (Frechilla et al. 2000). Blue light inhibits the early stem elongation in the seedling stage whereas green light promotes it (Folta 2004). Also, blue light results in flowering induction, and green light inhibits it (Banerjee et al., 2007). As you can see, green light works very closely with blue light, and therefore not only the amount of these two wavelengths separately is important but also the ratio (Blue: Green) between these two in the designed spectrum. Furthermore, green light has been found to affect the elongation of petioles and upward leaf reorientation with the model plant Arabidopsis thaliana both of which are a sign of shade avoidance symptoms (Zhang et al. 2011) and also gene expression in the same plant (Dhingra et al. 2006).
As mentioned before, green light produces shade avoidance symptoms which are quite intuitive if you consider the natural conditions where the plants grow. Not all the green light is reflected from the highest canopy leaves in nature but a lot of it (50-90%) has been estimated to penetrate the upper leaves at the plant level ((Terashima et al., 2009; Nishio, 2000). For the plant growing in the understory of the forest green light is a signal for the plant of being in the shade of a bigger plant. Then again, the plants growing under unobstructed sunlight can take advantage of the green photons that can more easily penetrate the upper leaves than the red and blue photons. From the photosynthetic pigments in higher plants, chlorophyll is crucial for plant growth. Dissolved chlorophyll and absorb maximally in the red (λ600–700 nm) and blue (λ400–500 nm) regions of the spectrum and not as easily in the green (λ500–600 nm) regions. Up to 80% of all green light is thought to be transmitted through the chloroplast (Terashima et al., 2009) and this allows more green photons to pass deeper into the leaf mesophyll layer than red and blue photons. When the green light is scattered in the vertical leaf profile its journey is lengthened and therefore photons have a higher chance of hitting and being absorbed by chloroplasts on their passage through the leaf to the lower leaves of the plant.
Photons of PPFD (photosynthetic photon flux density) are captured by chlorophyll causing an excitation of an electron to enter a higher energy state in which the energy is immediately passed on to the neighboring chlorophyll molecule by resonance transfer or released to the electron transport chain (PSII and PSI). Despite the low extinction coefficient of chlorophyll in the green 500–600 nm region it needs to be noted that the absorbance can be significant if the pigment (chlorophyll) concentration in the leaf is high enough.
The research available clearly shows that plants use green wavelengths to promote higher biomass and yield (photosynthetic activity), and that it is a crucial signal for long-term developmental and short-term dynamic acclimation (Blue:Green ratio) to the environment. It should not be dismissed but studied more because it brings more opportunities to control plant gene expression and physiology in plant production.
REFERENCES
Banerjee R., Schleicher E., Meier S. Viana R. M., Pokorny R., Ahmad M., Bittl R., Batschauer. 2007. The signaling state of Arabidopsis cryptochrome 2 contains flavin semiquinone. The Journal of Biological Chemistry 282, 14916–14922.
Dhingra, A., Bies, D. H., Lehner, K. R., and Folta, K. M. 2006. Green light adjusts the plastic transcriptome during early photomorphogenic development. Plant Physiol. 142, 1256-1266.
Folta, K. M. 2004. Green light stimulates early stem elongation, antagonizing light-mediated growth inhibition. Plant Physiol. 135, 1407-1416.
Frechilla, S., Talbott, L. D., Bogomolmi, R. A., and Zeiger, E. 2000. Reversal of blue light -stimulated stomatal opening by green light. Plant Cell Physiol. 41, 171-176.
Kim, H.H., Goins, G. D., Wheeler, R. M., and Sager, J. C. 2004.Green-light supplementation for enhanced lettuce growth under red- and blue-light emitting diodes. HortScience 39, 1617-1622.
Nishio, J.N. 2000. Why are higher plants green? Evolution of the higher plant photosynthetic pigment complement. Plant Cell and Environment 23, 539–548.
Terashima I., Fujita T., Inoue T., Chow W.S., Oguchi R. 2009. Green light drives leaf photosynthesis more efficiently than red light in strong white light: revisiting the enigmatic question of why leaves are green. Plant & Cell Physiology 50, 684–697.
Zhang, T., Maruhnich, S. A., and Folta, K. M. 2011. Green light induces shade avoidance symptoms. Plant Physiol. 157, 1528-156.
Wang, Y. & Folta, K. M. Contributions of green light to plant growth and development. Am. J. Bot. 100, 70–78 (2013).
Zhang, T. & Folta, K. M. Green light signaling and adaptive response. Plant Signal. Behav. 7, 75–78 (2012).
Johkan, M. et al. Blue light-emitting diode light irradiation of seedlings improves seedling quality and growth after transplanting in red leaf lettuce. HortScience 45, 1809–1814 (2010).
Kasajima, S., et al. Effect of Light Quality on Developmental Rate of Wheat under Continuous Light at a Constant Temperature. Plant Prod. Sci. 10, 286–291 (2007).
Banerjee, R. et al. The signaling state of Arabidopsis cryptochrome 2 contains flavin semiquinone. J. Biol. Chem. 282, 14916–14922 (2007).
Goggin, D. E. & Steadman, K. J. Blue and green are frequently seen: responses of seeds to short- and mid-wavelength light. Seed Sci. Res. 22, 27–35 (2012).
Mandák, B. & Pyšek, P. The effects of light quality, nitrate concentration and presence of bracteoles on germination of different fruit types in the heterocarpous Atriplex sagittata. J. Ecol. 89, 149–158 (2001).
Darko, E. et al. Photosynthesis under artificial light: the shift in primary and secondary metabolism. Philos. Trans. R. Soc. B Biol. Sci. 369 (2014).
Lu, N. et al. Effects of Supplemental Lighting with Light-Emitting Diodes (LEDs) on Tomato Yield and Quality of Single-Truss Tomato Plants Grown at High Planting Density. Environ. Control Biol. 50, 63–74 (2012).

Likes
2
Share

@ReinDeer
Follow
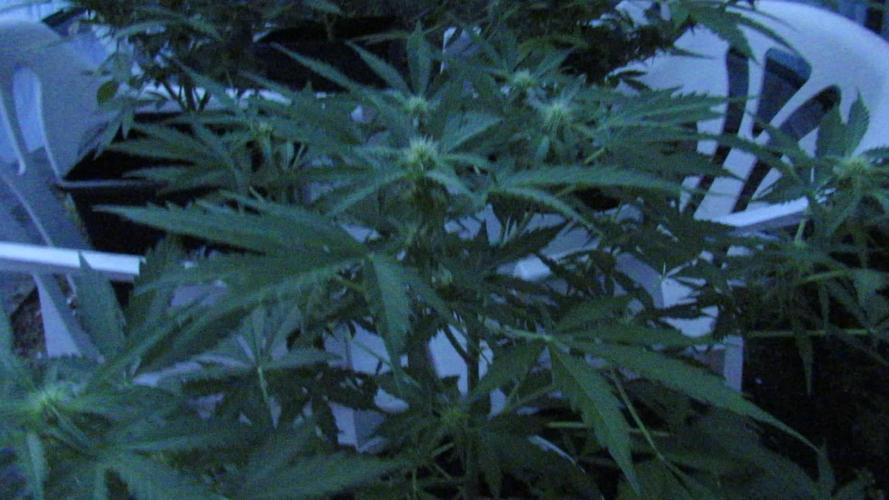
The plants are growing nicely and small preflower pistils are emerging slowly and it seems all of them will be female 😀
I've started adding them Cal Mag solution as an addition to my existing package as the leafs were showing a slight signs of deficiencies but nothing major.
We'll be in the flowering stage next week for sure, until then wish you all a nice week😉

Likes
13
Share


@GrandmasBoy2021
Follow
Week 9 (aka day 63)
According to the strain report, today would of been the day of harvest (if perfectly grown) Since I am not a master grower, it appears she needs more time. ha She is coming along great though! Super frosty and the flowers along the stems are starting to pack on weight. According to other grow diaries I've read, the harvest day will probably be in one month 3/3/21 (12 weeks total) If you notice my tent is a bit crammed, that's the only thing that's not ideal lol
I am watering every three days with 6.0 phd water with 1 tablespoon of molasses and 1 teaspoon of SuperNova mixed into a gallon or more of water.
Please let me know if you have any suggestions/ questions/ concerns. I am getting excited about harvest day! It's not to far away :) Wish me luck in the end stretch! lol Happy Growing everyone


Likes
57
Share


@CHILLING_RACOONS
Follow
Welcome lovely Friends,
in this grow cycle we will try an awesome strain under an awesome light, I'm talking about Girl Scout Coockies and the 💡💡TS 600 by MarsHydro.💡💡
TS600 is an awesome lap for all growers, from the beginner to the expert because it has a balanced light spectrum (good for veg and flowering) and a low wattage. It is cheap to buy and to use, your bill will never be too high!! This lamp is also really efficient and it never get hot, a perfect replace and upgrade if you have an HPS!!
(P.S.: They also have awesome stickers, you must stick them in your grow box for perfect results🤪🤪🤪)
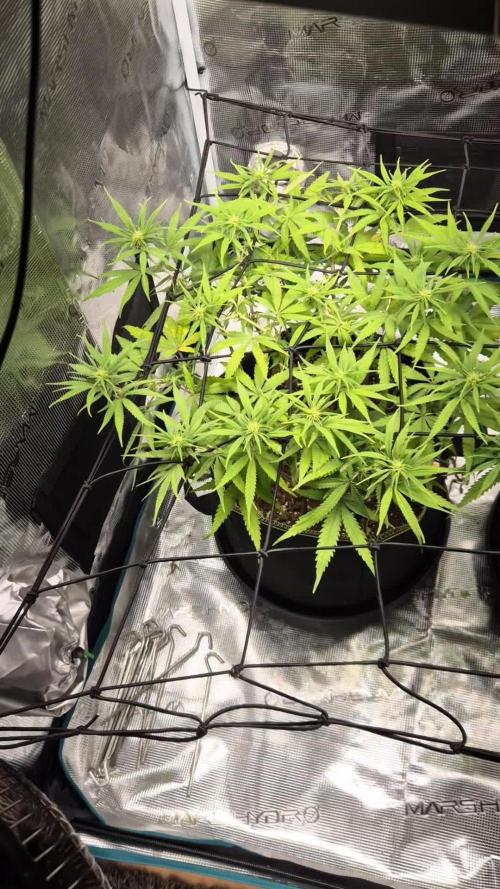
week #5
this week go to 22/11 to 28/11. The plant is growing so well! The light of MarsHydro is awesome, plant is growing fast and healty. Stems of the plant are strong and it is difficult to bend them! The light is never too hot and it create a perfect enviroament in the box.
We are still doing LST and this baby are developing a lot of buds! WE'RE READY TO FLIGHT 🚀🚀🚀🚀🚀🚀🚀
day to day fert schedule:
📅 22/11
📅 23/11
📅 24/11
📅 25/11
📅 26/11
📅 27/11
📅 28/11
💡💡Here some details of this lovely light:
Reduced Energy Usage LED Grow Light: Consuming 100w as well as installed with 225 pcs chips, TS600 is able to replace a 150w HPS light while saving 30% electric power.
High Efficiency LED Grow Light: With overall light output PPF 190umol/S and good PPE 2.0 umol/j, it's 50% more photon effective so can promise a 30% more return comparing to the old HPS/MH lights.
Patent Reflective Hood Design: The reflector on TSW2000 has actually been patented, which can effectively gather the light dispersed in all directions to improve its light intensity and aid plants acquire more light absorption.
Full Spectrum Plant-Preferred Spectra: By the special combination of ranges that emits most light in the 400-700nm waveband, extremely conducive to plant photosynthesis. Appropriate IR(730-740nm) is additionally included in the range to help form larger buds.
Trustworthy Qualifications And Warranty: CE, ETL, RoHS, UKCA security certifications approved, 50,000 hours long lifespan, 5-year service warranty, and local after-sales solution facilities.
I WANT TO TELL THAT MARSHYDRO SERVICE IS INCREDIBLY AWESOME, I ALLWAYS RECEIVED FAST AND PRECISE ANSWERS! EXCELLENT LAMP, PERFECT CUSTOMER SERVICES AND FAST DELIVERY. THANK YOU GUYS, THANK YOU DEAR ELEEN!
💸💸💸💸💸BUY MARSHYDRO TS600: https://www.mars-hydro.com/mars-tsw-600-led-full-spectrum-hydroponic-led-grow-light
💸💸💸💸💸 OTHER AWESOME STUFF: https://www.mars-hydro.com
🍫🍫🍫ZAMNESIA SEEDS - GIRL SCOUT COOKIES AUTOMATIC: FAST AND FURIOUSLY TASTY🍫🍫🍫
TASTE OF A CLASSIC
The enduring appeal of Girl Scout Cookies largely comes down to it embodying many crucial aspects of good cannabis. It owes its origins to the competitive Californian cultivation scene. Many classics have emerged from West Coast growers, but "Cookies" strains have spread particularly far and wide. Not least of all because they breed well with other strains. This has led to the creation of many Cookies hybrids looking to boost the already sensational characteristics of the original.
Enter Girl Scout Cookies Automatic by Zamnesia Seeds. This strain harnesses the trademark high and flavour of GSC, and packs it into a compact autoflower.
The uplifting effect of this strain makes for a high that is long-lasting and very satisfying. This is in part due to a THC content of around 17%. Although not as potent as some photoperiod GSC cultivars, this strain still makes waves throughout the entire body.
These effects are made all the more sumptuous by the delectable flavours present. Distinctive dessert notes of chocolate, cinnamon, and mint make Girl Scout Cookies Automatic an ideal after-meal accompaniment.
GROWING GIRL SCOUT COOKIES AUTOMATIC BY ZAMNESIA SEEDS
While Girl Scout Cookies is undoubtedly a popular strain to cultivate, it isn't always the quickest to reach harvest. That's why Zamnesia decided to offer a robust autoflowering strain that encapsulates the hardy GSC genetics in small and compact plants. The resulting buds will be tight and resinous with thick orange hairs.
The plant will finish its grow cycle after only 8–10 weeks post-germination. This strain is adaptable to most growing environments, reaching heights of 50–120cm indoors, and up to 150cm outdoors. While indoor plants are capable of producing 350–425g/m², outdoor plants can yield between 140–175g/plant. Not bad for such compact specimens!
GIRL SCOUT COOKIES AUTOMATIC (ZAMNESIA SEEDS) FEMINIZED DATA SHEET
Brand Zamnesia Seeds
Genetics Auto Indica
Parents Girl Scout Cookies x Ruderalis
Flowering Time 9-10 weeks
THC 17%
CBD 0-1%
Yield (Indoor) 400-450 gr/m²
Yield (Outdoor) 150-200 gr/plant
Height (Indoor) 120cm
Height (Outdoor) 150cm
Available as Feminized seeds
Flowering Type Autoflowering
Sex Feminized
💸💸💸💸💸 BUY GIRL SCOUT COOKIES AUTO BY ZAMNESIA: https://www.zamnesia.com/5408-zamnesia-seeds-girl-scout-cookies-Auto-feminized.html 💸💸💸💸💸
🔧💡OUR SET UP💡🔧
-LIGHTS:
💣Quantum board - 480w - 4x120w Boards by Zhoangshan Koray Opto-Electronic Ltd.
Samsung LM301B 288 led/board
+24led/board led Osram 660nm
Efficiency 2.6 umol/J 220 lm/w
Driver: Meanwell HLG-480H-36B
temperature: 3000k
Heat dissipator board: NO, only the 3mm board but it never be too hot
Noise: 0dB
💣Quantum board - 240w - 2x120w Boards by Shenzen Yuanhui Led Ltd.
Samsung LM301H 504 led
+24led/board led Osram 660nm
Efficiency 2.7 umol/J 220 lm/w
Driver: Meanwell HLG-240H-48B
temperature: 3500k
Heat dissipator board: YES 15MM PASSIVE HEAT SINK
Noise: 0dB
✔️ MARSHYDRO PRODUCTS 🚀🚀🚀🌕🌕
📦120X120 GROW TENT: an awesome box, easy and fast to assembly. Made by strong materials, solid zips and it is totally lightproof. The position of holes is optimal and the two lateral windows will make easier the work inside the box. There is also a double end, so you are 100% sure that dirt or liquids will not spill out. You can find it here: https://www.mars-hydro.com/grow-tent/buy-mars-hydro-grow-tent-48x48x80-1680d-4-x-4-size-keeps-all-light-in-top-quality-1680d-canvas-is-tear-proof-and-double-stitched-light-blocking-fast-installation-for-sale
💡TS 600 FULL SPECTRUM 100W LED GROW LIGHT : with this light you will achieve excellent buds, you will not need anything more. This lamp replace a 150w HPS lamp, but, with this Led Light you will smoke bigger, harder and tastier buds because Led have a complete spectrum and a powerful light penetration, so your plants will work as much as possible to make you happy. Psssssss it it extremely cheap and it is only 100w, your bills will never be too high, YOU HAVE NO EXCUSES!! Here if you want this little beast: https://www.mars-hydro.com/led-grow-light/mars-ts-series-led-grow-light/mars-tsw-600-led-full-spectrum-hydroponic-led-grow-light
-ESTRACTION FAN:
Blauberg 125 Turbo Pro Series
Maximum air flow: 430-560 m³ / h 50W 32-44 dBA
-FANS:
A)OSCILLATING FAN D.15cm 2 speeds 20w
B) COMPUTER FAN Sunon DP200A – 230V 20w (Strong, reliable and quiet)
C)Cornawall Electronics Multifan Turbo, three speeds, can be used both on support surfaces and mounted on the wall. High capacity, about 740 m3 / h. High silence and reliability.
Power Consumption: 35 Watts
Operating noise: approx. 39 db
Diameter: 20 cm
💊💉💊FERTILIZERS:
We allways use BioBizz All Mix, it is perfect also for the first weeks.
TOP CROP:
-DEEPER UNDERGROUND: to stimulate roots system
-TOP VEG: for a excellent growth in the vegetative phase
-GREEN EXPLOSION: to promote creation of bud sites and to allow a faster growth
-MICRO VITA: bacterias for equilibrate the soil and to make the plant healty
-BIG ONE: to stimulate bud sites and to stimulate resin production
-TOP BLOOM: to achieve excellent big and hard buds
-TOP CANDY: to feed the buds with molasses for a tastier smoke and to gain weight
-TOP BUD: to enlarge buds and to gain weight
PLAGRON: PK 13-14 to have big and hard buds and to feed plants with lower effort
ADVANCED NUTRIENTS: Sensi Cal-Mag Extra-> for cal mag deficiency
GROTEK: CAL MAG for cal mag deficiency
HESI: PowerZyme to clean and balance the soil. It feeds the plant cleaning the soil.
GHE: - Final Part (ex Ripen) accelerate the final flowering phase, dissolves minerals in excess
- Flash Clean to flush the plant and to be sure that all excesses are out from plant and pot
These two products improve A LOT the smoke of our babies
-PURPINATOR to stimulate flavonoids and to have a better taste and smell.
____________________________________________________________________________________________
🙏❤️ THANK YOU FOR BEING HERE ❤️🙏
Please leave a comment with your opinions, it is very important to us to have a comparison.
If you like our job, tap the weed button and follow us. It will be really appreciated.🙏
We want to thank again everyone that help us in our project. You support us to support of our dream. ❤️
🌿Thank you again🌿
❤️Sweet hugs❤️
👨🌾CHILLING_RACOONS👩🌾

Likes
22
Share


@dutdut
Follow
Smells like new shoes lol I think I made a decent haul off 315 Watts the buds look frosted and I can’t wait to dry some. I knew what to expect in the coming weeks and if I run this again I think I’ll keep the plants shorter like last time. Highly recommend this Indica strain to anymore looking to make dry ice hash or solvent less!
I’ll do the weigh in shortly0

Likes
3
Share


@High_Grade_Dadli
Follow
Quick update I know I been MIA..diary label xmas tree got deleted after losing the mother tree(die back)and about 80 cutting(weather)
1 of the cutting which I took before from the mother that died is the mother to set 1 and 2 (29)...took some cutting off of set 1 (30) jus waiting to see how rooting goes...mother tree jus hit the 2nd week of flowering will update with pic in week 2

Likes
120
Share

@Hologram
Follow
OK, im doing an update now becouse my breakup cake is going tranny!!(hermie)
I already have noiticed she was not growing as strong .. but u can blame that on anything , especially when growing outdoor..
but this morning i saw that she was g(r)oing 'bananas'!😢
I have put her aside from the rest (in the back of garden) but think gonna have to terminate her asap!..(and i will, right after this post👍)
The weed she will give will be filled with seeds and those seeds will be hermies too, so wothless..
and if i dont throw her away quick she can infect the rest.
So goodbye breakup cake..😢
who wants to eat a cake when they are breaking up anyway..😒 (just hiding my pain with lame humour 😳)
happy growing for all ✊
Processing
Likes
22
Share


@CenturionGrower
Follow
19/07/20 (Sunday)
7AM - Set 4 seeds to germinate in cups of water (Trinidad and Tobago, St. Vincent and the Grenadines, Jamaica, Columbia)
7PM - St. Vincent and the Grenadines seed shows taproot
9PM - Trinidad and Tobago seed shows taproot
10PM - Seed from Jamaica shows taproot
11PM - Set the 3 germinated seeds into individual half gallon pots filled with promix.
20/07/20
11AM - SVG seed rises to the soil level
8PM - Jamaican follows suit
11PM - TT also exposes itself
21/07/20
The weather and forecast for the week show scattered showers and the seedlings are showing early signs of stretching so I decide to build a makeshift grow tent to supplement their light cycle while bringing them outside for a minimum of 4 hours every day to acclimate them. I decided on a 75W output LED bulb with a temperature of 6500K and 1055 lumens while using my room fan to simulate wind for healthy stem growth.
22/07/20
The plants show slowed stretch symptoms but still not to the level I want, so I revamp the 'grow tent' with reflective material (crumpled aluminium foil for more reflective surfaces) and upgraded the bulb to a 100W output LED with the same temperature and a higher luminousity of 1350. One cotyledon on the SVG strain was broken but not completely sheared off, but I'll leave it to its own devices.
23/07/20
Columbian seed has yet to germinate so I added another from my backups.
24/07/20
Seedlings have shown normal rates of growth so I think the current grow tent is sufficient. When I took them outside they endured light gusts and rainfall for a half hour during their sun bask. I decided to add foil to the door of the tent to trap more light in.
25/07/20
Tropical Storm Gonzalo may make landfall today and the skies are set up for thunderstorms so I decided to keep the plants in their indoor setup for the full 18hrs of their light cycle. Since both Columbian seeds still show no signs of germination, I decide to go collect another strain. I got my hands on a 21 day old Dominican Republic strain that was grown in a seedling tray and left there; It was fed once with 20-20-20 and calmag. The cotyledons were white, the stem red between the top nodes and yellow the rest of the way down, the leaves a light green, and it was no taller than 2 inches excluding it's 1 inch sq root cube. I immediately transplanted it into my remaining half gallon pot upon returning home, dampened the soil with my spray bottle and left it to sit with the others and finish the light cycle.
Likes
19
Share


Likes
1
Share


@Sketchyfrog
Follow
So much stretching going on this week. I think we are just about done though. Which is good because I do not want to have to move the exhaust and all. Really upped the nutrients this week. Burned em just a tad but I think I found her sweet spot. 1300-1500 ppm. Seems strong but if I even go down to 1000ppm #3 starts getting yellow. Finally some nice flowers forming. Aromas are starting to fill the room when I open the tent each morning. I thought this was supposed to be an 8 weeks strain but I'm 17 days in and it's feeling more like a 10-11 week strain.