Likes
Comments
Share


@Geili_Seili_fireinfireout
Follow
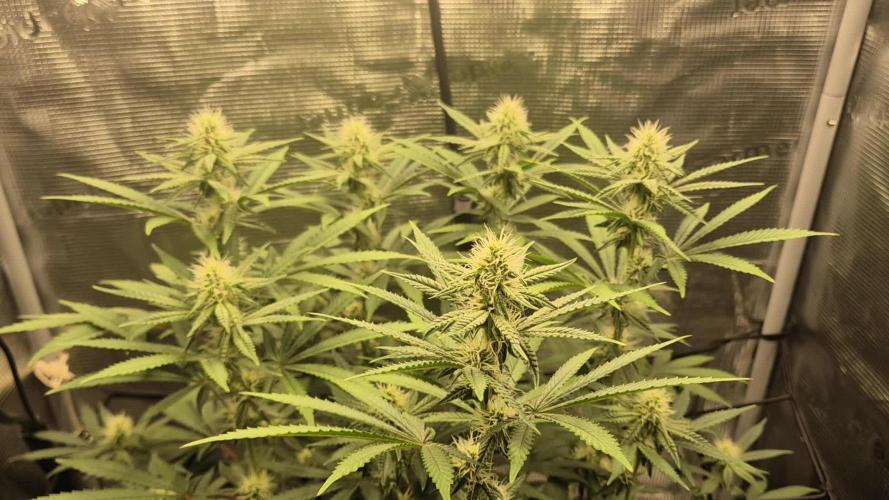
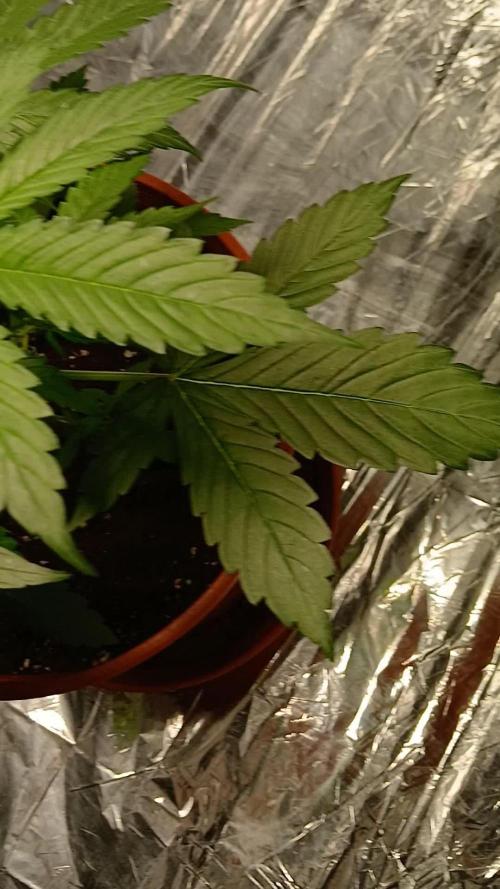
Anfang woche 3 in flow und fangen schon an richtig geil zu duften.👌💚
Hätte mit etwas mehr strech gerechnet. Aber is auch gut so wie es is.😅😅 da ich im sommer eh immer gern mehr platz zur lampe habe.
Bin bis jetzt echt zufrieden und gespannt wo die reise mit diesen ladys noch hingeht.
Die vitalsten und saubersten stecklinge (weil alle 2-3 monate im labor getestet) gibts wie immer hier bei ROOTS-FARMS. The best in austria and maybe in europe


Likes
59
Share


@HerbalEdu
Follow
Second week flushing and harvest @8,5 weeks flowering.
(82 cm - 102 cm) 90 cm
Lovely fruity smell.

Likes
6
Share

@MisterTree
Follow
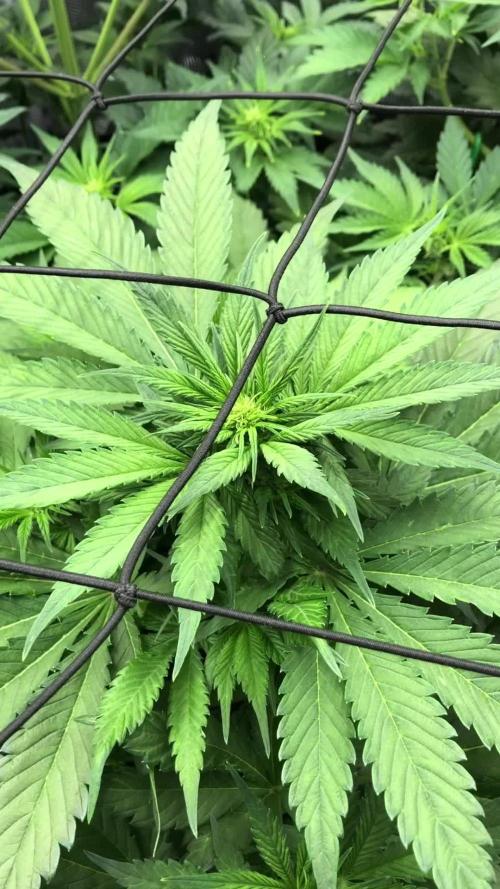
Tag 28 meiner Ladys sie wachsen gut - heute früh wurde das Netz eingesetzt.
Die Lady‘s sind noch gut feucht, werde heute nicht gießen- gestern zuletzt ( 7.10.25 ) 5/6 Liter (Tap-Water).
Habe LST letzte Woche bei allen 3 unternommen - und Leaf tuck in ( Blätter runter gesteckt )
Licht wurde auf 80% gedimt.
Werde die Tage Updates von den Pflanzen (zu dieser Woche) hoch laden und spezifische Veränderungen, falls welche entstehen sollten.
Bleibt Gesund und viel Spaß beim Grow
Update selber Tag : ( 8.10.25 ) / 6 Bilder
LST + Netz angezogen. Nicht ohne Verlust leider wie man auf den Bildern sehen kann.
Sehr gespannt auf die nächsten Tage.
10.10.25 - Alle 3 Pflanzen mit 6 Liter gegossen jeweils ca. 2 Liter pro Lady.
Punkte auf vereinzelten Blättern - gehe von Lichtstress aus, denke nicht es sind Insekten bin aber Anfänger ( untere Seite vom Blatt sieht auch gut aus, ohne Spuren )
Falls jmd ein Tipp hat gerne bitte kommentieren 🙏🏽
11.10.25 - Catwalk Video - lasst es euch gut gehen Leute 🙏🏽
Cya in da next Episode

Likes
12
Share


@Biggy2k20
Follow
Great experience. Would've grown even taller if it was outdoors. An absolute monster that stinks and is rich in trichomes. Can't wait to harvest fully and try, it looks to be an awesome growth. Some mould spots here and there because of humidity but not a lot now. Washing will be in warm water with lemon juice

Likes
22
Share


@Madge
Follow
Overall a good week last week. Most comments are below.
.
12/23 Day 90: While the first plant is drying I let the second plant continue to grow another week or so. The second plant is continuing to yellow. I have only been feeding it water and gave it some FloraKleen yesterday to begin the flushing. A few photo updates today. This one has not purpled at all compared to the other plant.

Likes
12
Share


@TappedN
Follow
Sorry For The Delay but I was kinda busy ......Anywho on 3/19 I Changed The light Schedule form 18/6 to 12/12 To Begin My Pre-Flower Stage I Also Bent The Last Few Uneven Tops To Have A Table Top like Canopy (LST) Also Cut Off all Little Branches (Lollipopping) To Prevent Getting Any Little Pop Corn NUGs. Then ON 3/20 I Increased My Light Intensity From 25% to 50% And began giving These Girls There Flower Nutrients Listed Above .
AN Updated Video Of the Week POSTED ABOVE Video Taken About 3 Days After Making These Changes And yes The are All Showing to Be Females


Likes
7
Share

@GERGrowDesigns
Follow
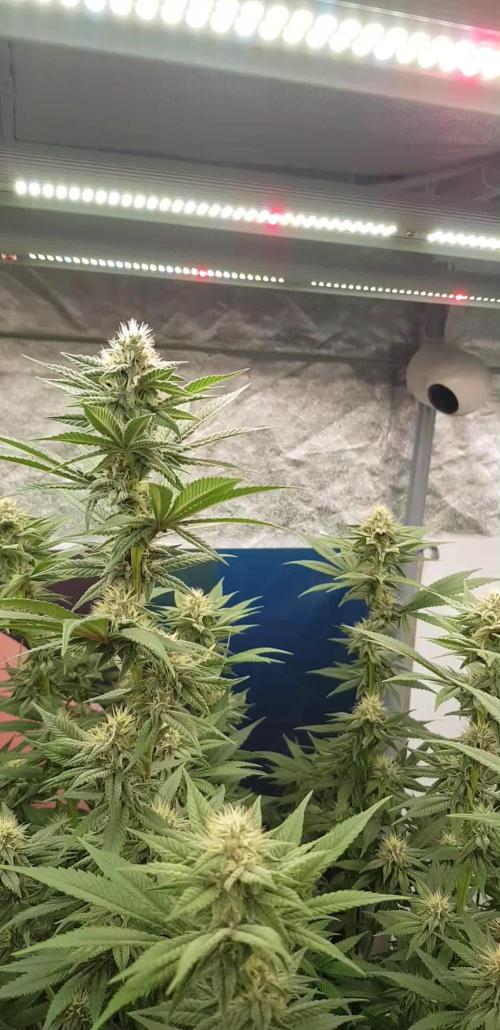
Welcome to Flower Week 4 of Sweet Seeds Sweet Mandarine Skittlez F1
I'm excited to share my grow journey with you from my
Sweet Seeds Project . It's going to be an incredible ride, full of learning, growing, and connecting with fellow growers from all around the world!
For this Project , I’ve chosen the Feminized Photo strain Sweet Mandarine Skittlez F1 :
Here’s what I’m working with:
• 🌱 Tent: 120x60x80
• 🧑🌾 Breeder Company: Sweet Seeds
• 💧 Humidity Range: 50
• ⏳ Flowering Time: 7weeks
• Strain Info: 19-24%THC
• 🌡️ Temperature: 26
• 🍵 Pot Size: 16
• Nutrient Brand: Narcos
• ⚡ Lights : 600W x 2
A huge thank you to Sweet Seeds for allowing me to try my Best with this amazing collection from Photo Strains they managed to Sponsore . Big thanks for supporting the grower community worldwide! Your genetics and passion speak for themselves!
I would truly appreciate every bit of feedback, help, questions, or discussions – and of course, your likes and interactions mean the world to me as I try to stand out in this exciting competition!
Let’s grow together – and don’t forget to stop by again to see the latest updates!
Happy growing!
Stay lifted and stay curious!
Peace & Buds!

Processing
Likes
5
Share


Likes
11
Share


@PanGrower
Follow
Day 36: I bend the branches even more, cut off the top leaf that covered 2 buds, one of them is very small, I hope to give it at least a little chance to grow. This is a victim of a broken branch.
Likes
14
Share


@Groweedo
Follow
Les têtes ne grossissent plus (déçu) je vais acheter une lumière plus puissante pour les prochaines sessions 😎

Likes
15
Share

@Miketama
Follow
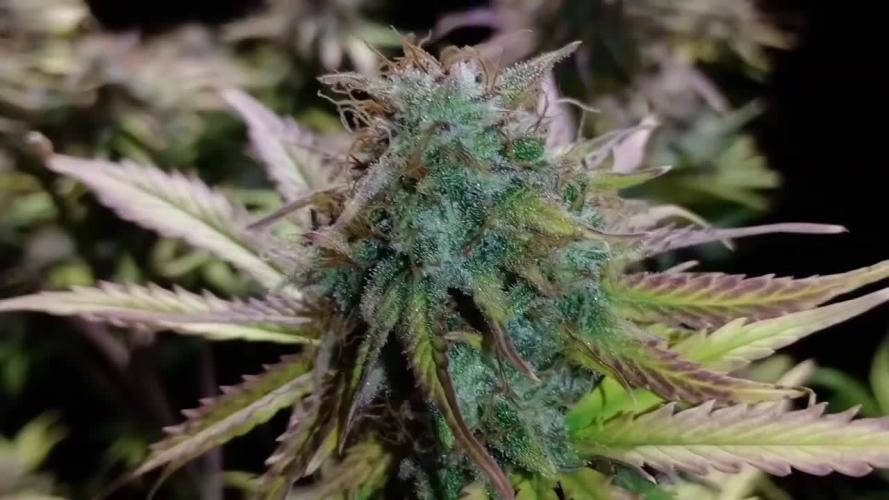
What can I say—I absolutely loved growing this strain. The plant has a great natural structure and didn’t really need any low stress training. Even while staying relatively compact in height, it tends to spread out a lot, which slightly reduces g/m², but makes up for it with beautiful elongated buds.
I harvested her on day 76, at around 5% amber trichomes, to preserve that uplifting effect I was aiming for.

Likes
8
Share


@LACREME
Follow
E aí vamos nós!
Quero agradecer a toda a equipe da Fastbuds por me mandar essas seeds.
Em meu país é muito difícil encontrar genética boa de verdade, então foi uma benção para mim.
Essa Kosher eu resolvi fazer no kokostec e usarei GH com Fórmula de Lucas, knf e micorrizas. Nesse inicinho aplico apenas enzimas e microorganismos benéficos para a raíz.
Enfim, acompanhe, e qualquer sugestão ou critica, fala comigo!
Processing
Likes
5
Share


@Dysons12
Follow
Day 14 today from seed. A real difference on last weeks maturity is starting to show.
The following nutrients have been added this week;
Rhizotonic
Part A
Part B
Calmag
Cannazym
Boost accelerator
Ph: 6
ppm +/- 600
Now under spider farmer LED1000
There is now more strength in the stems and no more falling over
Likes
8
Share


@farmerjim
Follow
Plant 1: This was the highly trained and defoliated plant. It stayed the shortest and doesn't have very dense nugs likely because of its distance from the lights given the height of plants 2 and 3. Ended up with 2.5oz after 9 days of hanging.
Plant 3: This was the second most highly trained plant. Not as much tying down so has some height. Nugs are more dense than plant 1. Ended up with 3.2oz after 10 days of hanging.
OMG!!! Plant 2: dried and jarred. Final weight... 10.6oz!!! that's a total of 16.4oz for 3 autos! I'm so pumped...🤯😍🤘🤓📉00

Likes
20
Share


@scooter112
Follow
Moving right along, each girl is on her own pace. Tent was so crowded I had to remove the heater therefore I bought a bigger tent and will use use this one for drying.
Thanks for looking..

Likes
228
Share


@StarLorr
Follow
Welcome to my Pablø Ęscøbar diary.
In this diary:
Seeds: sponsored by Ðivine Șeeds
Media: Promix HP
Nutrients: Advanced Nutrients, Diablo Nutrients, Gaia Green Power Bloom.
Light and Weather: Şun☀️and Mother Earth.🌎
___________________________
Feeding:
Tue 03 Sep: 4L supplements Monster Flower, K not pH'd
Wed 04 Sep: 4L supplements Monster Flower, K not pH'd
Thu 05 Sep: 4L water not pH'd
Fri 06 Sep: 4L nutrients pH'd 6.5
Sat 07 Sep: 4L water not pH'd
Mon 09 Sep: 4L supplements Monster Flower, K and Carboload not pH'd
___________________________
*please note that watering are from the top.....since i smashed the saucers with the weed wacker*🤦🏻♂️
______________________________
The week started cold then warm midweek then rain and cold for the weekend.
______________________________
Buds are puffing up nicely😋
______________________________
Thanks for stopping by, likes and comments are appreciated!👊🏻😎
Keep on growin!
Keep on tokin!!!
😙💨💨💨💨💨

Likes
35
Share


@The_Bearded_Grower
Follow
Day 80 Harvesting was a bit of a trick with this one because I used to Trellis Nets but it went very smoothly no accidents and in the end I ended up with a staggeringly large amount of wet weight. My wet weights have a minimal amount of stock so that they more accurately represent the actual weight of the flower itself. In three days roughly I will be putting in the dry weight and then putting all the flowers into curing.
welcome to Day 83 this will be my last update i have now done my final trim and got my dry weight 362.30 gram's !! off one plant. that's 12.77 ounce's i don't sell but my god if i didn't care about laws lol, For a plant thats no cured i will sat it tastes smooth AF and has a nice head high that i didn't really expect from her being that its not cured and didn't really look like she had tones of trichomes. This baby is going to be nice in a month.
I'd like to thank everyone that followed this grow and asked questions as always my friends keep your stick on the ice

Likes
1
Share

@kdifiori_
Follow
Week four! Here are the first signs of flowering. This girl has picked up the pace, growing 20 cm this week. She drank 300 ml three times during the week, for a total of 0.9 l. I halved the nutrient doses (starting this week for flowering), but despite this, the new leaves continue to show signs of nutrient burn. Next week, I will only give her water with controlled pH to fix this problem. There are probably too many nutrients left in the soil, and this beauty is not so hungry. The lamp is now 30 cm away and dimmed to 75%. Ready for week five? Now the fun begins!
Likes
Comments
Share