
Likes
Comments
Share


@BreedBros_Testing
Follow
10.06 - I planted 11 Savage seeds and 10 OG Lemonade seeds for germination. I use a heat propagator, a few drops of hydrogen dioxide for disinfection, and a few drops of clonex.
12.06 - Tommorow all will sprout and I will put them into the 1,5L pot!
13.06 - 21 / 21 Sprouted all in the pots. I add 700g Earth Vibe Soil from Lurpe Solution for 50L of Soil.
14.06 - I'm waiting for them. This time is always full of stress. It will appear or no ? :P I add some my genetics to help them :P.
18.06 - I hope that till tomorrow they will all show up and I can start a first veg week.
22.06 - For this moment I have a 19/21. I accidentally damaged it with my hunger-shaking hand. remember to get to work on germination and cuttings after you have eaten. Now I waiting for leafs and switching on first Veg week.

Likes
25
Share


@Ratch33
Follow
They're improving substantially.
Minor Tent & Equipment Sterilizing
All 900W running for late Flower
Adjusted the Fan positions & speeds
Raised the humidifier closer to canopy
Average VPD = 1.5kPa @ 19C


Likes
16
Share


@Costocano
Follow
Cada día se nota bastante la diferencia en las hojas, el tallo es grueso y el color es verde tirando a fosforito, no estoy teniendo ningún problema con ella. Hay mosca del mantillo pero en poca cantidad, estaré atento de que no se desmadre demasiado


Likes
37
Share


@XperencdGmanXG
Follow
week 6 of flower and she is starting to put on the weight. Buds have not got more frosty, not sure if its the strain or I've missed something. We are going to go with it the strain and not me, LoL. RQS says 8 to 9 weeks for flower. We will see how accurate that is. i'm going to give some Silica this week to see if it will help with trich production.

Likes
25
Share


@BudGardener420
Follow
Week 2
This week I put a humidifier in the tent for a few days. Without it the humidity is around 42-49%, with it it is around 55%. I don't know if this makes sense.. Maybe one of you has some advice for me, thanks in advance.
I noticed that the leaves were slowly starting to curl up at the edges. I then did some research and hung the lamp higher, about 120cm above the leaf tips and reduced the power from 50% to 40%. I hope that I have solved the problem. So far I think the leaves of the plants look better.
I watered every ~ two days - without draining - and since yesterday the water quantity has been 1.5L per plant divided into 3x0.5l watering units (water, wait 30min to 1h, water again, wait, etc.). I added 6ml of CalMag to 3 liters of osmosis water.
I put the last Biobizz tab into the soil and filled the pot with some more soil.
Music 🙏👇
Song: sumu - apart [NCS Release]
Music provided by NoCopyrightSounds
Free Download/Stream: http://ncs.io/apart
Watch: http://ncs.lnk.to/apartAT/youtube

Likes
6
Share


@BLAZED
Follow
Week 8 (17-3 to 23-3)
17-3
Temps: 17.4 to 21.9 degrees
Humidity: 60% to 72%
18-3
Temps: 17.5 to 22.2 degrees
Humidity: 54% to 65%
19-3
Temps: 17.9 to 22.4 degrees
Humidity: 52% to 61%
Watering: Both 500 ml. EC: 0.4
Watering: Both 1000 ml. EC: 1.4
Defoliated both plants and attached some shoots to the rack. She got really big fan leaves!
I also supercropped some branches.
20-3
Temps: 18.2 to 22.8 degrees
Humidity: 59% to 69%
21-3
Temps: 18.5 to 23.4 degrees
Humidity: 57% to 67%
Watering: Both 1000 ml.
22-3
Temps: 19.4 to 24.1 degrees
Humidity: 55% to 67%
Watering: Both 1000 ml.
Set the strength of the light to 50%
23-3
Temps: 19.8 to 24.8 degrees
Humidity: 58% to 67%
Watering: Both 1000 ml.
As you can see, instead of removing the leaves, i tucked down all the leaves to open up the canopy.
I will see if i like this method as its the first time i try this.
I also attached some more shoots to the rack, its looking nicely spread out now :)
The #2 makes my fingers very sticky and smells really strong! I love it!

Likes
22
Share


@420_liquidsun
Follow
I can say I didn't expecting this.. she amazed me, and teach that you can get decent amount of buds in 1L pot also.. this is my first growing in small pot and teachs a lot about using your space..54300
Processing
Likes
11
Share


@MemesBeforeDreams
Follow
Yellowing of WW#2 is worrying me, looks to be a nutrient issue maybe? I raised the light above WW#2 by 4 inches in case its light burn as well. Other than that and the nute burn on The other plants things seem well.
End of week update: things are looking great, I think whatever happened to WW2 is reducing its ability to form buds? Not sure. It’s looking okay, hoping they’re going to fill out well! Definitely need to grow the widow XXL again, it’s a shame I had another plant fall on WW2 and damage it, likely contributes to the yellowing and such.
WW1 still has no amber trichomes, waiting for this entire week to end before I even think about harvesting. I am eager to harvest so I can get more light to lower buds on the other plants.
I had to tie up 1/3 NL2 main colas. It was so heavy it was beginning to split the bottom stalk, there was no damage really just maybe 1/20th of the stalk was peeling from the weight. I tied him up to the light and everything seems well. I figured I wouldn’t run into that problem, but don’t underestimate how much weight buds can pack on!

Likes
25
Share


@Canna_ballistic
Follow
Humidity a bit hight??? Bud rot, been checking very closelym
Water stressing, packing on the resin
Likes
11
Share


@TgOgFaRms
Follow
week 5 flowering - No herms, strong aroma, and THC production! 🌿🌸🌱🔥
Hello, fellow growers! It's time for another thrilling update on my flourishing journey. We've officially entered week 5 of the flowering phase, and things are looking absolutely fantastic. Here's what's been happening in my grow room:
The most exciting news is that I haven't encountered any hermaphroditic plants thus far. It's a relief to see the ladies staying true to their gender and focusing solely on bud development. 🚫⚡️
The aroma emanating from the grow room is simply amazing! The fragrance has become more pronounced and enticing, filling the space with the delightful scent of resinous goodness. It's a testament to the terpene profiles of these strains. 🌿👃🌸
Additionally, the THC production is in full swing! The buds are swelling and becoming denser by the day. It's truly a sight to behold, and I can't wait to see how they'll develop further as we progress through the flowering stage. 🌿🌱🌸💪
While the plants are thriving, I've noticed a slight nutrient burn on the tips of some leaves. To address this, I've decided to dial back the nutrient concentration a bit for this week. It's important to maintain a careful balance and avoid overfeeding, especially during this critical phase. 💧💚
As for the nutrient solution, the pH has remained stable at 6.33, ensuring optimal nutrient uptake by the plants. The TDS (Total Dissolved Solids) level has been consistently maintained between 1150 and 1250, providing the plants with the necessary nutrient balance. ⚖️📈
With everything going so well, I'm filled with excitement for the upcoming week of flowering. Let's continue to nurture these beautiful plants and enjoy the bountiful rewards they will bring. Happy growing, lads! 🌿💚🌸😎


Likes
Comments
Share

@Organic_bud21
Follow
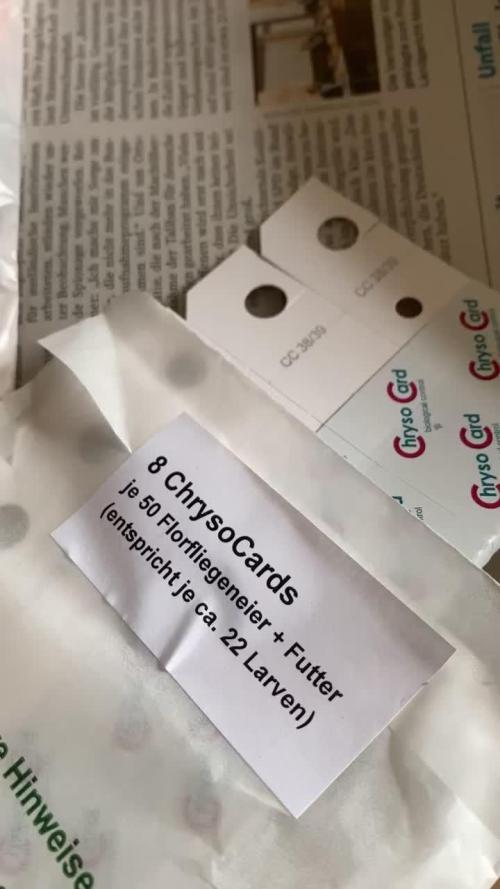
Anfang dieser Woche stand Umtopfen auf dem Plan. Da ich vom vorherigen grow noch Mycotrex hatte, wird auch alles verbraucht, genauso wie zum eintopfen 0,5g pro Pflanzloch. Den ersten Tag habe ich die Bewässerung ausgesetzt, zum anwurzeln lassen. Der 2te wurde normal bewässert 10% vom Topf Volumen. Ohne drain. Ab 4tag der dritten Woche, wieder tägliche Bewässerung 10%. Nach dem Umtopfen habe ich mit B-52 und Rhino Skin angefangen. B-52 wurde als kleines Experiment mit Break Thru Foliar ausgebracht, direkt nach dem umtopfen. Ich habe Außerdem einen leichten Thrips Befall festgestellt. Deshalb wurde einmal zum Ende der dritten blütewoche mit Neemöl 5ml pro L Spritzwasser behandelt und Nützlinge wurden auch danach eingesetzt. Raubmilben + Florfliegeneier. Ab jetzt sind 30% des unteren Topfvolumen Euro Pebbles.

Likes
12
Share


@Trickybis82
Follow
Hey again my fellow growmies,
Tomorrow being the 13th will be my last water change before i harvest on Sunday 17th.
Then she would have been flushed for 14days and should be clean and nutrient free! The discoloration to her leaves show me that she is ready!!!
Her smell is absolutely amazing I can't explain it. Apart from she smells like a candy store! Absolutely beautiful!
Once harvested she will go into glass jars to be cured and then I can place a review and pics etc. Cannot wait!! Excited 😁 😄 💗 💖 😁 😄
Till the next time peace and love to you all 👍✌️🤜🤛🌱

Likes
12
Share


@SiriusBlack117
Follow
I think the stretch is nearly done, they could have filled out a little better but overall I’m pretty pleased, this is the fewest I’ve run in here and to have it this even and filled out im pleased.
If low temps stunt growth we will find out soon, these had a brief stint in the mid 70’s toward the end of veg but they’ve been experiencing sub 50 degree nights for basically the whole run.
Anyways, flowers are coming in, probably towards the end of next month, but who knows, they’re never simple.
Thanks for checking this out!

Likes
7
Share


@Adam22
Follow
Day 28 week 4 of flower plants looking good I dropped a 3L water bottle on a string which snapped a whole branch from the bottom 😳 on right plant 😭
Likes
170
Share


@Master_weeda
Follow
Bonjour à tous les padawans et maîtres jedis jour84 arrosage avec 25 centilitres d'eau ph6.3
Jour87 arrosage avec 30 centilitres d'eau ph6.3
Jour88 pratique de la techniques du tronc fendu (videos explicatives) et arrosage avec 20 centilitres d'eau ph6.3
COMMENT FENDRE LES TIGES DE VOTRE PLANT DE CANNABIS
Pour fendre les tiges de votre plant de cannabis, il vous faudra :
Une lame propre et aiguisée (une lame de cutter fonctionne bien)
Un mètre ruban
Une ficelle ou un adhésif pour marquer les coupures que vous ferez le long de la tige
Un crayon, une baguette ou une brochette pour séparer la tige une fois fendue
1. Tout d'abord, commencez par mesurer la partie de la tige que vous allez fendre. Il faut faire une incision d'environ 10–20 cm juste sous la branche la plus basse de votre plant. Utilisez un ruban adhésif ou de la ficelle pour marquer le début et la fin de l'incision.
2. Ensuite, prenez votre lame et faites une incision en travers de la tige, en commençant par le haut. Attention à faire une coupe propre, jusqu'au centre de la tige.
3. Utilisez votre lame pour tailler en descendant vers le bas, jusqu'à la marque inférieure de la mesure que vous avez prise auparavant. Essayez de tailler aussi droit que possible. Une fois que vous avez atteint votre marque du bas, laissez la lame au centre de la tige, puis utilisez un crayon/baguette/brochette pour ouvrir la partie coupée, puis sortez votre lame.
QUEL EST LE MEILLEUR MOMENT POUR FENDRE LES TIGES ?
Il existe de nombreuses théories sur le meilleur moment pour passer votre tige au couteau, mais la plupart des cultivateurs suggèrent de le faire à la dernière semaine de floraison. Même si certains cultivateurs recommandent de le faire dans les 3 derniers jours avant la récolte, nous recommandons de le faire un peu plus tôt (7–10 jours avant la récolte).
QUELS SONT LES RISQUES À FENDRE LES TIGES ?
Fendre les tiges est une technique à stress élevé très agressive que nous ne recommandons qu'aux cultivateurs expérimentés. Nous ne recommandons également pas de fendre les tiges sur les variétés à autofloraison, car cela peut être bien trop intense pour elles.
FENDRE LES TIGES, ÇA MARCHE VRAIMENT ?
Il existe un solide ensemble de cultivateurs expérimentés qui déclarent que le fait de fendre les tiges peut produire de bons résultats. Malheureusement, peu de données qualitatives le prouvent. Cependant, il semble que la fente des tiges soit originaire des Pays-Bas, où elle est pratiquée par des cultivateurs néerlandais experts depuis les années 1970.


Likes
9
Share


@Green_Friends_Inc
Follow
Commencing week 3 - Day 15 on December 15th
Change has taken place. Switched out COBs for SolarStorm 440. Currently on VEG mode.
BS is a freak. Still has 4 cotyledons and now is displaying Tri-whorled mutation 🤔😄👍
Thanks for your time and attention!