
Likes
Comments
Share


@GrowPassionItalyChris
Follow
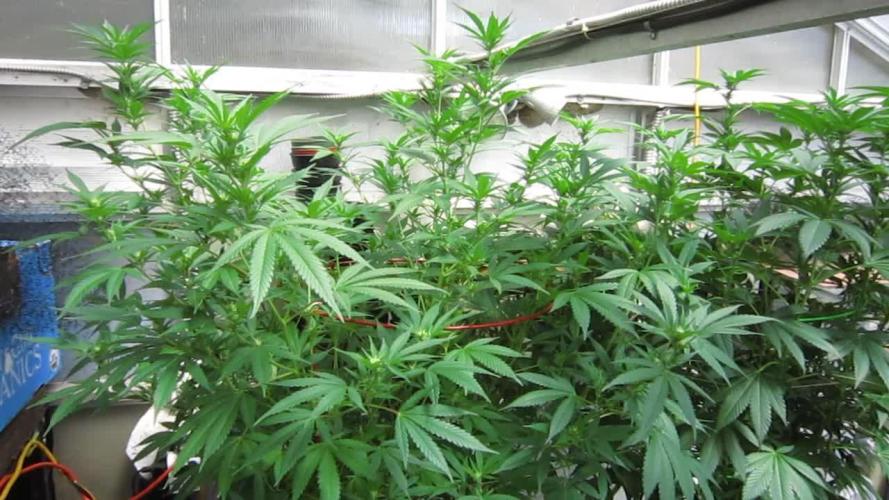
Settimana meravigliosa, caldo estivo arrivato! Crescono tutte in maniera impeccabile e molte sono di tipo XXL ! Resinose e appiccicose e molto profumate ormai si riempiono di infiorescenze dure e spettacolari! Resistono e sembrano soddisfare ogni esigenza. Molto abbondanti e facili da gestire non manca molto alla fine! Complimenti ai creatori di queste varietà! Sono felice! Un abbraccio a tutti!


Likes
132
Share


@rhodes68
Follow
11/29 Start week 3
Transplant day both into 5 gal pots both look fine.
Feed at 800ppm till water filter installed.
Training sometime later in week
12/1 Going to try a ponytail on them, doing Ripley now, Tara later
12/5 Contining ponytail - Feeding to once per day at lights on 1 qt (liter) 800ppm, runoff = 1 cup (25%) each
Likes
4
Share

@Chucky324
Follow
Hello. This is the end of week 2 and the beginning of week 3 of flowering.
The plant is doing good and growing fine.
I've got to get in here and do some trimming up on this plant.
It's got too many low sucker branches on the main branches and I'll take off a few fanleaves too.
The resin starts to flow after the 3rd week, so I like to get the trimming done before then.
OK. Be Great.
Chuck.
Likes
Comments
Share

@Professorpeng
Follow
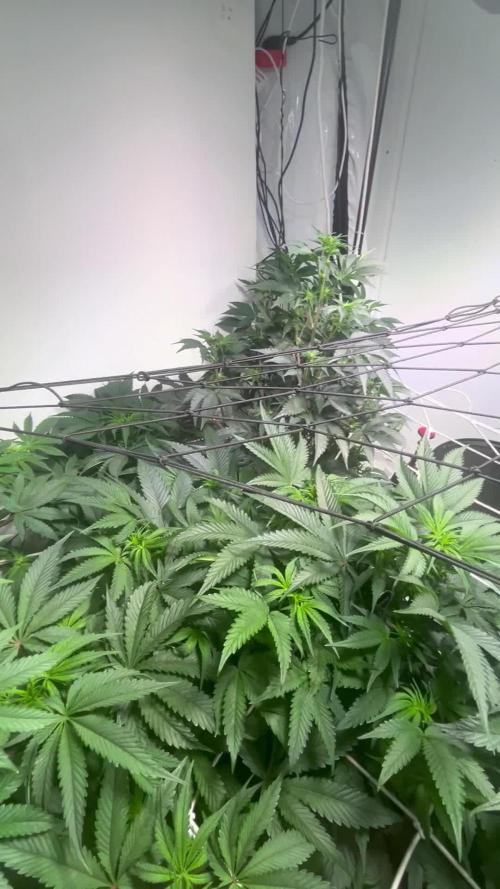
Still looking great, not stretching loads compared to other grows I’ve done. The added green light in the telos spectrum penetrates the canopy really well, resulting in bushy, uniform growth.
Still feeding veg nutrients, lights at 50%


Likes
10
Share


@Slow_grower
Follow
This week I noticed a good and healthy growth. I decided to Top one of the plants and on another one aI applied the “main line”. On the third plant from the next week I will try an “LST”. The temperature on the grow box is under control and umidity is good. The only problem we found was on the “Tangie n.2” that is developing quite slowly and showed up some yellow leafs.
20/03 we apply LTS on tangie 3 and 4.


Likes
39
Share


@BigDaddyK
Follow
I had to harvest plant A - Plagron 23/4/18 I will harvest plant B later , she is going the distance , this one had an 11 day flush .This is the top bud , pics to follow .Enjoy the vid people I’m starting to use technology 😜

Likes
7
Share


@OwlGang_Uk
Follow
Gorilla Glue #1 - Harvest Comment - I Am Very Satisfied With What I Got, I got 3 ounce 7 grams - I Uses Advance Nutrients PH perfect In veg then I switch to the iguana juice organic juice for the flowering stage. I notice a much more slower growth when I switch to organic nutrients.00
Likes
67
Share


@Ageddd
Follow
This week she is growing more buds every day and yellowing lower leaves, early flowering state...
Feeding schedule is for helping the plant to grow more bud sites in this stage..

Likes
5
Share


@TJHeadley
Follow
Tempature was getting to 60° at night and 67° during lights on. Bought foam board to put under the tents and an oil space heater to combat cold temps. Defoliated on 11-6-23. Top Dressed with BuildaSoil Craft blend ¼ Cup.
Likes
2
Share

@Idiotproof420uk
Follow
1 x black apple hitchcock}p#1
1 x choccolatto
1 x black hell
1 x black apple hitchcock p#2


Likes
14
Share


@Jazzvet
Follow
This week was very well, the girl showed her first pistils and she's stronger and healthier than ever, so:
Day 30 sprayed with bioprotect
Day 31 watered with 3l of water with 6 ml of bh, bg an a-v
Day 33 The first pistils are appearing sign that blooming phase has begun.
Day 34 water with the mix
Day 35 I've turned on the dehumidifier trying to decrease the humidity and starting to defoliated some lower leaves, 3/4 leaves per day stress the plant to much.
See you next week
Happy growing
Processing
Likes
7
Share


@Andres
Follow
we will see what he offers us ... nothing more to say at the beginning of his first week outdoor ...


Likes
34
Share


@JonnyKush
Follow
Day 15 🌱
everything is going well but I have accidentally decapitated N1, in reality I had topping already N3 but with N1 I broke without doing it on purpose. hope for the best.
Day 16🌱
wow today N1 I see it well it does not seem to have accused the topping. everything seems to be going well for N3 too, he seems to be growing very strong. N2 is in excellent condition.
Day 18 🌱
i am struggling a bit with "lst" but i guess because i started early. otherwise they seem to be growing well
Day 20 🌱
I let them rest for two days. some training again today, they look fit and grow great.
Day 21🌱
N1 and N3 grow great and look great. N2 grows well but has yellowed leaf tips as if I had given too much fertilizer, I think due to the pre-fertilized soil. Now I continue with water and I will check the drain ph
Thanks for viewing.
if you like my diary leave a like and a comment.
come back to see me 🎂
good cultivation and good day💚🌱

Processing
Likes
6
Share


@StoneyMelony
Follow
Overview of my grow:
Tent: Secret Jardin DS120 4 x 4 (120 cm by 120 cm)
Lights: 2 x 120 Watt CTlite c4 clusterled
Climat: Trotec Dehumidifyer 240 watt- 10L/24h
Filter: Prima Klima carbon filter PK2600
fan: 2 x Secret Jardin 20watt osc. fan
Pots: Gronest 4 x 11 liter airpots
Water : automated water system
PH: bluelab
Nutrients: Plagron cocos A + B
Plagron PK 13/14
ATA cal/mag
Epsom salt
Week 9 There is a lot off frost buds are not too big but they look and smell very tasty.

Likes
4
Share


@Growedbypepper
Follow
Tenemos una floración buena y nutrida ha crecido muy bien en los copos aún no veo presencia de plagas o algo que afecte la planta.
Todo muy bien hasta ahora
Buenos humos muchachos 🙏🙏🙏
Likes
8
Share


@StonedandSteady
Follow
AutoWhiteRussian Growing into her 10th week of Bloom and She's Finishing out Great, Glorious, Gasy, Greasy as All get Out! Super Stacked and Phenomenally Packed!!!
7th Feed of #HumboldtCountysOwn
#AutoWhiteRussian *Fem* breed by Team #DivineSeeds #DivineSeedsSquad #DivineSeedsBreedingCompany Looking Magnificent and Amazingly Great in her 10th week of Flower! She's Growing under the #Growatt600w and in my #TopoLite 24×24×48 Grow Tent! I'm also using #TNBNaturals #TheEnhancer Co2 Despersal Canister and using thier Ph⬆️⬇️ for my Decolinated Tap Water!
#AutoWhiteRussian breed by Outstandingly Awesome Team #DivineSeeds #DivineSeedsSquad #DivineSeedsBreedingCompany
Yo!!! This Lil Beauty popped open in under between 16-18 hours of Germination using this Wet Papertowel Method, this New Heat Mat, Baked potato ToGo Container and Regular Tap Water Helped Tremendously! Heck Yeah Growmies and Growmets!!! Let's Grow!!!
DivineSeeds:
#AutoWhiteRussian
Origin:Afghanistan
Type:Indica/ Sativa/ Ruderalis
Flowering:65 days
THC:24 %
Harvest:400-600 g/m2
Height:100-150 cm
https://divineseeds.net/
https://instagram.com/divine.seeds?igshid=osxe2v7en33v
HumboldtCounty'sOwn:
Email: [email protected]
Phone: (707) 725-4119
Toll free: (866) 872-9434
Humboldt Bottling
Po Box 429 · Fortuna, CA 95540
HumboldtCounty'sOwn Website Link: https://humboldtcountysown.com/
HumboldtCounty'sOwn Instagram Link: https://instagram.com/humboldtcountysown?igshid=1qj809qkkwych
I love and Appreciate Everyone!!! Thanks Again Teams! Cheers Famz!!! Much Props and Much Topz!💯

Likes
4
Share


@ATX_growguy
Follow
Has a great taste not too strong of a buzz but just right night time. Cdb numbing effect… this was the smelliest plant ive grown so far. I wanted to make fem seeds but seems like it was unsuccessful using. Colloidal silver. I see one weird looking seed but don’t know if it’s viable. Callin this a half win because the bud is good . Will grow again when i have more space because i have a seed left. Thanks seedsman.
Solid auto genetics send me more autos please lol

