


Likes
Comments
Share


@XTheJX
Follow
After several methods of much appreciated advice I chose to:-
1. Cut off all the s**te
2. Let fully dry out.
3. Water only.
4. Lowered light.
I had noticed a faint mark on inside of plant pot of which I had a previous grow (from clones, I only supplied the room) so topped soil up to that mark also.
Quite happy with results


Likes
26
Share


@Growin_it
Follow
Defoliation on lower branches to improve air flow and future larf.
Going into 12/12 for flowering, next week.

Likes
Comments
Share

@SidekickGrowie
Follow
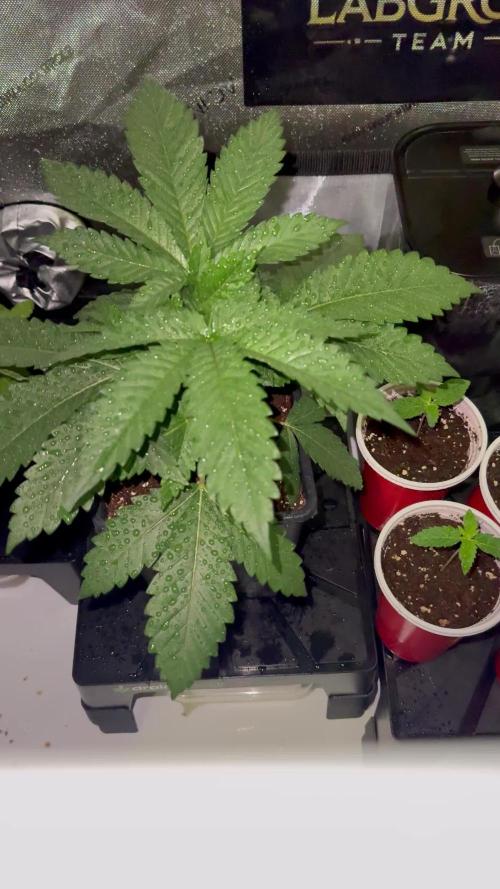
Hallo
- Den Befeuchter befülle ich aktuell alle 2 Tage.
Wichtig ist!
(Immer mit destilliertem Wasser)
Tag 22 :
- Die Pflanze sieht sehr vital aus und hat ihre Größe so langsam erreicht, sodass ich die Pflanze toppen kann.
- zusätzlich habe ich die „Keimblätter“ entfernt.
Tag 23 :
- gegossen mit 250ml (Düngermischung)
Tag 24 :
- kurz bevor es dunkel wird einmal IPW angewendet (2,5ml auf 1 Liter)

Likes
23
Share


@420DeepGrow
Follow
Gracias al equipo de Kannabia, Marshydro, XpertNutrients y Trolmaster sin ellos esto no sería posible.
💐🍁 RS11:
Las variedades de marihuana son cada vez más grandes y mejores, y la Rainbow Sherbet #11 de Kannabia ha llegado para revolucionar tu mundo con su extraordinario contenido de THC del 30% y sus terpenos increíblemente deliciosos. Con una genética 70% índica, esta descendiente de la Pink Guava y la Sunset Sherbet ofrece muchas características interesantes, como su espectacular belleza. Sus cogollos a veces adquieren una tonalidad azul y brillan con una gruesa capa de tricomas, por lo que parecen piedras preciosas cannábicas.
Germina las semillas en exterior o interior, y prepárate para quedarte con la boca abierta. La Rainbow Sherbet #11 no necesita muchos cuidados para producir plantas robustas y vigorosas. Incluso los principiantes podrán conseguir un buen botín cuando llegue el momento de la cosecha, y los cultivadores que ya tienen experiencia no tendrán problemas para hacer que sus plantas rindan al máximo. Con un poco de LST podrás maximizar su producción, y tras 9 semanas de floración en interior conseguirás alrededor de 450-500g/m². Al aire libre, esta variedad puede generar hasta 500-600g por planta.
El nombre de esta variedad augura un montón de sabor, y la Rainbow Sherbet #11 cumple con creces. Sus cogollos tienen un aroma extremadamente complejo que convierte cada fumada en un viaje aromático. Las fragancias que más destacan son las afrutadas (principalmente a cerezas y bayas), así como las cítricas. Esta mezcla va acompañada de unos matices terrosos y especiados y de un toque de pino. Tras unas cuantas caladas, los efectos de la Rainbow Sherbet #11 aparecen con toda su fuerza, potenciando la alegría y la creatividad, calmando el cuerpo y la mente, y ayudándote a olvidar las penurias del día.
💡TS-3000 + TS-1000: se usaran dos de las lámparas de la serie TS de Marshydro, para cubrir todas las necesidades de las plantas durante el ciclo de cultivo, uso las dos lámparas en floracion para llegar a toda la carpa de 1.50 x 1.50 x 1.80.
https://marshydro.eu/products/mars-hydro-ts-3000-led-grow-light/
🏠 : Marshydro 1.50 x 1.50 x 1.80, carpa 100% estanca con ventanas laterales para llegar a todos los lugares durante el grow
https://marshydro.eu/products/diy-150x150x200cm-grow-tent-kit
🌬️💨 Marshydro 6inch + filtro carbon para evitar olores indeseables.
https://marshydro.eu/products/ifresh-smart-6inch-filter-kits/
💻 Trolmaster Tent-X TCS-1 como controlador de luz, optimiza tu cultivo con la última tecnología del mercado, desde donde puedes controlar todos los parametros.
https://www.trolmaster.com/Products/Details/TCS-1
📆 Semana 5:
Recuperada de estrés comienzan a formarse los cogollos, las hojas se llenan de resina cada dia y el olor es bastante fuerte. Parece que ha terminado de estirar. Practico una defoliación intensa para airear los futuros cogollos y dejar mas espacio en el cuarto de cultivo.
Agrupo de nuevo las macetas en su lugar optimo para asi rellenar por completo la carpa @marshydro.
Me quedé algo corto de nutrientes pero estoy muy contento con los resultados, cada vez le voy encontrando mas su punto optimo. Siempre es mejor quedarse corto que pasarse.

Likes
22
Share


Likes
25
Share


@nijuana
Follow
Here we are :) the are finished
You can see a lot of difference between the 4 strain specially the tall one #4 who have a lot of pistils

Likes
6
Share


@rvabudman
Follow
Graduated, and am off from work for a few weeks, so went overboard on photos. Plant is doing well, leaves are starting to turn yellow (strain trait).
Can't wait for the harvest and being able legally gift my xmas ornaments to my cousins during our "cousins walk" at our family xmas party.


Likes
9
Share


@Growfornow
Follow
Week 9-10 flower
She’s a thirsty girl! Drinking about 1/2 gallons every 2-3 days
Looking good!
Thanks for lookin
Likes
3
Share

@Elemental
Follow
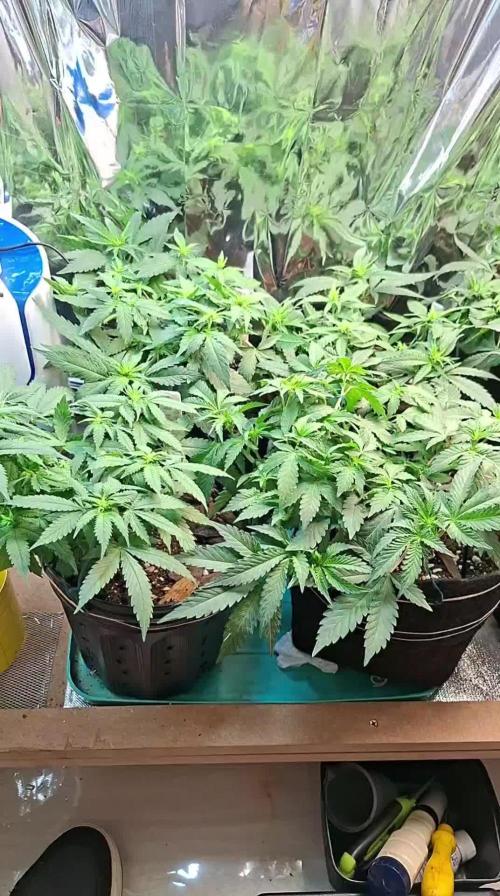
0.1) Observação Geral
Todo o cultivo foi conduzido com monitoramento constante e ajustes precisos de intensidade luminosa (DLI e PPFD), temperatura e umidade, garantindo condições ideais em cada estágio do desenvolvimento.
1) Substrato e Nutrientes
O cultivo foi realizado utilizando água mineral com pH balanceado durante todo o ciclo.
Fase vegetativa: fertilização com BioGrow.
Floração: alimentação com Flowermind.
A mistura do solo foi composta por 50% de substrato reutilizado, rico em nutrientes do cultivo anterior, e 50% de novo solo (proporção 70/15/15), resultando em uma base equilibrada e fértil.
2) Germinação – 19 de agosto
As sementes foram germinadas utilizando água mineral + peróxido de hidrogênio em copinhos de gelatina individuais. Permaneceram por 24 horas na solução líquida, seguidas de 24 horas no escuro total sobre papel toalha umedecido com a mesma água, dentro do mesmo recipiente. Os copos foram abertos apenas a cada 12 horas, em ambiente de baixa luminosidade.
Todas as sementes germinaram com sucesso.
As sementes com raízes de aproximadamente 2 cm foram transferidas para vasos de 1 litro, com adição gradual de substrato conforme o crescimento das plântulas, prevenindo o tombamento dos caules.
3) Fase de Plântula
a) Conduzida sob lâmpadas de 35W e 50W dentro de uma caixa de papelão personalizada, equipada com coolers e exaustor para controle de temperatura.
b) Aplicação de FORT (enraizador) em uma rega, após o aparecimento do primeiro conjunto de folhas com cinco pontas.
4) Topping – 10 de setembro
Foi realizado o primeiro corte apical para incentivar maior ramificação e uma distribuição mais equilibrada de energia.
5) LST (Low Stress Training) – iniciado em 13 de setembro
O treinamento começou três dias após o topping, com amarrações graduais dos ramos para promover a abertura do dossel e melhor penetração de luz.
6) Transplante – 27 de setembro
Transplante realizado para vasos de 4 litros, com rega leve e adaptação gradual à nova base de substrato.
7) Início da Floração (Troca para 12/12) – 6 de outubro
O fotoperíodo foi ajustado para 12 horas de luz e 12 horas de escuridão, marcando o início oficial da fase de floração.
8) Defoliação – 10 de outubro
Remoção estratégica das folhas grandes de ventilador (fan leaves) para melhorar a circulação de ar, otimizar a distribuição de luz e estimular o desenvolvimento dos buds.

Likes
Comments
Share


@The_Lonely_Farmer
Follow
So I received some fastflowering testers from the amazing fastbuds I cannot wait for these girls too show themselves and start growing 🌱
Thank you so much too the fastbuds team I'm very excited too see what they become 🤞 👀🙏
I have not yet decided which nutrients too use between shogun and aptus but I may use both let's see.
hope you will feel comfortable too advise as I go along any comments are welcome.
Any aptus nutrients users please feel free on giving tips as I think I will be using aptus
Stay blessed growmies 🙏🌱💚
Likes
19
Share


@PeppaWutz
Follow
This week i had to lollipop and defoliate them. Really bushy stuff devolped :)
No visible plan issues till know but i have some temperature problems (sometimes above 30 °C).
Hopefully this will not affect the plans.
Likes
62
Share


@OwlGang_Uk
Follow
Time Is Winding Down On The Girls Scout Cookies In The 3 Gal Pot It’s Starting To Show A Nice Purple Color On The Buds. All The Girls Are Highly Scented And Frosty. The Lemon OG Looks Like It’s Going To Be The Frostiest Of Them All. . .The Purple Power Is Still Drying But It Shrink Up Pretty Bad I’ll have An Update For You Next Grow.
Height Chart:
Girls Scout Cookies: 31 inches (3gal)
Stardawg: 35 inches
Girls Scout Cookies: 40 1/4 inches (5gal)
Gorilla Glue: 33 1/4
Lemon OG: 42 inches


Likes
3
Share


@Lazuli
Follow
She stayed small, in the veg stage its a bit a challenge to get the branches going its important u give all heads light by bending the big leaves under them, dont defoliate the big leaves as long the branches havent reached out over the pot, once she flowers she gave a quick stretch and all head started bulcking in no time. I love blue dream
Likes
7
Share


@Nacholicious
Follow
WEEK 4:
SHE HAS EXPLODED THIS WEEK!
Heavy LST with some light defoliation done throughout the week.
No notable deficiencies or toxicities.
~~~~~~~~~~~~~~~~~~~~~~~~~~
FF Ocean Forest Soil
Botanicare Cal-Mag: 4 ml/gal
Botanicare Hydroguard: 2 ml/gal
Added: Humboldt's Secret Golden Tree 1 ml/gal
Reservoir ppm: 250
Reservoir pH: 6.3
~~~~~~~~~~~~~~~~~~~~~~~~~~~
Notes:
At the start of this week I added Golden Tree supplement at half dose, and I'm happy with the results. I read some comments about it stinking up your grow room, it is NOT the case for me. I would definitely recommend it, my Pineapple seems to love it.
She has sprouted a ton of new shoots this week which have been LST'd to create an even flat canopy (see pics).
Through LST and defoliation, my goal is to create 7 or 8 large colas around the perimeter and a bunch of smaller ones in the center (see pics). Using garden ties i bend the main stem down to almost 90 degrees, exposing the lower bud sites to the light. As new bud sites grow, they also get tied down and some light defoliation is done, only removing what blocks the lower bud sites from the light. This means the leaves that face towards the center get clipped, everything else not blocking a bud site stays.
She ALWAYS responded positively to the LST and defoliation. Never slowed her down (see time lapse above).
Likes
10
Share


@Dendegrow
Follow
Harvest Report – Blue Sunset Sherbert
The weed turned out absolutely phenomenal!
The colors were stunning – incredibly dark, almost black, with deep purple hues that really popped.
It was harvested at Day 80, with about 20% amber trichomes – just the right timing for a balanced effect.
Check out the pictures – they speak for themselves!
Stay tuned for the smoke report!
---
Erntebericht – Blue Sunset Sherbert
Das Weed ist einfach phänomenal geworden!
Die Farben waren atemberaubend – richtig dunkel, fast schwarz, mit tiefvioletten Tönen, die richtig hervorgekommen sind.
Geerntet wurde bei Tag 80, mit etwa 20% bernsteinfarbenen Trichomen – genau der richtige Zeitpunkt für einen ausgewogenen Effekt.
Schaut euch die Fotos an – sie sprechen für sich!
Bleibt dran für den Smoke Report!

Processing
Likes
5
Share


@Major
Follow
hello everyone I had a very positive week on my BSB Bruce Banner colas are forming and hardening full of resin are on the flowers and leaves the harvest is coming soon I am very happy good luck everyone 😘😘💪💪👌👌👍


Likes
28
Share


@Ferenc
Follow
Day 72, 21st of November 2020:
Gorgeous, tall and strechy. Nice nice and nice. Straching has stopped finally and more work on buds. Amazing creation.
All good as it can be seen keep getting older haha.
Buds are on the way getting fat ;)
Fertilization is the same every 2nd day with the mix and the ratio above....
All LST has been removed as the plant remains the same so no need to keep her in "chains".
The lamp is on 11.30 min and off 12.30 min.
Last week was 15 min longer light cycle....
So every week 15 min shorter light cycle until the 5th week. So far -30 min. It switches on at 6 am and off at 17.30 pm.


Likes
7
Share

@CannaArchive
Follow
Growth Stage:
Transition / Pre-Flower
Environment:
Temperature: ~25–26 °C
Humidity: ~60–62 % RH
Light intensity: increased to ~500 PPFD
Watering / Feeding:
Plants were watered with plain water + CalMag during this week.
No base nutrients were added, as the focus was on keeping stress low during the transition into flowering.
Observations:
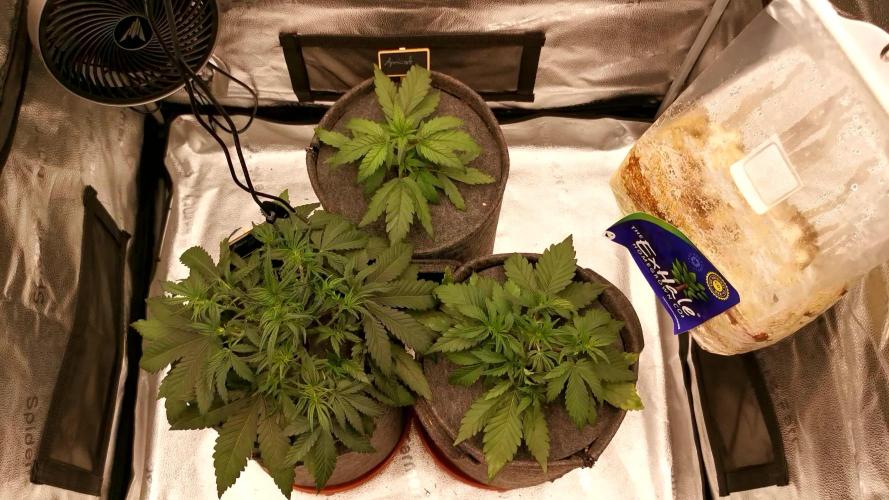
Week 3 marked the start of pre-flowering for both Apricot Autos.
Apricot Auto #1 showed the first white pistils about one day after the Amnesia, clearly indicating the transition into flower. Growth looks stable, and the plant continues to improve compared to the earlier weeks.
Apricot Auto #2 entered pre-flower about one day after #1. While still noticeably smaller and less developed, it also showed clear signs of flowering and continued growing steadily.
The transition into flower felt slightly early for the Apricots, but the decision was made to let them run naturally without any intervention.
Training / Work Done:
No training or manipulation was done this week. The plants were left untouched to avoid unnecessary stress during the transition phase.
Notes:
Week 3 was mainly about observation and stability. Both Apricot Autos successfully entered pre-flower and are now preparing for the upcoming stretch and early flowering phase.