
Likes
Comments
Share


@deFharo
Follow
Bienvenidos cultivadores de marihuana clandestinos, y también, a los que tienen la fortuna de no serlo!🖐️👨🌾 esta temporada cultivando leyendas y sativas... todo por la causa!
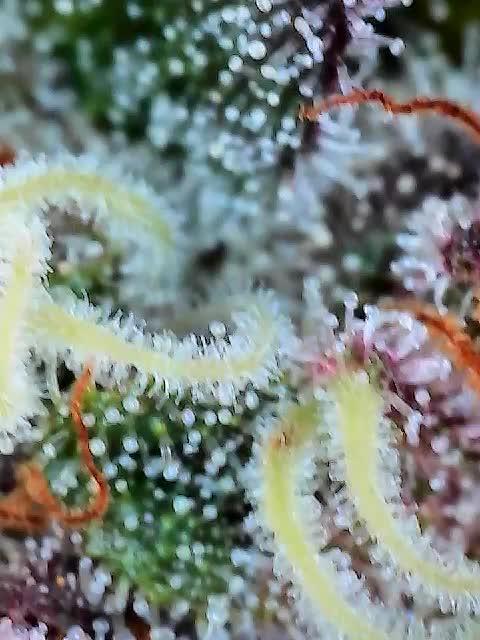
Once semanas de vida automática entre el sol y las luces, la formación de flores se mantiene activa, el cogollo central con irreverencia fálica engorda día a día, creo que puedo mantener el cultivo al menos dos semanas más, a no ser que la planta entre en senescencia acelerada, como ya me ha pasado con otras plantas auto florecientes.
De momento, la planta bebe y come en abundancia, pistilos blancos adornan todos los brotes florales, que a su vez despiden un olor muy fuerte, que se instala durante mucho tiempo en la nariz... que siga el juego!
Feliz verano a todos!
🌞💡 CULTIVO MIXTO INTERIOR/EXTERIOR
Las macetas que ocupan esta carpa de cultivo, salen de ella a las 8:00 AM y comienzan a tomar rayos de sol directo hasta las 14:00h, esperan hasta las 16:30h, después llega el sol directo del atardecer hasta las 20:00h, a continuación las plantas duermen hasta las 23:00 y a esa hora enciendo la carpa de cultivo... si los días están muy nublados dejo las plantas en la carpa de cultivo desde las 23:00h hasta las 17:00h... a jugar!
Hasta la próxima...
SALUDOS A TODOS!!
===============================================
Info de la cepa: https://dutch-passion.com/es/semillas-de-marihuana/auto-xtreme
Dominancia sativa
Genética: Outlaw Amnesia (Amnesia x Super Haze).
Tiempo de cultivo: 11-12 semanas.

Likes
17
Share


@Dunk_Junk
Follow
She's chugging through flowering!
I notice she's not very tall at all. But very bushy!

Processing
Likes
10
Share

@CrackinBeans
Follow
Well I'm a bit upset last week I ended up dropping my ph meter in a tank of nutes I was mixing and by the time I got it out the meter was junk. I was planning on flushing the crystal but had to wait another week for the meter.
I suppose the good thing to take from this was I found out why I was having issues with my plants. When the new ph meter came in I went to check my run off and my nutes that I had all ready mixed up. It turns out that my meter i had been using this whole grow was off by about -2-2.5 so this whole time I had been feeding the plants at around 3ph smfh. I cant believe they look how they do knowing what went on this whole time.
Fastbuds crystal meth is 3days into flush and i will be cutting it down this weekend most likely.
Mephisto hubbabubbasmelloscope is smelling like sweet sweet candy and is thick in resin
Bighead seeds freeze berry/ blueberry crumble has a dank pungent stank to it and also is frosty but larrfy
Big bomb is still growing thick and have bud sites everywhere
Now I'm ready for the next batch and ready to get dialed in!


Likes
2
Share

@PharmaZ
Follow
Sun 12th July (day 15) Lights on🌺
Planning of a big defoliation later closer to the end of the lights on period so she can recover lights off.
Also reduced light down to 75% for a few days as it’s hot as hell
0.5ml/L - MagneCal+
2ml/L - Canna A&B
2ml/L - Organic bloom liquid
1ml/L - Nirvana
2ml/L - Growzyme
EC1.2 PH?
Monday 13th July (day 16)
Defoliated massively, removing pretty much all undergrowth that looked pointless.
Also measured the light distance
It’s 60cm @ 75% will be playing with that soon raising and increasing intensity back up to 85%
Tues 14th July (day 17) 5am
Unfortunately I have sporadic waterings as I’m working nights I’ve been finishing late recently so schedule is all off.
However I have reduced the amount of Base Canna A&B by 50% and also made sure to give a really good heavy watering to try and displace as much excess out as much out of the pot as possible with a higher dose of Kelp to help remineralise excess
Raised light 60cm down to 75%
Check PPFD/DLI
Increase intensity and by day 21 have it around 700-800 in the centre of the tent
0.5ml/L - MagneCal+
1ml/L - Canna A&B
2ml/L - Organic bloom liquid
1ml/L - Nirvana
2ml/L - Growzyme
EC1.0 PH?
Weds 15th July (day 18)
Light 40-50cm 80%
500-680ppfd
Thurs 16th July (day 19)
0.5ml/L - MagneCal+
1ml/L - Canna A&B
2ml/L - Organic bloom liquid
0.5ml/L - Big Bud Coco
2ml/L - Growzyme
2ml/L - Big Fruits
EC1.1 PH?

Likes
29
Share


@HighZenBerg
Follow
Here we go again !
Welcome to my grow diary. This time I was gifted with a single seed of Sensi Amnesia Feminized by Sensi Seeds.
To celebrate the upcoming legalisation in Germany, I dedicate my diary to all my fellow German pot heads. We almost reached our goal !! 👏
As always, I got started and throw the seed in a cup of water and let it soak for 24 hours.
After that, she was directly transplanted in a little pot with BioBizz Light Mix soil.
To keep temperature and humidity up, she will spend the first days in a little propagator
Update: germination successful !
We mark 11/27/2021 as her day 1
Update 2: the lady gained hight quickly. That’s why I reduced the light distance to 40cm.
Temperature at day: 25-27 C
Temperature at night: 19 C
Humidity kept around 65%
Germination week was without problems. No Temperature or humidity issues at all. She got a bit tall in her first days.
Keep in touch !
Cheers HighZenBerg

Processing
Likes
10
Share


Likes
57
Share


@DogDoctorOfficial
Follow
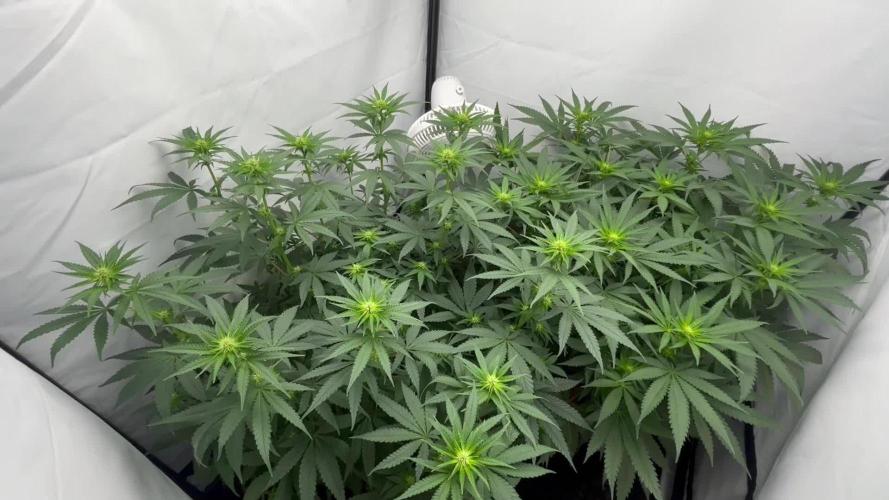
Man how great is my Medusa F1 from Royal Queen Seeds, She is really taking off in the second week of flowering. I mean, have you seen the fruit formation on this girl? She's going to be a real beast! And I can't forget to give a big shoutout to Royal Queen Seeds for sponsoring my journey - their seeds are top-notch and I'm grateful for their support.
By the way, have you heard of the "Medusa's Gaze" cocktail? Yeah, it's named after the infamous head of snakes and apparently it's quite potent. But enough about drinks, let's talk about the plant!
During this stage, it's important to make sure my Medusa is getting all the nutrients, light, and water she needs to keep growing strong. I'm keeping a close eye on her progress and making adjustments as necessary to ensure she stays healthy and happy, for this i trust no one but Aptus Holland and the magic only they know how to do <3 <3 <3
Overall, growing Medusa F1 is turning out to be an amazing experience, and I can't wait to see how she does in the coming weeks.
As always thank you all for stopping by and for supporting me on this journey, i am super passion about growing and fell blessed to have you all with me on this new journey <3 <3 <3
Genetics - RQS MEDUSA F1
Ligth - LUMATEK ZEUS 465 COMPACT PRO
Food - APTUS HOLLAND
All info and full product details can be find in can find @
https://www.royalqueenseeds.com
https://aptus-holland.com/
https://autopot.co.uk/
https://lumatek-lighting.com/
With true love comes happiness <3<3<3 Always believe in your self and always do things expecting nothing and with an open heart , be a giver and the universe will give back to you in ways you could not even imagine so <3<3<3
<3 <3 <3 Growers love to you all <3 <3 <3
Medusa F1
Medusa is a true F1 hybrid created from pure, inbred cannabis lines. She boasts uniform grow traits, mouthwatering aromas and flavours, and plenty of potency. If you're looking to bring stable, elongated plants into your room, tent, or garden, look no further. Mouthwatering Aromas, High Potency, and Mid-Size Plants
Though she won't turn you to stone like the mythical goddess after which she's named, Medusa F1 is bound to get you plenty stoned in her own special way. Combining genetics from inbred lines deriving from Sugar Magnolia, a thick and sweet indica, and American Beauty, a fast, fruity hybrid loved for its well-balanced, positive high, the result is an autoflowering F1 variety that produces fresh flavours, a unique cannabinoid profile, and large yields.
A very aromatic cultivar with a vibrant concentration of terpenes bearing notes of fresh mint alongside an upfront peppery kick, backed up by hints of fresh fruit, berries, and tangy fuel. Her thick, frosty flowers consistently produce high levels of THC and CBG, as well as high concentrations of myrcene, ocimene, farnesene, and caryophyllene. As a result, Medusa F1 has strong effects that relax and stone the body from head to toe (brought on by particularly high concentrations of myrcene and farnesene) while motivating the mind with an uplifting, creative, and motivating kick (thanks to high concentrations of ocimene).
Medusa F1 seeds produce elongated autoflowering plants with long, strong branches and well-spaced internodes. Plants regularly grow up to 80–85cm tall and boast a fast flowering time of just 42–45 days (72 days from germination to harvest). Thanks to her genetics, Medusa F1 produces plenty of thick flowers with big, swollen calyxes that make for very easy trimming. Medusa F1 is very stable, handling stress and unfavourable growing conditions with ease, though she is somewhat susceptible to Botrytis, so make sure to keep tabs on the humidity in your grow room/garden

Processing
Likes
1
Share


@Mnmgrwer420
Follow
The ladies got new shoes today. The went from 3 gal to 5g. In this soil mix is based with nectar of the gods #4 soil with added mykos, azos, recharge, roots organics terp tea mix, potassium silicate, fresh worm castings.
Likes
27
Share


@DeepRootsGrowTrees
Follow
Gelato-K By Kannabia Seeds
Week #19 March 15th-22nd
Week #8 of Flower
About 4 weeks left. She continues to stack and swell her buds are cover in trichomes.

Processing
Likes
16
Share


@LittleBigTrees
Follow
Broke my phone so haven't been able to update but all good now.
The soil is peat moss based with added hardwood and banana skin ash to bring the pH up to 6 and bunny buttons mixed in (first time trying rabbit poops)
I've also added seaweed .
To be sure I don't under feed I've decided to use biobizz , grow , bloom, and top max.
I've been keeping the soil damp but not soaked with no run off .
The light is at 15000 lux.


Likes
33
Share


@Belverde
Follow
Welcome growers
Week n°6 is ended, the first in flowering for this two BLUEBERRY CHEESECAKE 🍰
The one that is growing in its most natural form apparently looks fitter than her sister where I have practice a topping technique, but in general they are quite beautiful and healthy..
The plants are starting to show early pre-flowers 🌻🌻
The appearance is not extremely healthy because of me, I was away for a few days and my self-irrigation system did not work properly, leaving the plants in shortage of water 💦
Maintaining the correct proportions between dry and wet soil is essential
But they will recover anyway..
In this week I have slightly defoliated to allow the light to penetrate more and also better ventilation ✂️✂️🍃🍃
About the lights cycle 💡
We are now in a 12/12 on / off..
Always under two SP3000, from Mars-Hydro, at 75% of the power..
About nutrients 👇
I still giving their always organic/veganic nutrients..
A little bit of silicium (Bionova) / Activator (Biomagno) / Crescita (Biomagno) / Activera (Biobizz) / Grow vegan (Bionova) / The Missing Link (Bionova) / X-Cell (Bionova) / Bioheaven (Biobizz) , a little bit of P-K 3-5 (Bionova) {in spray solution } and for the firsth time a little bit of Fioritura (Biomagno) and Bloom vegan (Bionova)
Like i usually do, a little bit of everything at any watering 💧
And that's pretty much everything i've done..
See you in week n°7 📆
Thanks for stopping and watching 😎👍👍
FC ✌️
🇮🇹


Likes
6
Share


@Ksouth1
Follow
Last week went well. She is growing steadily and I can't wait to get her outside. She is going to be great once she can spread her roots in the ground. I took a few clones to attempt to keep this strain around since it was my only seed. Can't wait for the fall. She had some leaves removed and I did some lst and supercropping to even out the canopy further. She was topped on every branch to double the amount of tops. I will update as she progresses. Until next time happy growing to everyone!


Likes
16
Share


@Drtomb
Follow
Start of Week 5
I have two sections of plants growing from the same feeding resivour. For the first time ever I've decided to do a mid grow flush.
I ran through 1-2gal of water on each 5 gal bucket. I use only perlite as medium so I figured that I wouldn't need much to flush. It all drained back to the main resivour and I disposed of it. I ran a 24hr cycle of straight PHed tallboy filtered tap water (160ppm) and then drained that again (340ppm).
I refilled the resivour with fresh nutes and PHed again (1100ppm)

Likes
11
Share


@Beedog
Follow
Good weed will come back with full harvest weight when it’s all fully dry total weight 1650g and a plant that went to complete shit that had about 6oz on it added to the trim to be made into something what ever she decides so over all a good harvest if I had another two weeks and not a massive heat wave in middle of flower i reckon I would of touched two keys
Likes
25
Share


@Fatnastyz
Follow
Week 8
10-14
Water, both drinking around 750 ml a day!
Pretty much just fun with pictures from here.
Kosher still seems a bit hungry, but doing awesome!
Ztrawberriez is just nasty! Cant seem to get good enough pictures! Lol
10-17
Water and Guy was up to no good! 😻
10-15
Guy stopped in to pose today!
10-19
Flushed both today. I thought they should be low on food, but I over loaded again, I guess.
K ppm starting was 1200, now 440
Z 1050 now 310
Sheesh! One day I may Not over feed. 🤣
I even thought 2 tbs was light. 🤣
.