


Likes
Comments
Share


@Terpyboyz
Follow
This is week 3 of flowering - realistically week 2 since pistils have shown.
All is starting to balance out humidity and temps, I’m still running a bit too warm at 28 but al fix that further down the line.
Done a light defoliation on week 2 and another light strip of blocking fan leaves today.
I still can’t get this Lumi over 250w with the 2 Mars hydros middle running at 50% and the end right light running at 75% so I’m hoping later on I can reduce these Mars and atleast get 400w on the Lumi by week 4/5 flowering
But all is looking well - strains that are already starting to chuck out is this purple punch x dosido and the rs11 smaller bushy pheno type are looking fire.


Likes
37
Share


@DogDoctorOfficial
Follow
🌱 Germination Journey with Terpyz Mutant Mentha de Croco 🌱
Hey Grow Fam! Today kicks off an exciting adventure with Terpyz Mutant Mentha de Croco genetics. I’ve got 10 regular seeds ready to sprout, and I’m looking forward to discovering some beautiful female phenotypes—and maybe even a standout male for potential future breeding. It’s been a while since I’ve worked with regular seeds, so I’m thrilled to dive in!
Germination Process Overview:
Here’s a step-by-step rundown of the germination setup and process, with a special focus on the equipment and nutrients that are helping these seeds thrive right from the start.
Step 1: TheCannaKan Germination Pod 🌱
For germination, I rely on TheCannaKan—a device I’ve come to love and trust. It’s designed to create the perfect microclimate for seed germination, and within just 24 hours, the seeds started showing signs of life. By the 32-hour mark, they were all ready to be transferred to the next stage! I can’t recommend this gadget enough for anyone serious about getting strong, early growth from their seeds.
• Why TheCannaKan?
• Humidity Control: Ensures seeds stay hydrated without oversaturation.
• Stable Temperature: Maintains an even temperature around the seeds, so there’s no shock or stalling.
• Enhanced Oxygenation: Keeps fresh air circulating, helping prevent mold and ensuring seeds don’t suffocate.
Step 2: Transfer to Root Riots & Aptus Holland Supplements 💧
Once the seeds were sprouted, I transferred them into Root Riots, known for their excellent water retention and structure that encourages strong root growth. Root Riots also have a pH-balanced, spongy texture that makes it easy for roots to penetrate, promoting sturdy, healthy root systems.
At this stage, I started using Aptus Holland’s Regulator and Startbooster at 1ml/L each. Here’s why I chose these products for early growth:
• Aptus Regulator (1ml/L): Helps strengthen the plants against environmental stresses by supporting cell wall structure. It’s a fantastic choice for giving young seedlings an early boost in resilience.
• Aptus Startbooster (1ml/L): This product provides essential microbes and nutrients that stimulate root growth and early plant vigor. Especially for regular seeds, the early root development makes a noticeable difference in later growth stages.
Step 3: Lighting with Future of Grow (FOG) LED at 200 PPFD 💡
For lighting, I’m using a Future of Grow (FOG) 600W LED. For the germination stage, I’ve dimmed it to around 200 PPFD (photosynthetic photon flux density), which provides just enough light for healthy, strong seedling growth without overwhelming them.
• Why Low Intensity?
• 200 PPFD ensures that young plants aren’t exposed to too much light, which could cause stress or stunting. This level of intensity is perfect for encouraging healthy development without risking “stretching.”
• The FOG LED provides a balanced spectrum tailored to plant growth, setting up these young sprouts for success as they grow.
Step 4: Environmental Control with TrolMaster Tent X Controller 📲
For monitoring and control, I’m using the TrolMaster Tent X Controller, which lets me dial in every aspect of the environment to make sure these little ones have the perfect conditions for germination and early growth.
• TrolMaster Benefits:
• Precision Control: Adjust temperature, humidity, and lighting all in one place.
• Notifications: Sends updates in real-time to my device, so I can make adjustments as needed without being physically present.
• Consistency: Maintains stable conditions around the clock, reducing stress on seedlings and ensuring they’re thriving.
Grow Tips & Reflections:
Germination is one of the most crucial stages in a plant’s lifecycle. Starting with strong genetics like Terpyz Mutant Mentha de Croco, combined with a solid germination setup and the right nutrients, creates the foundation for a successful grow.
💡 Quick Tips for Fellow Growers:
• Hydration Balance: Don’t oversaturate! Moisture levels should be high enough for the seeds to sprout but not so wet that they drown.
• Light Management: A low PPFD for young seedlings prevents stretch and keeps nodes tight, preparing them for a healthy vegetative phase.
• Environment Consistency: Use a reliable controller like the TrolMaster Tent X to manage your settings, and consider monitoring tools for real-time adjustments.
Shout Outs to the Community:
Big thanks to Terpyz Genetics for these incredible seeds, Aptus Holland for their top-notch nutrients, Future of Grow for the stellar LED lights, and TrolMaster for the amazing controller. Also, shout out to all of you in the growing community—you make this journey exciting and filled with endless learning. Let’s keep growing and sharing together!
That’s it for the germination update! Next up, I’ll be monitoring growth closely to identify strong females (and maybe a standout male for breeding). Stay tuned for updates on our Mutant Mentha de Croco adventure—this is just the beginning!
Genetics - Mentha De Croco
https://terpyz.eu/products/menta-de-croco-fern-type?_pos=1&_sid=e9237cbcb&_ss=r
DogDoctorOfficial Discount Codes @ terpyz.eu - DOCTOR 15% off
Nutrition - @aptusholland
https://aptus-holland.com/
Led Power @ F.O.G. Future Of Grow
https://www.thefuturofgrow.com/en/online-store/BLACK-SERIES-600-p489093171
Controls @ TrolMaster
https://www.trolmaster.eu/tent-x
As always thank you all for stopping by, for the love and for it all , this journey of mine wold just not be the same without you guys, the love and support is very much appreciloved and i fell honored with you all in my life
With true love comes happiness Always believe in your self and always do things expecting nothing and with an open heart , be a giver and the universe will give back to you in ways you could not even imagine so
Growers Love To you All 💚

Likes
30
Share


@gottagrowsometime
Follow
Welcome to my sponsored Runtz X Layer Cake from BarneysFarm.
Was only in the ground 12hrs and she was up. As you'll see in the germination week she had a 1 - 1.5cm tap root and. I mixed 3g of powder for every 1L of light mix substrate. I filled the pot 3/4 full and wet with 300ml of bioenhancer, sprayed the rest that was going in on top, soil needs to be ready, (don't water after you put the substrate in, the seed can move, drown, the soil that was lightly packed in falls in on itself and you'll have collapse later on as she starts to grow. Don't compact the soil In yourself, the liquid should do it. Fill the rest of the 1/4 of the pot with your damp substrate and make a little mound, (pic above) make sure the tap root is facing down, (now some tap roots might curl up, don't try bending it down into the substrate, what you need to do is place it on an angle, / like that tap root on bottom and the root will take hold and the seed will push itself up, if you try force the tap root down you risk breaking the tap and seed might die.
Trying to keep the RH as High as I can without compromising my late flowering plants in my big tent. The seedling tent is inside the big one on a negative seal. I have a damp towl in the small tent why you see a 10% dif in RH when my plants finish up next week I'll up the RH to 70+%.
Seedling Day 3. She's doing great. Settling in well in her new digs. Hopefully soon we'll start seeing a lot of fungus, (mycelium), seeing some already so it's great. Just water and Bioenhancer every 2 weeks, so far, so good. Now that we are in optimal growing range for seedlings I'm expecting things to take off in the next 2 weeks.
Seedling Day 7, she's moved quickly the last 2 days. Barneys strains are so strong and quick. You can tell they are hybrids.
(Hybrids are when you have a mix between indica & sativa) and this girl is 50/50..

Likes
9
Share

@Barakuda
Follow
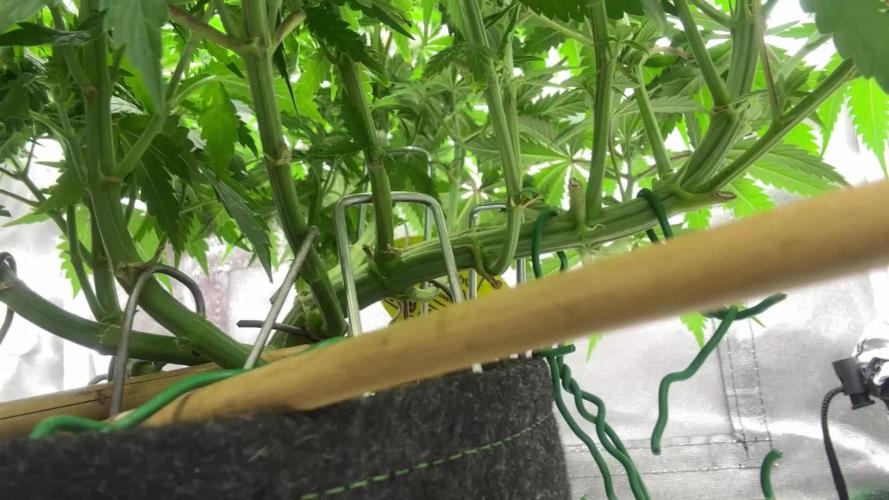
Hi zusammen , so der 8 Wachstum Woche ist rum , habe etwas entlaubt in der Mitte , mal schauen 1 oder 2 Wochen noch Dann schallte auf 12/12 💚💚🏼

Likes
4
Share

@DerEkstaseHase
Follow
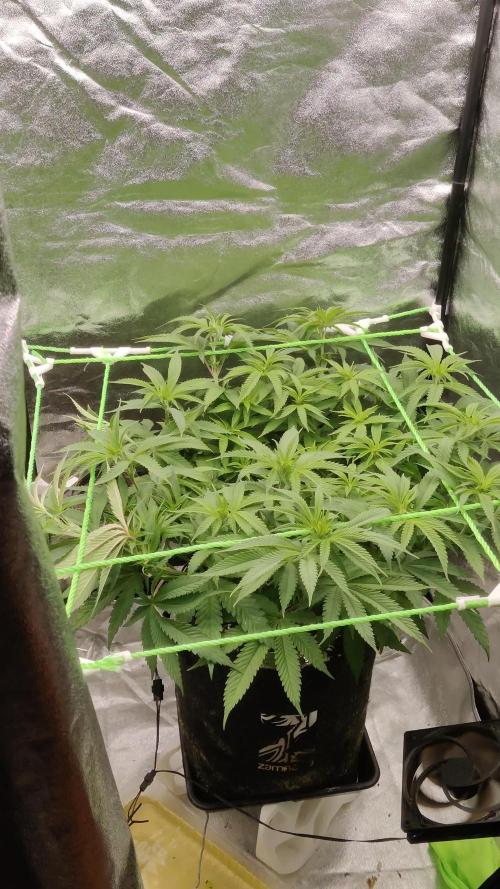
Die Umstellung auf 12/12 ist passiert, jetzt beginnt der Stretch und dann die Blüte.
Die nächsten zwei Wochen wird nichts geschnitten, nur die höchsten Tops werden auf eine höhe gebracht.
Ich bin sehr zufrieden mit dem aktuellen Stand!
:)

Likes
43
Share


@The_Good_Twin
Follow
13 Jun 2021
Continuing to flush my DarkStar Kush probably for another week at least. If I were following my original plan, I would be cutting her down today and starting the harvest. However, the runoff is still colored (not as much as it was, but still), and the TDS runoff was higher today than yesterday by almost 200 ppm. I’ve added new pics for this new week to show how she’s changing colors later in her life. She’s begging to be harvested, but I want to smoke her and not her nutrients! I’ve already waited this long, what’s another week or so. 🤷♂️ Oh well. I gave her a gallon of water chilled to 49.2 degrees F, and gave her 20 drops of pH DOWN which adjusted the pH from its initial 8.2 to a final pH of 6.7. The TDS going in was 76 ppm. Runoff pH was 6.3, and TDS runoff was 1740 ppm (up from 1462 ppm yesterday). Tent temperature was 82 degrees F, and humidity was 42%.
14 Jun 2021
Continuing with the flush today. Feeding a gallon of 45.5 degree F water with nothing more than 22 drops (gtts) of pH DOWN to make it just right. Initial pH was 8.4, and adjusted down to 6.4. The TDS going in was 85 ppm. Runoff pH was also 6.4, and TDS runoff was 1377 ppm. Working in the right direction at least. TDS runoff yesterday was 1740 ppm, so a reduction of 363 ppm today, but still a ways to go. Tent temperature was 82 degrees F and humidity was 47%. She’s looking more and more ready for harvest each day! Uploaded some pics of her colorful foliage today along with some new trichome pics. They’re almost all cloudy/milky with some amber interspersed here and there. Come on flush!! Do your job! 😜
16 Jun 2021
Went out of town on a day trip yesterday, so no watering was done, but I’m back today to continue the flush. The tent temperature was 81 degrees F, and humidity was 43%. Thought I’d start off backwards today in my note from the norm. I gave a gallon of cold water (51 degrees F) with 20 drops of pH DOWN to adjust the initial pH of 8.2 to 6.5. The TDS going in was 83 ppm. Runoff pH was also 6.5, which to me is promising, and the TDS runoff was 814 ppm. That’s a decrease of 563 ppm since the last watering/flush on the 14th. Hopefully in just a couple of days I’ll be able to start the harvest because she is READY!! I took more trichome pics today which were marvelous! They are perfect (to my untrained and inexperienced eye)! Hopefully I’m just days away!!
17 Jun 2021
Continuing the flush another day. The TDS runoff is still decreasing a little bit every day. Today I’ll be uploading a video instead of a bunch of pics. I already have a lot for this week, so I figured I’d do something different. I’m still giving chilled, and properly pH’ed fresh water. Nothing else. So, today I gave a gallon of H2O chilled to 51F. The initial pH was 8.4, so I added 22 drops (1ml) of pH DOWN to adjust it to 6.4. The TDS going in was 85 ppm. Runoff pH was 6.5, and TDS was 758 ppm. There is a 56 ppm decrease from yesterday, and I was hoping for much more, but it is what it is. I’ll keep going till it is better till harvest. Looking at the plant, it’s losing several leaves that are just drying up and falling off. Not a lot, but about as much as should be expected at this stage. The plant, trichomes, and buds are ready for harvest, but I want to make sure that I get all the nutrients out before I do it. Thankfully, I’m a patient person!
19 Jun 2021
I’ve been doing the flush for 2 weeks now, and the TDS runoff is still measuring 647 ppm. Honestly, I don’t know what the level should be for the harvest, but I’m getting to the point where I just want to go ahead and do it. Her buds are looking awesome, and many of the sugar leaves have turned dark purple, but she’s losing a lot of her bigger leaves. None of the ones around any buds, so I’m not concerned with it that much. However, I don’t want the trichomes to get more amber. The vast majority are milky, which is what I’m looking for with only a smattering of amber here and there. She’s just right!! Anyway, I gave a gallon of water at 48.7F with an initial pH of 8.3. I added 21 drops (1ml) of pH DOWN to adjust it to 6.7. The TDS going in was 71 ppm. Runoff pH was also 6.7 (it has consistently been the same or just a decimal point off from that going in for the last week or so). The runoff TDS was 647 ppm as noted above. Tent temperature was 84F, and humidity was 48%.

Likes
7
Share


@cliv4ge
Follow
Last week of the apple fritter..
As Im writing this I already harvested it. Ill report back in 2 weeks after the drying and before the curing.
This was an amazing journey that its not yet finished. Drying and curing is very important and ill be doing the following:
Drying Environment:
- Temperature: Maintain between 18-22°C (65-72°F). This prevents terpenes from degrading while slowing the drying process.
- Humidity: Aim for 50-60% relative humidity to avoid mold and overly crispy buds.
- Airflow: Use a small fan to keep air circulating, but don’t let it blow directly on the buds to avoid uneven drying.
- Darkness: Keep the tent as dark as possible. Light can degrade cannabinoids like THC.
- Timeframe: Drying typically takes 7-14 days. Stems should snap (not bend) when drying is complete.
Curing:
- Jar Storage: Once the buds are dry, ill trim them again properly
- Humidity Packs: Using Boveda packs (58-62%) to maintain proper curing humidity inside jars.
- Burping: For the first 2 weeks, open jars for 10-15 minutes daily to release excess moisture and allow fresh air in. Afterward, reduce burping to once a week for long-term storage.
- Curing Time: At least 2 weeks minimum..
Ill comeback soon with final dry weight. Wet was 400g.
Keep up the good work galera 💜

Likes
Comments
Share


@Shoeless31
Follow
All caught up. Transplanted into 3 gallon pots. Lightly watered with some calmag and recharge
Roots were good and just about ready for the upgrade. No pics but I’ll keep this in mind for my next grow and take some. I know I looked on here and watched YouTube videos to see how was done and it has been very helpful

Likes
17
Share


@Fitzwell
Follow
The start was easy as it gets just add water the first 20 days and LST every day. When i saw some of the lower leaves start to change color that's when i started to add nuits. after that it was just following the instructions foxfarm already had laid out for me. I cut back by half in the start of my feeds but by the end of my grow I was at full strength. Testing your run off is key. Cropking send me great seeds and genetics is a great foundation and starting point.
---------------------------------------------------------------------------------------------------------------------------------------------------------------------
I was very happy I got almost 5 ounces off one plant.

Likes
2
Share


@SolitudeCorners
Follow
We’re deep into Week 8, and Blue Banana Cream is stacking up beautifully. Trichomes are looking frosty, covering the buds in a thick, sticky layer—definitely a strain that’s going to shine post-cure.
The aroma has intensified compared to earlier weeks, now pushing out a stronger creamy, fruity scent with a slight gas undertone. Every time I open the tent, it hits harder. The buds are swelling up nicely, transitioning from airy to more mid-compact density. Pistils are still mostly white, meaning it’s got a bit more time before it fully ripens.
One thing I’ve noticed—the branches are starting to lean from the weight, so some light support might be needed to prevent them from bending too much in the final stretch. I’m keeping temps at 18-20°C and humidity around 55-60% to ensure a proper finish.
With harvest around the corner, it’s just about watching those trichomes shift from clear to cloudy/amber and letting this one reach its peak.
Likes
48
Share


@PapaNugs
Follow
Another good week come and gone. A couple of the girls needed nutrients so I add some general hydroponics blend into those that needed them. Didn't seem to make much difference yet. But they are getting into late flower.
She's still holding on. Losing all her fan leaves, starting to lose sugar leaves. Not looking good. She needed more nutrients and gave them but didn't seem to help much. We'll see otherwise she's getting chopped first
Dimmed to 80%
Here are the lights details:
Medic Grow Mini Sun-2 150W LED
Model: MN150-022
Spectrum mode: V1
Efficacy: 2.8 umol/J
Thanks for stopping by!
You can find the light on Grow Diaries:
https://growdiaries.com/grow-lights/medic-grow/mini-sun-2-150-watts
You can find the light on Medic Grow's website:
https://medicgrow.com/


Likes
5
Share


@Ninjabuds
Follow
My Rainbow Saltz plant has some lighter green leaves, so I gave it a dose of calcium this week, hoping they'll darken up. One of the branches wasn't keeping up, so I pruned it off. Now the shape of the plant is perfect for fitting against the wall in the tent.
It's been a challenging week with the constant rain and ridiculously high humidity. Keeping things dry indoors has been a real struggle. Despite the weather, I managed to flip all my feminized photoperiod plants to flower this week. I'm hoping the switch will go smoothly, but with this humidity, it's going to be tough.


Likes
47
Share


@KilgoreTrout
Follow
So, I’m excited. New lights today. Horticultural grow lights quantum boards built for me by growerslights.com
I don’t have to time or knowledge to build one but I wanted one. Growerslights builds and tests for you for $50. Money well spent. This light is the shit. Full stop. So bright, so efficient. I’m getting a lot more light for 80w less per hour and that’s on full power. I’m going to start at 1/3 and slide up a little over the next few days. It’s the hlg-650h ok commercial done.
I cannot wait to do a full grow under this monster.
As far as the current plants. They’ll do their last week and a half under it. I’ll move the mars hydros to a small cloner I got.
Flushing now until harvest on the weekend of the 30th-31st


Likes
15
Share


@Springbokke
Follow
Доброго дня
Сегодня ровно 135 дней моей девочке и ровно 10 недель как я ее перевел на цвет. Думаю подержать ее еще пару дней. последние два дня я ее поливал ледяной водой и не по 3 литра как всегда, а всего лишь по 0,5 литра. Она почти готова, думаю еще несколько дней ей пойдут на пользу. Еще не решил сутки или двое она у меня будет без света.
Совсем забыл. в начале недели я обрезал большую часть листьев.
Likes
6
Share


@StickyFruits
Follow
last week vega, cut the lower steams into clones, do defloration and go to bloom)
Likes
4
Share


@Iceni
Follow
Everything is looking good, frosty nugs crowns, trichomes, keeping it simple with green house feeding bio line 😁
Likes
3
Share

@NoProbation4Weed
Follow
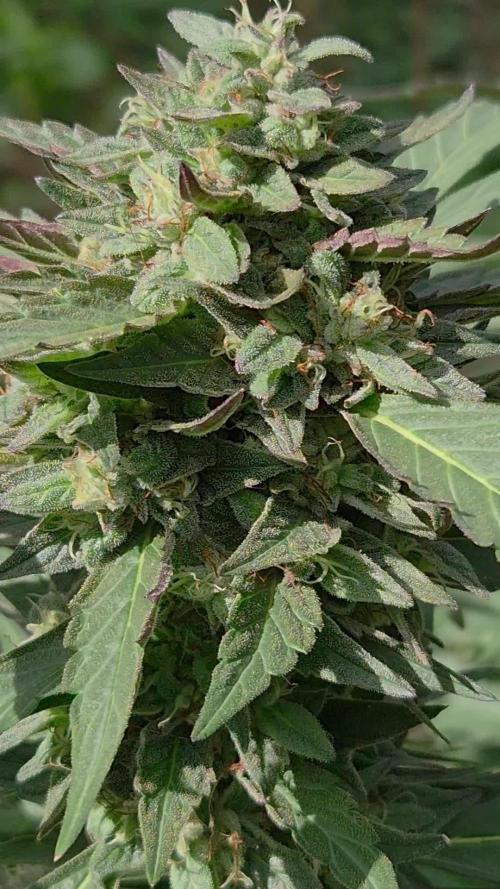
It was approximately week 7 of flowering, and it was time to harvest the plant as the first signs of bud rot had already appeared on the larger buds. I had to discard approximately 10% of the harvest due to mold, but despite this, the guerilla grow was still a successful one.
The harvested buds were immediately placed in the freezer and will be processed into bubble hash in the autumn.
In terms of terpenes, it has a slightly fruity aroma with a hop-like finish.
Likes
49
Share


@Gruenerfinger85
Follow
Einen wunderschönen guten Tag meine Pflanzen Freunde, ich hoffe ihr seid alle gut durch die Woche gekommen.
Die Pflanzen haben das topping und entlauben Gut über standen.
Sie haben jetzt ausreichend Zeit gehabt sich zu generieren.
Am Ende der 8 Woche werde ich anfangen den Lichtzyklus langsam auf 12/12 umzustellen.
Dann bekommen die Pflanzen für 3 Tage 15/9 Licht bevor ich auf 12/12 umstelle.
Somit haben die Pflanzen Zeit sich auf die Blütezeit vorzubereiten.
Ansonsten gibt es keinerlei Probleme.
Aktuelle Pflanzen Höhe am Tag: 52
#1)18cm
#2)14.5cm
#3)16cm
Denn Dünger scheinen die Pflanzen gut zu vertragen und schmatzen den so weg.
In der 9 Woche werde ich anfangen den Dünger Zusatz von S&R Organics mit zu verabreichen, der bei jeder Greenpower 5 in 1 Flasche dabei ist.
GREENPOWER20 mit diesem Code erhaltet ihr 20% auf euren Einkauf.
Ansonsten gibt es erstmal nix weiter zu berichten, ist auch mal schön wenn alles wie am Schnürchen läuft.
Wie immer bedanke ich mich für deinen Besuch und dein Like.
Sei in der kommenden Woche wieder mit am Start und schau dir in der Zwischenzeit meine anderen Tagebücher an, ich würde mich über ein Besuch von dir sehr freuen.
Oder komm auf mein Instergram Profil.
Zamnesia gibt 20% ZAMMIGD2023
