


Likes
Comments
Share


@Ganja_Victoria_Aus
Follow
Keeping my lady happy is a full-time job full of surprises, sometimes heavily exhausting long hours. I'm giving all my love to them. So thankfully, Respect and Love for my family for keeping me able to spend hours daily. 🌅🙏🤙
Unfortunately, grow diaries crash every time I update nutrients and photo 🤷


Likes
30
Share


@valiotoro
Follow
Week 4 has passed✔️
They double in size every week😳
We are now in the preflowering stage they seems to be happy with the LST & Topping✂️
Next week i will cut the nitrogen & start with the bloom nutrient🔥
Take care 💚


Likes
69
Share


@DogDoctorOfficial
Follow
🌸 Eternity Cup • Week 4 Flower • Runtz Phenos 1 to 5
Welcome back to the garden, my dear growers! This week, we enter Week 4 of Flower, and the energy is shifting — it’s subtle, like a foggy winter morning where everything is still, but alive with quiet anticipation.
Our beloved Runtz girls — phenos 1 through 5 — are beginning to reveal themselves fully, forming those early floral structures (the “ears,” you know the ones 🌱💚), and each one is expressing her beauty in unique, yet strikingly similar ways. This kind of uniformity only proves how stable and powerful these Zamnesia genetics truly are. They are fulfilling the scrog like queens — compact, bushy, and ready for the next phase.
This week, I noticed a slight decoloration in the leaves — just a whisper of pale green — and it felt like the perfect moment to adjust the feeding to bring out that lush vibrancy again. We’re now running the following dosages in our reservoir:
• Regulator: 0.15 ml/L
• System Clean: 0.25 ml/L
• RO Water Conditioner: 0.8 ml/L
• All-In-One Liquid: 2 ml/L
• Plagron Green Sensation: 1 ml/L
This blend brings us to an EC of 2.225 and a pH of 6.07 — right in the sweet spot. Let’s see these ladies rise up and glow 🌞
Since it’s been a little cold — temps started the week around 16°C and are now slowly climbing up to 23°C, with a humidity of about 50%, this gives us a VPD of around 1.50, which is still looking great considering the lower ambient conditions. CO₂ is sitting at 1000+ ppm, and light intensity is cruising around 550-600 PPFD, which we’ll increase in the coming weeks to match their needs as they bloom.
The Autopots keep our medium at 53% moist like clockwork, but I’ve added a water heater to the reservoir — aiming to gently raise soil temperature by warming the solution. That 16°C in the substrate wasn’t doing us any favors, so let’s bring the roots a little cozy love. Everything we do, we do with intention and care.
Visually, this week feels like a quiet fog has settled — like watching the garden through a soft lens. The atmosphere is calm, with the girls standing strong and steady under the ICL 300s and the Model Ones, which are doing a phenomenal job creating the perfect stage for this show.
Let’s take a moment to thank this beautiful community — the lovers, the learners, the OGs, the curious ones just passing by — your presence means everything 💚
Massive gratitude to Zamnesia for the incredible genetics, Zamnesia, Plagron and to Grow Diaries for hosting this Eternity Grow Cup. And of course, deepest thanks to all the sponsors making this magic possible:
Aptus Holland, Grove Bags, TrolMaster, ThinkGrow LEDs, Promix, Cannakan, FOG and Ziggy Papers — your support grows more than plants, it grows stories, friendships, and futures.
P.S.
Before we wrap it up for the week, I just wanted to add a note about one of the biggest tasks we tackled — the defoliation. It was time. The girls had grown into a dense jungle of love and leaf, and it was clear they needed more room to breathe. More airflow, more light. More photons reaching deep into their hearts. That’s what we aim for.
So, leaf by leaf, gently, carefully — with respect for each one — I went in. Four, maybe five hours of focused silence (with my jam on the back ground), removing what needed to be removed. It was a lot. And as I moved through them, it became clear: the Scrog net, too, had done its part. But now? It was just in the way. These girls are so compact, so thick, so full of presence and power — they can hold themselves.
So, I took the bold move. I freed them. No more net. Just them, as they are, open to the light and thriving on their own terms. It was a beautiful moment — one I wanted to share with you here, just quietly, before we say goodbye for now.
🌬️ Until next week — stay warm, stay growing, and let the fog roll gently through your garden.
Genetics - Runtz https://www.zamnesia.com/6000-zamnesia-seeds-runtz-feminized.html
Nutrients - Plagron https://plagron.com/en/hobby
- Aptus Holland https://aptus-holland.com/
Controls - Trol Master https://www.trolmaster.eu/
LED - https://www.futureofgrow.com/en
LED - https://www.thinkgrowled.com
Soil - https://www.promixgardening.com/en
Germination - Cannakan https://cannakan.com/?srsltid=AfmBOopXr-inLXajXu3QFgKXCXXos4F1oEvScjMKIB5MR5dk8-GJ-F49
DOGDOCTOR 15% off
Smoking Papers - https://ziggioriginal.com/
Terpene saver - https://grovebags.com/
As always thank you all for stopping by, for the love and for it all , this journey of mine wold just not be the same without you guys, the love and support is very much appreciloved and i fell honored with you all in my life
With true love comes happiness Always believe in your self and always do things expecting nothing and with an open heart , be a giver and the universe will give back to you in ways you could not even imagine so
As always, this is shared for educational purposes, aiming to spread understanding and appreciation for this plant. The journey with nature is one of discovery, creativity, and respect. Let’s celebrate it responsibly and continue to learn and grow together!
Growers Love To you All 💚
#EternityGrowCup #RuntzHunt #GrowersLove #CannabisCommunity #AptusHolland #ProMixSoil #TrolMaster #Zamnesia #Plagron #ZiggiPapers #Grovebags

Likes
3
Share


@dushi_genetics
Follow
Plants are happy, one more week before switching to flowering stage.


Likes
2
Share


@ExterminatorX
Follow
I've been letting her grow. She reached the highest point under the lamp inside the tent which was 110cm, I'm hoping her flowering boots up and she has enough daylight everyday to create energy.
I use Bloom as the PK Feeding nutrient. I have to water her EVERYDAY btw it's strange how dry her dirt becomes during the day and over night,.
Water and PK And 10-14 daylight. Water at 6.5ph

Likes
8
Share


@planties
Follow
31.05 / Day 49 - Adding 0,5ml Top-Max 🥦
This week the weather is good enough to put them outside on the balcony at daytime! ☀️ Plant #1 has started developing orange pistils and the buds are getting denser. #2 is not quite there yet :>
--------
Comparing to other growers' progresses I guess I'll harvest after week 12 for the best results. Plant #2 might need some more time tho we'll see. Patience is key, definitely 👌
Likes
15
Share


@MrJones
Follow
MrJones Ztrawberriez Auto
🍓╰⊰🍓´🍓⊱╮🍓╰⊰🍓´🍓⊱╮🍓╰⊰🍓´🍓⊱╮🍓╰⊰🍓´🍓⊱╮🍓
💧 Feeding - Using Gaia Green Grow / Bloom and Compost Teas
🍃Training / LST-Defoliation-Topping TBA
🕷️ IPM - Will be using Green Cleaner" 1 OZ per Gallon, and CannControl from Mammoth alternating between products each month for Integrated Pest
🍓╰⊰🍓´🍓⊱╮🍓╰⊰🍓´🍓⊱╮🍓╰⊰🍓´🍓⊱╮🍓╰⊰🍓´🍓⊱╮🍓
▶️Sunday 10.29.23 - Going to leave the light cycle alone for another week, these ladies are blowing up pretty well, don't want to mess with the MoJo :)
🍓╰⊰🍓´🍓⊱╮🍓╰⊰🍓´🍓⊱╮🍓╰⊰🍓´🍓⊱╮🍓╰⊰🍓´🍓⊱╮🍓
▶️Bud Description Ztrawberriez Auto produces long and fat buds with a beautiful light green shade with oftentimes purplish hues and a thick layer of resin that starts at the top of the flowers and continues all the way to the tip of the sugar leaves. It’s the typical bud structure you would expect from hybrid varieties topped with an explosion of fruity terps that’ll hit you in the face with a blend of creamy, fruity, and sweet aromas as soon as you break the buds open. Definitely a must for terp heads and extractors looking for exaggerated flavors and aromas
🍓╰⊰🍓´🍓⊱╮🍓╰⊰🍓´🍓⊱╮🍓╰⊰🍓´🍓⊱╮🍓╰⊰🍓´🍓⊱╮🍓
▶️SOIL MIX
40% ProMix HP
40% Coco Coir 70/30
15% Worm Castings
05% Malibu Compost
🍓╰⊰🍓´🍓⊱╮🍓╰⊰🍓´🍓⊱╮🍓╰⊰🍓´🍓⊱╮🍓╰⊰🍓´🍓⊱╮🍓
Likes
20
Share


@eldruida_lamota
Follow
Que pasa familia, vamos a añadir la novena semana de floración de estas Apple Fritter de RoyalQueenSeeds, empezamos con la temperatura que la tenemos entre los 21/25 grados, la humedad está entorno al 50%, el ph está en 6.2 , el foco actualmente lo tengo encendido 12 horas y la potencia es al 100% de lo que da el foco.
Las flores estan poniéndose bien guapas
Veremos como acaban estas semanas, ya les retiré el alimento y llevan una semana solo con agua.
Mars hydro:
Code discount: EL420
https://www.mars-hydro.com/
Agrobeta:
https://www.agrobeta.com/agrobetatiendaonline/36-abonos-canamo
Hasta aquí todo, Buenos humos 💨💨💨
Likes
2
Share


@Hydrokomahfarms
Follow
Very easy first grow very happy with results best weed I ever smoked and I can only get better from here so I'm excited to keep seeing more and more progress

Likes
7
Share


@Hommero75
Follow
Seed was in a cup with water for 72hrs when germinated.
Seed spent 2 days in soil before sprouted
Likes
1
Share

@Olduffybastard88
Follow
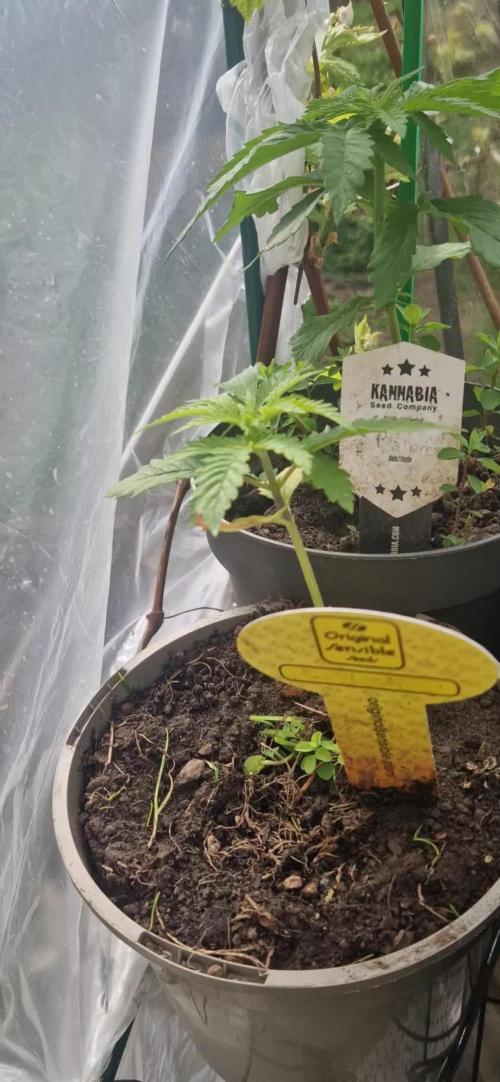
Greenhouse is reallt heating up goong select some for outdoor growing some for inside tbe mars hydro tent and light and some to finsh in the greenhouse so we will have the best of all worlds and will see witch ones prefrom best

Likes
3
Share

@UDUDUDUDU
Follow
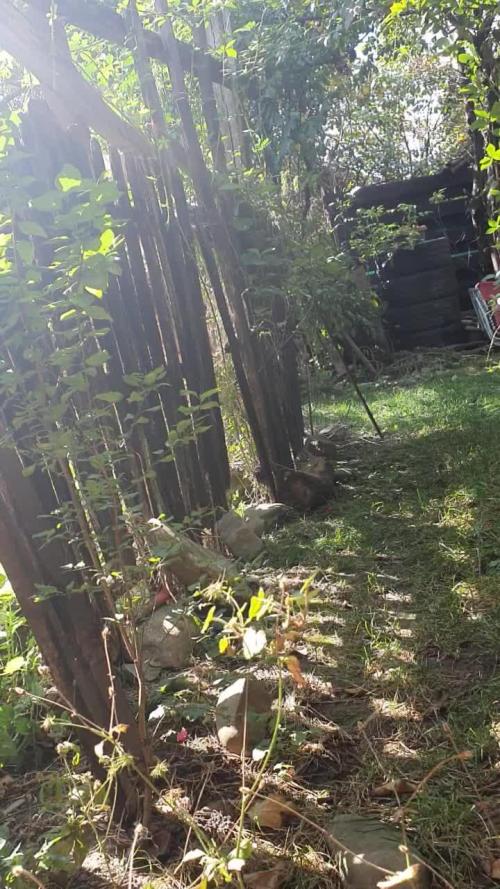
Release the cloNez.
To haVe a strong mother to clone from iz da dream of every stoner ? How many shrimp do u have to eat till ur skin will stink ?? Oooo Flamingo ! ?

Likes
13
Share


@Hawkbo
Follow
This is what's left in the tent, the gelato is comin down tonight and maybe the 2 smaller lemon aks maybe tmm. The cream cookies and other lemon AK will come down soon too and then I can get some pics. The pineapple and blue dream get 1 more flush


Likes
4
Share


@DeepRootsGrowTrees
Follow
CHERRY 🍒 COLA by FASTBUDS
WEEK #3 June 15th-22nd
Week #2 Veg
This week she's doing great outside no issues to report this week. She's made the transition to outside effortlessly.
Likes
2
Share


@Ninjabuds
Follow
Man, that Skunk Apple runtz plant is giving me some trouble. It's still really small and hasn't grown much at all. I think I might've messed up a little because the leaves are looking kinda rough. Hopefully it can bounce back.
Well, it's Christmas again. This year feels a little different, though. Maybe it's the snow blanketing everything, or the way the tree lights up the whole living room. Either way, it's cozy and warm, even when it's freezing outside. I'm really looking forward to seeing what Santa brings. I hope I get that new video game I've been wanting. But most of all, I can't wait to spend time with my family. We always have so much fun
This past week was a good one for the plants. They started the first week of their stretch, and they've already grown a decent amount. I can really see them filling out. It's cool to watch them grow so fast. I can't wait to see how big they get by the end
I always get a little worried at this stage, like they're not gonna get as big as I want them to. But then I remember how they always end up surprising me. By the end, they're always perfect.
Likes
8
Share

@Rangaku
Follow
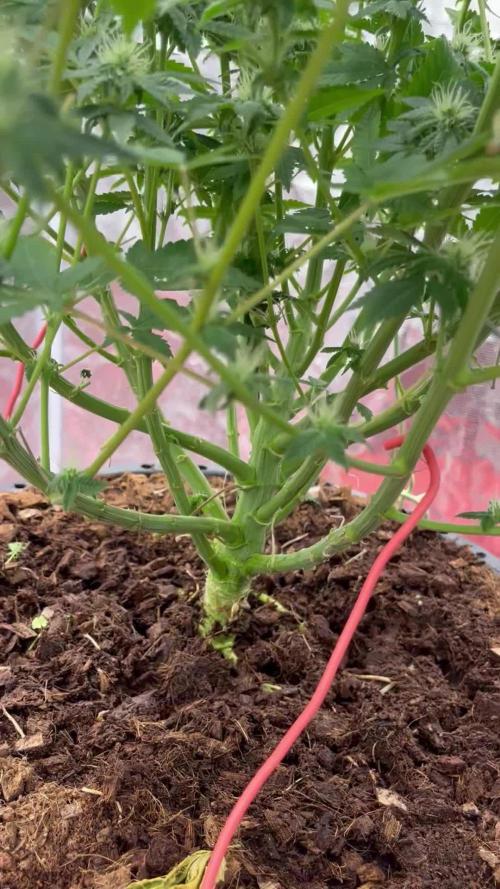
Permanent Bluez is well into flower now , smelling sweet and starting to get sticky. Love the shape she’s taking , multiple bud sites all looking healthy and chunky . I’ll keep tightening the tie wire and giving her room to chunk up as she naturally wants to . Sit back and enjoy the ride over the next month or so .


