By continuing to use the website or clicking Accept you consent to our cookies and personal data policy and confirm that you are at least 18 year old. For details please see Privacy Policy and Terms
Accept
Likes
Comments
Share


@Fuzzel
Follow
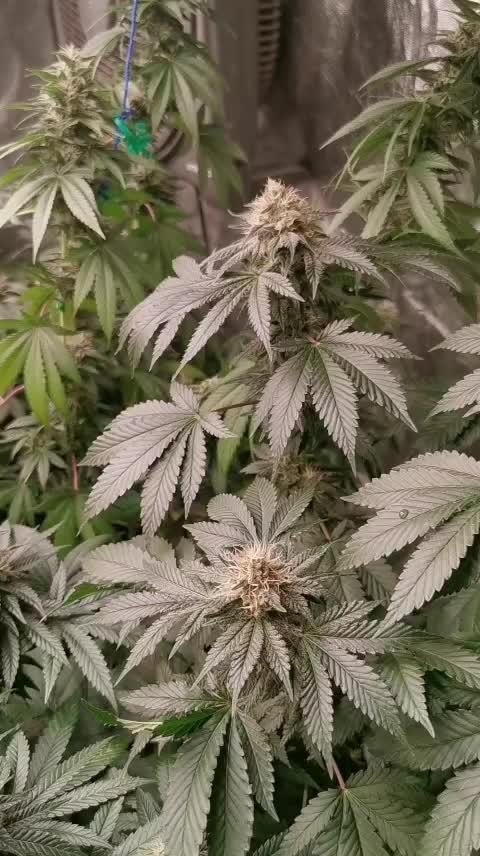
#3 getting harvested soon. Deofliated sixty-some leaves from green to yellow and then went into the dark for 48h.
#2 is still gonna take a few weeks, Lots of nutes to slow down yellowing of the leaves. She will probably end up quite fluffy
Likes
2
Share


@C_More_Budz
Follow
Resin and terpenes Production has ramped up a bit other than that everything is on cruise control.


Likes
18
Share


@TheCannaProphet
Follow
~ FASTBUDS TESTER #2204 ~
Well friends, here we go on another 'canna-venture' together!
The grow room has had a complete remodel and some upgrades done to it including brand spanking new 4x8 and 4x4 tents and a Trolmaster Hydro X controller along with a new Control Panel.
This tester strain is one of six tester strains that FastBuds has graciously provided me with and I'm looking forward to seeing what this girl has to offer when she's grown to her full potential!
One drawback of 'testers' is I have little to no information on it other than its number and that it's an autoflower... 🤪 But, it's ALWAYS a blast growing them for me because not knowing a lot allows me to just concentrate on the essentials: Light, Environment, Water, Nutrients and possibly a bit of LST... not complicated, just basics like keeping a constant temperature and RH in the tent at a level that gives a good VPD, watering when almost dry and maintaining proper light levels according to their stage of growth.
____________________________________________________________________________________________________________________________________________________________________________________________________________________________________________________________________________________________________________________________________________________________________________________________________________________________________________________
~THE SETUP~
~Initially seeds were lightly scuffed, then soaked for 3 hours in 78℉ distilled water after which they were transferred to moist paper towels laid out in a Jiffy Pellet plastic starter tray with lid. Underneath the tray was placed a Vivosun Heat Mat with Controller that was set to 78℉ where they stayed until their tap roots emerged.
~Planted into Jiffy Peat Pellets that were hydrated with distilled water warmed to 78℉ with a 7.0 ph.
~Once roots emerge from the Jiffy Pellet they're transferred to their fabric pots.
~Grown 100% organic in a 4g Gronest fabric pot and a 3g fabric pot by Wraxly filled with Mother Earth 70/30 Coco/Perlite medium and initially amended with Dr. Earth 4-4-4 / Earthworm Castings / Dr. Earth Flower Girl 3-9-4 and Coast of Maine Stonington Blend Organic Plant Food 5-2-4.
~19/5 light cycle for the entire run with supplemental UVA added during flower. Lights are controlled by a Trolmaster Hydro X controller set for a 15min Sunrise/Sunset simulation.
~Top dressing every 3-4 weeks with slow release dry amendments and Earthworm castings.
~Straight water ph'd @ 6.2-6.8 when needed and bi-weekly Compost Tea's.
____________________________________________________________________________________________________________________________________________________________________________________________________________________________________________________________________________________________________________________________________________________________________________________________________________________________________________________
Weekly Updates:
12/29- Here we go into Week Four of Vegetation but I'm somewhat relieved that they haven't started flowering yet as they are only 5" & 6" respectively so some more time to grow is a good thing right now! It's been a month since these pretty ladies popped out of the ground and other than being short, they are both looking perfect!
The #1's 4g Gronest pot was heavy when lifted as was the #2's 3g Wraxly pot and they both looked happy, so I skipped watering today and will check them tomorrow morning after the lights come on.
Since being topped for the first time a week ago, they both have two new shoots that are emerging and have new growth sprouting out all over with extremely tight node spacing making them definitely Indica dominate, and will most likely result in very short stocky cultivars from this strain which would be ideal for someone with limited grow space. 😎💚
Both of these girls are extremely healthy with excellent vigor and color and I can't wait to see if they get any taller and for them to begin flowering! 🧐💚
12/31- Today was a 'dry day and all I did was refill the humidifier and some canopy maintenance, tucking shade leaves and gently bending branches.
It's been a little over four weeks since they were planted in their amended medium and it's time to give their microbes a good feed so they can continue to provide them with all the macro and micro nutrients they need so, yesterday they got a good watering with 0.5g of de-chlorinated water with GreenGro's Veg, Flower, Green Aminos, Natures Brix and Granular Myco added to it @ 1.5 tsp/g and then ph'd to 6.4 @ 73℉.
Still no signs of flowering on either tester but I anticipate it will be any day now!
01/02- Yesterday I finally saw signs of flowering on the #1 tester! The #2 is still a no-show but as short as she is it's probably for the best!
Today I watered them from the bottom with 0.5g of de-chlorinated water to which I added 3ml/g of Earth Juice OilyCann cal-mag to prevent any Cal-Mag issues they may encounter before they arrive.
I also have the HLG 650R set 36" above canopy and it's set at 60% power which is being controlled by a Trolmaster HydroX controller. The tent environment is on point with temp's running 70 when the light's off and 74℉ with the light on. I'm keeping the RH at 55-60% right now but will drop it as flowering progresses. Finally, I've been keeping the VPD in the tent running 0.85 - 1.05 which I'm happy with!
01/04- They have both been doing really well getting watered every other day and yesterday they received 0.5g each of de-chlorinated water with 3ml/g of Fish Head Farms Fish Sh!t Soil Conditioner which was then ph'd to 6.3 @ 72℉.
The #1 tester is on her fourth day of flower and looking great! Because she's so bushy and was getting choked with growth, I removed a few shade leaves to open her up and get some light penetration down into her canopy.
The #2 tester has yet to show any signs of going into flower which I won't be concerned with unless it persists for another week or so, at which point I'll make a decision on how to deal with her.
😎💚 Thank you for checking out my passion in life! Please visit as often as you wish and I hope you enjoy this journey as much as I know I will! Grow Strong! 💪😎🤙
Likes
15
Share


@YOZYY
Follow
Moved to tent and topped with some low stress training as well nothing crazy so far just waiting for the bottom nods to stretch out for more training. Feeding is just Ro water ph'd between 6.5 to 7.0. Will feed nutrients if I see a deficiency so maybe in 2 weeks.
Likes
6
Share


@Headies
Follow
So we got some very bushy plants. I topped them three times and trained them sideways and the plant focused it's energy on growing out sideways.
Likes
77
Share


@Ukfarmer420
Follow
Hi guys, so I chopped the little gelatocake 3 days ago and its hanging in 55% humidity and 15°f, I have taken a sample bud, you no how it is lol.
Sherbert mimosa are struggling along and going purple 💜 bit cold here lately, starting to fatten up a bit now, the baby photos are growing fast but need repoting.
Happy growing guys 💜💚💪

Processing
Likes
22
Share


@CenturionGrower
Follow
26/07/20 (Sunday)
Plants were starting to exhibit signs of light burn so I switched back to the 75W bulb. SVG never seemed to recover from having it's cotyledon damaged so I decided to take a risk and fed all of the seedlings 20-20-20 nutrients except the D.R. which I thought would've suffered shock, so I just watered it.
27/07/20
Decided to mist the plants with a homemade pesticide mix today because they're readying to be introduced as full time outdoor plants in a week or two so their sun basks are getting longer.
28/07/20
Noticed what looks like new growth from the first true leaves of the SVG, fingers crossed it's making progress.
29/07/20
The new growth from the SVG has split into two on both sides leading me to theorize that it's abandoned it's main stem (for now at least) and started two new stems. All other plants are working on new nodes and are showing a steady growth of .5cm a day. I've decided to revert to the 100W bulb because I believe I've misdiagnosed the light burn.
30/07/20
Today I left them outside for their longest sunbask to this point; 7 of their 18 total hours was provided by sunlight. The SVG now has two new 3-leaf true leaves on each new stem confirming my theory. Also starting to see signs of a minor mite problem on one of the leaves of my TT plant (Though it's new growth that wasn't sprayed with my homemade concoction.)
31/07/20
New growth has already begun sprouting from between the new true leaves of the SVG with no visible progress on the 'abandoned' main stem. Also had a power outage for 2 of the plants 18 hours.
01/08/20
Today the plants again stayed out in the sun for longer than previously making 8 hours in direct sunlight. I've decided to keep them in the grow tent for a further week because when I went to retrieve them the Jam was blown down flat by winds and had started to grow bent towards the light, so I doubt it's stem is ready for that daily beating. I raised the soil level and massaged it back into shape and it seems to be back on track. The D.R. is slowly beginning to bounce back from being stunted in the seedling tray and from it's third node (from the bottom up) of 3 leaf true leaves has turned into 5 leaf leaves. The SVG has made a major recovery and seems to be on it's way to even surpassing the others by the end of the week. The TT is officially the sturdiest of the younger seedlings and it's growing right behind the Jam in terms of node development. All in all this week was an overall success growth wise and I'm looking forward even more to week 3.
Likes
13
Share


@gr3g4l
Follow
No me pude estar de hacer una nueva poda de bajos, tercer y cuarto nudo a todas.
Sigo batallando contra la araña roja :-( No hay manera de deshacerme de ella al 100% y cuando me sube un poco las temperaturas vuelven a salir. También podria haber ayudado porque programé mal el temporizador del ventilador hace un par de dias y estubo parado por la noche y coincidió también durante unas horitas mientras aun estaba encendido el ATS. , esas horas la temp habria subido hasta los 29 -30ªC.
Volví a aplicarles otra con Solabiol por segunda vez, por arriba y por el en envés de las hojas , todo bién mojado.
Como se puede ver en alguna fofto del seguimiento, en la semana 7 por ejemplo, antes tenia un tablón de madera con muchos abujeros para facilitar que suba el calorcito de los calefactores pero no las tenia todas al ser madera, me temo que al ser madera era más difícil de desinfectar bién el armario y obté por poner unos soportes elevadores metálicos con sus abujeritos.
Creo que empiezo a estar enamorado del ATSPro , deberia esperar a que termine la flora para no tirar cohetes si pero por lo que voy viendo me está ganado mucho. Llevaba tiempo cultivando con COBs , anteriormente con LEC y anteriormente al LEC con PHS y esto es en diferencia lo más cómodo y que mejor reparte la luz y por lo que voy observando una mejor o mayor penetración lumíca , creo que esta iluminaria me permitirá que los cogollos arranquen de más abajo. toquemos madera.
Esta semana empecé con el Delta 9 en el riego, las veces anteriores habian sido via foliar.
terminada la semana creo que ya podemos asegurar que variedad es más vigorosa y cual predomina más el feno índico. Como puede observarse las Animal cokies ganan en altura con una distancia internudal mayor. Las OgKush todo al contrario, bajitas y una distancia internudal menor.
Por lo que hace a la altura de las plantas las OGK rondarian entre los 70 ctms y las más altas que vendrian a ser la Animal C unos 90ctms. áprox.

Likes
9
Share


@andrewkeed
Follow
Everything goin very smooth. will update soon on other changes that may come up


Likes
48
Share

@TheCannaProphet
Follow
~ WEDDING CHEESECAKE FAST FLOWER by FastBuds ~
Well fam, here we go again with another epic strain from FastBuds Fast Flowering stable. After having such tremendous success growing their Gorilla Cookies Fast Flower outdoors last year, I've decided to run another of their fast flowering strains outdoors this year... Wedding Cheesecake Fast Flower!
The best description of this awesome cultivar comes directly from my friends at FastBuds which is as follows:
"A delight for the mind and body: Wedding Cheesecake FF (Fast-Flowering) is a delicious strain that offers XXL yields in a 7-8 weeks flowering cycle. This terpene powerhouse produces loads and loads of mouth-watering vanilla-creamy-cookie-scented terps with hints of citrus and cinnamon. In addition to its delicious aromas, this variety grows very well in both indoor and outdoor setups, yielding up to 650 g/m2 without extra maintenance, making it the ideal strain for beginners as it allows you to maximize yields while minimizing work. This super-fast feminized photoperiod version offers upbeat and energetic yet deeply relaxing effects that are perfect for consumers looking for a heavily focused, motivating, and creative high. It’s the ideal strain for those needing that extra energy boost to start a busy day on the right foot.
Wedding Cheesecake FF boasts chunky, large-sized buds with a thick layer of silvery-white resin and bright orange hairs scattered all over: that just screams ‘quality’. The lime-green flowers sparkle with an array of hues ranging from dark to light green, to magenta and purple, and reek of a delicious aroma that’ll remind you of fresh store-bought cheesecake.
This is an XXL hybrid that grows extremely tall in height, reaching up to 3m with one huge main cola and multiple long side branches that can withstand enormous yields of up to 650 g/m2 with ease. Wedding Cheesecake FF is extremely resilient to the elements and can be grown in almost every climate as long as you’ve got the space and basics covered, making her an excellent choice for those looking for large-scale harvests with a quick turnaround time without much effort."
________________________________________________________________________________________________________________________________________________________________________________________________________________________________________________________________________________________________________________________
The Setup:
This is going to be an outdoor grow, but I have started the Wedding Cheesecake FF indoors as our weather is still too cold to put her outside (nighttime temp's dipping regularly into the 30's℉).
The plan is simple... let her grow inside under a 19/5 light schedule until the nighttime temperatures stay above the mid 40's℉, at which point she'll be moved outside and transplanted into the soil which I have already setup and inoculated with beneficial microbes, and then let the fun begin!🤪💚
________________________________________________________________________________________________________________________________________________________________________________________________________________________________________________________________________________________________________________________
Weekly Updates:
5/3- Week Six is here and the Wedding Cheesecake Fast Flower by FastBuds is on a mission!
Yesterday, I spread straw over the entire mound of soil and surrounding area to help keep the soil from drying out so fast and the watered with well water through a hose.
5/5- I'm noticing that something has taken a likening to the plant and is eating holes in her shade leaves. I went ahead and sprayed her down with Neem oil and will keep an eye out to try and determine what/who the culprit is.
5/7- Rain showers today handled the watering duties and all I did was to add some straw to a couple of bare spots on the mound.
5/9- I'm not seeing much in the way of any new damage to the leaves of the Wedding Cheesecake FF and I am continuing with the Neem oil preventative along with spreading some powdered cayenne pepper around the base of the plant to take care of any slugs that may think of trying a taste of cheesecake!
There's another week gone by for this lady. The weather is getting better by the week and her growth is responding to it. The next weeks should be fun! Stay Blessed!
Thank you for checking out my diary, your positive comments and support make it all worthwhile! 💚Growers Love!💚😎🙏
Likes
13
Share


@HeavyHead
Follow
Started giving full strength nutrients and added big bud and bud candy at this point. Dropped my room temperature slightly. Been having a bit of an issue with room humidity and I’m too cheap to buy another dehumidifier so I added a second fan to keep everything dry. Starting to get a nice purple on one of the plants too :)
Also have some orange sherbet autos going in the back of check my other diaries :)
Likes
42
Share


@DogDoctorOfficial
Follow
Oh man, this lavender auto is really starting to come to life! I defoliated it a bit and it didn't even flinch. That's a true sign of a tough plant, and I love it. It's like having a little green warrior in my grow room.
And let's talk about Aptus, my nutrient sponsor. I swear by their products, they are the real deal. I've been following their feeding schedule and it's like the plant is just drinking it up. It's like giving a thirsty person a glass of water on a hot day - they just chug it down!
Now that we're in the first week of flowering, I'm getting excited to see those buds start to really form. It's like watching a baby grow up right in front of my eyes. And who knows, maybe with all that lavender, the plant will make some moon-inspired magic happen. Hey, I hear there's a blue moon coming up - maybe we'll get some extra magic out of this lavender auto!
As always thank you all for stopping by and for supporting me on this journey, i am super passion about growing and fell blessed to have you all with me on this new journey <3 <3 <3
Genetics -Seeds Mafia Lavender Automatic
Light - LUMATEK ZEUS 465 COMPACT PRO
Food - APTUS HOLLAND
All info and full product details can be find in can find @
https://seedsmafia.com
https://aptus-holland.com/
https://autopot.co.uk/
https://lumatek-lighting.com/
<3 <3 <3 Growers love to you all <3 <3 <3
Auto Lavender Feminized is a very popular type of cannabis, whose strong therapeutic effects are highly appreciated. It has a flowering period of approximately 9-10 weeks and can be grown both indoors and outdoors. It is a resistant variety which can be cared for easily.
This variety is mostly appreciated because it produces strong, durable and resistant plants. Its branches and stem usually grow vertically rather than horizontally. It reaches heights of 120 cm and the harvests amount to 90 grams/plant. In addition, it contains high levels of THC- up to 20%.
As their name suggests, the plants that grow from Auto Lavender Feminized seeds have a smell and taste similar to those of lavender, also comprising mint and rosemary tones. This is a variety of cannabis that is usually appreciated for its pleasant fragrance and high productivity, seeing as its buds and stem produce an impressive quantity of resin. If you’re looking for another kind of feminized, autoflowering variety, Auto Lavender Feminized will not disappoint you for sure!
auto Lavender Feminized is a feminized, autoflowering variety, obtained by crossing the Lavender and Lowryder 2 species. The plants that grow from this variety have a very specific structure: they are tall, vigorous, and have large branches. At the end of the flowering period, the plants acquire an orange-gold shade


Likes
10
Share


Likes
6
Share


@Moss420
Follow
Got hydro halos setup because I need to be able to go away for work for a few nights, Was actually really easy to setup and works awesome, I got most the parts plus all my nutes from my local hydro store. I'm using cocoforcannabis.com as a guide for most of this grow and his site includes details on how to setup an auto watering system.
At this point I'm still using Professors Go Green for cal-mag and following the GP3 feed chart to mix nutes to the right ratio and then diluting with cal-mag water to target EC (300-400EC for wk 1).
Some of the plants had clawing leaves and were really dark green - I read that this could be caused by nitrogen toxicity and I'm concerned this may be due to the Go Green as it seems to be intended as more of a deficiency fix rather than a regular use cal-mag supplement for coco. Some of the leaves on one of the plants started getting rust spots like calcium deficiency, Canna Coco comes pre-buffered and I was adding Go Green so it had plenty, I think the likely case is that nitrogen toxicity may be blocking calcium intake also. I intend to change to Green Planets Pro-Cal which has low nitrogen and is made to work with their line of nutes.
Also we named the girls! My roommate and I were pretty baked if you can't tell...


Likes
Comments
Share

@jonnyMcKush
Follow
Neben dem normal Dünger gibt’s jetzt noch Sugar Shot und Sticky Fingers von expert

Likes
60
Share


@Drgreenthumb627
Follow
This strain grew tall and lanky, with very compact and beautiful nugs. the frost that came out is quite incredible and the fruity sweet and piney smells coming off the plant are lovely. i would definitely grow this plant again, it was easily trainable and the node spacing allowed light to penetrate deep into the canopy, maximizing my grow surface area
