


Likes
Comments
Share

@Budhunter
Follow
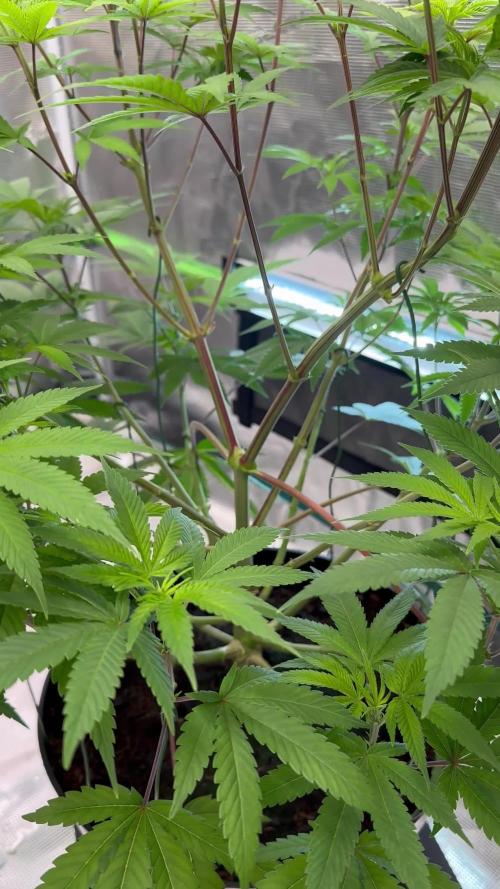
Week 1 flowering - Day 5 of flowering & Day 61 of life
Finally flowering here. It’s been 5 days on flowering, still pre flowering but finally the best is coming.
Jealousy is happy and looking healthy. Bud formation seems not that big but I am optimistic about it.
Let’s go 💪🏼🙏🏼🔥

Likes
8
Share


@Kirsten
Follow
26.12.24:
These are my 2 best plants P1 and P2 Purple Punch, they are looking great! Not sure what happened to P3.
They are in early flower/ pre-flower with the pistils clearly seen on P2. I am also hoping to tie some of the branches down to help light penetration on the lower canopies.
I have noticed light stress on my plants. I had moved the lights further away and increased the light intensity to 70%. Unfortunately that created some issues. Namely severe palour of the leaves.
To try and rectify the situation, I've dimmed the lights to about 30%, staying at the same distance, about 30 inches away. I measured the par levels, after I did this. They should a reading of anywhere between 40 and 150, at the canopy of the plants. They are all different sizes. This seems to have improved the colouring on all plants.
After this evenings watering, I will monitor recovery and increase lighting intensity again slowly. I am also using the light cycle of 21/3, so the plants have many hours more light to absorb, than for example 12/12 or 18/6.
I am pleased with the progress, considering all of my mistakes!
29.12.24:
So I finally gave LST a shot, it's probably a bit too late, however I really want to get the most of the triploid pheno, and I went a little crazy and LST'd all plants except 2, as they're too small.
I did that late last night, this afternoon I was amazed to see the plants turn their leaves back to the light source. I'm glad I overcame my fear of trying it. I'm very excited to see them adapt and progress! 😁 there are videos above with before and after of my LST process.
Thanks for checking out my diary 🍃 ✌️

Likes
48
Share


@TheCannaProphet
Follow
~ WEDDING CHEESECAKE FAST FLOWER by FastBuds ~
Well fam, here we go again with another epic strain from FastBuds Fast Flowering stable. After having such tremendous success growing their Gorilla Cookies Fast Flower outdoors last year, I've decided to run another of their fast flowering strains outdoors this year... Wedding Cheesecake Fast Flower!
The best description of this awesome cultivar comes directly from my friends at FastBuds which is as follows:
"A delight for the mind and body: Wedding Cheesecake FF (Fast-Flowering) is a delicious strain that offers XXL yields in a 7-8 weeks flowering cycle. This terpene powerhouse produces loads and loads of mouth-watering vanilla-creamy-cookie-scented terps with hints of citrus and cinnamon. In addition to its delicious aromas, this variety grows very well in both indoor and outdoor setups, yielding up to 650 g/m2 without extra maintenance, making it the ideal strain for beginners as it allows you to maximize yields while minimizing work. This super-fast feminized photoperiod version offers upbeat and energetic yet deeply relaxing effects that are perfect for consumers looking for a heavily focused, motivating, and creative high. It’s the ideal strain for those needing that extra energy boost to start a busy day on the right foot.
Wedding Cheesecake FF boasts chunky, large-sized buds with a thick layer of silvery-white resin and bright orange hairs scattered all over: that just screams ‘quality’. The lime-green flowers sparkle with an array of hues ranging from dark to light green, to magenta and purple, and reek of a delicious aroma that’ll remind you of fresh store-bought cheesecake.
This is an XXL hybrid that grows extremely tall in height, reaching up to 3m with one huge main cola and multiple long side branches that can withstand enormous yields of up to 650 g/m2 with ease. Wedding Cheesecake FF is extremely resilient to the elements and can be grown in almost every climate as long as you’ve got the space and basics covered, making her an excellent choice for those looking for large-scale harvests with a quick turnaround time without much effort."
________________________________________________________________________________________________________________________________________________________________________________________________________________________________________________________________________________________________________________________
The Setup:
This is going to be an outdoor grow, but I have started the Wedding Cheesecake FF indoors as our weather is still too cold to put her outside (nighttime temp's dipping regularly into the 30's℉).
The plan is simple... let her grow inside under a 19/5 light schedule until the nighttime temperatures stay above the mid 40's℉, at which point she'll be moved outside and transplanted into the soil which I have already setup and inoculated with beneficial microbes, and then let the fun begin!🤪💚
________________________________________________________________________________________________________________________________________________________________________________________________________________________________________________________________________________________________________________________
Weekly Updates:
6/18- Week 12 and the Wedding Cheesecake Fast Flower from FastBuds is on a mission! The amount of growth happening right now can only be described as explosive, with new shoots appearing and existing branches going crazy with growth!
6/20- Our summer is here and we're under an early heat wave this week with daytime temp's hitting the mid to upper 90's ℉ with heat indexes in the low 100's ℉... in short, IT'S FNG HOT!🔥🔥🔥
I'm watering the Wedding Cheesecake FF daily now with 5-7g of straight well water from the garden hose. I'm watering at sundown so that the water will have some time to soak down into the soil before the heat evaporates it. The coating of straw that I previously spread over the soil has helped a lot as well.
6/22- The weather continues to relentlessly bake everything outside... many thanks for a good A/C!❄️
The daily watering continues and I also went ahead and removed a bunch of foliage that was below the trellis net.
6/24- Today I top dressed the FastBuds Wedding Cheesecake FF with 2 cups each of Gaia Green 4-4-4 and 2-8-4 along with 1 cup of Down To Earth Bio-Fish 7-7-2 and 1/2g of Wiggle Worm castings. After top dressing and working the amendments in by hand I replaced the straw coating over the soil and watered them in with 5g of straight well water via garden hose as usual.
There goes another week for the Wedding Cheesecake FF and it won't be long before she begins to show signs of pre-flowering!
Thank you for checking out my diary, your positive comments and support make it all worthwhile! 💚Growers Love!💚😎🙏


Processing
Likes
4
Share


@Therbalist
Follow
Very busy have some white Dynamite seedlings started for hopefully more feminised strains. My dream is to open a seed company and become the best seed supplier! Thanks for the views. Seeds should be on eBay by tommorow (regular ones)
Likes
3
Share


@High_Grade_Dadli
Follow
Quick update I know I been MIA..diary label xmas tree got deleted after losing the mother tree(die back)and about 80 cutting(weather)
1 of the cutting which I took before from the mother that died is the mother to set 1 and 2 (29)...took some cutting off of set 1 (30) jus waiting to see how rooting goes...mother tree jus hit the 2nd week of flowering will update with pic in week 2

Likes
30
Share


@dataTwiiix
Follow
05_02: ça y est là flo. A démarrer.
Un grand merci à @xpertnutrients pour son support! Pour l'instant j'utilise que les booster et les micro nuts de la game et ça le fait 👌 nickel. Je suis impatient de faire un session avec uniquement du xpert nutrients. En tout Cas leurs additifs sont aux top!

Likes
162
Share


@Lukush
Follow
1 day off week 1 in flower 🎉🎉🎉 finnaly so happy and she is looking really happy and enjoyng the viperspectra 450...
Cant wait to se the buds coming along 🌻🌻
Hope yall enjoy and like mi beauty
If you have any questions just comment under hear and if you like click that like button 👍👍😎
Likes
12
Share


@Herbz_Unkraut
Follow
Defoiled alot of leaves underneath and some of the leaves that put shade on budsites
Also defoiled for reducing RH and increasing airflow
Likes
6
Share


@Shadow_grower89
Follow
Im goong to start a to flush one of my plants this week for 10 days the other one is a few weeks away yet

Likes
10
Share


@Fibro_Witch
Follow
This strain went so much better than last year. A lot more resin production which I'm putting down to my good ol' gallon of Molasses. Seriously. Worked so much better than the $40 flowering nutes that I used last year. So honestly, I spent like $250 on nutes and sprays last year, yet I only spent around $125 this year, no mineral salts, natural everything and I ended up with better bud. Didn't have to spend time flushing or worrying about burning plants and trying to remember what I fed when and which product I need to use next, etc. Keepin' it simple.
I also had less mold thanks to the tomato roof and also I was more diligent about caterpillars. And of course I really like the tomato cages. I mean some of the branches do rub, and they don't look the greatest in the photos (maybe I need to paint them green for next year?) But the convenience factor is high. It work out a lot better than the staking and tying I was doing last year.
I had about 25% better harvest, since last year was 2.8 oz per plant and this is 3.72 oz of dry bud. So that's a big improvement! Not to mention better quality and not just raw numbers. And last year I harvested everything, whereas this year I didn't deal with a lot of the little popcorns and gave them to the livestock.
But I gotta say that the pictures don't do her justice. She absolutely glittered in the sunlight. And I don't think the other strains will get nearly as frosty. Not to mention that distinct aroma of guailol. So intoxicating!
Cut down most of the colas Wednesday and finished lower colas Saturday. Washed as always with 1/4 cup each of baking soda and lemon juice in 5 gallons of warm water and rinsed in 5 gallon plain cold water. Hung up to dry in the upstairs of the barn with the oscillating fan (Do pardon the mess, my mother in-law is a hoarder and we need to downsize her clutter since she's safely thousands of miles away). Storing in mason jars in cabinet with 58% Boveda humidity packs. The 62's I used last year were a little too humid for long term storage so I'm trying the 58's this year.
For some reason Growdiaries isn't letting me review this strain at the top or the Big Bloom and I'm wondering if that's because I've already reviewed both? But anyway, I've gotta say that this bud is higher quality than what I produced last year. It's stronger and you really feel like you're wrapped in a warm blanket with this strain. I also got a little bit of a headband with what I sampled, so we'll see what she's like after she cures a bit. It's a wonderful comfort at the end of a long day. About an hour of being happy and relaxed and then after that it's all you can do to keep your eyes open.
I really enjoy making caramels with this strain. It's so easy to just grab one out of the freezer, and that way I sleep all night😴
1 cup Cannabutter
2 cups brown sugar
1 can sweetened condensed milk
Melt butter with sugar on stovetop over low heat until combined. Add milk and gradually increase heat while stirring. You want to bring the mixture to 245F or 118C but you want to do so slowly so that your don't burn the mixture, and you want to shut it off immediately once you get there. You can pour it into molds, little paper cups or I pour it onto a parchment liked cookie sheet. Feel free to sprinkle a little finishing salt on top if you like salted caramels. Then I put them into the freezer to harden before wrapping. I wrap them on squares of parchment about 4"x4" and put them in a freezer bag. If cutting, I usually get 40 caramels that weigh 20-22 grams each. The most important thing is to be gentle and stir often. Don't scorch it! Otherwise this recipe is pretty darn easy, you just need a candy thermometer.

Likes
19
Share


@ArtisticGrown
Follow
Why hello, if you are still here thank you for the love & support. I cant believe we are already on the start to week 3 of bloom!
This lady here has been streching the last 2 weeks! During the first week of bloom I gave her nutrients with both bloom a & b as well with bud candy! Then water in betwen watering. Shes been needing watered everyday in this 10 Gallon pot! So im very careful with the nutrients and keeping a close eye on her! Ive also used dried coconut powder with irrarated, ph balanced water. To help the roots absorb the nutrients and really up take!
Im beyond ready to see what week 3 brings us! Ive been behind on defoilation only taking about 3 to 5 leafs a day just to try to get other coals light!
If you have any question feel free to ask! Much lovee lets go guava!!!
Likes
6
Share


@SecretC8keSociety
Follow
Today 7-23-23 will marked Day 57. Wedding Glue according to the breeder source goes up to Days 63-70 from seed to harvest. With that being said I am taking it up to 10 weeks -> will use Carboflush. Maybe will go another week flushing depending how the girls looking. I will continue to use 6.5 PH water until Harvest Day.
Used Beastie Bloomz on Week 7 & 8 . On week 9 attempting to use Cha Ching but will have to wait till Sunday get here. The smell is kicking sweet and earthy … low and a hint nothing too crazy. Not strong yet.
Beginning of Bloom/Flower I’ve been adding 2ml of Bud Candy and Big Bud. Per 2 gallons.
Stay Green and Uplift Growmies ! 😁
Likes
Comments
Share


@Anditsch
Follow
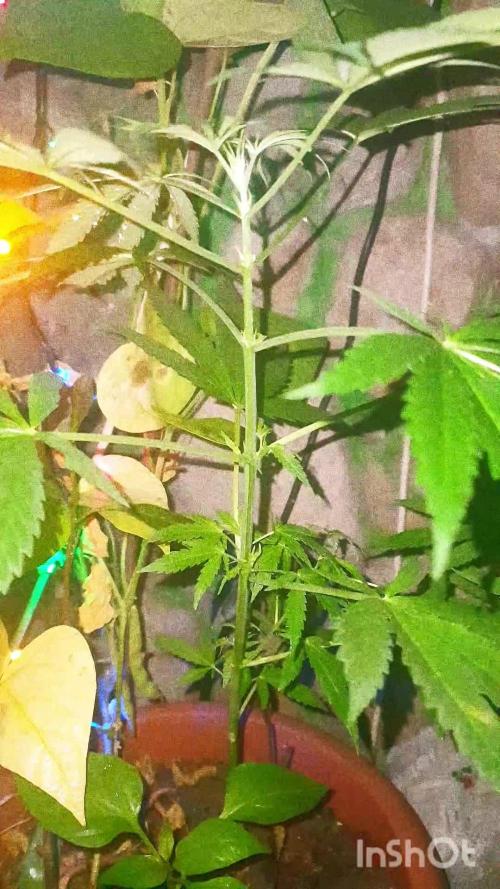
Doing Great :) Looks Pretty, when it rains i put her on a big window.

Likes
Comments
Share


@Anon73
Follow
I started topping the plants to enhance branch growth to increase tops.
The weather has been decent but hazy from the Canadian wildfires.
Growth is vigorous.


Processing
Likes
8
Share


@Reaper
Follow
march 10: start of week 8 (pictures)
the video of this week was from day 55
Likes
12
Share


@Drtomb
Follow
This is the final week these girls have to get there tan on in the flower tent. Next weekend is harvest. I've been running straight water for the last 3 days. Will continue the course for a total of 7 days followed by a couple days of nothing to allow the roots to dry.


