Likes
Comments
Share
@Terpyboyz
Follow
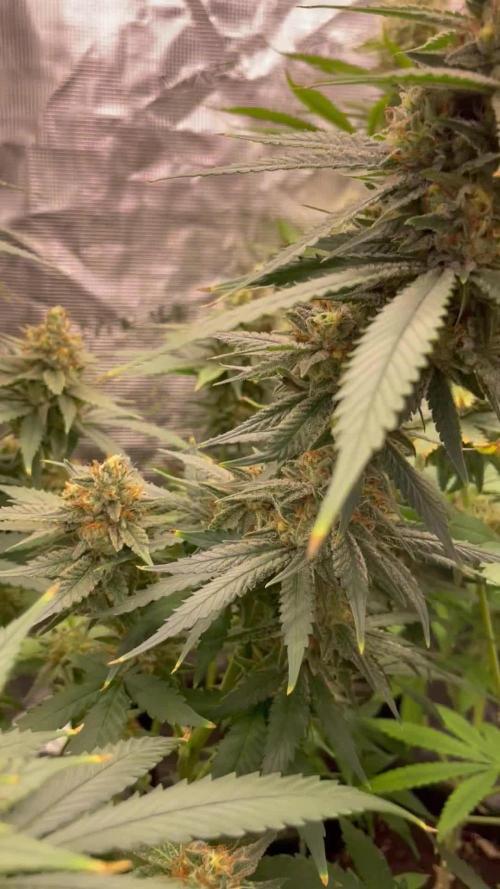
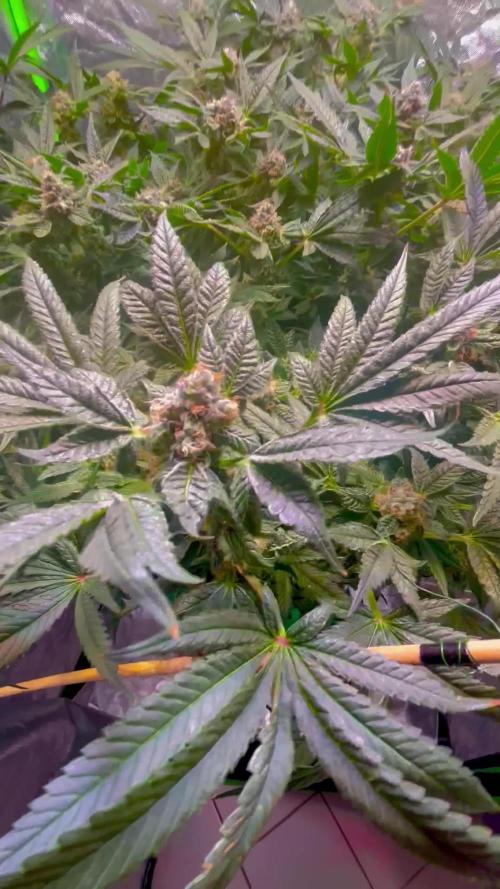
This grow should be coming to an end next 2 weeks or so some are looking to be in the last stages, only issue is having multiple strains is strains finishing at diff times. There’s one exodus cheese that looks like she’s going to go 10/11 weeks but she’ll be cut well before that to start a new batch. There’s 3 clones that were taken 1 being a big Buddha blue cheese that absolutely reeks of tangie/Clementine terps with a slight sour cheesey smell. This is getting revegged and cloned for the next run. Ripper seeds - this is another strain I’m going to try to reveg as this is another keeper I should have taken cuts. Platinum x harachata - 2 different pheno / one with rock solid nugs other is more Sativa.
Likes
49
Share
Coming along nicely now apart from alittle cock up yesterday where I accidentally topped her while trying too lst but I have managed too tape the stem in place so I am hoping my little cock up will force the lower branches too shoot upwards while the broken stem heals , This week I had too change my lighting too 600 true watts of kingbo dual optical LED range due too the temps getting closer too 30c than I would like , and by doing so I have now got a constant temp of 27c lights on and 18c lights out, Update on day 4 or week 3 , My little cock up snapping the main stem while trying to lst the tape seems too have really don't the trick , and although snapping the main stem is not ideal lol , It seems I've managed too top this plant and still get too keep the top , the leaves all look fresh and healthy and feed so I will leave the tape on there for two weeks and then try and remove it as all I had too hand was selotape lol The breakage really do not seemed too affect the top 2 nodes at all apart from trigger the lower plant too stretch out , as this break was bad , like hanging on by a thread bad , so really shocked it took too the repair so easily , and as always I had just been leaching the soil with a single feed that lasts them 7 days , my set up is completely automated and I only go too the grow space once a week but I have a WiFi cam inside the grow space so I can check the temps and how dry the pots are just incase I need too increase the feeding , but too be fair these autos seem too have a mad feed at week 7 and 8 and then drink one feed per week , keeping it simple has helped I think as the plants seem too love it , and I don't need too do anything apart from check the camera , And that's just the way I like it , I pay special attention too the temps in my grow space and a calculator in hand for the nutrients , Other than that I leave them alone too do what they do , I will take some end of week 3 pics over the weekend at some point it's abit of a drive so once a week suits me down too the ground , :) Update on day 5 of week 3 well as you can see from the photos this week has had a huge raise in production , the breakage I did too the main stem has completely healed it's self and the plant has bushed right out at the bottom and top of the plant where it broke , So all in all my little cock up has actually helped the plant grow larger , I today gave them a smaller defoliation basically anything covering a branch that could not be tucked under it I removed , This is too get as much light too these spots as possible too get them too develop before flowering starts , But so far so good , temps are good and no nutrient burns on any of the plants , and the results from day one / first feed on green buzz nutrients too this photo today day 5 is dramatic , the photo of all four was before defoliation , but the defoliation has just shown how busy they have this week and the bud sites on this things already is crazy , my next plan this week is too put the net in there and space out all of the branches too give the best spacing between the breaches
Likes
3
Share
@YOZYY
Follow
Was really easy grew very fast and was easy to train I could have did a better job but that was on me got a little lazy but it was mostly taking care of itself.
Likes
24
Share
@Hawkbo
Follow
Everything is healthy as it could be right now. The heater made such a big difference I couldn't be happier with how these are growing at this point hopefully it keeps up. Been removing fan leaves here and there but I'm trying to hold off until day 21 and I might give them all a pretty heavy leaf strip. I read something saying defoliate heavy on day 21 and 42 to increase yields so I might give that a shot. These lights are the real deal I got a meter and even tho I barely know how to read it I'm getting much better canopy penetration and the flexibility of having 4 separate units instead of 2 is going to come in handy. Soon I will put all the shorter plants on one side and tall on the other and adjust the lights accordingly. If anyone is interested in these lights or a tent or green buzz liquids or rain science grow bags you can use the code bangdang for 10%. Pretty much everything I use will be 10% off with the code so if you want to grow the bangdang use the code. This Corona virus has hit around here and I just want to remind everyone again to do their part and try to stay out of crowded spaces, wash your hands and take care of eachother. It's a worldwide pandemic everyone can relate to and the best way to beat it with the least possible damage seems to be to isolate yourself since younger people can carry it without any symptoms. It can be easy to transmit it to your parents or grandparents that might have a weaker immune system. Better safe than sorry. I need the NBA back asap too The code ' bangdang ' will get you 10% off at the follow companies. @rainscience_growbags @growlightscience.led *NEW @greenbuzzliquids *NEW @gorilla_grow_tent Gorilla grow tent discounts extend to all companies affiliated with grow strong industries which inclue @super.closet Lotus Nutrients Kind LED grow lights
Likes
18
Share
Week 1 Report: The White OG - Solo Survivor’s Journey Survivor Status: One Seedling Standing Strong 🌱 Our girl The White OG is standing tall and doing her thing! While some seeds may take their time or not make the cut, this resilient little seedling is already setting the tone. With close to 100% relative humidity (RH) under the dome, she’s got the ideal environment to kickstart her roots and early growth. Environment: Humidity Dome Life • RH: Close to 100%, creating that tropical atmosphere where seedlings thrive. Humidity at this level helps keep her cells hydrated, and with a dome, moisture is consistently recirculated. This prevents her from drying out and promotes steady root and leaf development. • Lighting: For now, we’re keeping the intensity low. At this young stage, seedlings benefit from indirect, gentle light, just enough to encourage photosynthesis without causing stress. Future of Grow LED on a dim setting (200 PPFD) does the job, providing the perfect balance for early growth. Water & Nutrition: Keeping It Simple No heavy nutrients this week; she’s working off the stored energy in her seed. The aim is to keep the soil or Root Riot cube slightly moist but not soaked. Overwatering can drown young roots, so light misting is all she needs to stay comfortable and growing strong. Growth Observations: Slow but Steady Wins the Race Our solo survivor might be growing at her own pace, but that’s exactly what we want! At this early stage, less is more, and slow growth often indicates a strong foundation. We’re looking for stable, healthy roots and tight early nodes as she finds her rhythm. Grower’s Tips for Week 1 1. Humidity Control: Keep RH high but watch for condensation build-up. Too much moisture can invite mold, so allow some airflow if needed. 2. Stay Light on Water: Just enough misting to keep the medium damp. 3. Patience Is Key: Each plant has its own pace; giving her time to establish now sets her up for a strong journey. Next Steps As we move into Week 2, I’ll be keeping an eye out for early leaves (cotyledons) opening up, as well as steady, even growth. Soon we’ll gradually adjust light intensity and start thinking about nutrients. Shoutouts to the Community! Big thanks to Seedsman for the genetics , to Future of Grow for top-notch lighting, Aptus Holland for the reliable nutrients, Trolmaster for total control and everyone in the growers’ community cheering on this solo survivor. 🌱💪 Growers Love! 🌞 and here’s to a strong start for the future of this grow! 🌱 DISCOUNT CODE - SeedsmanSeeds - DOGDOCTOR 10% off As always thank you all for stopping by, for the love and for it all , this journey of mine wold just not be the same without you guys, the love and support is very much appreciated and i fell honored and so joyful with you all in my life 🙏
 With true love comes happiness 💚🙏 Always believe in your self and always do things expecting nothing and with an open heart , be a giver and the universe will give back to you in ways you could not even imagine so 💚

 Friendly reminder all you see here is pure research and for educational purposes only 💚Growers Love To you All and remember to keep that smile big and alive 💚
Likes
241
Share
📆 Week 18, 21-27 May 2024 21-27 May - Observed and let the plant mature. 📑 At this point in the grow there is nothing much left to do except observe the plant and let it finish maturing. Although the bud size is somewhat smaller than anticipated, they appear tight and very uniform. The trichomes overall are 80% milky/10% amber/10% clear. Almost all pistil hairs are dark, and her smell has peaked with a sweet pine, gas, fruity scent. This was the last week of flower and she’s ready for the final week of flush and harvest. 🍶 21 May changed nutrient solution 🍽️ 21 May updated feeding schedule 💧 Using reverse osmosis water with EC/TDS at 0 🐉 Nutrient Solution EC .9 at 70 degree F 🔆 Light power: one at 75%, and one at 50%, DLI 35-40 canopy coverage at 12hrs 😤 Using General Hydroponics, HGC728040, Dual Diaphragm Air Pump, 320 GPH That is it for this week. Thanks for the look, read and stopping by.
Likes
28
Share
This week was good, she grow nice, but very slow...have a nice week✌️✌️
Likes
26
Share
Likes
34
Share
Welcome to my ganja runt auto comp grow. Be sure to drop a like or comment so I can visit your grows if youd like, either way thanks for dropping by, good luck and stay safe😎 2/5/22 Popped Today VD1 for Ganja Runtz Auto 17-25% THC. Think after Its grown I'm going to send a sample to the dam to get tested. If it's nice that is. As it's a big gap and wondering where I can get her to. Am starting her on TERRA POWERS growth base nutrients and am following it's chart as guide to use and will decide on the ML/L depending on the PPM as I'm using the full 19 nutrients so the PPM will be way up there unless I break it down into equal ppm feeds when it gets bigger and give 2 1l mixes on later stage of growth and a flush in between. I'm going to try and push her to the max that stays withIn the boundaries of not stalling her with any tox, so light tip burn will be fine and is the norm when using heavy bloom boosters (SyntheticNutrients), the best growers in the world get tip burn it's just a by product of your plant taking up max nutrient and the tips are so gentle they get tip burn, but in saying that, some ppl don't like to push their plants, nice a less harsher taste. 100% natural/normal folks and actually looked for as if you aren't seeing this your plant actually has more feed it can take, meaning you aren't maxing out her 3-5wk stretch window in flowering, (personally in think, a slight push is better than a light pull back, when dealing with autos you HAVE TO MAX YOUR VEG TIME. I'll hopefully keep tip burn away until we get into flower and then tip burn is an after thought, and a welcome sign, for me it is. Now on the other hand, if I start seeing 'the claw' or/And very dark green/shiny leafs we got a normal tox that is an often occurrence in growth phase, nitrogen toxicity. (YOU WANT TO PULL BACK ON ANYTHING nitrogen based by a lot) Let's try stay away from that, "the claw, N tox",. Shes on a light feed. EC is 1.01 = 502ppm. PH is still a stable 6. Absolutely great products guys. I mixed a solution 3 days ago. Still holding the same PH/EC. Tip to higher RH. I've wrapped wet squeezed bath towel around my pots as it dries it raises RH, cups of water do not work with led lights. Will give pics and updates on growth and nutrient changes if any. But it'll just be straight love/care and gentle handling, (if any, some times I touch the tips with the corners of tissue if I splash nutrients on the top), other than that it shouldn't be touched unless it's bent and needs did an up. 3/5/22 Doing really well I decided to give the soil a once or feed of 2ml/L of biobizz calmag. It won't hurt in the least but will counter any possible calmag def and help overall with nutrient uptake. 6/5/22 So, it's begun. I've created a negative pressure environment, 1st time, let's see if it makes an impact. On wk 3 onwards I'll be running the intake extraction for 5mins every 30mins and I'll have 2 co2 bags up. If the RH becomes a problem or temp I'll put the extraction/intake back on 100% of the time. The extraction fan/intake is set at a ratio of 2 to 1. (100% extraction 50% intake) making a negative pressure environment, best way to show you have done this, the walls in your tent should bow in lightly. RH has climed to 77%. I'm going to pull it back down to 73%. And try keep it in a lower temp range. Thanks for reading. gottagrowsometime
Likes
44
Share
13 Aug 2021 Happy Friday the 13th everyone! I’m not a superstitious person, but I hope everything I did today turns out well. Today was a big day in my grow room. I finally cleaned up my big tent and got my three little Ladies transplanted into their new pots, as well as set up their new home to maximize their environment. I moved my Spider Farmer SF-1000 light into the big tent so that each of my girls has their own dedicated light, but that the spillover from the other two will be 3x as good! I leveled the lights 18 inches above the plants for even light distribution over the entire grow area. I also got a new standing oscillating fan for improved airflow and took out the other two I have been using. I can always add them back later if needed. I also repositioned my carbon filter and exhaust fan which opened up the whole top of the tent to place the 3rd light. I changed a lot of stuff in my grow room today in order for it to be neater, more organized, and basically more efficient as a grow space. Now if I can just get rid of all the damn boxes! That’s an inside joke with my wife. Now to my ladies… As I mentioned above, I transplanted my trio into their final homes today. I filled the pots with the same soil that they are currently in, Fox Farm’s Ocean Forest Potting Soil. I opened a small hole in the middle, then extracted each plant, one by one from their solo cups. I broke up the root ball of each plant so that the roots cover more area in their new home. Then I surrounded the root ball with more fresh soil and made sure each was secure in their positions. I then defoliated each plant of all their dead or dying leaves and then carried them upstairs to the grow room. After placing each plant into position, I labeled them all so I, and I’ll assume all of you, can keep track of which is which. They’re still C1, C2, and C3. Today I didn’t want to do anything really crazy, so I just watered the plants with two gallons of properly pH’ed water in order to get the plant roots and fresh soil wet enough to stay moist and consolidate a little better into one mass. I also wanted plain water so that I could see what the TDS levels were like from just the soil and water considering that the soil has some nutrients all by itself. So, each plant received approximately 3/4 of a gallon of water from 2 separate gallons. One with a pH of 6.4 and TDS going in of 89 ppm, and the other 6.7 with TDS of 98 ppm. Each plant had a decent amount of runoff from the water given. The runoff results were as follows: C1 - pH 5.7, TDS 628 ppm C2 - pH 6.2, TDS 532 ppm C3 - pH 6.1, TDS 622 ppm As you can see, the TDS going in was under 100, but the runoff was significantly higher. I think I’ll wait until their runoff TDS is lower before I recommence giving additional nutrients. I’ll just have to see how it goes. Temperature is hot outside again, so the temperature was a little elevated at 84F, and the humidity was 55%. Now the fun of caring for 3 big plants at once. 🙄 I thought two was tough! What have I gotten myself into! Happy growing everyone! 15 Aug 2021 So today started the fun of feeding three plants at once. I’m still just giving properly pH’ed water to try and use the nutrients in the soil first instead of adding additional nutrients to a pot that is already full of nutrient rich soil. I may do this one or two more times before starting the nutrients in the water solution again. I’m going to document each plant properly here in the note, but I can only put one on the updated weekly report for the website. I’m going to alternate between the 3, so today I’m going to start with C1. Each of the plants seem to be adjusting well to their new pot, as well as to their new environment inside the big tent. I took a couple of pics of each plant today to add to the diary for your viewing pleasure. The gallons of water (3 of them) were filled with tap water and then measured and treated independently as follows: C1 - gallon had initial pH of 7.7. C2 - initial pH of 7.7. C3 - initial pH of 7.8. I added 5 gtts (.25ml) of pH DOWN to each gallon which adjusted the pH to 6.2 in all three gallons. TDS going in was as follows: C1 - 94 ppm C2 - 98 ppm C3 - 91 ppm Runoff was also measured independently, and all 3 had very low runoff pH levels. Very low!! C1 - 5.2 C2 - 5.4 C3 - 5.3 TDS runoff was: C1 - 597 ppm C2 - 577 ppm C3 - 647 ppm As you can see, the TDS runoff is still pretty high due to the soil. I’m going to be looking after them carefully over the next week or so to see if any deficiencies can be seen and address them to prevent any issues from becoming a problem. So far so good. Stay tuned to see how this all ends. Happy growing everyone! 20 Aug 2021 It has been nearly 5 days since I’ve fed my ladies. I’m not proud of that fact, but it is what it is. They are all looking a little drawn out and dry, and a few of the leaves on C2 have gotten some pinkish/red borders on some of its leaves. I don’t really have any reason other than pure laziness! Today is the last day that I plan on giving plain pH’ed water, but I’m going to ease into nutrients on the next feeding by using half quantities till I see how they do. Today they each were given a gallon of water. The initial pH of each gallon was 7.3. I added 3 gtts (.2ml) of pH DOWN to each gallon which adjusted their pH levels to: C1 - 6.7, C2 - 6.6, and C3 - 6.7. Their TDS levels going in were: C1 - 90 ppm, C2 - 95 ppm, and C3 - 92 ppm. Runoff pH and TDS levels were: C1 - pH 5.8, TDS 422 ppm C2 - pH 6.0, TDS 529 ppm C3 - pH 5.8, TDS 489 ppm The temperature in the tent was 82F, and humidity was 53%. The plants still look pretty good, and are continuing to grow and adjust well to their recent changes. I’ve decided to just let these ladies grow naturally to see how it goes. What I mean is that I’m not planning on using any LST or HST methods to train them. I do plan on topping them at some point, but not yet. I’ll just have to see how it goes. Happy growing everyone!
Processing
Likes
10
Share
@PisBaked
Follow
Everything is looking amazing! All plants are at 4.5wks -5wks old now. Growth is extremely rapid. PPMS/PH of run off is less than what's going in! Still feeding to run off daily; vacuuming out the water everytime!! They're starting to need close to a gal. each :D I have defoliated & continue to pinch lower plant growth to lolly pop each branch -- I find this the best method hands down for autos.. The canopy for the most part is even with the exception of LSD-25, Fruit Punch, & most importantly; the one GSC (fast buds) -- it is a fucking monster as you can see (tallest plant by FAR). Cant wait to see the buds on what appears to be a Sativa dominate GSC pheno -- this plant was under the same 630w's worth of CMH along with the other GSC -- because it keeps growing, and was starting to developing light burn on leaves closer to the CMH's I've since switched spots with a GG#4 & it's now under two 600w LED's; growth continues to stretch on her, but I'm less concerned now that it's under less intense lighting, with a bigger distance from the lights . Other than that, things are looking to be on track for an epic harvest. Once buds start forming, I will drop the temps on the AC gradually to bring out the colors in GSC/LSD/Fruit Punch -- with lights/fans on full blast I can hold temps as low as 70f / 30% RH with the AC at less than 50% - Will be uploading more pics this weekend!
Likes
2
Share
Woche 5 Die Ladys wurden ein bisschen entlaubt und wachsen sonst sehr stabil, bin soweit zufrieden. Noch ca 7 Wochen liegen vor uns 😊
Likes
12
Share
We just pushed through another absolute beast of a week, and the first half of it was pure survival mode. The temperatures peaked at a jaw-dropping 39°C, and even the nights offered zero relief, staying at a sticky 26°C minimum. It’s been an intense endurance test for an outdoor grow! The Daily Hydration & Feeding Strategy: 💧 To keep them from turning into crisp, dry twigs, I had to switch to a strict every-single-day watering schedule. Missing even one day in that kind of heat wave would have been catastrophic. Amazingly, the ladies are showing incredible resilience—they haven’t displayed any noticeable signs of distress or major issues so far. Development is moving along beautifully, though I'm keeping my fingers crossed that there won't be any delayed fallout from the extreme heat stress. Nutrient-wise I'm feeding them at about 75% of the recommended dosing plan to keep them happy without overdoing it in this heat. The Strain Breakdown: 🌿 Lemon Cherry Cookies Auto: This girl is absolutely crushing the game right now. She is already stacking up some seriously decent, chunky buds, and the aroma is getting beautifully pronounced and loud! Every breeze brings a sweet whiff of what's to come. 😉 Amnesia Haze Auto: She has turned into an absolute monster! She’s gotten incredibly big and wide, taking full advantage of her outdoor space. You can definitely see that Sativa heritage shining through—judging by her progress, she’s definitely going to take a bit longer to cross the finish line compared to the quicker, Indica-dominant ladies like the Lemon Cherry Cookies. Bruce Banner Auto & Banana Purple Punch Auto: These are the two shorter ladies of the group, but what they lack in raw height, they make up for in sheer health. Size aside, they are doing exceptionally well, looking super vibrant, healthy, and stacking their own flowers nicely. All in all, I’m incredibly proud of how these genetics are handling a brutal summer. Now that the worst of the heatwave seems to be behind us, I can’t wait to watch these buds really start to swell!
Processing
Likes
5
Share
Just realized the BlackBerry is a quick flowering strain but I check trichomes and just cloudy white no ember yet. Thinking 1-2 more weeks. (Fav New Strain) Sour Melon needs a lot more Cal-Mag 1GL just got here. Smelling lil girl tho. Candy crush requires not LST or mainlining she grow straight as an arrow in all directions
Likes
6
Share
@sa2_gr
Follow
Heu guys ! Plants start to pre flower, everything is going good, few nutriments fails but overall it's pretty much ok Pretty sad about the Zake and the Shimo in the front that pretty much had no stretch 😓 Cant complain since im working from seeds ! See ya next week ✌️
Likes
33
Share
Cream Auto Summary Wk 1: Germination, game plan, equipment, and prepping the room. Wk 2: Germination progress, fertigation, and a new light. Wk 3: Two phenotypes. Wk 4: Woe and wonder, nutrients, and water source. Wk 5: Growing like a weed, and max power. Wk 6: Soaking up rays and consuming the nutrients. Algae remediation and proactive pest control. Wk 7: Will the size difference begin to fall in line with the predictions, and rearranging the wind. Wk 8: Time slows down, as buds build and plants are thirsty. Wk 9: A cone shaped bush, and trichome hunting season begins. Wk10: Playing the guessing game and learning is doing. Wk11: Escaping from Distancing. Wk12:Trichome Hunting and Changes in diet. Wk13:Lessons Wk14:When will it be the ‘right’ time? Wk15: This is the right time. Wk16: Harvest time and Summary. Final Weights: Cream 1gallon 157g (5.5oz); Cream 3gallon 299g (10.5oz); Combined 456g (16oz) ((Individual plant weight logs in pix)) New names for the Jars, 1 Cream for the 1 gallon plants buds and 2 Cream for the 3 gallon plants buds. 👉The 1 gallon plant was harvested the 3rd day of the week, It had only a couple of white pistols on each bud and wasn’t producing anymore fresh calixs. There was still very few amber trichomes, but the majority were definitely milky. Very frosty sugar leaves, and overall the buds are mega frosty and remind me of the Gorilla Glue I grew. However the buds are more airy. I started trimming from the top, and worked my way down. I recorded the wet weight for each bud and placed it on a clip with a number that corresponded to the order it was removed. I do this to monitor the % of weight loss due to moisture loss and aim for 20-25%. I did a partial dry trim and left all the frosty sugar leaves to be dry trimmed before going into jars. It had minimal actually larfy buds. I trimmed those not part of the main cola group for each branch and placed them on the rack for drying. The process went fairly easy and I might have spent 3hrs total. The sweet smell of sweet creamy citrus and the overwhelming funky stank was very fun. 👉After 2 1/2 days I placed the buds in paper bags, each cola in its own bag. The main cola was too long so reluctantly I cut it down so it would fit. After another 2 days I placed in jars, some with hygrometers and moisture packs. The overnight humidity in the jars was on average 52%. I added some damp paper towels hung off the lids to restore a bit of the humidity. This worked well and the humidity is now average 62%. I added moisture packs to some of the jars. The jar aroma is sweet cream orange zest and funky stank. 👉I had expected to harvest the one gallon plant during week 16. Given the way the 3 gallon was going, I figured the 3 gallon had another week or so. I assumed that because it had been so slow to develop in all of its phases. After I had harvested the 1 gallon I finally had a chance to really inspect the 3 gallon really closely. I couldn’t inspect it as closely as I had been the 1 gallon because it was further back in the tent and the 1 gallon hindered access. I didn’t think it was a big deal. I hadn’t rotated the 3gallon for two weeks I think. So during my close inspection, I was rotating the plant and it actually took me a while to notice…a dried up tip of a cola. This cola had been sitting on the far side. It hadn’t been against the tent wall. As soon as I saw it it was like a slap in the face…its what I feared would happen to this plant since the buds were so fat and dense….botrytis. Budrot. Nasty, grey fuzziness. My heart sunk as my fears were realized. How many more buds would be affected? Will it be like my Critical Purple and all the best big buds have this hidden scourge? I immediately inspected a few of the bigger buds. I didn’t see any. But there are over 20 colas. The only way to know for sure is to harvest. I didn’t have time to harvest the whole plant right then, so I had to wait for the next evening after work. 👉I took off work a little early to get a head start. The buds were full of sugar leaves still a lot of fan leaves so lots of trimming to do. It took a total of 6 hours from start to finish. I started doing a partial wet trim leaving the smaller frosty sugar leaves to be trimmed dry. I experimented with full wet trim on some of the smaller buds that ended up on the drying net and not left on the branch. I needed the buds to dry slow enough not to taste like hay, and fast enough the botrytis gremlin wouldn’t pay a visit. A close thorough wet trim seemed to look like it could be optimum for these buds. On the 7th branch I started giving the buds a meticulous wet trim. I took the liberty to enjoy some of my Tangerine Dream from a year ago. I listened to Physical Graffiti, Animals, Frank Marino Live, Foxtrot, and some dead air when the album ended and I needed to pick another one. I scrutinized each bud closely for any signs of the evil spores. But I saw none, such a relief after each buds inspection to see nothing but happiness. 👉I had 28 total branch end colas. Most were chunky pine cones. I recorded each branch in the order it was removed. I started at the bottom and labeled them alphabetically. 4 of the branches were smaller near the top in the middle of the canopy and one branch had the bud-rot. I trimmed the buds off the branches but left the bud group forming the cola intact. I put small larfy buds on a separate rack from the good buds trimmed of the branches, I didn’t weigh the larf, and had 72g of good chunky branch buds. The colas when dried to approx 22% weighed in at 227g. The total in the jars is 299g. Very happy! The chunky colas were slow to dry on the interior. I took special care to monitor the buds, not let them get too dry and would spread the buds open a bit to prevent wet spots that could turn into botrytis. When they got a little dry to the touch I would place them in paper bags. That slowed the drying down and allowed the moisture to equalize on the bud. I would weigh the buds and calculate the % of weigh left to help determine how dry they were. When they were below 25% of its wet weight I placed them in jars with many of them getting a hygrometer to monitor the humidity in the jars. I had to take them back out of the jars after one day and back into paper bags because the humidity climbed as high as 80% in some fo the jars. This meant the interiors were still moist. The bigger the buds the longer they needed to stay in the paper bags. The final weights on the buds were after they were dry enough to be at 62% or lower humidity in the jars wish was still around 20% of the wet weight. The jar aroma is not very strong. The aroma is a light sweet orange zest. It should improve over time. The buds are dense and sticky. Not all the colas got their own jars unless they were big enough. Some of the colas I separated from the branches and placed in smaller jars, even combining some of them. The intact colas got the large jars and some were combined in those as well. 👉I have one of those Trim-trays with the screen in the bottom with a tray underneath to catch keif. I trimmed off fans leaves and leaves with no fuzziness on them. I trim the fuzzy leaves over the tray. I did this for both plants. When doing the 3 gallon plants trimming I also snipped up some of the larf and small buds into small pieces to add to the pile. I let the trim sit in the tray till it was crispy dry. I then used my hands to grind the trim into smaller bits. I used a plastic card to scrape the pile back and forth across the screen. I continued to grind up the trim with my hands and alternately scrape the screen and sift the pile. It was hard to tell how much I had got till I used the plastic card to scrap the catch tray. I was pleasantly surprised to see a nice pile form. I made 4 pucks. 👉The bud is cured and stable humidity in jars. I’m doing the typical jar burping and inspection daily for another few days. I have tested both plants and am extremely pleased! Both have a sweet creamy orange zest like aroma (but not like an orange creamsicle). The 1gallon, now called 1Cream, is the strongest jar aroma. When hit on the bong both have a sweet creamy smooth after taste, and again the 1Cream is the strongest flavor. Both are very sticky when pinching off a bit for the bong, and the 1 gallon is the stickiest. Both pass the one hit test with flying colors! Hard to tell the difference between the two as far as the high goes, creeper buzz, with a nice uplifting energy, settling into couch lock and sleep-inducing trail-off. Perfect for night time use. I’m surprised at how nice it is already. The typical 6 week cure review will be updated in the review. If its anything like the other plants Ive grown so far 6 months is when it really hits its stride and is at its best flavor and effect. 👉Methodology Summation: I am really happy with the fruits of my labor. Its not perfect, and I believe I have learned a lot of knowledge and insight. All my grows so far have been in 3 gallon cloth pots with coco coir mixed with 30% total volume of expanded clay pebbles for hydro. The one gallon plant got bigger than I expected it could. I believe that’s due to frequent fertigation I the coco/cloth pot. The problems of being in an undersized pot were somewhat mitigated but not eliminated. The 3 gallon was also showing some of the issues of an undersized container but not as severe as the one gallon. Knowing this will help if I choose to grow in a smaller pot again. Obviously the draw backs to the under sized pots is the issues show up during flower when the plant is at its biggest. Maybe next time I wont exacerbate the issues by chasing my tail. But the drawbacks are not enough to say its bad news to grow good big buds in undersized pots. There is a drawback to frequent fertigation method, the amount of time spent tending to the plant. Two times a day, every day. That is actually the minimum recommended. If I could have automated it I would have done 3 times a day. I am curious what my results might be if I was able to fertigate 3xs a day. I chose this method so I would be spending a lot of time tending my plants anyway, and with coco I avoid the pitfalls of over watering soil when you’re an overzealous gardener. 👉Growing Summary: The 3gallon was actually the second seed to germinate. The first seed petered out, and the 1 gallon was put in four days after the 3gallon had germinated. The 3 gallon was slow to straighten and open its cotyledons up. The cotyledons had a yellow tinge to part of them. It was slow grow for the rest of the grow when compared to the 1 gallon plant which started flowering 12 days before the 3 gallon and seemingly was always almost 2 weeks ahead of the 3 gallon. The trunks of both plants became very stout. I was wondering if somehow I had been given mismatched seed pack, but in the end I think they are the same strain due to the similarities such as aroma and high. The leaves were identical. Both had fat stout trunks, and both had super sturdy branches. I didn’t use one support for the 3 gallon plant, a first for me, and the buds were very dense and heavy. I put some on the 1 gallon plant but that was for its protection from me since it was at the front of the tent. Both plants also smelled similar, sweet caramel cream when sniffed up close. But different in the natural canopy both made around its queen cola, and in the structure of the flowers. Its been very fun and interesting watching these plants grow and seeing two phenotypes of the same strain!😻
Likes
79
Share
Greetings, green enthusiasts! It's time for our Week 4 Veg Report, and the Epsilon F1 is flourishing like a botanical dream. The journey continues, and this week has been all about finesse, guidance, and a touch of foliar love. Our verdant queen is still receiving the VIP treatment in terms of training. Bending and guiding have become a horticultural ballet, a dance around the fabric pot, keeping her close to the soil like a green goddess in the making. It's like shaping a living sculpture, and our Epsilon F1 is responding with grace and vigor. Now, let's talk about a little foliar magic. I treated our emerald beauty to a luxurious Foliar Applied Liquid Fertilizer called NutriSpray. It's not just a foliar fertilizer; it's a blend of natural surfactants, stimulators, and microelements that create a symphony of nutrients. This foliar spray is like a botanical spa day, providing essential microelements throughout the growing cycle. Plus, it leaves a natural coating on the leaves, a protective shield that both nurtures and defends. It's like giving our Epsilon F1 a green hug from the outside in. Why, you ask? Prevention and pampering! NutriSpray acts as a preventive measure, ensuring our plant gets the nutrients it needs before any deficiencies can even think about setting in. It's like a proactive health plan for our green companion, ensuring a thriving and resilient journey. As we traverse through this week, the environment remains a haven of consistency. Room temperatures and humidity are the pillars of stability, creating the perfect atmosphere for our Epsilon F1 to stretch her leafy wings. And, of course, the nutrient banquet continues. The Aptus Holland super soil mix, with its Micromix Soil, Substrate Buffer Powder, and All-in-One Pellet, remains the culinary delight for our plant. Mycor Mix, the microbial sidekick, ensures the root zone is a bustling community of support for our growing queen. Shout-outs to Royal Queen Seeds for the genetic marvel that is the Epsilon F1, and a big salute to Aptus Holland for crafting nutrients that transform our grow space into a thriving botanical sanctuary. Stay tuned, dear readers, as we witness the unfolding saga of the Epsilon F1. Happy growing, and may your gardens be forever green! As always thank you all for stopping by and for supporting me on this journey, i am super passion about growing and fell blessed to have you all with me on this new journey
Likes
33
Share
@McManus
Follow
Merry christmas everyone 🎉🎉🎉🛍️🎁🎊🎊🌲🌲🌲🌲