


Likes
Comments
Share


@TOMI08
Follow
120.nap...de lehet hogy több😀😀
A lányok szépen meg nyúltak
Volt egy kis tápanyag problémám de már jól vannak
Elfelejtettem a rovarok ellen a múlthéten fújni és a kender moly is be fúrt a bubba slushba
A jövő héten puskaport akarok adni a special kushnak

Likes
29
Share


@Spliffing_Around
Follow
Has a sweet taste to it. Again , I didn’t log any larf in the weight. Very resistant strain.


Likes
72
Share


@HighFromHome
Follow
Pleased with how this plant is doing. Lots of stretch this week and looks like she's still got more in her. Still been training the tops where i want them but the branches are getting stiff now so that's nearly it.
The cooling fan on my grow light is really noisy and the loudest thing of my setup by far. So i have changed it for a much higher quality one and it's amazing! Night and day difference for noise and performance too! See before and after videos.
I have a feeling i might run out of space in the middle with the 4 buds. Also that the outside ones are too close but we will see. Any comments welcome or suggestions. As i keep saying, all a learning process to get better each time. I am already planning my next grow which will either be do si dos auto or gorilla zkittlez auto both from Barney's Farm.
Have a possible weeks fishing trip on 7th Aug. So has it not finished by then I will buy a water pump and set it on a timer. As i expect i will be flushing around then so just ph water through the pump.
Thanks for looking
P.s. Planted 2 more outdoors today - 1 went with the other 5 and 1 in its own spot. See last photo of the now 6 outdoors!

Likes
7
Share


@MrPott
Follow
She's really growing to be a bushy one! Did a few more LST and cut off one satellite leaf to expose the other bud sites. Really enjoying her growth so far!


Likes
74
Share

@yan420
Follow
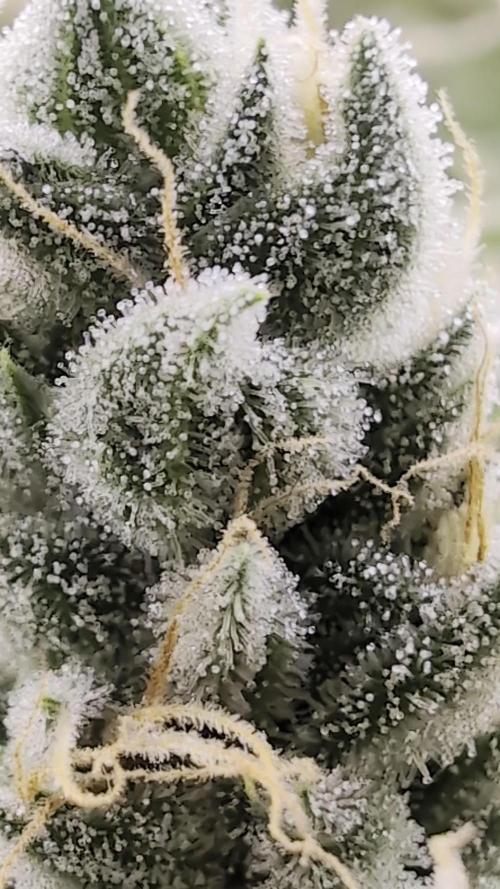
FERMAKOR BARREL MIX – BASE IN USE
(Testing on the Fantasy Feast girl we pulled out of another diary
https://growdiaries.com/diaries/274722-grow-journal-by-yan402 )
(FERMAKOR BASE SYSTEM KOH VERSION diary
https://growdiaries.com/diaries/278391-grow-journal-by-yan402)
(Urea & Micros on the way — first week running without them)
🍶💧🍶💧🍶💧🍶💧🍶
💧 30 L Barrel – Current Working Mix
🍶💧🍶💧🍶💧🍶💧🍶
Step 1 – Calcium Nitrate (Part A)
7 L warm water (~35–40 °C) → added 45 g Calcinit, stirred until fully clear.
That’s the calcium + nitrogen backbone for the feed.
Step 2 – FERMAKOR PK Base (Part B)
15 L water in the main barrel → added 30 ml FERMAKOR PK Concentrate, mixed well.
This forms the main P + K part of the formula.
Step 3 – Combine Solutions
Slowly poured the Calcinit mix into the barrel while stirring — no reaction, still crystal clear.
That confirms the mix is stable and precipitation-free.
🌿 Step 4 – FPJ / FFJ Batch
Added 30 ml homemade FPJ (fish + veg batch) ≈ 1 ml/L.
Color shifted to a light-amber tone — looks alive and active.
🍋 Step 5 – Citric Acid Balance
Added 1 tsp citric acid after everything was blended to fine-tune pH and help chelate micros later on.
📦 Step 6 – Top Up & Check
Filled to the 30 L mark with plain water → pH tested with drops, showing yellow-green — roughly 5.8 – 6.0 range.
Nice clean look, stable smell, no residue.
💧 Current Base Ingredients (Active Mix)
Warm Water ≈ 22 L total
Calcinit 45 g → N + Ca foundation
FERMAKOR PK Base 30 ml → P + K support
Citric Acid 1 tsp → Chelation + pH balance
FPJ / Fish Emulsion 30 ml → Organic enzyme booster
Result: clean amber mix, mild and balanced.
I’ll let this version run for a week before adding anything.
👀👀👀👀👀👀
Observations and changes
👀👀👀👀👀👀
27.10.25 VW27 noticed some min burnt tips so I decreased Calcium Nitrate 45 to → 40g, decided to add two more elements micros and Epsom salts just to make sure they got everything, Fetrilon Combi 1 (Micros): 0.5 g, Epsom salts: 8 g
28.10.25 VW27 she seems devoid of any deficiencies, seems ready for the flip to 12/12
02.11.25 VW27 girl is looking good so I decided to stop making daily videos and do a standard once a week update.
09.11.25 aVW28 7 days since flip,stretch in full swing, first pistils showing, leaf color deep and healthy. Slight tip burn early week → gone after pH stabilized.
Feed stayed clear, no residue, roots clean and sweet-smelling, did what I hope is a last cleanup and pruning🎥
10.11.25 VW29 added Phosphoric acid pH down to the schedule for flowering stage.
14.11.25 FW1 FERMAKOR PK Micros 40 → 50 ml
23.11.25 FW2 got some burnt tips, observe and act accordingly in case it worsens, diluted by 25% for this week.
05.12.25 FW3 about 2 weeks ago Calcium Nitrate 35 g → 25 g, FERMAKOR PK Micros 50 ml → 60 ml
12.12.25 FW4 Calcium Nitrate 25 g → 20 g, FERMAKOR PK Micros 60 ml → 80ml
16.12.25 FW4 Calcium Nitrate 20 g → 17 g, FERMAKOR PK Micros 80 ml → 110 ml
20.12.25 Calcium Nitrate 17 g → 15 g
26.12.25 Ffj fpj 30 →0ml
🌱💦🌱💦🌱💦🌱💦🌱💦🌱
🌿 Day to day tasks & actions 🌿
🌱💦🌱💦🌱💦🌱💦🌱💦🌱
Fed about 5l a day of #1 and on the weekends I do a pure FERMAKOR PK flush 2l runoff
(*RUNOFF reused for tomato plants)
💧💧💧💧💧💧💧💧💧
🌱 Nutrients in 30 L #1 – FERMAKOR (progression kept)
💧💧💧💧💧💧💧💧💧
Calcium Nitrate (Calcinit / Nitcal):
45 → 40 g → 35 g → 25 g → 20 g → 17 g → 15 g
= 1.50 g/L → 1.33 g/L → 1.17 g/L → 0.83 g/L → 0.67 g/L → 0.57 g/L → 0.50 g/L
= 207 ppm N / 253 ppm Ca
→ 184 / 225
→ 161 / 197
→ 115 / 141
→ 92 / 112
→ 78 / 96
→ 69 / 84
PK Concentrate (FERMAKOR Base):
30 → 40 ml → 50 ml → 60 ml → 80 ml → 110 ml
= 1.00 → 1.33 ml/L → 1.67 ml/L → 2.00 ml/L → 2.67 ml/L → 3.67 ml/L
→ balanced 1:1 P:K + light micros (from extract)
Home-made FFJ/FPJ (Fish + Veg):
30 ml → 0 ml
= 1.00 ml/L → 0.00 ml/L
Epsom Salt (MgSO₄·7H₂O): 8 g
= 0.27 g/L → ~26 ppm Mg + ~35 ppm S
Fetrilon Combi 1 (Micros): 0.5 g
= 0.017 g/L
→ Fe 0.7 ppm · Mn 0.7 ppm · Zn 0.3 ppm · Cu 0.3 ppm · B 0.1 ppm · Mo 0.02 ppm
Phosphoric Acid (pH down) + Citric Acid (chelation): as needed
→ First set pH with phosphoric acid, then add a little citric only if you want extra chelation
Target pH: 5.8 – 6.0 (drop test yellow-green)
📦 TOTAL (corrected):
Liquids (PK + FFJ/FPJ):
60 → 70 → 80 → 90 → 110 → 140 → 110 ml per 30 L
= 2.00 → 2.33 → 2.67 → 3.00 → 3.67 → 4.67 → 3.67 ml/L
Solids (CaNO₃ + Epsom + Fetrilon):
53.5 → 48.5 → 43.5 → 33.5 → 28.5 → 25.5 → 23.5 g per 30 L
= 1.78 → 1.62 → 1.45 → 1.12 → 0.95 → 0.85 → 0.78 g/L
YouTube Link: https://youtube.com/-m8h?si=A7x4Zlr2kj-_ga31
Likes
1
Share

@Trichoma
Follow
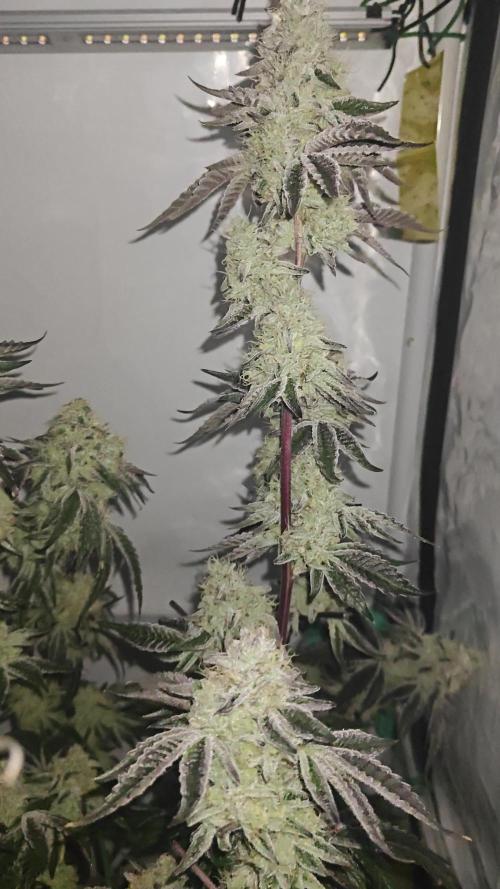
@ 1.4-1.5 kPa
I discovered some spider mites, just an extremely small amount. I removed all unnecessary leaves over the last week and increased the humidity and airflow in the tent. Last but not least, I added some predatory mites to ensure the population stays small, likely because my RH was extremely low, in the 40 range.

Likes
17
Share


@SwedenX
Follow
Started her outdoor in a 1.5 l pot, had great weather with alot of sun, but in about 1-2 weeks in bloom the weather changed and the temp droped to about 5 celcius by night, so se slowed down in growth, took her indoor under a budget 150 w led light and after a few weeks she started to fatten up and eat alot again, shes a real gulper of nutes,
A plessure to grow! The smell is amazing! Very strong genetics!
This strain has potntional to yield enormous in a bigger pot and better light.
Amazing work by @Fast_Buds
A very very potent smoke! Perfectly balanced hybrid, love it! Starts in the head and lift you up and get you giggly then slowly gets down you're whole body and get you very relaxed
Processing
Likes
6
Share


@Shellshocked
Follow
There was a change of plans this week I got in 5 clones of an exotic strain I've been trying to get for a few months finally the guy gave in lol. I switched most of my plants to the flower tent to make room for my new strain. I decided to try and make fem. Seeds with 2 of the ladies ( og kush and gg#4) Using colidal silver. Feed plants my first compost tea I've ever made plants seemed to love it. My gg#4 in the dwc is growing like crazy she's catching up to it's mother she also got thrown into flower.

Likes
14
Share


@Bread_n_Buds
Follow
Here we are again ready to start again, always under the sign of Zamnesia, we make our fantastic plants and we show you what we are capable of. We have 5 autoflowering strains and 5 photoperiodic ones and now we present them to you.
The third autoflowering but certainly not in order of importance (where she would probably be the first) that we present to you is the Sticky Beast.
Don't mess around with both the relatives Bubble gum and Og kush and in fact it is a strain that has won awards at cannabis cups.
This was advised and recommended to us directly by the elves of Zamnesia and we are sure that they are keen to send us refinements, we must admit that we have already grown it in the past and indeed there are some dear friends who will be very happy to smoke it again.
To explain my germination method which is a combination of experiences acquired in the field and readings of the right advisors, I have chosen to divide it into phases so that those who want can follow them and understand better step by step.
- Preparatory Phase ---- Check the average temperature in the room, humidity status to understand if it is the case to start or wait, I decided for the end of August because the temperatures start to drop towards the 22-25 degrees recommended for germination.
Then another thing more or less credible depending on the sensitivity is the control of the lunar phases. I believe in it a lot, it is a method that ancient farmers used to understand when it was best to plant depending on the attraction of the moon. To make my life easier I use a simple app that advises you on the right time to plant, harvest and put in the jar (depending on the lunar phases).
- Phase 1 --- Soaking in water. There are many authoritative friends who advise against this method due to the risk of drowning, but I have always been fine and I follow the rule if it opens in water the seed is almost certainly healthy and will come out of the ground 90% normally.
- Phase 2 --- Opening the seed in water. As soon as the seed opens and the root comes out a little, you have to be very very careful not to leave the seed in the water open for too long. This is why there is a risk of drowning. So as soon as the root comes out, it must be planted. Do not wait for it to stretch out a lot, you can wait a little longer in the absorbent paper, but not in water.
- Phase 3 --- In the meantime, while I soaked the seeds, I prepared my pots: I use small biodegradable pots (choose the ones with holes underneath for drainage). A few hours before working with the opened seeds, I moistened the soil with water adjusted to the right pH (5.8 - 6.2) and Plagron Power Roots. The small root is now open and we can make a little hole with a toothpick, widen it and insert the seed. Not too deep with the root facing downwards. From Serious Seeds we learned the dome technique: if you put a small dome of soil on the seed the water will settle on the sides avoiding overwatering problems.
- Phase 4 --- The plant emerges from the soil. So far I have not put the light, now I turn it on at minimum after half a day of soil to give direction to the seedlings. The first week the light will be gradually brought from 40% to 60% to go to 70% - 75% in the remaining weeks of veg. During the first week maximum, I keep the cycle of 24 hours to avoid stretching. Be careful not to exceed the first week at least with photoperiodic plants.
- Germination % --- In water 20/20 seeds have opened for good luck I'm waiting to talk when they come out of the ground but it seems that we are going towards an excellent percentage of germination..."Not too bad"...
- Soil and Food --- The soil used is entirely organic in every part and is the Plagron Promix that will be used with the 100% organic pack provided by Zamnesia complete with all the main fertilizers for your plant buy it at the link --
https://www.zamnesia.io/it/11457-plagron-easy-pack-natural.html
// Strain Description // What happens when three famous strains come together? Sticky Beast Automatic by Zamnesia Seeds is a pure autoflowering composed of some of the best strains. From this combination, where the delicious flavors of Bubble Gum meet the famous OG Kush and the productivity of Critical Auto, a real autoflowering is born that is extremely easy to grow!
// AWARD WINNING STRAIN // First Prize at Autoflowering Highlife CUP 2018 --
- Get a seed of this amazing strain --- https://www.zamnesia.io/it/3331-zamnesia-seeds-sticky-beast-automatic-femminizzata.html
- Soil and Fertilizers entirely organic --- https://plagron.com/en
- Growbox --- https://www.secretjardin.com/
- Music and sound --- I made my girls listen to 432hz frequencies and music from www.radionula.com
- Z --- You can find these seeds, much more from the world of cannabis, mushrooms and an incredible series of accessories and gadgets on the reference site not only mine but of many growers ----
https://www.zamnesia.io


Likes
4
Share


@Skinnytalls420
Follow
Another easy auto to grow looks like she’s gonna come out amazing
When dried let’s see how it goes!!!
Processing
Likes
65
Share


@Wicked_Stix
Follow
Day 34 Gave her a flush and fresh nutrients. Added a little maxibloom. Switched lights to 12/12.
Nutrients per gallon
.5 tsp maxigro
.25 tsp maxibloom
.25 tsp armor si
.5 tsp calimagic
.1 tsp 90/10 humic/fulvic acid
Ph to 6.0

Likes
1
Share

@BunnyBud
Follow
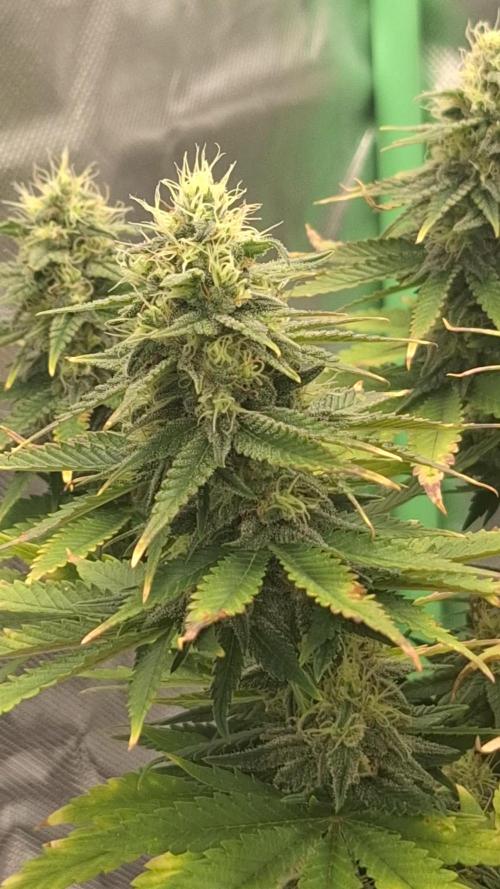
I noticed that the drainage EC exceeded 2.6. I'll have to correct that. 🙊


Likes
22
Share


@Foxtrotoscar
Follow
Made the mistake of buying Soil from amazon and I now have an infestation of gnats!


Likes
Comments
Share

@AkatsukiVirtue
Follow
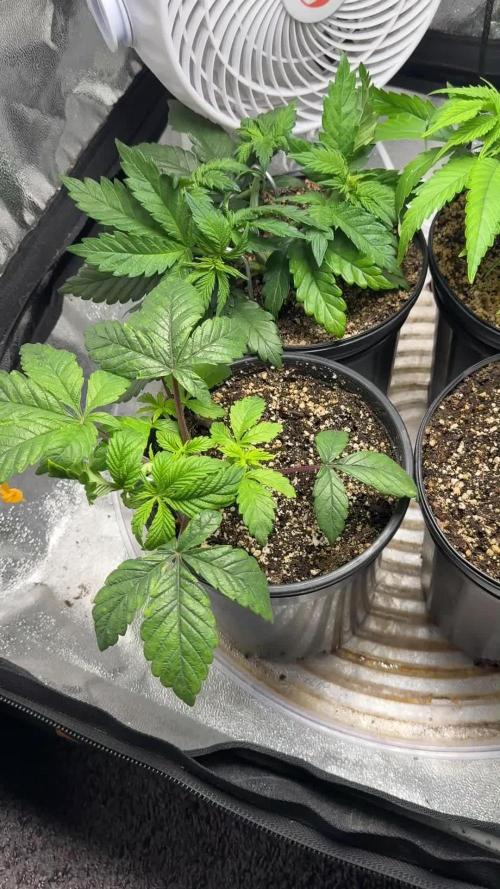
Feed all 4 plants with nutes this week.
Money Maker and Chocolate Skunk received 100% of the formulation while both GPA Cookies strains received 50% strength.
I also added the AC Infinity Cloudforge T3 to generate more humidity and this seems to be helping!
Got the Photone app to help me calculate PPD and adjust light height.


Likes
121
Share


@NuggetPawn
Follow
No reservoir change this week in the end, just top ups and nutrient top ups - If I stop being lazy, I might do a complete change out tomorrow (D85).
They're getting really frosty now. Can't wait to make some leafy THC snow in a few weeks time after I install my 24w UV-B tube above the canopy.
Starting to pack on some lateral buds as well, pretty much mirroring last grow in terms of growth so far, without hacked off tops this time :)
Can't really do anything about the wind burn, just got to accept it, otherwise the fan is on too low and doesn't move air properly.
Solid argument against excessive leaf removal here: https://www.cocoforcannabis.com/community/photons_corner/to-defoliate-or-not-to-defoliate/
--UPDATE D89--
After the reservoir change on D85, I upped the pure blend tea to 10ml/US gallon, by god she's exploded. I think as a whole, the bud mass is almost on par with my last grow when it was chopped and there is still another 40-45 days left in her... Fingers crossed I don't fuck this one up 🤐
Thanks for stopping by!
Likes
4
Share


@JDExotics1719
Follow
Honestly wish I would’ve kept up with the whole grow from seed to harvest because it was my officially first CopyCat grow. Very satisfied with these genetics!!
