Likes
Comments
Share
@Hydronaut
Follow
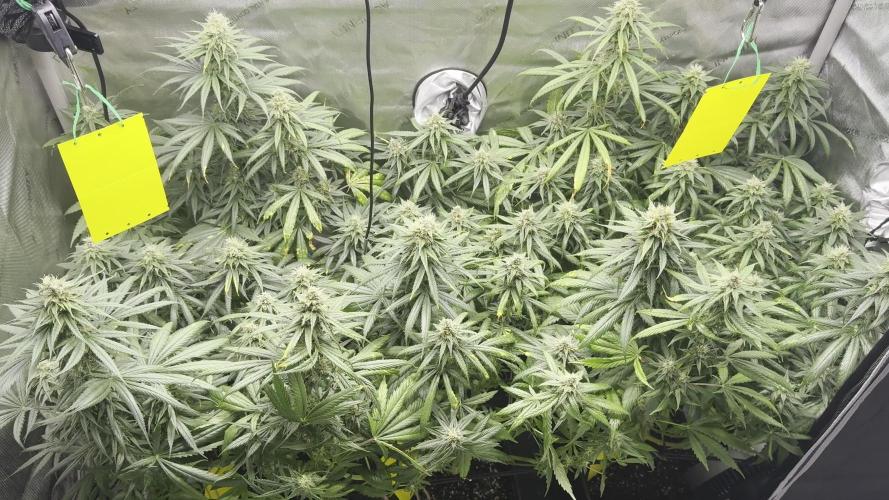
Dropped temperatures to 55-60F, added 2 hrs of darkness, and adding only water from 250 ppm - through finish. I guess I have to make them purple? Most trichomes are cloudy, so there isn’t time to freeze them to color. Going to chop in two days and call it a grow! Dumped half the res and dropped ppm to 0 and added FloraKleen. Will chop in a day or two. The bells toll…
Likes
12
Share
@Andres
Follow
She is in her last stage to be cut. I want them to be 80% ambar. so I'll let her bounce all the salts by washing her roots. It has 97 days outdoor.
Likes
5
Share
🗓️ Week 7 – Flower Week 3 (MAC n Cheese only) This week called for a slight adjustment in the feeding plan: I had ramped up to ~75 % of the Advanced Nutrients schedule, but the very tips of the leaves started showing mild signs of burn. To stay on the safe side, I’ve dialed it back a bit. 🌱 🌿 MAC n Cheese has been lollipopped along with the others – now all the plant’s energy can focus on developing the top sites. 📏 Post-stretch height: 102 cm Stretch seems to be complete, and this girl definitely reached for the sky. The tent is officially maxed out – lights are at their highest position now, with very little room to spare. 😅
Likes
30
Share
this little shogun that could has stretched to the max! She is actually a little big bush now. Too bad this season was not as ideal as it could have been. She has started to flower 7 to 8 weeks to go.
Likes
38
Share
February 23, 2021 (Week 7, Day 50, Flower 1): It's the first day of flower! The plants slept for 12 hours last night and will keep that up until harvest. Still seeing pretty crazy growth even for the 12 hours of darkness they went through. Grew about another .5". Excited to see how much these things stretch. Soil was very dry this morning so I watered with 4l of water per plant with 3ml/l pH Perfect Bloom + 2ml/l pH Perfect Grow + 2ml/l Sweet Raw + 1ml/l Big Bud + 1ml Cal-Mag Plus + 1/4 tsp/gal Humboldt Nutrients Big Up Flower Powder with a pH of 5.8. Runoff pH of 6.3. I will start watering with a 6.0 solution going forward. I also top dressed with about an inch of fresh Roots Organics Lush soil. Plants are looking great. Not seeing any problems currently. I'll keep a close eye on them as they transition. Turned down humidity another 5% today. Averaging 50% rH and 73℉. February 24, 2021 (Week 7, Day 51, Flower 2): Plants look great. Soil still moist from watering. Tilled half inch of topsoil. Averaging 50% rH and 73℉. Nothing else for today. February 25, 2021 (Week 7, Day 52, Flower 3): No complaints at all. These plants are as healthy as they can be from what I can tell. The growth sites are starting to do some funky stuff and everything is kind of starting to "clump" together. Really interesting to watch this process happen, as I've always wondered exactly how the buds begin to form. I was greeted with a very sweet smell when I opened my tent this morning, nothing strong yet. To encourage further vertical growth I've removed all LST ties except for two from Gelato 1 and Unknown 2. I adjusted the ties on Unknown 1 because it's already starting to stretch and I need it to slow down just a bit while the others catch up. Soil is semi-moist this morning but the pots are still pretty heavy, so I'll water in a day or two. Averaging 50% rH and 72℉. February 26, 2021 (Week 7, Day 53, Flower 4): Pots were light today so watered with 4l per plant with 3ml/l pH Perfect Bloom + 2ml/l pH Perfect Grow + 2ml/l Sweet Raw + 1ml/l Big Bud + 1ml Cal-Mag Plus at 6.0 pH. Runoff sitting at 6.4 pH. Defoliated one more node on each growth stem - the lollipop look is coming around. It will probably be my last defoliation like this. From now on I'll only pluck fan leaves that get in the way of bud sites. Unknown 1 grew over 2" in the last 24 hours. The stretch is getting real. I removed all remaining LST ties from Gelato 1 and Unknown 2. I redid the LST ties on Unknown 1 in an attempt to control its growth, but at this point I feel like it's just going to be a lanky plant and there's nothing I can do about it. I'll do my best to keep them as level as I can. Also, I took off Unknown 2's stem cast today and it healed really, really well. I have never seen a plant do this, but it filled itself in with tissue that is soft to the touch, and there's only a slight split at the top. It's looking really great. My wife noticed the smell of the plants this morning for the first time - so that's a good sign! Plants are starting to put off a lot of their own humidity, so I haven't refilled my humidifier in days. Averaging 50% rH and 72℉. Happy Friday everyone! 👻 February 27, 2021 (Week 7, Day 54, Flower 5): Soil is still moist - tilled half inch of topsoil. Overnight it appears Gelato 1 and Unknown 2 are doing their damnedest to catch up with Unknown 1 - they both grew about 2". Plants are looking great and are definitely starting to stretch! Averaging 50% rH and 70℉. February 28, 2021 (Week 7, Day 55, Flower 6): Top soil is pretty dry, but the pots are still heavy. I'll hold off watering for a day or two. The last 24-hour period I think I saw the biggest difference in the plants so far. Each growth stem stretched a ton on each plant, but at varying degrees. The canopy is suddenly uneven, but I think trying to keep everything even at this point will be futile. I will let them go and install the SCROG net soon if the colas start growing too differently from one another. The stipules on every plant tripled in length overnight so I think the plants are definitely getting with the new 12-hour schedule. All the plants are starting to shoot off tons of pre-flowers and pistils now. They're in the swing of things now. Averaging 50% rH and 70℉. March 1, 2021 (Week 7, Day 56, Flower 7): Soil is dry but pots still have some weight. Will probably water tomorrow. Plants are looking fantastic. Canopy is stretching all over the place. Averaging 50% rH and 70℉. Looking forward to next week! Hopefully we'll start to see some flowers poking through soon!
Processing
Likes
22
Share
Week 9 .......... Flower Week.........June 6 to 12, 2020 ........ Days 57 to 63 from germination The two girl are sure opposites of each other in how this grow is turning out😂😂👍 GSC2 didn’t get a good transplant and she has really suffered for it........add in that both of them were battling high pH in first weeks and thus the reason for the transplant from the fabric pots into plastic.......she is actually hanging in there and this week progressed well. GSC on the other hand I just have to put into her own tent!!!! She is too freaking big!!!!! I can’t fit her in with the other flowering girls and have any success at the grow👍💪👊😉 The environment is not where it needs to be though for flower so added another humidity controller and smaller full spectrum light to bump up to 300 watt range in the veg/flower tent now. Had limited choice with a limited budget and needed it now. I could go through more fooling around for only roughly 3 more weeks before others are done and could combine the plants.......good excuse though to have increased flexibility going forward😉😉😉👍 Feed amount have been as expected with GSC taking 4L most days while GSC2 is more of 2.5L range when feeding. Have noticed they are taking more water in the taller 3 gallon plastic pots. That is a lot of bottles listed but they are never fed that all at once. That is just a full list of products used this week and the dosage in that feed. I have been holding the feed numbers around 1000 ppm the last week and I think she can take more so have bumped that up to 1300 range for the next week. Expect to see some tip burn as pushing them but very little so far. GSC is now 36” and 36” wide but her bud sites are not very big in my opinion. I have replaced G.P. Massive with A.N.Big Bud for now as I don’t need her getting any taller......just grow BIG BUD😃😃 GSC2 is being fed the same schedule as GSC and the same feed so all numbers are the same. GSC2 is only 17” tall though and 24” wide. GSC Environment has been hovering at 80 degrees and 50 percent humidity most of the days. (Another Humidity controller and light arrive this week.) GSC2 Environment has been hovering at 79 degrees and 61 percent humidity for most of the week. Yeast and sugar CO2 in use. Fast Buds strain is solid👊💪👍😍 as is evident in GSC......all issues are grower related to pH problems in first three weeks of their life. Little more detail: June 6, Day 57 - 8L mixture with BigBud @ 2ml, VeloKelp, Rezin, liquid Wt, Vitathrive, Dual Fuel @ 1.5ml, CalMag @ 1ml = 1275ppm and 6.1pH - GSC took 5L and GSC took 3L. - turning lights down yesterday helped. Both girls leaves are standing up more now, June 7, Day 58 - debated on feed but mixed 8L with BigBud @ 2ml, Rhinoskin, VeloKelp, Rezin, liquid Wt @ 1.5ml, Dual Fuel @ 1ml = 1015ppm and 5.6pH - GSC took 6L and GSC2 2L.......good run off from GSC but none from GSC2 - GSC tent needs more humidity in it......working on it - GSC2 is not looking all that great with her long fan leaves. June 8, Day 59 - dry out day - GSC is doing very well and looking big. - GSC2 is doing better since in the flower tent and under the T5 light. June 9, Day 60 - mixed 8L water with Massive and Terpinator @ 3ml, Sensizyme, Rezin, Vitathrive @ 2ml, Liquid Wt @ 1.5ml, Dual Fuel @ 1ml = 1050ppm and 5.6pH - GSC given 5L and GSC2 was 3L. - Full strength feed as things are going okay overall. - GSC2 is getting taller and lower branches standing up more now. - GSC is happy by herself😀 June 10, Day 61 - 6L mixture with BigBud, Rezin @ 2ml, Liquid Wt @ 1.5ml = 475ppm - 4L for GSC and 2L for GSC2 - fair bit of runoff - GSC2 still has lots of leaves but they are not touching the pot anymore, she is getting taller. - GSC is really happy with her leaves way up. Buds are getting bigger as well......slowly😳 June 11, Day 62 - Dry out day today. - left them alone. - GSC will remain by herself. Need to get the humidity up over the 53% though. Temp is fine at 79 degrees. June 12, Day 63 - 8L mixture with Terpinator @ 3ml, BigBud, Rezin, Vitathrive @ 2ml, Sensyzime, Liquid Wt, Dual Fuel @ 1.5ml, CalMag @ 1ml = 1350ppm and pH to 5.6 - GSC took 5L and GSC2 was 3L.......good runoff amounts from both. - GSC2 taken off the milk crate today. Stripped more leaves as well. Looking better at the end of the week👍
Likes
16
Share
Our Green Cure CBD has started to flower, the main lining here worked really well, the plant is getting nice and big and the branches and flowers are going up really really well. The plant is a specimen with a medium-wide internodal distance, I managed to work it quite well. I managed to send it a bit over as you can see from the yellow tips but the quality of the flower will not be affected. We need some cbd in our lives. We are still using soil, feeding and all the recommended additives from Plagron 100% organic. We have moved on to the flowering start schedule that keeps the same Power Roots additives - Sugar Royal, Pure Zym and adds the flowering stimulant dear in my house for obvious reasons of Biscotti. Of course the basic fertilizer is now Alga Bloom. The Green Sensation when the flowers are already a bit swollen, do not start immediately. The Power Buds must immediately stimulate the start and development of the buds. ---- Decide on the right soil and calculate your fertilizer schedule based on the soil on the official website. -- www.plagron.com Try a seed of this variety that drives us crazy.. ---- https://www.zamnesia.io/en/10672-zamnesia-seeds-green-cure-cbd-f1-automatic.html Description Zamnesia // Zamnesia's breeding team has harnessed F1 genetics to bring you Green Cure CBD F1 Automatic. This autoflowering cultivar is easy to grow, accessible and reliable for all levels of experience. Ready in just 11 weeks, growers can expect impressive yields of tasty buds with a clear-headed effect that's ideal for meditative moments. All the best that mother nature can offer is on ---- www.zamnesia.com
Likes
26
Share
Finishing up week 9 flower. She's looking great! I have had a few small issues this week. Noticed she has a few crispy tips. I have been feeding pretty heavy and the drip system has been getting clogged up with the Big Bud coco. Not a great product to feed using a drip. So I'll be top feeding for the remainder. Her buds are ripening nicely. Thinking she's not going to end up with very large buds however she does have a lot of them so I'm super happy!!!
Likes
18
Share
Week 6 (Day 42) - This week was a lot more manageable with temps as it has cooled off. I also was able to pick up a portable AC unit that has dehumidifier built in. I Macgyver’d a bunch of ductwork so I can run a hose to my tent, Amazing 🤩. I have been able to run consistent at 74 degrees with lights on, and 68-69 degrees with lights off, and humidity between 43-50 % Lots of new growth this week at the bottom canopy, both bud and leaf. Kinda gives me a better idea of timeline with this strain, I think it’s going to go 10-11 weeks from what I see online. Trichomes are still clear, but the hairs are turning nice colours, and I think I se me a touch of pink starting…👀 Buds continued to thicken, again, not huge by any means, but the ones that were small are fattening up, and there are so many of them 🤗 I think I’m going to feed nutrients this week, Monday is the start of week 7, and assess the situation then to determine when to start straight water feeds to begin the flush…
Processing
Likes
55
Share
Week 19, day 6. Second week after switching to 12/12 lighting. Nr 1 is 155 cm tall from top of soil and Nr 2 is 171 cm. All video and pics is taken when the girls have hade 11.5 h of no lights and just got watered. The stretch on these girls was incredible the past 2 weeks after switching to 12/12 lighting. So fare this has gone smooth as silk and no problems at all despite temperatures over 30 degrees Celsius for the last 45 days. I have manage the heat by having between 85-95 % of RH in the room all the time. And this genetics from DinaFem seeds is awesome, i hope i will get a massive harvest of strong indica medicine.
Likes
1
Share
@Ninjabuds
Follow
"Week three of flower is off to an amazing start! At day 22, the ladies are looking incredibly healthy. They're praying like crazy, reaching for the light, and stacking nodes like it's their job. The buds are starting to plump up, and the trichome production is getting intense. I'm so excited to see how they develop over the next few weeks
Likes
5
Share
@Major
Follow
hi i think i will wait a few more days to harvest the frichomes are not yet ripe and that's good i still have too many green leaves on the plants. a light watering to hold 3 to 4 days and harvest. ciao ciao🤣🤣😃😃😃
Likes
17
Share
Animal Mints — Legends of the Frozen North Part 2 — Drying, Trimming & Preserving the Harvest Before we begin, once again, we want to apologize for dividing this harvest into multiple reports. We know it can feel like a long journey to follow week after week, but honestly, this is the only way we can properly document everything in the level of detail that these plants deserve. Harvesting, drying, trimming, curing, resin collection, storage methods, smoke reviews… all of these stages are part of the final medicine. And instead of rushing through it in one giant post, we prefer to slow down and share every step in the most educational and transparent way possible. So welcome back to the frozen north. This is Part 2. ⸻ Ten days later, the room had completely changed. The giant living plants we harvested in the previous report had now transformed into hanging medicine. Slowly drying in darkness, at around 18–20°C and roughly 60% humidity, allowing the moisture to leave the flowers gradually instead of forcing them dry too quickly. For the first couple of days, humidity was brought slightly lower to help remove excess external moisture, but after that, conditions stabilized again for the slow dry we love so much. And then came that moment every grower knows. That little click. That beautiful snap in the branches that tells you the plant is finally ready. Not too wet. Not too dry. Just right. And honestly… after seeing these girls hanging there for days, fully intact, massive branches swinging slowly in the dark, it was finally time to begin the next ritual. Trimming day. ⸻ Gloves on. Scissors ready. Trim bin prepared. Medicine beside us. Mr. Baggy supervising operations as always. One branch at a time, we carefully broke the plants down by hand, slowly removing each flower from the stems before shaping every nug individually. No rush. No machine trimming. No shortcuts. Just patience, resin, and respect for the plant. And these Animal Mints girls absolutely covered everything in trichomes. The moment trimming started, the gloves became sticky almost immediately. Thick resin building layer after layer until eventually it rolled naturally into small dark hash balls directly from the fingers and gloves themselves. This is one of those little moments we genuinely love about harvest season. That sticky resin coating the gloves is essentially concentrated trichome resin — cannabinoids, terpenes, waxes, oils, and all the aromatic compounds that make the plant what it is. With a little warmth from the hands and gentle pressure, it naturally rolls together into traditional finger hash. Simple. Ancient. Beautiful. And of course… we also continued our little Moroccan-style “drums” with the trim. By gently agitating the dried trim across the screens, we collected an absolutely beautiful amount of dry sift. Bright golden-yellow resin, soft and sandy, full of aroma and life. No exact scale numbers this time — this was more about enjoying the process than chasing statistics — but the quality spoke for itself immediately. Honestly, this type of hash is one of our favorite ways to enjoy the plant. A little inside a joint, slowly melting together with the flower, enhancing both flavor and depth without overpowering the experience. Pure magic. ⸻ Now let’s talk numbers. And honestly… these girls performed beautifully. Plant A gave us: 127g Plant B gave us: 247.8g Plant C gave us: 287.9g For dense, compact, heavily resinous flowers grown 12/12 from seed, this is an outstanding result in our eyes. Especially considering the morphology of these plants. This style of growing continues to impress us more and more every single run. The plants remain relatively compact vertically, but the flower production becomes incredibly efficient. Tight node spacing. Massive bud stacking. Heavy trichome production. Strong support structure. Dense flowers without absurd plant height. The frozen north delivered once again. And standing there in the studio holding entire branches in both hands… honestly, it was impossible not to smile. Happy grower moment. ⸻ Once trimming was complete, the next mission began: Preserving the terpenes. Because harvest means nothing if the cure is bad. So this time we decided to test multiple storage methods side by side. Some flowers went into traditional glass jars — still one of our absolute favorite methods for long-term curing. Stable, simple, reliable, and something we continue to trust deeply. Some flowers went into vacuum-style Zamnesia metal containers, where air can be partially removed while maintaining stable conditions inside. Others went into vacuum plastic containers with pressure-sealed lids. And finally, part of the harvest also went into Grove Bags, since the yield was simply too large not to use multiple preservation systems. Inside several containers we also added 62% humidity control packs. These packs are not “magic terpene creators” or anything like that — they simply help stabilize relative humidity inside the container, preventing flowers from becoming either too dry or too moist during curing. The flowers themselves were already dried correctly before storage. That part is important. Humidity packs are not there to fix bad drying. They are there to help maintain stability afterward. And honestly, one of the most exciting things now will be revisiting these exact same flowers months later to compare how each storage method affected aroma, texture, smoothness, and terpene expression over time. Because curing is alive. Medicine changes. Terpenes evolve. And that journey is part of the magic too. ⸻ One thing we also want to mention is how much easier trimming became with the curved point Zamnesia scissors. It might sound like a tiny detail, but those curved tips genuinely help reach deep into dense flowers without damaging structure, allowing cleaner trimming while preserving the natural shape of the buds. Small tools. Big difference. ⸻ By the end of this session, trays were full, jars were packed, hash was collected, gloves were destroyed by resin, and the studio smelled absolutely unreal. pine, diesel and earthy. Animal Mints is looking amazing. And honestly… looking at those giant trimmed branches in the studio lights, it was one of those moments where you simply stop for a second and appreciate the entire journey from seed to harvest. Because this is more than growing plants. This is preservation of flavor. Preservation of resin. Preservation of time, patience, and intention. ⸻ But we are still not done. Not even close. The next report will be the final chapter of this frozen journey: the smoke review, terpene breakdown, curing evolution, flavor analysis, effects, and our complete final thoughts on Animal Mints from seed to harvest. And trust us… This girl still has a lot to say. ⸻ Huge thanks once again to everyone following this journey: Zamnesia for the genetics, Plagron,FOG Lighting, the gear sponsors, the community, GrowDiaries, the growers supporting from day one, the silent followers, the commenters, the critics, the legends, the OGs… And of course, thank you to everyone taking the time to read these reports week after week. The frozen north continues. 📡 DELETED @ 1K Please stay tuned.we never quit https://www.youtube.com/@TheDogDoctorOfficial NEW 🙏 Thank you for your patience and continued support. FOR DISCOUNT CODES AND MORE JUST FOLLOW THE LINK https://website.beacons.ai/dogdoctorofficial 📲 Don’t forget to Subscribe and follow me on Instagram and YouTube @DogDoctorOfficial for exclusive content, real-time updates, and behind-the-scenes magic. We’ve got so much more coming, including transplanting and all the amazing techniques that go along with it. You won’t want to miss it. GrowDiaries Journal: https://growdiaries.com/grower/dogdoctorofficial Instagram: https://www.instagram.com/dogdoctorofficial/ YouTube: https://www.youtube.com/@dogdoctorofficial Deleted by Youtube - https://www.youtube.com/@TheDogDoctorOfficial NEW Vimeo : https://vimeo.com/dogdoctorofficial Under construction stay tuned ⸻ Explore the Gear that Powers My Grow If you’re curious about the tech I’m using, check out these links: 🔆 Lighting & Environmental Control • Future of Grow — Advanced LED lighting technology https://www.futureofgrow.com/ DISCOUNT CODE: DOG20 • Lumiflora — Under-canopy LED lighting https://lumiflorade.com/ • TrollMaster — Environmental controllers and automation gear (past collaboration) ⸻ Genetics • Zamnesia Seeds — Genetics used in this project https://www.zamnesia.com/ ⸻ 🌱 Soil, Substrates, Boosters & Root Support • Plagron — Substrates, bio mixes, and supportive products https://plagron.com/en/ ⸻ 🎒 Storage, Curing & Preservation • Grove Bags — Curing and storage solutions https://grovebags.com/ ⸻ 📸 Photography Equipment & Tools (Not sponsors, but part of my creative toolkit) • Sony A6700 • Sony full-frame macro lens + few more • Stacking photography workflow - learning • iPhone (for behind-the-scenes shots) As always, this is shared for educational purposes, aiming to spread understanding and appreciation for this plant. Let’s celebrate it responsibly and continue to learn and grow together. With true love comes happiness. Always believe in yourself, and always do things expecting nothing and with an open heart. Be a giver, and the universe will give back in ways you could never imagine. 💚 Growers love to all 💚 📸 P.S. – The Eye Behind the Lens All photos in this diary (for now — except for the ones showing the camera, which I took with an iPhone) are taken with a Sony A6700 paired with a Sony full-frame macro lens and a few more. Photography is part of the story — it’s how we share the fine textures, the glow, and the quiet details that words can’t always capture. I’ve also started experimenting with photo stacking — a technique where multiple images, each taken at a slightly different focus point, are layered together to create one perfectly sharp image from front to back. It’s not digital enhancement or AI; it’s pure photography — a way to reveal the plant’s beauty in microscopic depth, from trichome to petal. You’ll even see a few shots of "ghost me" capturing the shots — camera, lens, setup — because every grow deserves not just to be cultivated, but documented like art. FOR DISCOUNT CODES AND MORE JUST FOLLOW THE LINK https://website.beacons.ai/dogdoctorofficial NEW DISCORD - Official Server Invite Link : https://discord.gg/ksjAkA5T74
Likes
120
Share
~_~_~_~_~_~_~_~_~_~_~_~_~_~_~_~_~_~_~_~_~_~_~_~_~_~_~_~_~_~_~_~_~_~_~_~_~_~_~_~_~_~_~_~_~_~_~_~_~_~_~_~_~_~_~_~_~_~_~_~_~_~_~_~_~_~_~_~_~_~_~_~_~_~_~_~_~_~_~_~_~_~_~_ 12/12/21 🤘😺Week 5 of veg!! Everything is going fantastic, color looks uniform across the board now.. I think 1-2 are a little on the small size for their age but besides that everthing else is great.. everyone is getting a little feed now with every watering and we just started adding a few drops of calmag this week just to stay proactive..we hope to start flowering a week from now but their size will be the determining factor... thank you as always for dropping by friends and happy harvests everyone!! 😽💨 ~_~_~_~_~_~_~_~_~_~_~_~_~_~_~_~_~_~_~_~_~_~_~_~_~_~_~_~_~_~_~_~_~_~_~_~_~_~_~_~_~_~_~_~_~_~_~_~_~_~_~_~_~_~_~_~_~_~_~_~_~_~_~_~_~_~_~_~_~_~_~_~_~_~_~_~_~_~_~_~_~_~_~_ 12/15/21 ...I decided to do another round of topping today on all plants, this should make 8 main branches from the 4 most have now...we'll give them at least another week of veg after topping before moving to flower 😻 ~_~_~_~_~_~_~_~_~_~_~_~_~_~_~_~_~_~_~_~_~_~_~_~_~_~_~_~_~_~_~_~_~_~_~_~_~_~_~_~_~_~_~_~_~_~_~_~_~_~_~_~_~_~_~_~_~_~_~_~_~_~_~_~_~_~_~_~_~_~_~_~_~_~_~_~_~_~_~_~_~_~_~_
Likes
37
Share
Heute ist der 02/07/2025 und es ist Tag 101 der Triple Chesse. Wir habe sie nun Geerntet, alle Triebe tragen sehr Schöne Blüten und diese riechen auch sehr intensiv nach Käse 😁 -Das einzige was uns leider sehr weh tut ist das einer der Haupttriebe, da wo die Mutation ist, die wo wir immer wieder auf den Bilder gezeigt haben, ist leider Blütenfäule entstanden, wir haben ein paar Fotos und ein Video hochgeladen wo man es sehr gut erkennen kann. Das liegt wohl daran das an dieser stelle sich die Großen Buds berührt haben und keine Luft dran Kamm. -Der Rest der Blüten wurden natürlich auch sehr gut Kontrolliert aber keinen weiteren Schimmel gefunden. -Wir haben insgesamt 414 Gramm Nassgewicht nach dem Trimmen aber noch die Stängel dran, nun wird alles in das Zelt gehängt und die Luftfeuchtigkeit auf unter 52% getrieben. Und jeden Tag nach Schimmel Kontrollieren. -Nach der Ernte haben wir die Wurzel mit dem Kompletten erdballen aus dem Topf gezogen wie man auf den Fotos und Video erkennen kann, waren die Wurzel im kompletten Topf Verteilt. Das gibt der Pflanze eine Solide Basis um zu wachsen.
Likes
25
Share
ANTHOCYANIN production is primarily controlled by the Cryptochrome (CR1) Photoreceptor ( !! UV and Blue Spectrums are primary drivers in the production of the pigment that replaces chlorophyll, isn't that awesome! 1. Diverse photoreceptors in plants Many civilizations, including the sun god of ancient Egypt, thought that the blessings of sunlight were the source of life. In fact, the survival of all life, including humans, is supported by the photosynthesis of plants that capture solar energy. Plants that perform photosynthesis have no means of transportation except for some algae. Therefore, it is necessary to monitor various changes in the external environment and respond appropriately to the place to survive. Among various environmental information, light is especially important information for plants that perform photosynthesis. In the process of evolution, plants acquired phytochrome, which mainly receives light in the red light region, and multiple blue light receptors, including his hytropin and phototropin, in order to sense the light environment. .. In addition to these, an ultraviolet light receptor named UVR8 was recently discovered. The latest image of the molecular structure and function of these various plant photoreceptors (Fig. 1), focusing on phytochrome and phototropin. Figure 1 Ultraviolet-visible absorption spectra of phytochrome, cryptochrome, phototropin, and UVR8. The dashed line represents each bioactive absorption spectrum. 2. Phytochrome; red-far red photoreversible molecular switch What is phytochrome? Phytochrome is a photochromic photoreceptor, and has two absorption types, a red light absorption type Pr (absorption maximum wavelength of about 665 nm) and a far-red light absorption type Pfr (730 nm). Reversible light conversion between the two by red light and far-red light, respectively(Fig. 1A, solid line and broken line). In general, Pfr is the active form that causes a physiological response. With some exceptions, phytochrome can be said to function as a photoreversible molecular switch. The background of the discovery is as follows. There are some types of plants that require light for germination (light seed germination). From that study, it was found that germination was induced by red light, the effect was inhibited by subsequent far-red light irradiation, and this could be repeated, and the existence of photoreceptors that reversibly photoconvert was predicted. In 1959, its existence was confirmed by the absorption spectrum measurement of the yellow sprout tissue, and it was named phytochrome. Why does the plant have a sensor to distinguish between such red light and far-red light? There is no big difference between the red and far-red light regions in the open-field spectrum of sunlight, but the proportion of red light is greatly reduced due to the absorption of chloroplasts in the shade of plants. Similar changes in light quality occur in the evening sunlight. Plants perceive this difference in light quality as the ratio of Pr and Pfr, recognize the light environment, and respond to it. Subsequent studies have revealed that it is responsible for various photomorphogenic reactions such as photoperiodic flowering induction, shade repellent, and deyellowing (greening). Furthermore, with the introduction of the model plant Arabidopsis thaliana (At) and the development of molecular biological analysis methods, research has progressed dramatically, and his five types of phytochromes (phyA-E) are present in Arabidopsis thaliana. all right. With the progress of the genome project, Fi’s tochrome-like photoreceptors were found in cyanobacteria, a photosynthetic prokaryotes other than plants. Furthermore, in non-photosynthetic bacteria, a homologue molecule called bacteriophytochrome photoreceptor (BphP) was found in Pseudomonas aeruginosa (Pa) and radiation-resistant bacteria (Deinococcus radiodurans, Dr). Domain structure of phytochrome molecule Phytochrome molecule can be roughly divided into N-terminal side and C-terminal side region. PAS (Per / Arndt / Sim: blue), GAF (cGMP phosphodiesterase / adenylyl cyclase / FhlA: green), PHY (phyto-chrome: purple) 3 in the N-terminal region of plant phytochrome (Fig. 2A) There are two domains and an N-terminal extension region (NTE: dark blue), and phytochromobilin (PΦB), which is one of the ring-opening tetrapyrroles, is thioether-bonded to the system stored in GAF as a chromophore. ing. PAS is a domain involved in the interaction between signal transduction-related proteins, and PHY is a phytochrome-specific domain. There are two PASs and her histidine kinase-related (HKR) domain (red) in the C-terminal region, but the histidine essential for kinase activity is not conserved. 3. Phototropin; photosynthetic efficiency optimized blue light receptor What is phototropin? Charles Darwin, who is famous for his theory of evolution, wrote in his book “The power of move-ment in plants” published in 1882 that plants bend toward blue light. Approximately 100 years later, the protein nph1 (nonphoto-tropic hypocotyl 1) encoded by one of the causative genes of Arabidopsis mutants causing phototropic abnormalities was identified as a blue photoreceptor. Later, another isotype npl1 was found and renamed phototropin 1 (phot1) and 2 (phot2), respectively. In addition to phototropism, phototropin is damaged by chloroplast photolocalization (chloroplasts move through the epidermal cells of the leaves and gather on the cell surface under appropriate light intensity for photosynthesis. As a photoreceptor for reactions such as escaping to the side of cells under dangerous strong light) and stomata (reactions that open stomata to optimize the uptake of carbon dioxide, which is the rate-determining process of photosynthetic reactions). It became clear that it worked. In this way, phototropin can be said to be a blue light receptor responsible for optimizing photosynthetic efficiency. Domain structure and LOV photoreaction of phototropin molecule Phototropin molecule has two photoreceptive domains (LOV1 and LOV2) called LOV (Light-Oxygen-Voltage sensing) on the N-terminal side, and serine / on the C-terminal side. It is a protein kinase that forms threonine kinase (STK) (Fig. 4Aa) and whose activity is regulated by light. LOV is one molecule as a chromophore, he binds FMN (flavin mononucleotide) non-covalently. The LOV forms an α/βfold, and the FMN is located on a β-sheet consisting of five antiparallel β-strands (Fig. 4B). The FMN in the ground state LOV shows the absorption spectrum of a typical oxidized flavin protein with a triplet oscillation structure and an absorption maximum wavelength of 450 nm, and is called D450 (Fig. 1C and Fig. 4E). After being excited to the singlet excited state by blue light, the FMN shifts to the triplet excited state (L660t *) due to intersystem crossing, and then the C4 (Fig. 4C) of the isoaroxazine ring of the FMN is conserved in the vicinity. It forms a transient accretionary prism with the tain (red part in Fig. 4B Eα) (S390I). When this cysteine is replaced with alanine (C / A substitution), the addition reaction does not occur. The effect of adduct formation propagates to the protein moiety, causing kinase activation (S390II). After that, the formed cysteine-flavin adduct spontaneously dissociates and returns to the original D450 (Fig. 4E, dark regression reaction). Phototropin kinase activity control mechanism by LOV2 Why does phototropin have two LOVs? Atphot1 was found as a protein that is rapidly autophosphorylated when irradiated with blue light. The effect of the above C / A substitution on this self-phosphorylation reaction and phototropism was investigated, and LOV2 is the main photomolecular switch in both self-phosphorylation and phototropism. It turns out that it functions as. After that, from experiments using artificial substrates, STK has a constitutive activity, LOV2 functions as an inhibitory domain of this activity, and the inhibition is eliminated by photoreaction, while LOV1 is kinase light. It was shown to modify the photosensitivity of the activation reaction. In addition to this, LOV1 was found to act as a dimerization site from the crystal structure and his SAXS. What kind of molecular mechanism does LOV2 use to photoregulate kinase activity? The following two modules play important roles in this intramolecular signal transduction. Figure 4 (A) Domain structure of LOV photoreceptors. a: Phototropin b: Neochrome c: FKF1 family protein d: Aureochrome (B) Crystal structure of auto barley phot1 LOV2. (C) Structure of FMN isoaroxazine ring. (D) Schematic diagram of the functional domain and module of Arabidopsis thaliana phot1. L, A’α, and Jα represent linker, A’α helix, and Jα helix, respectively. (E) LOV photoreaction. (F) Molecular structure model (mesh) of the LOV2-STK sample (black line) containing A’α of phot2 obtained based on SAXS under dark (top) and under bright (bottom). The yellow, red, and green space-filled models represent the crystal structures of LOV2-Jα, protein kinase A N-lobe, and C-robe, respectively, and black represents FMN. See the text for details. 1) Jα. LOV2 C of oat phot1-to α immediately after the terminus Rix (Jα) is present (Fig. 4D), which interacts with the β-sheet (Fig. 4B) that forms the FMN-bound scaffold of LOV2 in the dark, but unfolds and dissociates from the β-sheet with photoreaction. It was shown by NMR that it does. According to the crystal structure of LOV2-Jα, this Jα is located on the back surface of the β sheet and mainly has a hydrophobic interaction. The formation of S390II causes twisting of the isoaroxazine ring and protonation of N5 (Fig. 4C). As a result, the glutamine side chain present on his Iβ strand (Fig. 4B) in the β-sheet rotates to form a hydrogen bond with this protonated N5. Jα interacts with this his Iβ strand, and these changes are thought to cause the unfold-ing of Jα and dissociation from the β-sheet described above. Experiments such as amino acid substitution of Iβ strands revealed that kinases exhibit constitutive activity when this interaction is eliminated, and that Jα plays an important role in photoactivation of kinases. 2) A’α / Aβ gap. Recently, several results have been reported showing the involvement of amino acids near the A’α helix (Fig. 4D) located upstream of the N-terminal of LOV2 in kinase photoactivation. Therefore, he investigated the role of this A’α and its neighboring amino acids in kinase photoactivation, photoreaction, and Jα structural change for Atphot1. The LOV2-STK polypeptide (Fig. 4D, underlined in black) was used as a photocontrollable kinase for kinase activity analysis. As a result, it was found that the photoactivation of the kinase was abolished when amino acid substitution was introduced into the A’α / Aβ gap between A’α and Aβ of the LOV2 core. Interestingly, he had no effect on the structural changes in Jα examined on the peptide map due to the photoreaction of LOV2 or trypsin degradation. Therefore, the A’α / Aβ gap is considered to play an important role in intramolecular signal transduction after Jα. Structural changes detected by SAXS Structural changes of Jα have been detected by various biophysical methods other than NMR, but structural information on samples including up to STK is reported only by his results to his SAXS. Not. The SAXS measurement of the Atphot2 LOV2-STK polypeptide showed that the radius of inertia increased from 32.4 Å to 34.8 Å, and the molecular model (Fig. 4F) obtained by the ab initio modeling software GASBOR is that of LOV2 and STK. It was shown that the N lobes and C lobes lined up in tandem, and the relative position of LOV2 with respect to STK shifted by about 13 Å under light irradiation. The difference in the molecular model between the two is considered to reflect the structural changes that occur in the Jα and A’α / Aβ gaps mentioned above. Two phototropins with different photosensitivity In the phototropic reaction of Arabidopsis Arabidopsis, Arabidopsis responds to a very wide range of light intensities from 10–4 to 102 μmol photon / sec / m2. At that time, phot1 functions as an optical sensor in a wide range from low light to strong light, while phot2 reacts with light stronger than 1 μmol photon / sec / m2. What is the origin of these differences? As is well known, animal photoreceptors have a high photosensitivity due to the abundance of rhodopsin and the presence of biochemical amplification mechanisms. The exact abundance of phot1 and phot2 in vivo is unknown, but interesting results have been obtained in terms of amplification. The light intensity dependence of the photoactivation of the LOV2-STK polypeptide used in the above kinase analysis was investigated. It was found that phot1 was about 10 times more photosensitive than phot2. On the other hand, when the photochemical reactions of both were examined, it was found that the rate of the dark return reaction of phot1 was about 10 times slower than that of phot2. This result indicates that the longer the lifetime of S390II, which is in the kinase-activated state, the higher the photosensitivity of kinase activation. This correlation was further confirmed by extending the lifespan of her S390II with amino acid substitutions. This alone cannot explain the widespread differences in photosensitivity between phot1 and phot2, but it may explain some of them. Furthermore, it is necessary to investigate in detail protein modifications such as phosphorylation and the effects of phot interacting factors on photosensitivity. Other LOV photoreceptors Among fern plants and green algae, phytochrome ɾphotosensory module (PSM) on the N-terminal side and chimera photoreceptor with full-length phototropin on the C-terminal side, neochrome (Fig. There are types with 4Ab). It has been reported that some neochromes play a role in chloroplast photolocalization as a red light receiver. It is considered that fern plants have such a chimera photoreceptor in order to survive in a habitat such as undergrowth in a jungle where only red light reaches. In addition to this, plants have only one LOV domain, and three proteins involved in the degradation of photomorphogenesis-related proteins, FKF1 (Flavin-binding, Kelch repeat, F-box 1, ZTL (ZEITLUPE)), LKP2 ( There are LOV Kelch Protein2) (Fig. 4Ac) and aureochrome (Fig. 4Ad), which has a bZip domain on the N-terminal side of LOV and functions as a gene transcription factor. 4. Cryptochrome and UVR8 Cryptochrome is one of the blue photoreceptors and forms a superfamily with the DNA photoreceptor photolyase. It has FAD (flavin adenine dinucle-otide) as a chromophore and tetrahydrofolic acid, which is a condensing pigment. The ground state of FAD is considered to be the oxidized type, and the radical type (broken line in Fig. 1B) generated by blue light irradiation is considered to be the signaling state. The radical type also absorbs in the green to orange light region, and may widen the wavelength region of the plant morphogenesis reaction spectrum. Cryptochrome uses blue light to control physiological functions similar to phytochrome. It was identified as a photoreceptor from one of the causative genes of UVR8 Arabidopsis thaliana, and the chromophore is absorbed in the UVB region by a Trp triad consisting of three tryptophans (Fig. 1D). It is involved in the biosynthesis of flavonoids and anthocyanins that function as UV scavengers in plants. Conclusion It is thought that plants have acquired various photoreceptors necessary for their survival during a long evolutionary process. The photoreceptors that cover the existing far-red light to UVB mentioned here are considered to be some of them. More and more diverse photoreceptor genes are conserved in cyanobacteria and marine plankton. By examining these, it is thought that the understanding of plant photoreceptors will be further deepened.
Likes
13
Share
Harvest is finally complete, and after a proper dry and cure I’ve had the chance to enjoy the final result 🌿✂️ This grow had its challenges, especially the calcium deficiency during the vegetative stage and the small thrips outbreak in early flower, but fortunately both were dealt with in time and didn’t affect the final result as much as I expected. A good genetic always makes a difference, and this one definitely showed its potential from start to finish. Combined with the mainlining, the scrog, and a stable environment throughout flowering, it produced a canopy full of dense, frosty buds. The aroma is fantastic, the smoke is smooth, and the flavor is exactly what I was hoping for. The effect is powerful, long-lasting, and perfect for my needs. Overall, I’m really happy with how this run turned out. Every grow is a learning experience, but this one has definitely been one of my favorites. Now it’s time to enjoy it and start thinking about the next project 💚🌱
Likes
7
Share
It's hard to see any upward growth but the buds are getting thicker and ripening. The smell is getting more pungent. The smell eminates and tries to escape the tent when open. The more fresh air she gets the more smell comes out. Idk if I'm burning my trichromes but I have my light at 100 this week but still keeping temps low.
Likes
7
Share
Chopped down the Blueberry Auto. Drying for 14 days if possible. Rh is at 50 temp is at 66° . Northern lights will have all the light hopefully she starts to swell up.
Likes
3
Share
@Mett420
Follow
Effettuato topping, lst con clip e defogliazione degli strati più vicini all internodo (questo la settimana scorsa), e si può vedere un importante espansione delle foglie e irrobustimento degli steli. Tagli e tecniche necessarie per questo tipo di genetica e setup
Likes
9
Share
@Scilef
Follow
Daily report: Day 1. Watering: NO Notes: I am concerned that I've got a photoperiodic strain, not an autoflower. Day 2. Watering: Morning: 5.8 pH 1030 ppm (4.0 l 0.75% of Base + CalMag) => 6.0 pH 2120 ppm (0.65 l) Notes: I set up a 12/12 light schedule. I want Heracles to blow. Day 3. Watering: Night: 5.8 pH 1210 ppm (4.5 l + CalMag) => 6.0 pH 2160 ppm (0.75 l) Notes: Since today I'll feed Heracles according to the bloom feeding schedule. I forget to take a photo of Day 46, sorry. Day 4. Watering: NO Notes: I hope that it is a beginning of blooming. Day 5. Watering: Morning: 5.9 pH 1160 ppm (4.0 l + CalMag) => 6.0 pH 2400 ppm (1.25 l) Day 6. Watering: Night: 5.8 pH 1030 ppm (4.5 l + CalMag) => 5.9 pH 2450 ppm (1.55 l) Day 7. Watering: NO