Likes
Comments
Share


@bioaccessory
Follow
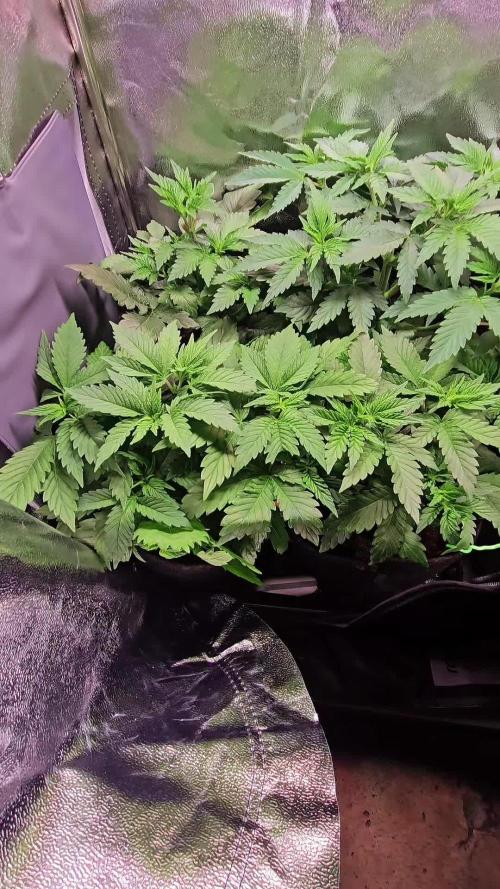
Hello!
All plants have entered the active flowering phase (the left one is slightly behind), and have practically stopped in height. I like how the purple phenotype turned out, I will continue to monitor😎
Thank you for stopping by, and be healthy! 🙏
To be continued... 😶

Likes
152
Share


@SlowpokeFuegobud
Follow
🍪 🍒 🍰🍩 🎀🍪 🍒 🍰🍩 🎀🍪 🍒 🍰🍩 🎀🍪 🍒 🍰🍩 🎀🍪 🍒 🍰🍩 🎀
Welcome to week 14, dear growmies!! 😘
This is the harvest day in week 14, please everybody stand up for the uncomparable, the luminous, adorable, the one and only BREAK-UP CAAAAKE!!! 🎉 ❤️
WOOOHOOOOO!!!
Now we bake a cake.. 😎
Thanks for showing up and supporting me and the girls, bless you, growmies!! 😘 ❤️
Shouts go out to my sponsors @GreenBuzzNutrients, thanks so much for your support!! 💚 💚 💚
If anyone would like to try their amazing organic products, you can find a generous discount code of 25% in my weekly comments! 😜 🙏
If you want a recommendation which product to get first.. BIGFRUITS!! 😍 I love the tasty terps with this one!!
https://greenbuzznutrients.com/
Thanks also of course @Kannabia, for the beautiful genetics!! 🧡🧡🧡
Pouring all my love into this grow, thank you for joining in, growmies!! 💚 💚 💚 😘 ❤️ ❤️ ❤️
Wishing you all the best for your beautiful gardens!🌱 🙏 Grower love!! 💚
_________________________________________________________
Strain Info:
https://www.kannabia.com/en/feminized-cannabis-seeds/break-up-cake
We need to talk
You’ve got to celebrate everything in this life, and that includes love and heartbreak. Since you’re all familiar with Wedding Cake feminised marijuana seeds, we’ve put a Break-up Cake in the oven at the Kannabia Seed Company – because things don’t always go well, and we sometimes need a friendly seed to lean on.
Break-Up Cake has a base of Girl Scout Cookies, one of North America’s best-known strains, which is earthy with a very potent indica effect. And we top it off with a delicious Cherry Pie which, in addition to giving it an elegant dark attire, adds a silky, deeply sweet flavour of cherries and berries. Look no further – it’s the perfect cake.
This seed will be celebrated for its ease of cultivation and abundant production. It’s one of the best investments you’ll make this year. But if it’s going to be memorable for one thing, it’s for its sweet complex flavour that’s full of contrasts. If we have to break up, let’s do it sweetly and amicably, right?
How to: Break-Up Cake
Break-Up Cake is an “all-terrain” marijuana seed, which will adapt to the place you allocate to it. An ode to independence, it’s a plant with only the most basic needs that knows how to grow by itself.
It’s a pale branching plant with tremendous dark green leaves, purple tips, and an icing sugar coating of trichomes. Its immense buds are some of the stickiest ones we’ve found in our seed bank recently.
Indoors, it needs 60 days of flowering to give no less than 600 grams per square metre. Use a Screen of Green method without hesitation, or plant it using hydroponics if you want to obtain the full benefit of its potency.
Outdoors, it reaches two metres in height with a harvest of 800 grams per plant, which is reason enough to give it a go. Like a good break-up cake, this plant doesn’t need to live with a partner, and knows how to live well in a Guerrilla plot. Between 25th and 10th October is its moment.
Taste and effect of Break-up Cake
Very relaxing but not causing lethargy, it’s a good indica-dominant plant. Its effect is mellow (we’re too old for childish games). It calms the consumer but it also gives rise to creative moments. Head on up to the top floor, later to make your way, little by little, down to the kitchen later (where you might want to give in to temptation if you need to stimulate your hunger).
The flavour is full of nuances. It will remind you of a vanilla sponge or cheese cake: you’ll notice a cherry topping, something sweet that you can’t quite distinguish, and an earthy undertone on a biscuit base… You’ve got to sample it to know it.
_____________________________________________________________________
SETUP:
80x80x180 cm Zelsius
240W Full Spectrum LED IR UV dimmable
DW240H-A6-HS
Heatsink color red
LED Chips:
512pcs SAMSUNG LM301H + 24pcs Osram 660nm + 8pcs Osram IR 730nm + 8pcs UV 385nm
Color mix: 2700K + 4000K
2,8umol/J
Driver HLG-240H-C2100B
Coverage: veg 5x3ft / flower 4x2ft
Product size: 628x205x68mm
Green Buzz Nutrients
Shouts go out to my sponsors @GreenBuzzNutrients, thanks so much for your support! 💚 💚 💚
If anyone would like to try their amazing organic products, use code GD42025 for generous 25% discount (for orders of minimum 75€) ✨
https://greenbuzznutrients.com/
Biobizz Lightmix
custom exhaust fan 320/270cm³/h
Carbon Active Granulate 240cm³/h
tab water pH 8 - EC 0,25 with Calmag to 0,5
Advanced Hydroponics pH minus Grow + Bloom to pH 6.2
🍪 🍒 🍰🍩 🎀🍪 🍒 🍰🍩 🎀🍪 🍒 🍰🍩 🎀🍪 🍒 🍰🍩 🎀🍪 🍒 🍰🍩 🎀

Likes
5
Share


@Ninefold
Follow
Transplanted to her final pot this week, I covered the stem up till the cotyledons. Mixed in 75 grams of Monster Bud Mix from Zamnesia and upped the nutes. Fixed the timelapse schedule as well.

Likes
1
Share

@Skunkiest_bender39
Follow
Entwickelt sich prächtig, hätte etwas früher mehr Nährstoffe gebraucht holzt sehr stark. Bis jetzt sehr resistent gegen outdoor!
Terps: Sweet Cali, Bonbon 🍬
Klebt sehr stark🌳🍀


Likes
107
Share


@Afterglow
Follow
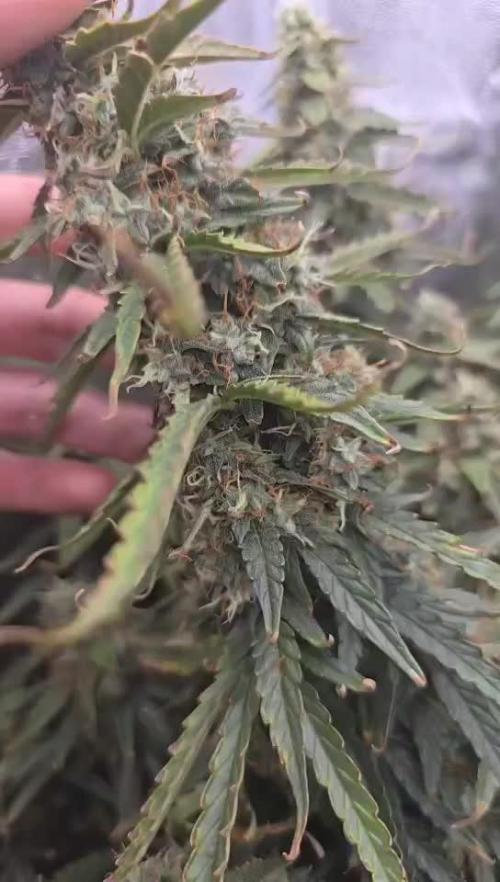
Ну вот и закончился наш короткий путь выращивания сатива-доминантного сорта. К сожалению, размер бокса не позволил полноценно включить лампу, так как растение сильно вытянулось и стало получать световые ожоги, плюс еще сыграл недостаток кальция. Изначально хотел 8 больших, толстых и симметричных колл, но пришлось гнуть дополнительно. На фотографии видно, что все ветки закручены по спирали - это пытался решить проблему сильно низкого освещения. Давно не растил сативный сорт и забыл, что в начале цветения растение ну очень сильно вытягивается. В итоге, из-за LST во время цветения, нижние этажи тоже вытянулись и вместо 8 колл получилось в 3 раза больше. Все-таки мне мой метод больше нравится, чем ML, так как времени уходить меньше, стресса меньше, а результат такой же.
Снял 607 грамм больших веток и около 100 грам всякой мелочевки.
Немножечко пересушил. Так бы вышло грамм 200 чистых шишек. Придется чуток их увлажнить.
Вцелом очень доволен собой и результатом.
Спасибо что заглянули и порадовались вместе со мной.

Likes
4
Share


@LoganatorDude
Follow
Day 8-
She is doing good!
Top dressed the outer perimeter with approx 1/2 tsp of Neem Cake (6-1-2). Watering with plain RO water.
Day 14-
First LST Tie-Down

Processing
Likes
4
Share


Likes
11
Share

@Xipsiomega1
Follow
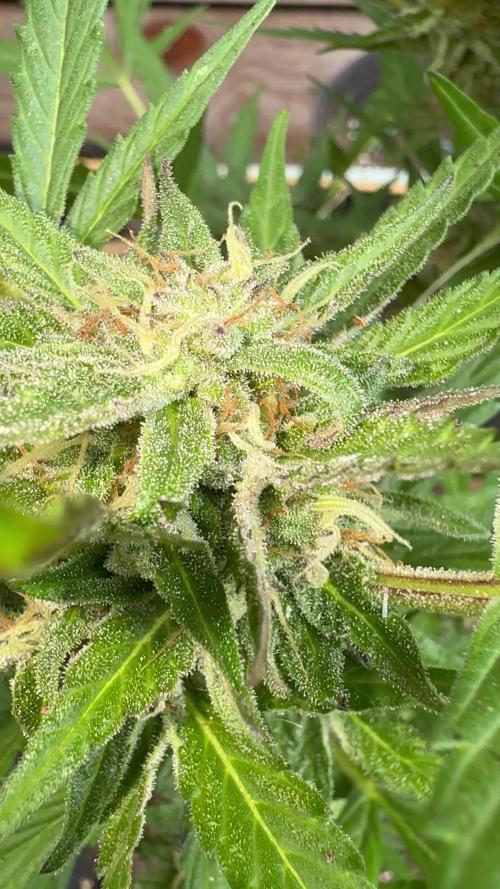
End of week 10 in bloom (day 70) and the time for harvest is approaching. Not all the plants are the same so they will finish gradually and they will be cut gradually. So i will start from Bangi Haze that is almost ready, needs few days more.

Likes
8
Share

@all_about_420
Follow
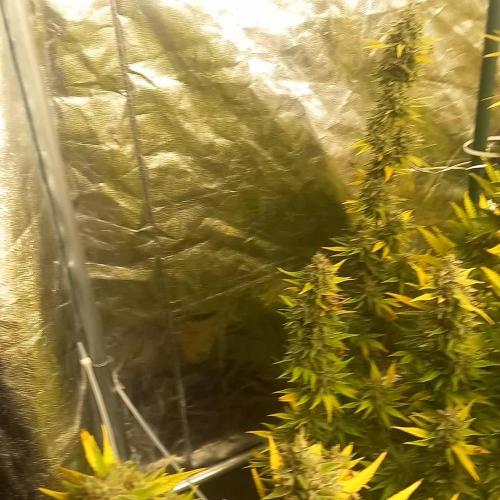
In der Übergangsphase zur Blüte zeigt die Blue Lobster eine deutliche Reaktion auf die eingeleiteten Korrekturmaßnahmen. Rückblickend auf die späte Vegetationsphase wurden knittrige Blätter und eine zunehmende Aufhellung des Blattgrüns analysiert, wobei Faktoren wie Lichtstress, VPD-Abweichungen oder pH-Schwankungen nach intensiver Prüfung ausgeschlossen werden konnten. Als eigentliche Ursache wurde ein Transpirationsstau in Kombination mit einem Nährstoffdefizit identifiziert, woraufhin die Umstellung auf Advanced Nutrients, eine Erhöhung auf 2 ml/l CalMag sowie eine gezielte Entlaubung zur Verbesserung des Mikroklimas erfolgten. Auch wenn das Problem zum Ende der ersten Blütewoche noch nicht vollständig verschwunden ist, zeigt der neue Austrieb bereits eine klare Besserung und eine Rückkehr zu satteren Grüntönen, was bestätigt, dass die Anpassungen gegriffen haben und die Lady sich nun nachhaltig stabilisiert. Mit diesem positiven Trend und einem regenerierten Stoffwechsel startet sie nun vielversprechend in den Stretch der generativen Phase.
Likes
8
Share


@JeyGanesha
Follow
Forbidden runtz auto.. è partita con una delle prime foglioline storpia...ma a vederla sembra stia venendo bene ..vedremo più avanti.,.......
II

Processing
Likes
16
Share


@Sur_cannabico
Follow
Partimos esta nueva semana transplantando nuestras green gelato de Rqs a su maceta definitiva de 7lts.
También subimos la dosis de nutrientes a 3ml de green grow y 2ml de gold sunshine de Quemanta Nutrientes.
Aprovechando el estres del transplante quitamos los primeros internodos de abajo para generar la concentración de energía en los nuevos brotes.

Likes
43
Share


@CrazyRussian
Follow
Here we go again, another week and a half passed, I am a little bit late with updating this week. I defoliated them, so the buds will access more light, than before. The plant that started to mature faster is now slowed down, so I gave her a little bit of nutes this week. Overall the plants feel really good, I expect to have the harvest around week 11-12. The trichomes are milky colour right now, and I would like to wait for the amber ones, because I'd like to grow a proper indica this time. Stay tuned 🙏
Likes
19
Share


@LittleBigTrees
Follow
This plant was germinated along side three other strains , it stayed short and compact ,it was very leafy and compact .
If I was to grow it again I would spread and thin out the canopy and defoliate more heavily .
This strain was in a10 litre pot and produced 90g of dried trimmed bud .
It was a low producer but the flower is really nice , a very enjoyable evening flower through a volcano vaporizer.


Likes
5
Share


@HighrishHash
Follow
I will say I stressed out this darling pretty bad in the beginning of veg. Sadly my furnace went out for two weeks while I was trying to veg her and so she wasn't as big as I intended before I had to put her in the flowering tent just cuz it was much warmer. So I don't have as much I intended when I popped that bean. But I'm glad that at least she didn't die on me and I didn't get anything at all. Getting more of these beans when I make my next order for sure and I'll do right by those girls lol. I loved the structure of the plant though she had very tight internodes with nice beautiful buds


Likes
201
Share


@Hattiwatti
Follow
Hola and straight back to budiness 🐴
Thanks KANNABIA for seeds and fast delivery. Always nice to work with professionals 😉
Wasnt that long summer holiday for boombox.
Doesnt help to hold your fart after shit is in pants.
No crying will help so new seed to soil and i have good feeling this is going to make until end 🤝
Next warrior is from KANNABIA.
Welcome Swiss dream rose auto cbd to challenge.
There was 2 bigger seeds so i plant the one thats in middle at picture. Straight to soil. Same 7l pot. Different color. Hit couple times around stonehenge with wooden shovel. Water from broken glass. Ofcourse dome until it germinates and clay pebles to surface.
Like last time i watered 0.5l from top and 1.5l to tank. Should be enough for 3 weeks. DLI 21 when it reach surface. and only i can do is wait and wish God Luck for myself, boombox and Rose🍀
With Medical Hopes 🍀


Processing
Likes
5
Share


@Ozgrow
Follow
Plants have stretched more than i thought. Been trying to fill out the screen as best as i can, some have worked better than others. Looks like there are plenty of bud sights. Began pk heavy this week so looking forwsrd to seeing them fatten up. I also gave a light defoliation under the canopy removing skinny stretchy stems receiving little light. I also removed some massive fan leaves that were blocking light from budsights. Not too many just enough to have light penetrate.