
Likes
Comments
Share


@IAmTheMoravianGrower
Follow
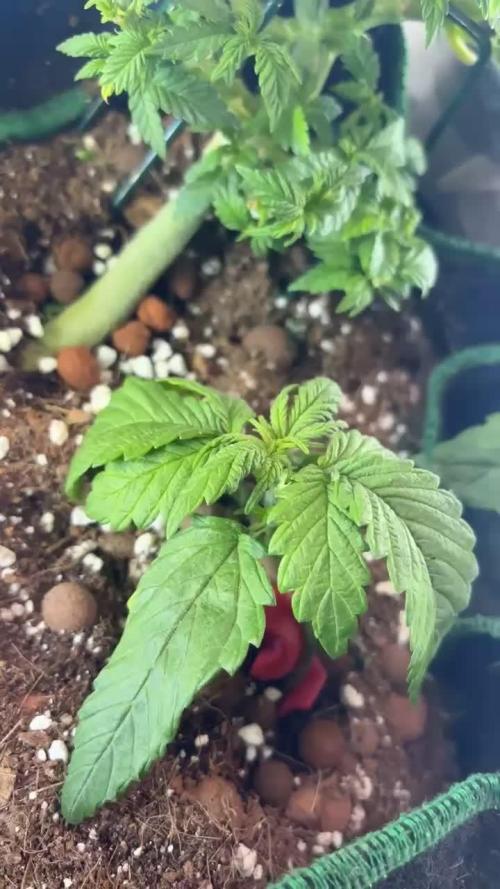
Hi growers, I choose a Humboldt Seed Organization for this season. The final flowerpot will be 25l in the garden. They're behind the window yet. Fertilizers by BioBizz.
1.4.2019 - germination
4.4.2019 - inserted into the soil


Likes
31
Share


@MadeInGermany
Follow
Info:
Unfortunately, I had to find out that my account is used for fake pages in social media.
I am only active here on growdiaries.
I am not on facebook instagram twitter etc All accounts except this one are fake.
Flowering day 50
since time change
to 12/12 hrs.
Hey everyone ☺️.
Another nice week goes by.
The buds keep getting thicker and smell better ;-).
This week the water was poured twice with 1.2 l each time.
One of them with GHSC enhancer.
Otherwise everything was cleaned and checked.
lots of fun and stay healthy 🙏🏻
You can buy this Strain at :
www.Zamnesia.com
Type:
Runtz
☝️🏼
Genetics:
Zkittlez x Gelato
👍
Vega lamp: 2 x Todogrow Led
Quantum Board 100 W
💡
Bloom Lamp : 2 x Todogrow Led
Cxb 3590 COB 3500 K 205 W
💡💡☝️🏼
Soil : Bio Bizz Coco
☝️🏼
Nutrients : Green House Seeds Company Powder Feeding Bio
☝️🏼🌱
Water: Osmosis water mixed with normal water (24 hours stale that the chlorine evaporates) to 0.2 EC. Add Cal / Mag to 0.4 Ec Ph with Organic Ph - to 5.8


Processing
Likes
Comments
Share


@Scarface8290
Follow
Went light on the nutes. Quarter strength. They responded well. Lowest leaves looking somewhat burnt. Still getting fat though.
Likes
36
Share


@SensimillaP
Follow
Beautifull strain with crazy smell and huge amount of thc. All you want in your weed and more 🙏💪
Pictures were took after one week of drying, will post more and the real weight in the near future.


Likes
16
Share


@Northern_Ent
Follow
Aug 17: Auto Overdose is a nice plant but it’s not an auto. I started this one late and only topped it once thinking it was an auto. Other growers have noticed it isn’t an auto too, so I forced it in the dark garage. Flowering has to be started by the end of July here or it won’t finish in the fall.
The flowers are forming quickly and I suspect this is actually Overdose Fast.
So far so good, and good genetics for a Fast plant.
Aug 18: no UV light today unfortunately but it was decently sunny. Scrog net certainly seems like a good idea. This plant is asymmetrical because I broke one of the two main stems a couple weeks after topping. This changed the shape of the plant so it’s become one-sided as if I was growing it up against a wall. Lots of nice lower branches came up so she looks pretty good now.

Likes
1
Share

@psychonaut420
Follow
Been lightly LSTing the stem for resilience have noticed more development and more than original thought would be thers the development of the 3rd-4th set of leafs with the development of the first 2 side branches on each autoflowers (first 2 on vid is lemon cherry cookies and last 1 on vid is frozen face) started lst to shape there structures I’ve defoliated the single set of leafs where first set of side branches are developing and stretching nicely

Likes
60
Share


@Secretflower
Follow
Hello my friends,
...April 11, 2022....Day N°30...
Beginning of the fifth week of growth for my two Feminized Royal THCV.
There are fine and beautiful, there are the biggest plants of the tent.
The topped plant seems love it.
www.royalqueenseeds.com
www.mars-hydro.com
Thank you very much for passing by.
Wish you the best with your green projects, peace.
See you soon 💨💨💨

Likes
4
Share


@ZweetZkittlez
Follow
Estuvo unos días con sodio y luego pasó a Led. Estoy usando Viparspectra

Likes
13
Share


@gr3g4l
Follow
Al ser la variedad con más predominancia sativa de las tres que habian estas fueron cortadas un poco antes de tiempo y los tricomas en su mayoria eran todo cristalinos, apenas habian unos pocos lechosos o ámbar y muchos de color morado xd.
No obstante una vez pasados los dias huele bién, sabe bién y buen efecto. No sabria describir el sabor pero tiende a Kush.
fácil de cultivar y como pudo verse hace o puede hacer unas bonitas porras.

Likes
9
Share


@eldruida_lamota
Follow
Vamos familia, acabamos ya está 3 semana de floración , que bien vamos con este proyecto, vaya color que tienen y cómo se están formando las flores.
Os recuerdo que les hice limpieza y posiblemente acabe defoliándola alguna semana más adelante.
Es una variedad bastante rápida entre los 57/63 días estará lista.
Agrobeta:
https://www.agrobeta.com/agrobetatiendaonline/36-abonos-canamo
Mars hydro:
Code discount: EL420
https://www.mars-hydro.com/
Las maximas de temperatura no superan los 25 grados y las mínimas no bajan 20, así que no me puedo quejar.
Los niveles de humedad también son los correctos van entre 50%/65% de humedad relativa.
Por supuesto el Ph lo estamos dejando alrededor de 6.
Hasta aquí es todo, buenos humos 💨💨💨.
Likes
12
Share


@SnarkyGoat
Follow
Day one of the 14th week was October 24th. The trichomes on the small bud leafs are still clear resin. The hairs are about 70% dark and many are receding back toward the bud. Harvest time is getting close.


Processing
Likes
13
Share


@Green_Blood
Follow
On the final few days of a 10 day flush.
Will be chopping down this week to harvest and hang dry.
Really excited to try this one. The smells in the room are unreal.

Likes
1
Share


@TheGanjaGrower
Follow
Started with LST and did extreme defoliation. Plants were pretty healthy so they will recover soon.
Likes
5
Share


@HighHolidays
Follow
I’m starting the fifth week, and balancing humidity and temperature is becoming a bit challenging; it feels like I’m always slightly off on one of them. I applied a preventive antifungal treatment since the humidity has been a bit high.
The buds have finished forming and are beginning to compact. Some leaves are still yellowing slightly. The smell is getting much stronger, and some pistils are already starting to turn brown.
Likes
51
Share


@nonick123
Follow
Día 36 (25/11) Aplico ligero LST a LSD-25 Auto
Parece que OG Kush Auto se ha ralentizado un poco tras el Lollipopping y la defoliación
Día 37 (26/11) CBD Auto 20:1 #2 & LSD-25 Auto han parado el stretch y se dedican a engordar los cogollos
LSD-25 Auto sigue generando unos colores preciosos con todas las hojas inundandose de color morado / purpura
OG Kush Auto está empezando la floración en todos los nodos
CBD Auto 20:1 #1 es un monstruo que no para de crecer! Le hago un ligera defoliación (3-4 hojas) y Lollipopping en un par de nudos inferiores
Día 38 (27/11) CBD Auto 20:1 #1 sigue imparable hacia el cielo! Empieza a formar timidamente los nodos...
CBD Auto 20:1 #2 muestra pistilos rosas en el ápice! 😍
Día 39 (28/11) CBD Auto 20:1 #1 non stop! 🚀 Elimina algunas hojas que tapan a los brotes inferiores
LSD-25 Auto empieza a generar tricomas! 😍 Elimino un par de hojas que tapan los cogollos de la zona media
Día 40 (29/11) Solo riego. NO tiempo a más!
Día 41 (30/11) Día sin riego. Todas las plantas presentan el sustrato humedo
CBD Auto 20:1 #2 empieza a engordar muchos los cogollos y a mostrar pistilos entre morado y rosa 😍💥
Día 42 (01/12) CBD Auto 20:1 #1 non stop! 🚀 Elimino algunas hojas que tapan a los brotes inferiores
LSD-25 Auto tiene unos colores precisosos. Im in love
OG Kush Auto la floración está a tope! Elimino algunas hojas que tapan a los brotes inferiores
💦Nutrients by Bio Tabs - www.biotabs.nl/en/
🌱Substrate PRO-MIX HP BACILLUS + MYCORRHIZAE - www.pthorticulture.com/en-us/products/pro-mix-hp-biofungicide-plus-mycorrhizae
"GDBT420" 15% DISCOUNT code for the BIOTABS Webshop https://biotabs.nl/en/shop/


Likes
9
Share


@HighKing
Follow
They get sticky now. Smell becomes stronger. I will feed them nutrients till end of week 6. Cant wait to try them.
