


Likes
Comments
Share


@Roberts
Follow
Banana kush autoflower was a okay grow. She was very hungry and threw my ph off several times. So she had some leaf damage through flowering. She had more potential then I got out of her. Still a good grow and lots of sweet flower. Thank you Medic Grow, and Athena nutrition. 🤜🏻🤛🏻🌱🌱🌱
Thank you grow diaries community for the 👇likes👇, follows, comments, and subscriptions on my YouTube channel👇. ❄️🌱🍻
Happy Growing 🌱🌱🌱
https://youtube.com/channel/UCAhN7yRzWLpcaRHhMIQ7X4g

Likes
3
Share


@Mackey
Follow
We did a 9 week veg on this Raspberry Boogie. Came in week 2 and did major defoliation and lollipop. Just beginning to stretch internally space is decent im expecting UFO bud structure. Instagram @mackeys_grove

Likes
37
Share


@TheIceCreamParlour
Follow
End of week 10 - Day 70 / 35 of flower
Another good week at the parlour. A lot of hours spent in the tent yoyo-ing the biggest colas. Half way through the week nearly all of them had fallen over so I had a full evening trying to make some space and hanging them up.
I messed up a feed at the beginning of the week and over fertilised them with PK which can be seen on some leaves. For the last 3 feeds they've been on only 0.5ml per litre to try and reverse a bit of the damage. After today they come off PK completely and onto the BioGreen X-Blast.
Obviously with this being my first grow I have nothing to properly compare too just other diaries. Only 1 or 2 of my friends grow their own medicine but regardless I've never seen weed like this (in person) in my life. The frostiness is next level. Even with the lights on you can see just how many Trichomes these have produced.
It's looking like they will only need another 3 weeks. Plan is to carry on following the feed chart for for another 2 weeks and if I see any signs of cloudy Trichs I'll start to flush them untill they are 50/50 cloudy and amber.
I really hope these keep going strong. I just cant wait untill I can pack a bong and take a rip of my very own home grown weed!

Likes
5
Share

@Aleks555
Follow
Hello friends! 🌱
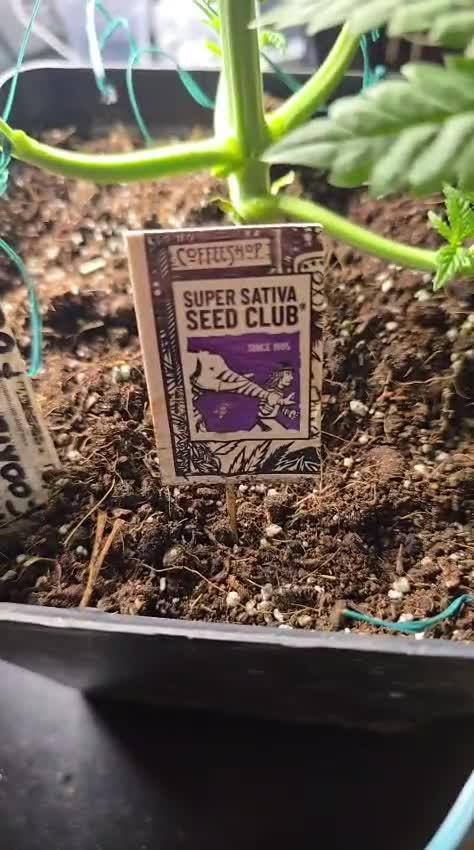
F028 - The Devil’s Cookie One from Super Sativa Seed Club — Day 23
Everything is going great, and she’s really spreading out — over 30 cm wide now! She looks amazing, with big, healthy leaves, already showing more than 5 fingers per leaf. After topping, she has gained noticeable mass in just 6 days — a real chunky girl 💪
Today we stretched her out again and will continue to enjoy watching her grow.
Day 26 — we performed defoliation
Lighting: 50% power, about 45 cm from the top
Temperature — Day: up to 27°C | Night: 19–22°C
Humidity — around 80% day and night
We are not using any nutrients yet, as the soil is already rich and provides everything she needs for now.
We really love how she looks — what do you guys think? Drop your comments, ask questions, don’t be shy! Let’s share experience and knowledge — we’re all here to learn and help each other 🤝
Likes
15
Share

@Ribemarti
Follow
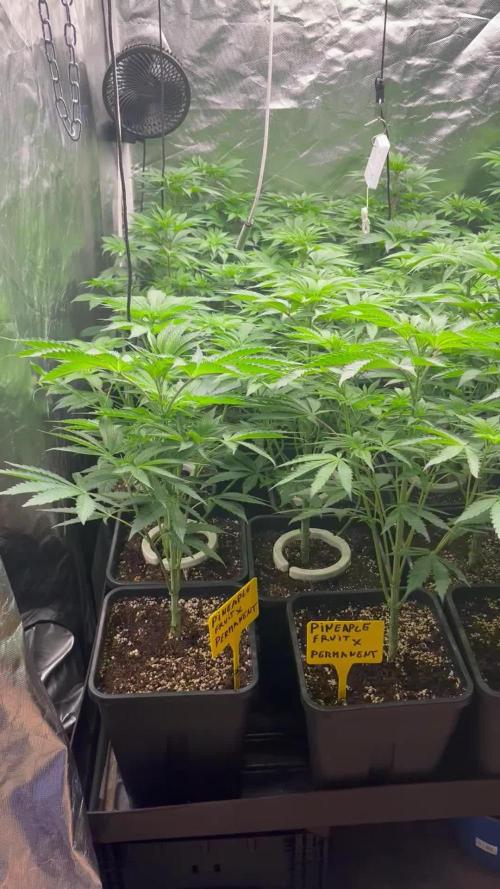
SEGUNDA SEMANA DE FLORACIÓN, LAS PLANTA ESTAN ESTIRANDO BIEN, TANTO PARA LOS LADOS COMO HACIA ARRIBA, QUEREMOS LLENAR Y NO DEJAR NINGUN HUECO, DE MOMENTO VAN COMO UNA MOTO
ESTOY REGANDO CADA PLANTA CON 1,5 LITROS, SIEMPRE RIEGO CADA 3 DIAS, EC 1080 PH 6,3 SEGUIMOS TODA LA TABLA DE BIOBIZZ
TENEMOS HASTA EL DIA 14 PARA HACER LA ULTIMA PODA DE RAMAS BAJAS, DESPUES DE DIA 14 SE PUEDEN ESTRESAR, SE VALORARA DURANTE LA SEMANA Y DOMINGO HAREMOS LIMPIEZA DE BAJOS,

Likes
31
Share


@Mr_Motalovah
Follow
Hello growers and tokers! 👋 👩🌾 🧑🌾.🔥💨
There has been much change this week!!
First there was a big defoliation done, I cleaned the bottom of the plants.
All the growth that wouldn't amount to anything because the light doesn't penetrate that low.
Also took off the biggest fan leaves to give more light penetration.
Then finally switched to 12/12..
After just 36 hours after the defoliation there wasn't much change
Some new growth..the colas are stacking nicely which is good.
Hope they stretch some more still..
I'm still watering every other day, After the defoliation I watered with only Enzymes 2ml/L to clean the roots a bit then started with the nutrientes again.
I dropped the amount of grow nutrients from 3ml/L to 1ml/L and started adding bloom nutrientes 2ml/L for now.
I'll slowly be upping the bloom nutrientes and after week 2 I'll no longer add grow nutrients.
That's it for this week. Stay tuned to see how they flower.
Stay safe!

Likes
44
Share


@Chedderbob112
Follow
Yes guys lot of arguing n disbelief and negitive vibes on ma chat do you know a was Fukin rajin ready tae head over tae Texas n open a can of whoop ass on old @silverback guerilla aye herd him gettin tooled up for war so the Mack tenz n rocket 🚀 launchers on stand by everyone has there own opinion true rite ok I think mutation because I know I haven’t potted stray seed highly unlikely


Likes
9
Share


@Nachtjasmin
Follow
Sie gedeiht :)
Ist im Gegensatz zu ihrer zum gleichen Zeitpunkt eingesäten BPP Schwester ein bisschen langsamer unterwegs aber das macht mir nichts aus. Gibt mir letztendlich dann mehr Zeit für Trainingsmethoden, wenn sie langsamer unterwegs ist. Zudem hat sie im Gegensatz zur BPP nicht gespargelt und keine nekrotischen Flecken auf den ersten Blättern.


Likes
12
Share


@QueenBZA
Follow
Beautiful take off from these ladies with the Wedding Cake Roots already touching water!


Likes
5
Share


@Skinnytalls420
Follow
So I would say this is day 77 start of week 11-06/12/22 she’s looking better new growth is nice and green but will need to give her more time I think before turning over
Likes
27
Share


@CanadianFillmore
Follow
Harvest time is here for both Mandarin dreams. Both plants were frosty, sticky and healthy, with MD2 being the better of the two. Will update in 7-10 days with dry weight and smoke report.
Thanks for stopping by 👽🌳🔥💚
Update 01/26 - dry weight of 141 grams, MD1 surprised me with the higher weight, her buds are much denser than MD2. Smell and taste is fruity, citrus, with a little berry.

Likes
48
Share


@CapybaraProbioticTeam
Follow
Hola!
Esta fue la cuarta semana de floración. La planta avanza lento, pero avanza. En comparación a la semana pasada, se vio un mayor desarrollo (yo creo que esta ligado a que las temperaturas de esta semana fueron superiores a la anterior).
Esta semana no hice riegos foliares ya que de nuevo estamos teniendo una humedad ambiente alta, y no quiero favorecer la presencia de hongos.
Esto fue todo por ahora..
Saludos!
Likes
61
Share


@Verlido
Follow
Note : * = Changed watering schedule to giving 4 Liters per plant per day since day 3 during week 12, currently giving 6 liters a day per plant due to extreme temperature change. Might drop back to 5 Liters per plant per day depending on weather conditions.
Note : Haven't been giving nutrients to my plants since the beginning of week 12, will be giving nutrients again at the end of week 14. The plants are having 2 weeks of flushing and seeing if they are in need of nutrients or not.
Week 13 - Day 1 : Upscaled watering *
Week 13 - Day 2 : Unknown information
Week 13 - Day 3 : Water check, pinched lower branches
Week 13 - Day 4 : Unknown information
Week 13 - Day 5 : Temperature check, humidity check, pinched branches of subjects 1,2 and 3
Week 13 - Day 6 : Restday
Week 13 - Day 7 : Pinched branches from subjects 1,2 and 3.
Week 14 - Day 1 : Pinches branches of subject 1,2 and 3. Picture from above showing the canopy of subject 1,2 and 3. Showing subject 4 and 5.
Week 14 - Day 2 : Restday
Week 14 - Day 3 : Unknown information
Week 14 - Day 4 : Pinched branches of subjects 1,2 and 3.
Week 14 - Day 5 : Pinched branches of subjects 1,2 and 3. Super cropped subject 1 into a more even canopy, bend into a 90-degree angle and secured with a rope.
Week 14 - Day 6 : Changed setup, due to subject 5's height he needed to be moved more backward, also for a better-controlled airflow.
Week 14 - Day 7 : Restday, didn't make a picture of subject 3 accidentally.
Note : Still haven't been using nutrients yet for 2 weeks straight. I don't think they need that much nutrients since I have been giving them so much lately. Will ask this tomorrow in my new grower question and lets see who comes up with the best answer for this.
Likes
5
Share


@Staffedition
Follow
Привет друзья!
Пол пути уже пройдено, полёт отличный😃
На 3 фото, левый куст TROPICANNA POISONZKITTLEZ XL AUTO
Всем добра и мира
Likes
52
Share


@blazin_skywalker
Follow
Day 9 - These plants are growing immaculately. Dark green, thick, healthy leaves, no stretching, they're growing like an absolute dream.
Since removing them from the run-off catching orange cups, they have happily air pruned themselves and are continuing to beast out. 💪
I've only watered them once on day 5 so far. I've been warned by other growers that M3 is very easy to accidentally over water, so I am keeping that on my mind with every check.
Day 10 - Noticed some pale spots on one of my seedlings. It's only on the second true leaves of one plant. Gave them a watering with 6.5 pH water
Day 11 - Spots on one of my plants still there, taking up a little more space on the leaves. Still only present on the second true leaves of this plant. The plant appears otherwise happy and healthy. All three others are green and mean. 💪
Day 12 - Transplanted these little lovies into 1 gallon pots. Gave a light watering to just the outer ring of the pot with 6.5 pH water. My Step-Veg program for my California Lightworks Solar System 550 has been gradually increased to R80 W80 B99.
First time transplanting anything outside of a seedling before, I was embarrassingly nervous. Made sure to get a ton of pictures of each one because I'm Mom af. 😂
Anyway - excited to see how many ladies I can score this round! Please give me at least one! 💜🙏💙
Day 14 - Closing out a beautiful week. I'm still unsure of what is causing the spots on one of my plants. I've gotten many suggestions of pests, but I've spent at LEAST a cumulative 4 hours over the past 2 days with her under the microscope, combing the leaves like an overprotective mother, and I have seen zero suspicious microscopic gang activity.
As a precaution, I mixed some neem oil and dish soap and sprayed all the plants at lights out.
Storytime was a big hit with the kids. 🤣💜
Likes
55
Share


@BodyByVio
Follow
Just got done with trimming the 4x4 @greenhouseseedco Super Silver Haze / @blimburnseeds Silver Surfer Haze tent.
The final yield is exactly 1000g plus some (kind of a lot)that I smoke in the last 2 weeks 😃
Also got 6, gallon size ziploc bags filled with good quality trim for concentrate.
To be honest I was expecting a little more but keeping in mind that this grow I did not supplemented with bottled CO2 I think I’m good with the results.
Definitely I enjoyed a lot this grow and I’ve learned even more.
Likes
11
Share


@The_Hoods_Club
Follow
Possibly this is your last week with only water to eliminate excess mineral salts. The appearance of the buds is great, covered in resin and quite hard, almost like stone.Does anyone have any tips for making some live rosin?

Likes
2
Share


@Passionatos
Follow
I put the baby’s into the scrog a few days ago they look super healthy and are growing rapidly:)
Likes
8
Share

@Mikeyc420
Follow
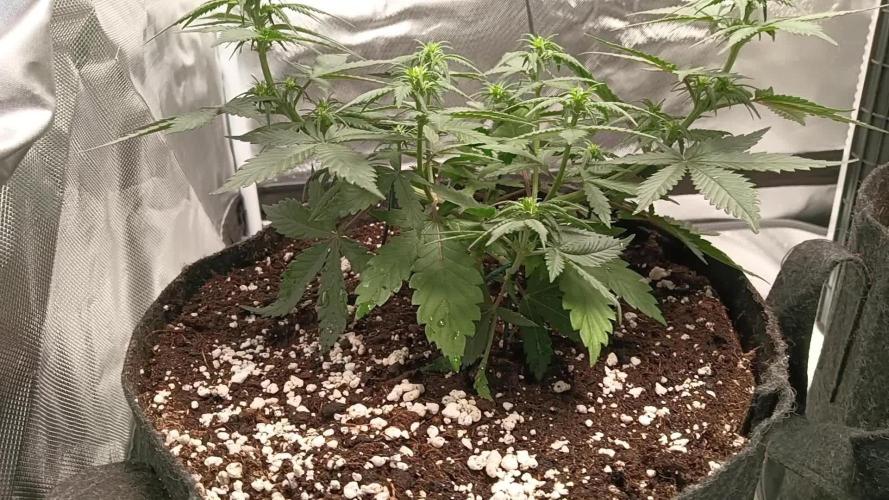
Strawberry gorilla is growing nicely have transferred to a bigger pot (should of done it a week early) she has started to grow white pastels
Sticking with LST buy sting the branched down to allow more light in to other budsites
Don't forget your 15% off your next seed order at fastbuds by using discount code 420CLUB
Likes
17
Share


@m0use
Follow
This was a fun project that was a few years in the making and a year later to see if they would last a season for this upload to happen. Before any of this I would bike aorund town grabbing up all the old Ikea solid pine bed slats that I could find and storing them in the basement. I have a lot of wood down there, any size worked as long as I have enough of them. The hot days to find them were the first and last of the months because that's when people where moving in/out. I also kept an eye on the free section on local online classifieds as well. The entire purpose of this was to recycle as much off the streets as I could before buying anything to finalize the project. In the end I only bought sealer, screws and some takeaway/beers. All the wood was 100% free and salvaged off the streets of Toronto saving it from the dumpster bin.
After collecting all the slats for about 2 years I was playing aorund with them on how I wanted to make this work. I had previously done a little project like this before but I messed it up and the boxes where crap. did not last longer then 2 seasons, they where thin and shallow as well could not grow much of anything in them. I Was talking to my friend who is renovating their house and we brainstormed some ideas on the boxes, I found some designs I liked online and said lets make something like this out of what I have here. We tossed out a few of the design features when looking at them as it would have been wasted wood and extra work not needed. If I had more wood them maybe it could have been an option but simple was the name of the game. They taught me what I needed to know like how the miter saw and sander worked, plus all the other tools I was using. They did help out with a table saw and creating the triangle support joints in the corners, They used some pine left overs they had while making a staircase indoors. I did not feel up to the task of using a table saw given all the relatives I know who have lost a finger to them.
In the end we decided the design would be three boards high and take an alternating pattern on corners. layer one short, layer 2 long, layer 3 short. Went with a galvanized and painted deck screw so it can take the weathering. Ran into some problems like making everything level as some of the boards were warped and other ones had undesired aspects like knots and tacky sticker goo I could not remove. So I used them for the base that will not been seen so much. Clamped everything down and called it a day.
Once it was all done and over with, I then brought them back home from my buddies work garage and started to seal them. I went with a boiled linseed oil as its a food safe option should the wood degrade into the soil I will plant in them. I will need to reapply it to the boxes year after year but the main coat is the most important one and I put it on 3 layers with a good dry in between coats. the inside of the boxes that where coated did not degrade at all as the sun did not hit them so it will not need a new coat just the outside. Overall the end result was very impressive for myself, I've never taken a woodworking class ever and It was a near perfect outcome for me. Heavy Duty Planter Boxes for all my gardening needs. I made a last min decision to add in a plastic liner to preserve the wood even longer and stapled that into the frame. it has held up quite well and may need replacing end of 2nd or 3rd year out in the sun. Used a thick moisture wrap plastic with UV protectors in its formula.
Lets see what I can grow in them this year!
m0use's haus of projects - garden box edition