


Likes
Comments
Share


@Carlovska
Follow
I had to go out of town twice for 5 days for a business trip. Minor errors occurred at that time. It's an easy genre overall. You should not be afraid of fertilizing too much. I'll be back with comments on taste, dry weight and feel. By the way, I'm waiting for your dry weight estimates, I think it will be between 145-165 grams.

Processing
Likes
1
Share


@Dunk_Junk
Follow
Wow monster growth this week!!! last week 9cm, same time this week 30cm!!! Also I fimmed/topped her earlier in the week too!!
Looks like she started flowering this week too.
Look how much she has stretched! I've tried doing a bit of LST. Truth be told I have no idea what I'm doing, but it seems like a good idea to me to spread out the branches so they all get decent light.

Likes
8
Share

@Mannirumpel420
Follow
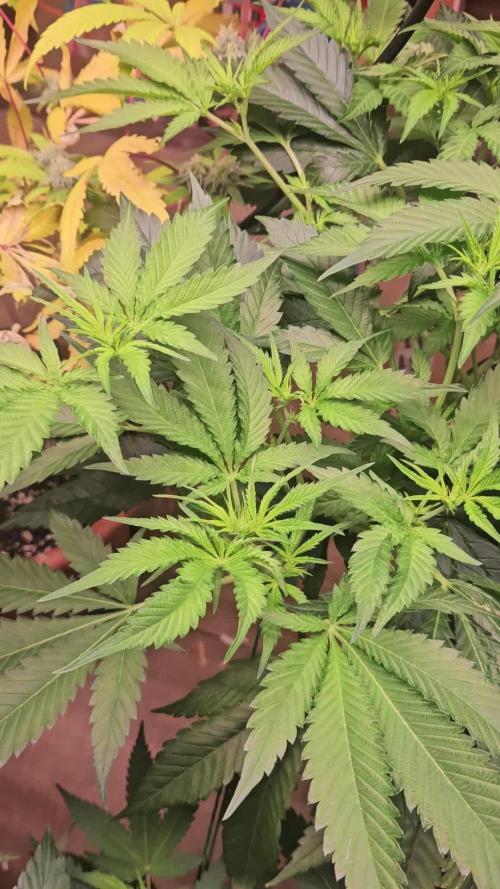
Sie strecken sich schon sehr.Auch ihnen habe ich jeweils Wurm Humus und Power Bloom 2-8-4 auf den Topf gemischt.Somit sollten sie die Nährstoffe in den nächsten Wochen aufnehmen können.

Likes
25
Share


@PrairieFrostGrow
Follow
*****Week 15 growth – March 13 to 19, 2021 – Week 6 flower ******
Feeding has ended this week and we are in flush mode now. The girls have just started to slow down their drinking and pistols are changing colour, buds are swelling, they are getting ready to finish. Added the UV and IR light bars in this week. Started the week with just one bar and then both in place by end of week. Each bar has 10 x 730nm, 10 x 395nm, 6 x 660nm pulling 30 watts each. Trichome enhancers!!
Working with the new light this run I have certainly pushed them with more light intensity than they should have received, broke 1100 PAR for a bit. This has also started to cause some foxtails to begin rather than staying compact and swelling the buds. Know for next time……always changes to make 😊
Little more detail…..
Mar 13/21, Day 36
- Feed day with full line of Innovating Plant Products but at ¾ strength.
- Keeping up the feeding but thinking about nitrogen levels and working on reducing.
- feeding with grow – 0.5, micro – 1.5, bloom – 2.5, ult B – 0.5, carbs – 0.75, B Storm – 2, S Storm – 3, Terp – 3, Jet Fuel – 1.5, Rezin 1
- 1300ppm and 6.2pH
- 4L
- Added in the first UV bar today
Mar 14/21, Day 37
- Seeing lots of swelling these days from the girls.
- Microbe feeding today…….possibly last round of microbes.
- Plain tap water with Recharge @ ½ tsp/gal and Natures Candy @ 1.5ml
- 400ppm and 6.1pH
- 3L all around today…..very little run off.
Mar 15/21, Day 38
- Another feed day today. Last week of feed so pushing them a little more. No Grow added! Last couple of feeds with CalMag as well, seeing some magnesium issues so giving last dose.
- feeding with micro – 1.5, bloom – 2.5, ult B – 0.5, carbs – 1, B Storm – 2.5, S Storm – 3, Terp – 3, Jet Fuel – 1.5, MagNifiCal – 1.5ml
- 1175ppm and 6.0pH
- 4L
-
Mar 16/21, Day 39
- Just giving the basic building blocks at this stage. Most of the supplements not added this feeding.
- feeding with Grow – 0.5, micro – 1.5, bloom – 2, carbs – 1, Rezin – 1.5ml, MagNifiCal – 0.5ml
- 875ppm and 6.0pH
- 4L
Mar 17/21, Day 40
- Last Feed Day……calling it at day 40 this run!!!!!
- 4L of feed water left from yesterday so added in 12L of RO water to keep the ppm down.
- Left over plus Rezin @ 2ml, Overdrive @ 2ml (its hard to let go of your routines…I have been using Overdrive for so long……it feels wrong to not be using it this run….snuck in a couple ml😊)
- 485ppm and 6.0pH
- 4L
- Light power pushed back up to 525 watts……..keeping the intensity up to hit the lower bud sites….will see what happens to the uppers.
Mar 18/21, Day 41
- Starting flush but not hitting the pots with 12 gallons of water each type of flush! Will just drop the ppm down to nothing and use RO water……planning on having close to 3 weeks to flush….second guessing that I really have that long though so may actually end up adding a flushing agent to the girls…..decide in the next 4 days so can leave plain water time if I do.
- Watering with Enzymes @ 2ml…….clean up the roots and help them get more of the ppm out of the media.
- 100ppm and 5.9pH……..missed the pH but not adding both up and down, ran with this.
- 4L
- Light power pulled back down 480 watts
Mar 19/21, Day 42
- Dry out day today. Will be letting the pots get dryer now before adding more moisture.
- Leaving them for today though. Give flushing agent in next 2 days if going to.
- Work down the light intensity more in next couple of days as well.
- UV lights going now for 3 hours per day on both fixtures at the middle of the light schedule.

Likes
32
Share


@OrionSparkles
Follow
•Todo marcha ok; hay dos Epic que están más desarrolladas.😊
•En esta semana trasplantaré a mecetas de 6L,y prepararé el abonado a usar.
•Powder Feeding Bio🤙🏻
--------------------------------------------------------------
🚀A dia de hoy: 👇
▪️Editado: 15/10/23
-Trasplanté a macetas de 7L,tamaño final.
-Mezclé en cada maceta 15g de feeding bio grow.
-Y 2g por 2L,de Aditive powder Enchancer; está mezcla la aplicaré cada 12/14 dias aprox.PH: 6,🤙🏻

Likes
16
Share


@peggyo
Follow
Going into Harvest with 2 of the plants next week, flush started - these are more Indica - Tri's are mixed cloud and clear. Other 3 plants are clear and getting 1000ppm nutes still.

Likes
33
Share


@Weird_Jimmy
Follow
😼Wk15: Surprise! This is the right time.
👉This week’s journal is only the days that lead up to the harvest which happened mid to late in the week. Since the harvest process takes more than a couple days, and it happened late in the week, I will be making one more week with the harvest process after the buds are dried to 20-25% (hopefully) and in jars. I should have all the final specs for the grow.
👉The 1 gallon plan was not even absorbing much fluid. The saturation volume of the media was getting smaller each day it seemed. It would take over 5 minutes to be able to pour 1.5 liters of solution into the pot. The run-off would also end very quickly as compared to all other plants I grew. I surmise this is due to the roots packing the pot and compressing the media very tightly, not allowing it to absorb much solution. The light sweet caramel aroma is now replaced by what I would call the strong generic funky stank of weed. While there is nothing extraordinary about the aroma, it’s so strong that you can smell it outdoors (its vented outside from second story window). Even with, medium to strong winds you can catch whiffs of it. Smells like heaven to me! Super frosty buds. Only a couple buds had any fresh calyx’s with white pistols. During my trichome hunting expeditions I see very few amber. But those are not what Im hunting. Im looking for the majority of the trichomes to be cloudy. I believe by mid-week all the buds had mostly cloudy trichomes with a few clears left. Harvest came on day the 3rd day of the week.
👉The 3 gallon plant was consuming less fluid. It was easy to fertigate it with 3l of water. The EC was spiking very quickly and would not come down very much. The run off would fall back in range but be above target the next fertigation event. I figured it may just be the densely packed roots in the pot. With the pH runoff going in the opposite direction as the 1 gallon plants run-off and I was wondering what was causing the difference. Even though the lowest leaves look a little like the plant was over watered, I continued the high volume of fertigations. I did reduce the EC somewhat. I was giving it week 10 mix on the GHE mix chart for drain to waist mix. The leaves looked crappy, but the buds were looking awesome. The plant had the same light creamy caramel aroma when sniffed up close, but the strong aroma of stanky funk was the permeating odor that filled room. I had only done some light scouting for the trichomes on the plant and each time saw more cloudy tips. I wasn’t sure but by Tuesday the trichomes looked at least 50/50, which is a little further along than I thought it would be. After harvesting the 1 gallon plant I had room to pull the plant out and rotate it and give it an exhaustive scan for a more complete idea of how much time it had. When I rotated it, I didn’t notice it at first. Then I focused on it as the top of a cola was brown and the leaves around it were all dried. “Oh fuck!” I shouted. It was like someone had walked up behind me and jabbed me in the ribs and yelled "BOO"! I was startled and even jumped out of my chair. I then did a double and triple take to make sure my eyes weren’t being grizzled or bent. I then grabbed the branch cutters and took that branch. I searched the cola and it was isolated to the top 3 inches of this fat pine cone. I snipped it below that group of bud and removed it from the house, took it out back in the field and stabbed it, shot it and set it on fire (only in my imagination). I then washed and sanitized my hands, returned to the tent and inspected some of the larger colas, pulling them apart and looking to the center for nasty pestilence. Fortunately I didn’t see any. I didn’t have time to harvest it right then and there, but I did on Friday night. I knew I wasn’t out of danger yet though. These buds are pine cones and very dense. I was afraid Id see the same thing I saw in my Critical purple and lose all the best buds. I wouldn’t know until the harvest was complete, with the buds curing in the jars. 🙀

Likes
11
Share


@ElGrowLab
Follow
The End is near. Can’t wait to harvest and dry them. Next 2 Weeks I use to flush them.
I think then they’re ready. I’m very proud of the purple BigBud. She’s purely looking incredible.
What do you think ?


Likes
81
Share


@TheCannaProphet
Follow
Growing this strain was such a pleasure! I vegged her for quite a bit at 86 days as I started her along with a dozen Autoflowers that were growing in my 4x8 tent.
I wanted to wait until the Auto's finished up so that when I flipped the Meringue into flower I could move her into the 4x8 which has better environmental control, more light and co2 supplementation which I wanted to take advantage of to bring out the full potential of this awesome strain!
From germination through the Fourth Week of Veg she grew in my 4x4 under a HLG Blackbird light set to 300W at the wall, on a 19/5 light schedule and was given only de-chlorinated water with FishShit Soil Conditioner added. I then switched her over to Dutch Pro nutrients for the remainder of the grow.She handled up to 1400ppms 2.8 EC of nutrients without skipping a beat and ended up with a marvelous dark maroon coloration with hints of red that were contrasted by the heavy, frosty coating of glistening trichomes she produced throughout the last 5 weeks of her 9 week flower, four of which she received 4 hours a day of supplemental UVA light.
Once in the 4x8, I trellised off half of the tent and placed her under it. Once she was acclimated to her new home which only took two days, I flipped her light to 12/12 to induce flowering and sat back to watch the 'show' begin! By Week Two of flower she nearly had half of the 4x8 covered wall to wall! Keep in mind that she does have really wide node spacing so prepare yourself for daily 'leaf tucking' to ensure adequate light penetration through her canopy. All in all she was an absolute joy to grow and provided some of the most beautiful, pungent, dense and sticky flowers that I love so very much!
I've cultivated this strain several times now and would recommend it, especially to experienced growers as sometimes she can be a bit finicky. The breeder recommends 30-45 day veg and advertises an 8 week flower. I vegged her for 86 days and flowered her for a full 9 weeks, the last two of which had the light cycle dropped to 10/14 to further induce trichome production (which along with the 72hrs. of dark apparently worked) which is a reminder to you new guy's that Breeder times are not 'cut in stone' and are a 'general recommendation'. Always know your plant and check the trichomes to determine exactly when the ideal harvest time has arrived as so many variables can affect harvest times. Grow Strong! 😎💚💚💚

Likes
9
Share


@musashi_miyamoto
Follow
Both popped after 36 hours, then put in soil - they popped out of the soil in less than 24 hours - literally none of my seeds (probably germinated 10 seeds) have failed in intratuin soil, it's amazing. Since i'll be transplanting in a few days anyway, i put them together in a 5L pot. made sure to get a good amount of water in the bottom 2/3 of the soil so the roots have something to reach for.
Now they're "under" (more to the side lol) my 45W LED, which seems to have worked for other seedlings. 16/8 light schedule, need my sleep
Likes
4
Share

@eldruida_lamota
Follow
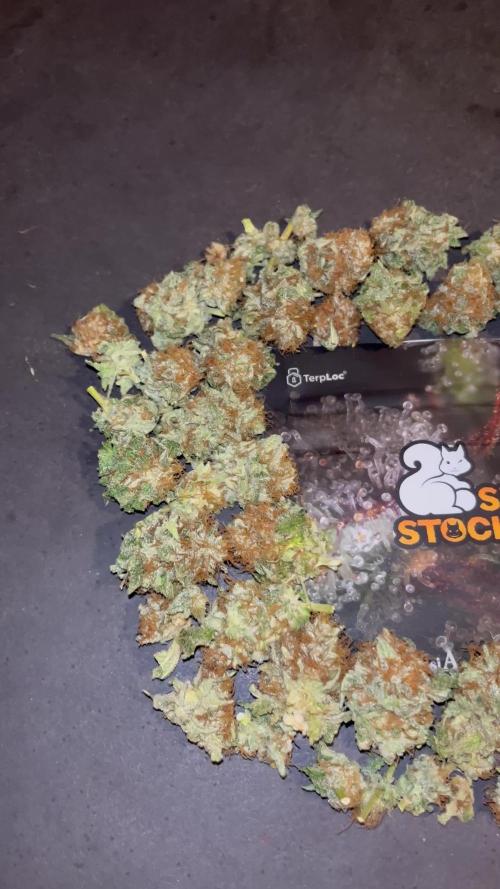
Venga familia que ya viene la cosecha de estas semillas mistery de Seedstockers, que ganas que tenia ya de darles machetazo.
Que locura de variedad , me encantó cultivarla , aún con la plaga de trips que sufrí aguantaron y sacaron unas flores alucinantes.
Las flores aparte de piedras, se ven resinosas.
a sido una genética con la que disfruté bastante, por el momento no puedo dar muchos más datos sobre este proyecto pero aquí resultados.
Agrobeta:
https://www.agrobeta.com/agrobetatiendaonline/36-abonos-canamo
Mars hydro:
Code discount: Eldruida
https://www.mars-hydro.com/
Hasta aquí es todo , espero que lo disfrutéis, buenos humos 💨💨.


Likes
17
Share


@BLAZED
Follow
Week 1 (31-1 to 6-2)
As for my waterings, i give RO water, with 0.50 grams of Calcium, and 0.2 ml of Atami Rootbastic a liter.
Growdiaries wont let me put my nutrients in grams so i'm forced to choose mililiters.
31-1
Watering: 20 ml.
1-2
Watering: 20 ml.
2-2
Watering: 20 ml.
3-2
Watering: 20 ml.
Heights:
Chemdog#1: 6cm
Chemdog#2: 5cm
4-2
Watering: 40 ml.
5-2
Watering: 20 ml.
6-2
Watering: 60 ml.
Heights:
Chemdog#1: 6.5cm
Chemdog#2: 5.5cm
Likes
24
Share


@OGOZHigh
Follow
Update : 09.06
Da das Wetter hier im Norden nicht so mit spielt, machen sie langsam Fortschritte.
Wir machen das beste Draus ✌️


Likes
5
Share


@InsideAz
Follow
Week 3/6 veg:
1/1/25
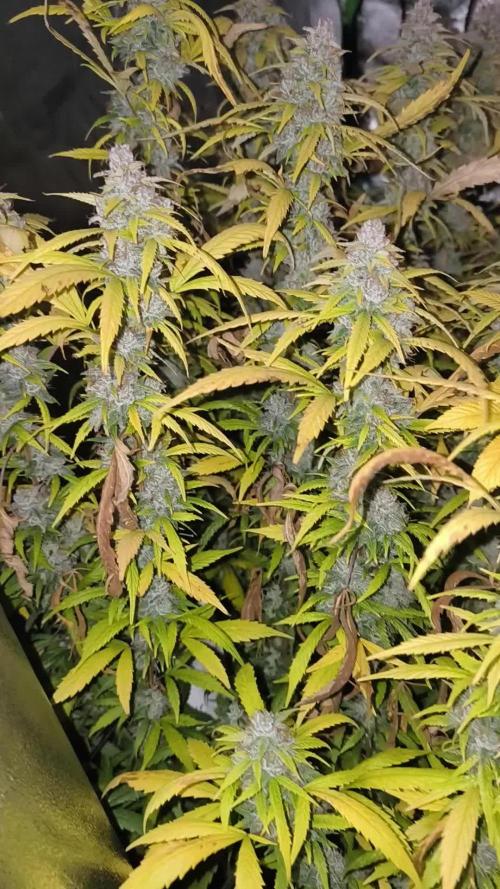
Just watering and twisting/bending branches every couple of days. Not putting a lot of effort into training in hopes of creating taller plants within my 6 week veg timeframe. They are loving the slow release nutrients and the extra space for roots
Veg tea in a few weeks
Light at 40% but will be increased next week

Likes
2
Share

@GrowdadGage
Follow
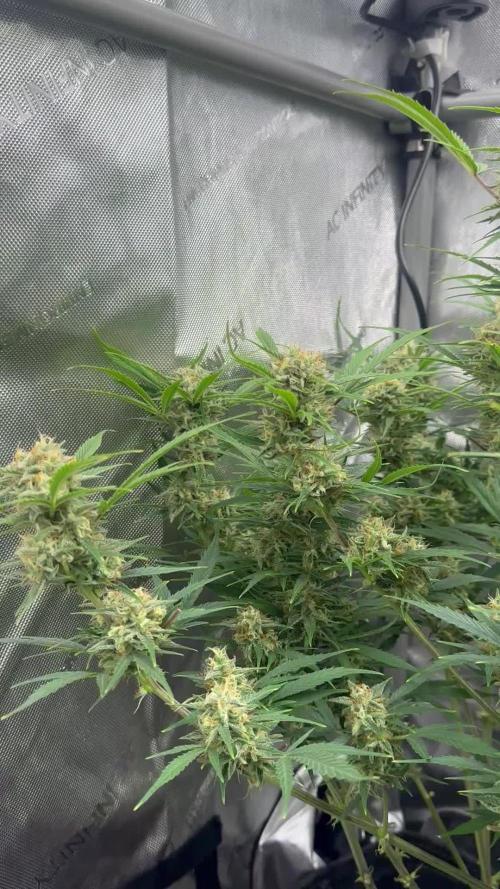
Trichomes still look to clear still debating if I start flushing this coming week or the next.
Either way buds look great starting to put on the frost on the density now.
What a fun grow 😁

Likes
23
Share


Likes
12
Share


@CANNASIM
Follow
The plats are not been trained, defoliated or anything, grown naturally.
I’m blown away how fast this plants are growing. First time outdoors and the experience is very nice, I love the fact it requires little to no effort, in the setup I have chosen.
As it is raining a lot, I’m using only a dry amendment I have built to use on them periodically, this way I’m not adding more liquids to the root system that is already highly saturated, essentially I’m using the following recipe update, I don’t know if it is correct but I live it all mixed. Use about a table spoon and a half every 15 days.
- Azomite 500g
- Natural fosfate 500g
- Biochar 1kg
- Bokashi 1kg
-Kelp meal 500g
-Mamona meal 1kg
-chicken meal 1kg
-Potassium silicate 500g
-Gypsum farm 500g
-Diatomaceous earth 500g
-Bunny guano 300g
-Bat guano 1kg
-Oyster shell powder 1kg
-Cow blood meal 1kg
-Cow bones powder meal 1kg.
-Wormcastings, spare use not in the mix.
The plants are showing good coloring, no fade and no deficiencies, the green is not to deep, nor too light. As the leafs are taking a lot of water and strong sun and wind, the leafs are feeling a bit. As the wind is high since day 1 the stems are very resistant, strong.
The Fastberry Is on the smaller size if compared to the other plants, together with the Banana purple punch, then we have the Bluedream and the CBD crack on the larger sizes thriving a lot, I expect to approach the end of flowed in a few weeks, the girls are very fast indeed. I’m looking forward to collect the fruits :)