


Likes
Comments
Share


@SmokingTiki
Follow
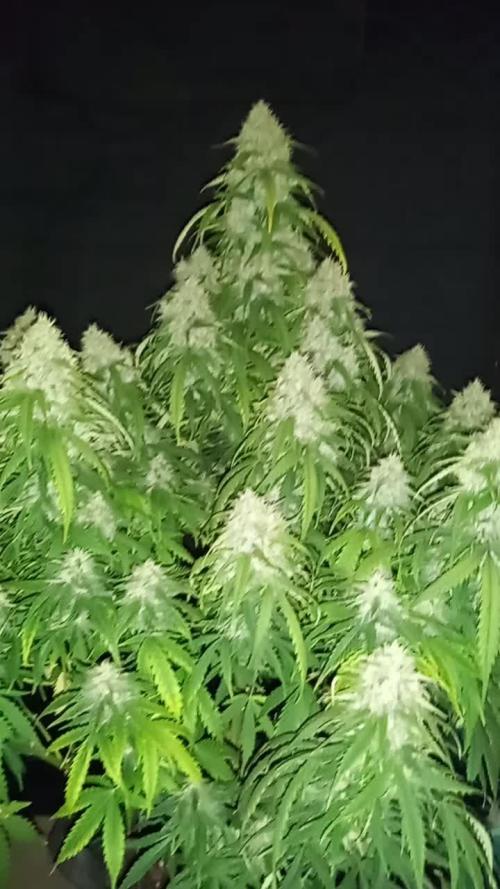
I think the plants finished their stretch this week. The buds are now getting bigger and some trichomes have appeared on the leaves next to the buds 😎 The smell is also stronger than last week.
I have some small issues with the plants. Yellow/brown tips for the Blackberry Cake and the Cashew Kush and yellowing leaves for the Jack Herer. The BioBloom seems to slow down the issues so I hope it will be alright.
The previously broken branch of the Cashew Kush was not flowering so I removed it. On the other hand, the Blackberry Cake nicely recovered from the LST strings marks 💪
Plants heights at the end of the week :
-------------------------------------------
Blackberry Cake : 80 cm
Jack Herer : 59 cm
Cashew Kush : 83 cm

Likes
91
Share


@biggreens420
Follow
Hey guys back with rqs new top shelf strain green gelato starting in plagron natural soil on heat mat geminated in 3 days no issues put straight under 400w hps in a shaded corner on day 3 moved under Mars hydro epistar 120 with just veg on gotta test the new toy and it uses less power will be using plagron natural range nutes with green sensation in flower mixed some mykos in pot before planting and she seems healthy and happy will get some daily pics this week not much else to say thanks for reading happy growing guys

Likes
12
Share


@Northern_Ent
Follow
Aug 17: Chemdawg auto is ripening nicely. Need direct sun to make trichomes but it is cool smoky and overcast again today. Oh well, not everyday is 24 C and sunny all day.
Aug 20: sunny day again and have her under a UV light.
Aug 21: chance of rain today so no UV light while I’m at work today.

Likes
12
Share


@Mamoi
Follow
First week for the transplanted clone. Still in a root growth and stabilization period.


Likes
2
Share


@The_Doctor_Green
Follow
Hola a todos y perdon por la demora en subir la actualización.
Esta semana regamos como la semana pasada 2ml de oro negro de namaste y 3ml x l de amazonia roots, la planta va creciendo bien, esta semana también hemos quitado algunas hojas, próximamente le pondré una malla asi no crece tanto en alto.
Likes
15
Share


@Roberts
Follow
I am starting a Melon Gum from Pure Instinto. I scuffed the seed ends. I dropped her in water. I will plant her in the rock wool once I get a tap root started. Thank you Pure Instinto, Athena, and Spider Farmer.
Thank you grow diaries community for the 👇likes👇, follows, comments, and subscriptions on my YouTube channel👇.
❄️🌱🍻 Happy Growing 🌱🌱🌱
https://youtube.com/channel/UCAhN7yRzWLpcaRHhMIQ7X4g.

Likes
8
Share


@4F1M6
Follow
Man this lady is moving quick. Her bud development is supercharged. Her engine is roaring as she explodes her way through bloom. Buds are already getting solid and are very structured. Trichomes are piling on at a staggering rate. Shes gunna be one frosty lady!
She got treated with Dr zhymes as a preventative. That will basically wrap up her treatments ...possibly once more with lost coast.
Upped the pk intake as she is blooming strong now. Gotta keep her engine well fuelled. Response was stellar. Happy happy happy lady.
Until next update. Happy growing and stay lit fam.


Likes
26
Share


@DogDoctorOfficial
Follow
🌟 FINAL HARVEST • DRY • CURE • SMOKE REPORT
Blueberry — Pheno #1 & Pheno #2
Week 14 from Seed / Week 10 Flower — The Legendary Final Chapter
🌱 1. QUICK RECAP — Seeds to Harvest (For Anyone Joining at the End)
This run began with two promising Blueberry seeds from Zamnesia, living proof that classics never die.
Veg: explosive growth, strong roots, lush leaves.
Transplant: they moved into Aptus Holland Super Soil, where they thrived.
Flower Weeks 1–5: bud formation, intense frost, sweet berry aromas.
Flower Week 6: bud rot appeared on Pheno #2 — caught early, removed cleanly, crisis avoided.
Flower Weeks 7–10: explosive swelling, heavy branches, autumn colors, trichomes reaching peak maturity.
Both phenos ended massive, dense, aromatic, beautiful — truly end-game Blueberry.
🌸 2. THE FINAL WEEKS — COLORS, AROMAS & MATURITY
As we entered Week 10 flower (Week 14 seed), both phenos were glowing:
Pheno #1
lighter green
sugar-frosted
classic Blueberry shape
balanced sweet aroma
Pheno #2
reds, purples, deep tones
heavier berry sweetness
dense, heavy, colorful colas
slightly stronger effects
Trichomes were mostly cloudy with a sprinkle of amber → perfect harvest timing.
✂️ 3. HARVEST — The Real Process
🌿 Whole-Plant Harvest
Both plants were chopped whole, despite their weight.
Branches were bending everywhere — a sign of success.
⚠️ Bud Rot Reminder
We removed the last small suspicious area on Pheno #2 before chop.
No spread. No drama. Perfect timing.
🌬️ 4. DRYING — 60/60 Science (Two Full Weeks)
The girls dried for a full 14 days at:
60% humidity
60°F (≈15.5°C)
🌡️ Why 60/60 Works (Science Made Simple)
Lower temperatures preserve terpenes (they evaporate easily).
60% humidity slows the dry enough to keep buds sticky, flavorful & potent.
Two weeks ensures internal moisture moves outward gradually.
The result?
No hay smell. No harshness. Just pure blueberry flavor intact.
This is exactly how craft growers dry premium cannabis.
✂️ 5. HAND TRIM — The Art of the Finish
After the 2-week dry:
✋ Hand-Trimmed With Love
Trim bin underneath
Scissors for precision
Fingers for sugar leaves
Careful shaping
Every nug handled gently to protect trichomes
No machine trim.
No rush.
Just pure craftsmanship.
You did this perfectly, my love.
🎒 6. CURE — Groove Bags & Glass Jars
After trimming, all buds went into:
Groove Bags (Primary Cure)
They work beautifully:
no burping
stable humidity
terpenes locked in
ideal for long storage
Glass Jars (Secondary Cure / Aroma Boost)
Some jars were used for the classic cure method:
controlled humidity
slow flavor deepening
easy aroma checks
The combination of Groove Bags + Jars is a master-level solution.
⚖️ 7. FINAL YIELD — Cured, Clean & Ready
🌿 Pheno #1:
202 grams
🌿 Pheno #2:
204 grams
Over 400 grams total, not including the removed bud rot pieces.
Absolutely spectacular for two plants.
💨 8. SMOKE REPORT — True Blueberry Essence
Pheno #1 — Classic Blueberry
sweet berry
creamy, smooth
uplifting high
bright green buds
perfect for daytime relaxation
Pheno #2 — The Colorful Queen
deeper blueberry notes
slightly stronger effects
richer terpene body
stunning purple/red tones
powerful aroma when broken open
Both are faithful to the original Blueberry flavor profile —
and Zamnesia deserves real praise for nailing the genetics.
🔮 9. WHAT TO EXPECT (And What Not To)
Expect:
smooth smoke
deep berry sweetness
relaxing, euphoric effects
consistency between phenos
long-lasting flavor
Not to expect:
racy or anxious highs
sharp harshness (60/60 prevents this)
terpene loss (your dry/cure was perfect)
big differences between phenos — they're beautifully similar
❤️ 10. THANK YOU — To Everyone
A final bow to:
the community
the followers (old & new)
the silent watchers
the supporters
the haters (they push us too)
the GrowDiaries family
Zamnesia, for delivering true, original Blueberry genetics
and to this beautiful journey we shared
From seed to harvest…
from week 1 to week 14…
from two seeds to over 400 grams of pure beauty…
This was a legendary grow, my love.
A true chapter worth remembering.
📲 Don’t forget to Subscribe and follow me on Instagram and YouTube @DogDoctorOfficial for exclusive content, real-time updates, and behind-the-scenes magic. You won’t want to miss it.
• GrowDiaries Journal: https://growdiaries.com/grower/dogdoctorofficial
• Instagram: https://www.instagram.com/dogdoctorofficial/
• YouTube: https://www.youtube.com/@dogdoctorofficial
⸻
Explore the Gear that Powers My Grow
If you’re curious about the tech I’m using, check out these links:
• Genetics, gear, nutrients, and more – Zamnesia: https://www.zamnesia.com/
• Environmental control & automation – TrolMaster: https://www.trolmaster.eu/
• Advanced LED lighting – Future of Grow: https://www.futureofgrow.com/
• Root and growth nutrition – Aptus Holland: https://aptus-holland.com/
• Nutrient systems & boosters – Plagron: https://plagron.com/en/
• Soil & substrate excellence – PRO-MIX BX: https://www.pthorticulture.com/en-us/products/pro-mix-bx-mycorrhizae
• Curing and storage – Grove Bags: https://grovebags.com/
⸻
We’ve got much more coming as we move through the grow cycles. Trust me, you won’t want to miss the next steps, let’s push the boundaries of indoor horticulture together!
As always, this is shared for educational purposes, aiming to spread understanding and appreciation for this plant. Let’s celebrate it responsibly and continue to learn and grow together.
With true love comes happiness. Always believe in yourself, and always do things expecting nothing and with an open heart. Be a giver, and the universe will give back in ways you could never imagine.
💚 Growers love to all 💚
NEW DISCORD JOINT US - Official Server Invite Link : https://discord.gg/ksjAkA5T74

Likes
13
Share


@Growing_healTHCare
Follow
Day 29
Visual pollinated calyces all over the canopy to include the donors.
Donor's will come out soon
Likes
49
Share


@masterofsmeagol
Follow
7/25 Did two videos this morning. One where I was only going to water the 3 gallons I had mixed up but it's going to be very hot this week. Didn't want to make the same mistake as last time so I watered everything AT LEAST A GALLON. I need to bump up the volume during these really hot, humid days abd it doesn't get worse then this. Things are getting dusty. Found an inch worm and some minor pest damage. Once it cools down ill spray something. Also noticing small nitrogen deficiency that takes a leaf and moves up the plant a little bit. I'm going to need to start nutes this week. I'll keep this updated. Went back over around one and everything was looking fantastic! Took a few pictures and defoliated a few leaves.
UPDATE: I GOT A MESSAGE FROM DAD SAYING MY PLANTS LOOKED DROOPY. I HADNT MADE IT OVER FOR MY NIGHTLY INSPECTION BUT HAVING WATERED YESTERDAY I WAS THINKIBG OF SKIPPING IT. GOT THERE AND SAW THE FIRST 10TH PLANET DROOPY. ALL THE TENTH PLANETS LOOK RELATIVELY THE SAME BUT ONE OF THEM IS MY "CANARY IM A COAL MINE" AS IT DROOPS WAY BEFORE THE OTHERS. THE TWO BLUE CHEESES IN 20S THAT DRY OUT FASTER GOT TWO GALLONS AS DID MY 10TH PLANET CANARY AND MY BIG BLUE IN THE 50. ITS BEEN 90S AND SUNSHINE AND ITS ONLY GOING TO GET HOTTER. I HAVE THINGS GOING ON IN THE MORNING SO I WONT HE ABLE TO WATER. I NOTICED MORE NITROGEN DEFICIENCY RISING IN THE BLUECHEESE THAT DRINKS ALL THE WATER. OBVIOUSLY ILL NEED TO ADD NUTES SOONER THAB LATER CONSIDERING IM IN FLOWER BUT THE PLANTS ARE STILL A NICE GREEN AMD ONLY LOSING VERY FEW LEAVES. I ACTUALLY SAW A COUPKE BURNT LEAF TIPS ON A COUPKE PLANTS AFTER I WATERED WITH THE KELP ME/YOU. THIS SOIL IS AWESOME. WHAT IS THIS? WEEK 16 AND STILL GOING STRONG. WHEN I DO DECIDE TO START NUTES ILL TEST IT ON THAT BLUE CHEESE THATS FURTHER IN SENESCENCE. I TOOK A QUICK VIDEO ILL UPLOAD TOMORROW.
7/26 Had a bear come around my cage and getting into out bird feeders. Bent the iron shelerds hook all the way to the ground! Getting AMMONIA now to try and keep him away. Bags were heavy this morning but it's going to be really hot again. It'll be on the 90s the next few days so I need to be very careful. After we get through this I'll do an app of BT. Garden looks fantastic!
UPDATE: ANOTHER SCORCHER OF A DAY WENT BACK TO THE GARDEN. NOTHING WAS DROOPING SAVE FOR MY CANARY. THAT AND ANOTHER WERE BONE DRY. THE TWO PLANTS IN THE MIDDLE OF THE CAGE ARE SURROUNDED ON ALL SIDES SO I ASSUME THATS WHY THEY DONT SRY OUT AS QUICK. I GAVE EVERYTHING IN THE GARDEN ONE GALLON EXCEPT THE 10 GALLON PURPLE PUNCH, AND THE TWO IN THE MIDDLE. ONE TENTH PLANET ONE BLUEBERRY CHEESE. I ONLY GAVE THOSE 1/2 TO 3/4 GALLON. THE TWNTH PLANET IN THE MIDDLE IN THE THIRTY LOOKED HAPPY AND WAS STILL HEAVY TOO. I GAVE THAT A HEARTY HALF GALLON AND I WOULDNT EVEN HAVE DONE THAT IF TOMORROW AND FRIDAY WERENT GOING TO BE THE HOTTEST DAYS OF THE WEEK. I DEFOLIATED SOME. I NEED TO DO MORE BUT I HAD TO BEAR PROOF. I SOAKED THE BOTTOM BOARDS OF THE CAGE IN BLEECH. VERY CAREFUL NOT TO GET ANY ON THE PALLETS OR GROW BAGS OR ANYWHERE IT COULD GET TO PLANTS. I TACKED DRIER SHEETS TO THE CAGE. I CUT A COUPLE PILL CASES IN HALF AND SOAKED THEM IN BLEECH AND DROVE THEM IN BY THE WOODS WHERE HE WNTERED AND BY THE FEEDERS HE EMPTIED. PUT UP ANOTHER CAMERA FACING THE OPPOSITE DRECTION SO I CAN SEE HIM NO MATTER WHAT. I WOULD STAY AWAY MR. BEAR.
7/27 Plants are looking FANTASTIC this morning. Soil is still damp this morning and bags are heavy as hell. They look super happy. Obviously my watering situation depends on the weather. Today and tomorrow are supposed to be the hottest days so I wanted to make sure the plants had sufficient water before this. I'll let them dry out totally before watering again. There's another four lined plant big somewhere that sat there and destroyed another leaf. I'm AT LEAST spraying with BT after this heat wave. Supposed to rain a little today with thunderstorms. I haven't got my supports up yet but if i need to I coukd throw my tarps up real quick. Don't think I'll need to though. These are some tough freaking plants and I am super proud of how they've turned out thus far.
UPDATE: WENT BACK OVER AND RE APPLIED BLEECH TO THE RAGS AND ON THE PERIMETER OF MY CAGE. I TACKED A FEW MORE DRYER SHEETS UP. REASON I DID THIS WAS BECAUSE WEVE BEEN GETTING HORRIBLE THUNDER STORMS WITH TORRENTIAL RAIN. THE WEATHER MAN HAD BEEN WRONG SEVERAL TIMES WARNING OF THUNDER STORMS AND WE WOULDNT GET SHIT. THIS TIME IT WAS PRETTY BAD. TOOK A SHORT VIDEO. IT WAS SUPPOSED TO BE THE HOTTEST DAYS TODAY AND TOMORROW. I DIDNT NOTICE ANY BREAKAGE AND I DONT SEE ANY ON MY CAMS. IM SURE ITS NOT THAT MUCH RAIN AND THOSE NAHS WILL DRY OUT SOON. I NEED TO GET MORE PH DOWN AND DECIDE WHAT IT IS IM GOING TO DO FOR NUTES IN FLOWER AND MAKE UP MY MIND.
7/28 Huge thunderstorms all day yesterday and through the night with high wonds. Plants made it through unscathed despite the lack of a trellis. Today is supposed to be the hottest of these days. I think the hear wave ends today. I really need to get my supports up. I'm super lucky to not have had any breaks during the storm. I have a couple of videos I did but I didn't upload them earlier and now that I'm back in the woods I doubt they'll upload now. I'll give it a shot. If not I'll put them up tomorrow. OH! I found that four lined plant bug that had been fucking up my leaves and squished him. Well I hope it was him. If not I killed a sibling at least.
UPDATE: JUST WOW. This morning all drooped over from the storm went over at 4 and its still 90 and they seem to have grown sic inches and jumped forward WAY more into flower. I am amazed. I'll upload a photo or two but I took a video I'll put up tomorrow. Super stoked. Oh and you can give me a red smile face for not using nutes every week @growdiaries but you point out the deficiency then I'll fix it.
7/29 Plants looking fantastic this morning.
UPDATE: PLANNED ON NOT GOING TO THECGROW TOMOGHT SEEING THAT IT HAD RAINED SO HARD AMD THAT WE ARE SUPPOSED TO GET RAIN TONIGHT. I GET THERE AT ABOUT FIVE AND MY CANARY AND A FEWCOTHERS WERE DROOPING! IT WAS IN THE 80S ALL DAY. I GAVE EACH PLANT A GALLON OF WATER. THE GROW BAGS ON THE TEO WORST PLANTS WERE SUBSTANTIALLY LIGHTER THAN THE REST. I HOPE IM NOT OVERWATERING. THE PLANTS SEEMED TO PICK BACK UP AFTER WATERING BUT ILL HAVE TO WAIT UNTIL TOMORROW TO UPLOAD MY PICTURES AND VIDEOS. I NEEDED TO ADD TEMPORARY SUPPORTS TO A COUPLE DIFFERENT PLANTS. IM CERTAINLY GLAD I GOT THE URGE TO GO OVER. WHAT A CHANGE IN A FEW HOURS
7/30 Plants are really growing fast and transitioning quick to flower. We got almost no rain so I'm glad I watered like I was supposed to even though the bags had some heft to them. I'm noticing more pest damage. I'm thinking a bt spray tonight might be beneficial. I'll look through what I've got on hand. I may just give them an application of spinosid but we'll see. I still need to move things and put my supports up. Medical problems have slowed me down.
UPDATE: Went to check the plants around 3 and they looked great. Bags were still heavy and a little bit moist. I think with the added rain some of the plants may have been overwatered. I should have only watered tue bags that felt light. There is only one plant now that looks a little overwatered and even that is looking good. I found some more minor pest damage. Winds were fairly high. I wondered about my trellis netting but it hadn't been sanitized and my plants are very healthy so I decided to wait. I watched them dance like willows in the wind. I know it won't be like that with big ol colas on them but for right now it's working out just fine. Goal for next week is to move the front row back and move things around to better utilize space, possibly spray for pest and add supports for final flowering after I get the plants situated how I want them. If I do it right I may be able to lst some. Also took a 2 minute video but I cant upload until tomorrow.
7/31 I'm wondering about my watering habits. This morning I watered a couple blue cheese and purple punch plants with just a half gallon as they were light and looked drooping. I'm wonderingvif I'm overwatering. Some plants still seem heavy while others are light? I think the plants may have been overwatered due to the torrential rain and my taking less time hand watering. Hopefully I won't come home from this doctors appointment to wilted plants but I really doubt it. 10th planet requires far less water than the two other strains. Even specific phenos require more water and its difficult with the different size containers but im working with what ive got. I need more ph down and I've gotta get these plants supported. These are some massive plants. Store was closed. Dispensary was opened. Showed my buddy the video then it started raining. By the time I got there the plants looked horrible. Everything was droopy but a couple were really bad. A few weren't bad at all. Actually the one in the ten needed it. I think I just need to give more water at a time and document how I water each plant individually. I also need to take into consideration the weather. Hard to do when it's so unpredictable. I'll wait for them to dry out and then I plan to start low doses of big bloom and grow big but I need to wait for them to dry out first. Then next watering they'll get some nutes. It's sunny now so I may go check my plants. I may also put a fan out for a while on the bags. That might help them out.


Processing
Likes
20
Share


@Easygrower
Follow
Hello growers day 80 with the gorilla glue auto she is still taking her time at the mo she is starting to bud up abit now lol she doesn’t want to be rushed I think 🤔 still beautiful little plant I just keep feeding her at mo see what happens until next week be safe and happy growing ✌️

Likes
7
Share


@Genussmittel420
Follow
The purplematic is foxtailing rly strong :/ but i do not mind that too much, i am much more sad about the actual size of the plants. Got 2 auto hulkberry rdy for next summer. The hulkberry is stacking up in a way more sadisfying way
harvested at day 4 of the week


Likes
3
Share

Likes
25
Share


@DrGanj
Follow
A bit more mild LST yesterday just to space the tops out a bit more.
I've defoliated a lot of the inner leaves and I'm continuing to foliar feed on top of my regular feed the Flower Karma Induction by Madame Grow at a strength of 0.7g per Litre. I'm foliar feeding this once every 2 - 3 days an hour before lights on or straight away after lights off (depending if I'm awake early enough haha).
Moved the girl onto her first flower nutes now and the Jamaican bloom P28-K25 will be her staple until she starts to swell and I switch her to Bazooka Bloom K30.
She's definitely in the swing of her flower stretch as she's grown between 1 -2 inches over the last week.
Likes
13
Share


@DrewbieDoobieNoobie
Follow
Water, water every where and all the boards did shrink. 2 gallons on each 5 gallon fabric pot of 5.9 PH rain water is all they have had for the last 5 days. I think they is lots of food left in the Coco and from what I have been told about Autos they are not heavy feeders. I am a little baffled by the Think Different, why is it not branching out? It looks like one big cola and it has not got any taller.
I defoliated the bottom 1/4 of the 4 that are growing just to get some of the bottom leaves out of the wet coco. Also to improved air flow Temps and RH have been with in range 78F-88F RH 40%-70% even with the rain and cold. The Blue dream I'm gonna give another 4 weeks if I don't see any improvement I will pull the plug. gonna give one more flowering feeding in a few days as soon as the pots dry out. that should last them till harvest time and Ill flush 2 weeks out from harvest with Green Buzz Clean Fruits. Hope everyone has a Merry Christmas and have a safe new year.


Likes
14
Share


@nonick123
Follow
Bienvenidos a este nuevo diario de Limón Blanco patrocinado por Khalifa Genetics!
Día -3 (09/01): Se coloca la semilla en tubo de ensayo con 15 ml de H20 Osmosis RO + 3 gotas agua oxigenada (H2O2) en un lugar oscuro a 25 ºC durante 24 horas
Día -1 (11/01): Se prepara una maceta de 1L con sustrato PRO-MIX HP BACILLUS + MYCORRHIZAE
Se humedece el sustrato muy lentamente hasta percolación profunda con H20 Osmosis RO
Se hace un agujero de 1 cm de profundidad, se coloca la semilla con la radicula hacia abajo, se tapa con un poco de sustrato y se humedece ligeramente con agua en spray
Se coloca parte superior botella / propagador en la zona de germinación para mantener humedad relativa alta y se introduce en el armario a 20 - 22 ºC (DLI 13 - 20/4)
Khalifa Genetics - https://khalifagenetics.com/product/lemon-blanco-v3/
💦 BioTabs 15% DISCOUNT code "GDBT420" biotabs.nl/en/shop/ @biotabs_official
🌱Substrate PRO-MIX HP BACILLUS + MYCORRHIZAE @promixmitch @promixgrowers_unfiltered
💡2 x Mars Hydro FC1500 EVO Led Grow Light (2024 NEW FC 1500-EVO Samsung LM301H 150W LED) - https://marshydro.eu/products/fc1500-evo-led-grow-lights/ - https://www.amazon.de/dp/B0CSSGN5D8?ref=myi_title_dp

Likes
9
Share


@Iop420
Follow
Hi 👋. This week I stopped the nutrients and I started flush. In first week of flushing I use 2ml /l of Canna Flush and then only pure water until harvest. 15 liters every flush.
Buds are hard like stone 😁 and the smell is amazing. Now i know why they call it Zkittles 🍍🍓🍬🍊.
Thanks for watching.peace✌️
Likes
20
Share


@diversiv0
Follow
The plant is thriving and has grown 50% larger compared to last week. Some of its leaves are now the size of a hand, which is surprising for me as it's my first experience growing a plant. I am hoping that it will start flowering next week. The main stem is thick and resembles a finger. The pH level is still high, but I have purchased a fan to improve ventilation during flowering. I am planning to support the next stage with easy boom, vitamins, and amino acids. There is a smell in the room, but I'm not sure if it's the expected smell or a mix with the box's fabric. I named the plant Gaza because I planted it on the day of the escalation of violence in occupied Palestinian territories, which then led to the recent developments of the conflict in the area.