
Likes
Comments
Share


@Hattiwatti
Follow
Res change at day 29. Have to lower nitrogen a bit cause its clawing and pretty dark. Otherways everything is just fine and it grows nice. Ad calmag 5ml to 20L.

Likes
2
Share


@Hydrus
Follow
she slowly begins to sweat and also develops her characteristic color.
i have not used any cropping or topping techniques, or defoliation, except that she will develop 2 head buds.
i still don't have any uV or iR light supplement, just using a sanlight led and senmatic fl300 grow with adjustable colorspectrum and adjustable poweroutput.
wondering. still in the same environment. all the pests have suddenly disappeared. i did not say any prayers.lol
my mouth is already watering.lol


Likes
15
Share


@GreenOrganicGermany
Follow
Die letzte Woche. Da bereits einige Pflanzen in der vorigen Woche geerntet wurden, ist unsere Zauberkiste nun deutlich leerer als in den letzten Monaten. Ich persönlich werde bei dem Anblick schon fast melancholisch-😢😀
Aber auch mit einem lachendem Auge denn der Geruch und das Aussehen der Buds ist wirklich fantastisch. Wird können es kaum erwarten sie alle nach und nach abzuernten. Warscheinlich werden wir dies auf mehrere Tage verteilen, da wir uns die Arbeit etwas einteilen wollen. Aber wir wollen mal nicht jammern 😝

Likes
16
Share


@NAG420
Follow
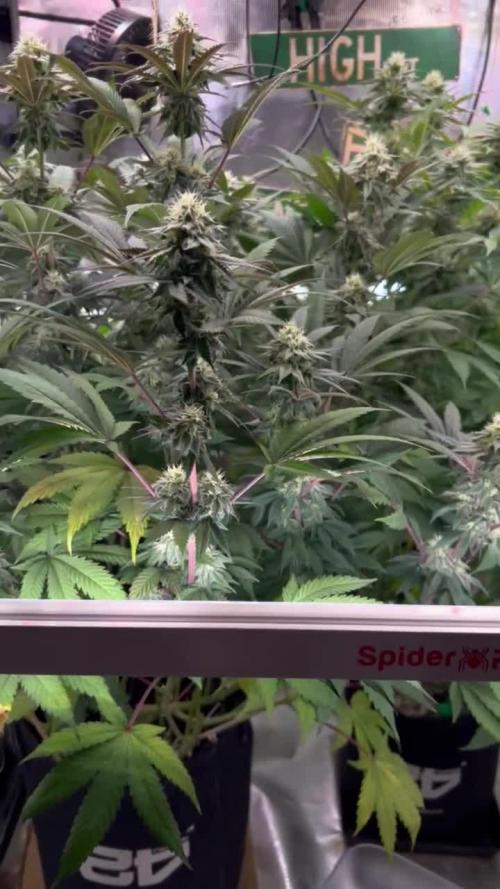
Wow I can say she is doing great have done a lot of defoliation on her also have done lolipoping to get more energy to the top buds this my 1st time trying it let see how she does. Feed 8th week chart mix with my fox farm will continue on the chart schedule haven’t tried the sledgehammer yet but before the end of flower I will. Will start to post videos of the grow from now on also of course tons of more pics. Day time temp 74-76 and RH is around 50-56%.
Likes
7
Share


@BlazingAngel420
Follow
Boy oh boy look at these babies grow I'm studying them more and more to ensure they are happy. I've notice that gelato 41 is producing bud spots like thats what it was ment for. Tropi cherry is coming along but not as fast as G41, and runtz muffin im a little disappointed in but i believe that is my fault for im still new and have only grown 1 plant prior to these 3. It also doesnt help i had to cut the vegitation cycle by 2 weeks as well. and further more I was at least able to give 2 clones away, the rest were still good but couldn't find them homes so i had to throw them away. Next time I'll have all the room they need and can't wait to make mother plants of my favorites.


Likes
2
Share

@AlpenZilla
Follow
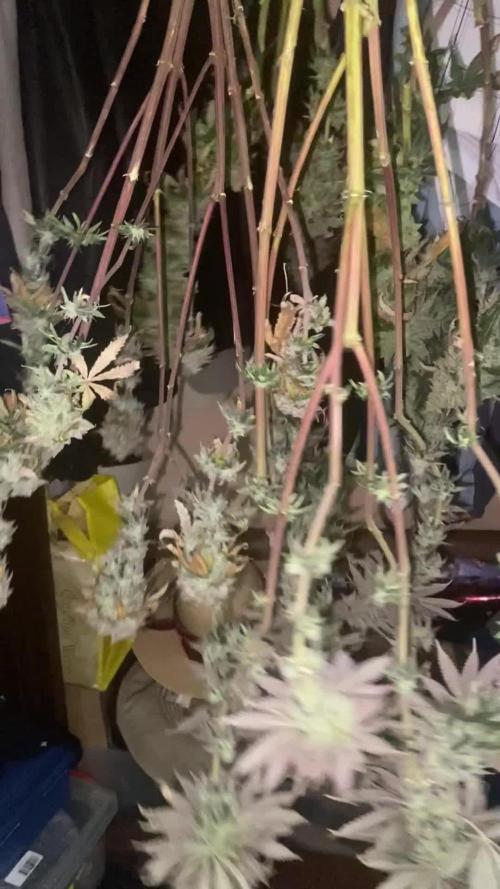
✂️ Harvest – Flowering Week 12 | Day 78 (17 weeks total)
Strawberry AK – Harvest Summary
Harvest took place today, marking 17 weeks from germination.
⚖️ Wet Weight
Strawberry AK: 1240 g
🌿 Final Impression
The Strawberry AK delivered a strong final result.
Buds appear dense, well-formed, and heavily frosted, with an overall solid finish to the run.
🧠 Post-Harvest
The plant is now hanging to dry, and final results will be determined after trimming and dry weight assessment.
Overall, a long run, but a successful outcome. 💪🌿

Likes
121
Share

@Schnabeldino
Follow
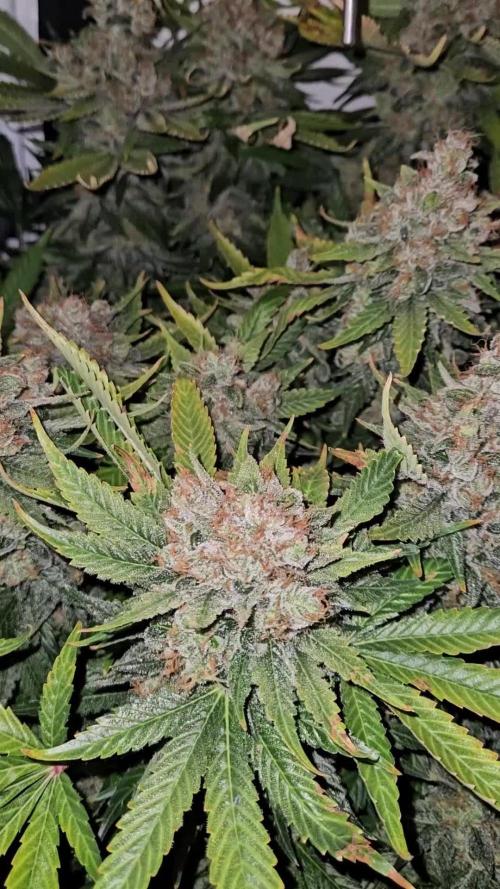
📅 Week 11 | 🗓️ Day 71–77
Day 77 – 3-4 week of flower 🌸 Lemon Cherry Runtz 🍋🍒
🔸Lemon Cherry Runtz is really kicking into gear this week. Buds are swelling up nicely, calyxes are plump, and the white pistils are shooting out like little antennas in every direction. Resin production is in full swing – the tops are already frosty, sparkling under the light, and the colas are stacking beautifully along the main stems.
🔸Leaves are looking strong and healthy – deep green with some subtle purple hues showing on the edges. No clawing, no deficiencies, and no signs of overfeeding, maybe she could use a little more nutrition.. Sugar leaves are already coated with trichomes, which is always a good sign that the plant is cruising in the right direction.
🔸This week I kept it simple: only water. I also cranked the SANlight up to 100% to push temps up a bit, and it worked out great. Daytime VPD now sits right around 1.4–1.6 kPa, which is the sweet spot. Climate is steady, airflow keeps everything dry, and the buds are staying fresh and compact.
📈 Current Conditions (Day 77)
🌡️ Day = 24.7 °C
🌡️ Night = 18 °C
💨 Humidity = 56.1 %
🌬️ VPD = 1.4 – 1.6 kPa
🔦 PPFD = ~1000 µmol (12/12)
🛠️ Setup (unchanged)
💡 2 x SANlight Evo 4-120 @100%
⛺ 120 x 120 x 180 Spiderfarmer tent
🍯 Pots: 18L fabric pots
🌱 Soil: Bio-Bizz Light Mix
💊 Nutrients: BIO Tabs
🌱 “Easy, organic, only-water method. Save 15% with GDBT420. biotabs.nl/en/shop/”
Likes
8
Share


@Papastroumf
Follow
Day 66 : The lady seems to be stabilized with the burns , so i started some juices to her water in order to help her with fattening. Hope to wake her a bit and produce some terpenes.
Edit Day 70 : I increased again juices to 3ml / L. Also added 1ml / L CalMag. She started to turn purple.


Likes
48
Share


@Focus420
Follow
Dobrý den a áhoj vítejte v poslednim týdnu kvetení 🤟🌱
Poslušně hlásím proplachuji 4 den 🤗
7 dní schází k dokončení procesu🌱🤠
Květiny vypadají skvěle.👊😉 na první sklizeň teda. AŤ PŘÍŠTĚ VYPADAJÍ LÍP!!!!!!!!!
podle mikroscopu cca 15 - 20 procent jantar trichom☺️
106 den - po proplachu zdá se být vysoká vlhkost 😂 cca 40%
- přidán odvlhčovač👍po 2 hodinách 30%,
107.den 🌱 proplach ph 6.3 ec 0,42👏
108.den kontrola trichomu, průměrně kolem 40 % jantar 😉
mohl jsem o týden víc podávat živiny..
109.den nic nedělám jen se dívám✌️
110.den poslední 3 dny nechám vyschnout vodu a sekera🤫
111. Den video , kontrola trichomu 60% ,zítra sekera🌶️🌶️
112.den sklizeň proběhla dobře ☺️ ted 10 - 14 dní sušení a jedem bomby ,
Barneys farm těším se 🤗🤗🤗
jsem připraven na vaše kmeny !!!🥇


Likes
4
Share


@cowstick
Follow
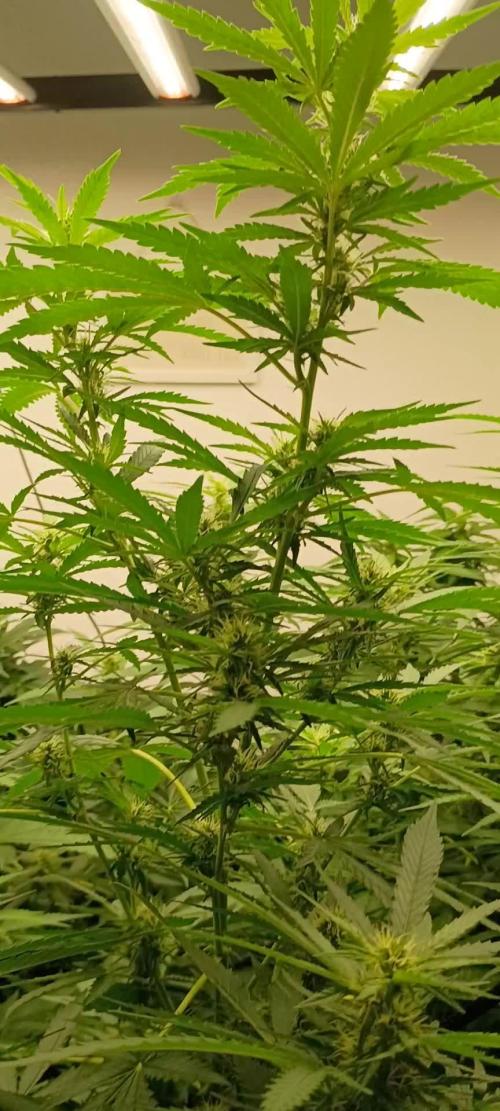
Last day of week 5 today. Got a great start to some frosty tops. Seeing some.purple leaves coming in. My wife's shower music played a key roll in this video.
These 2 Minnesota strains from Mad Shark Genetix , Taste of Minnesota on left, Blueberry Winter on the right, are doing very well and I have enjoyed growing these 2. 4 more weeks ish to go. Added a P boost and Recharge to this weeks feeding. Let's put on some weight baby!!! NFSOT
Likes
3
Share


@Mr_nugs_lover_David
Follow
Big tops! She's got a lot of rocket colas thanks to the training techniques that were applied, she smells exactly like her sisters, very sweet and floral, I'm starting to feel the cherry 🍒 notes on the smell of the buds, very good strain to grow, only 2 of the 5 phenos are 100% percent purple but tje other ones show purple on the leafs like this one because of the cold temperatures

Likes
111
Share


@DreamIT
Follow
🍋🥧🏎️ LEMON PIE AUTO BY FAST BUDS 🏎️🥧🍋
🍋 26.3...
🍋 27.3 ...
🍋 28.3 ...
🍋 29.3 ...
🍋 30.3 go on like this, yeah
🍋 31.3
🍋 1.4
Likes
2
Share


@Belivitez
Follow
I must to wait for dry buds 😁.... After waiting to buds dry out i can finally write final weight 336g, of premium buds! Buds are fully covered with trichomes ❤️
Likes
46
Share


@smoking_hills9
Follow
3 different phenos. Still can't believe I am having doctor greenspoon style buds on my N3. Crazy phenotype


Processing
Likes
9
Share

@Mr_nugs_lover_David
Follow
She's developing very healthy and strong, she's responding very well to tje training techniques and she looks fantastic right now, she's enjoying life! Hope you guys enjoy my work! ❤️💚💎
Likes
19
Share


@3footgiraffe
Follow
She has come down! .... 13 weeks start to finish, I let her go a little longer than necessary but she looks really good, should take a week or so to dry and then I will update the harvest.
114 grams/4 oz dry weight after one week in the box, happy with the result. 😉00