Likes
Comments
Share
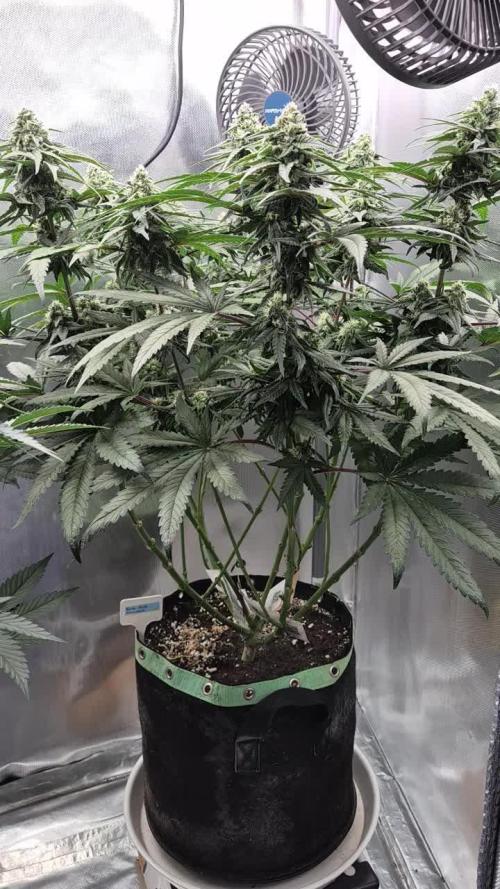
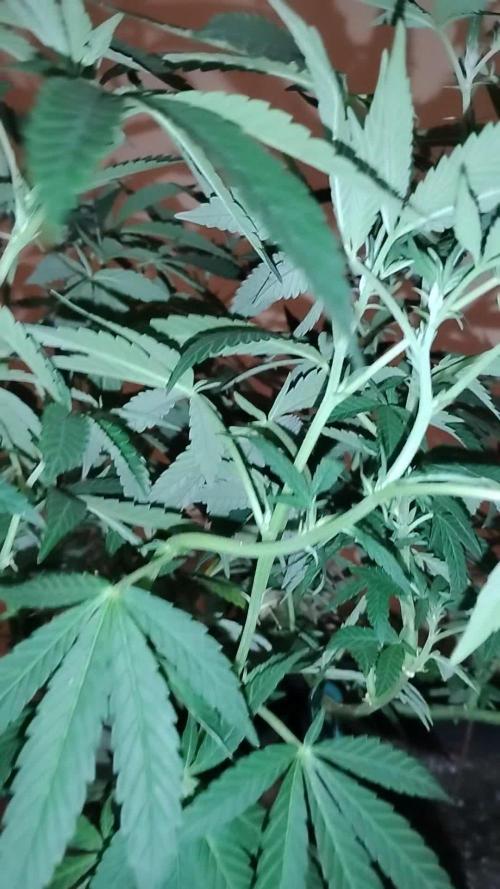
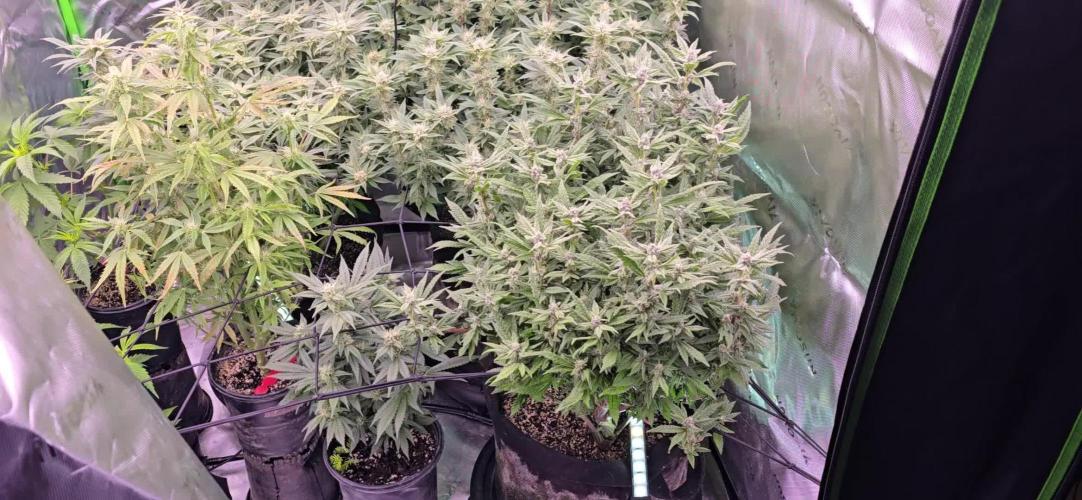
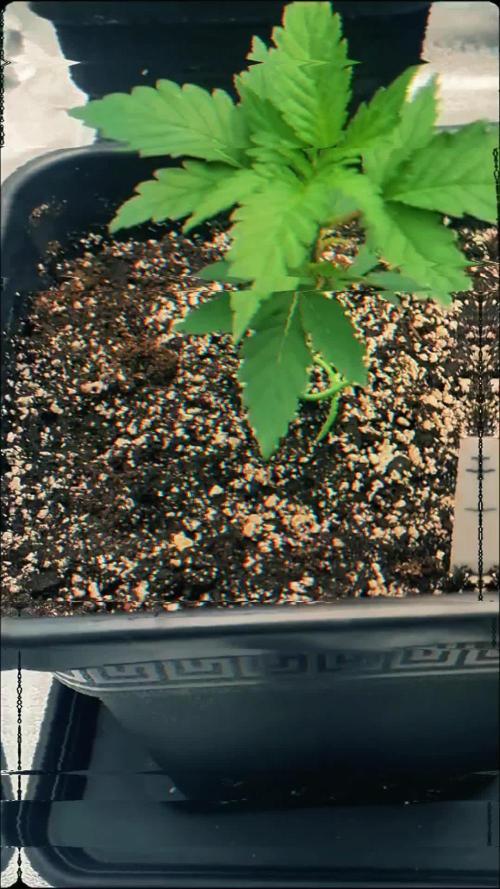
Hey!✋ The timely measures taken brought positive results - it is almost unnoticeable that the plants had problems a week ago.😇 I continue to bend the branches, remove excess foliage for better illumination of new shoots. This time I won’t delay the cycle for long; if everything goes according to plan, in a week I will switch the light schedule to flowering. Thank you for stopping by, and be healthy! 🙏 To be continued... 😶
Likes
29
Share
Flowering looks awesome on the ChemDog! Lots of bud sites and they're growing at a respectable rate. ATF's are running 3 plants in 3 diff stages- one's a couple weeks into flower, one's just starting,and one's still the holdout. Meanwhile, I've got flowering on the Night Nurse and one of the Viper Cookies. The rest are close but I can't say for sure they've transitioned. Weather's getting into a hot and humid phase, gotta watch that ChemDog. Think it's got a decent structure for ventilation but I've read horror stories on how the Dog loves mold. Further training of the branches has been fruitful, I'm seeing a lot more topside bud sites than usual. I'm working on irrigation-- I set up a 30 gal container and it works for drip, but without a pipe system it's still one at a time, although I have to admit it's worth it to save my back. Plus, I have to have a supply ready for use in case my buddy needs to fill in for me and water the ladies. Been checking the cameras regularly ( I have them all throughout the property, game cameras with IR flash), and to date haven't seen anything that would constitute a threat. Just some curious raccoons and one really ugly opossum. Even the skunks don't bother them this year, which is nice but a little strange considering they dig in them every year. It's really just the animals I'm watching for, people aren't as much of a concern. Mostly because I don't know any. Aside from that, I sleep with my head feet away from my babies, so somebody would have to have big brass ones to even try. Yes, I know, a little overprotective. Fingers crossed it'll be one hell of a harvest (by my standards). 8/11 Update: Been lucky still with the weather, but it's turning really humid. Fed the girls this morning, a mix of 1C molasses and 1/2C epsom salt in 20 gallons. Just a little supplement to the tiger bloom they've been feasting on. Speaking of the Tiger Bloom, I can't help but think I'd do just as well mixing my own nutrient solution, since the cost really adds up quick. For his year, however, it'll be fine. My watering gizmo is working well, just leaks a tiny bit and that's fine for the remainder of the year. Now that I have an idea of what works for me I can spend the off-season setting up something right. Had to thin out the Lamb's a bit, it wasn't getting anywhere near enough air flow. Also took a few on the ChemDog as I'm expecting mold/rot conditions for a while and she's prone. Shouldn't have much problem, wind blows almost constantly here, but you can never be too careful. Training is taking well, overall they look pretty good. Next year-- bigger grow bags, better soil, and much pickier seed choices. I think I may even abandon the idea of topping them in the future-- it just slows them down and you can get the same end results with training. Granted, my ladies are kinda sparse and ugly, but that's the learning curve. Next time around I think I have a pretty good idea of what to do and when to do it, based on what worked and didn't work this year. Another big thing is nutrient timing-- I def jumped the gun on flower power for a few of them and it just stunted them wicked-- shoulda continued veg food a couple weeks into flower even for the early bloomer, she'd be a monster.
Likes
47
Share
March14th Smooth sailing here. Plants are getting closer to Harvest Buds are stacking, Pistils get orange, Leaves are fading They smell wonderful Iam so happy with those mini-grows. Girls are sitting in around 10g of Soil Watering // Feeding daily in diving into the Feedingsolution, that has an Ec of 1200
Processing
Likes
34
Share
D33 (24/12/2020): First week of flowering. Both officially went into flower 4-5 days ago but I decided to finish the week before starting first flower week. I fed around 3L of water today, they were thirsty. I mixed full recommended dose of nutrients for last week of veg in 1,75 gal. of water. I want to go slow in reintroducing nutrients after 2 flush last week. - temp: 25C - water: approx. 3L per plant, PH6.4. 600 PPM - run off: 900 PPM for Banana Kush and 800 PPM for Glue Gelato - RH: 54% D34 (25/12/2020): Nothing special today except that it's Christmas, everything is going well. RH is higher today since higher temperature where I live but nothing crazy. - temp: 25C - no water - RH: 58% D35 (26/12/2020): I removed leaves under canopy today and fed with a gallon of water + minerals each plant. - temp: 25C - water: approx. 3,75L per plant, PH6.8, 350 PPM - run off: 750 PPM for Banana Kush and 600 PPM for Glue Gelato - RH: 55% D36 (27/12/2020): I readjusted some ties because they are stretching like crazy! The buds are forming and more pistils are showing. - temp: 25C - no water - RH: 53% D37 (28/12/2020): Still readjusting the ties and removed leaves today. The lights are now at 24 inch and plants receive around 495-525 PPFD (38 0000 to 40 000 lux). I'm aiming to go above 600 PPFD in the next week. I will check how they react with more light. - temp: 24C - no water - RH: 54% D38 (29/12/2020): I gave approx. 3.5 L of water per plant. I used 3/4 of the recommended dose for transition week. - temp: 25C - water: approx. 3.5L per plant, PH 6.4, 720 PPM - run off: 900 PPM and PH6.8 for Glue Gelato; 800 PPM and 6.8PH for Banana Kush - RH: 54% D39 (30/12/2020): Removed more leaves under canopy. - temp: 25C - no water - RH: 54%
Likes
15
Share
@Vogel451
Follow
Things are swelling up nice this week. Orange Hairs are starting to appear on all the buds one by one. It's been a very enjoyable grow. The buds are super tight! The sugar level could be better but If I have a successful harvest I will be very grateful. Any larger sugar leaves on the bottom of plants are starting to wither. Feedings are at 1150-1200ppm. as often as I can get the pots to dry. I will be getting more fans for this very purpose. I can't feed them if they are still wet. I was worried I had too many plants. But after defoliations and the plants stopping foliating I've wound up with a super solid canopy. I was reading other FoxFarm Diaries and I believe I have been underfeeding even though I've been following the feeding schedule. Not enough ppm's in flower to just use the Trio- Schedule. This morning I fed at 1550ppm and the plants are showing no negative signs. The max you can achieve using just the trio and the schedule is around 1150ppm. I believe that I was right about having a potassium deficiency but didn't know what to do about it since I was maxing out the scheduled nutes. Day 40 Flower - Feeding 300ppm of CalMag and RO/Tap Mix
Likes
17
Share
Likes
25
Share
@Kakui
Follow
Veg54, riego con 6.2 pH y EC 1.5, drenaje de 2.0 EC y pH 6.3, todo ok. Las plantas ya alcanzaron entre 25~30cm, en 2 días más comenzará la pre floración. Veg56, están casi de 30 centímetros de altura, último día de vegetación, mañana entrarán a pre floración, necesitan una defoliación.
Likes
46
Share
So week 2 was a bit of a fuck up, I think. The scrog went into flower and by the end of week 1, it was looking far to busy and leafy, zero light was getting through so I decided to thin down a little. Also I wasn't happy with how the scrog was over developing, so I took away the net and allowed them some free growth and little more spread across the canopy. I think this work stressed them a little, who knows?? Ideally I should have given them a far more comprehensive prune a week before flower, alas I didn't so here I am. This weekend will mark 3 weeks of flower, and apart from the prune I've seriously left alone and will have for a couple weeks, so this weekend they will get some serious defoliation and probably a few straggler tops will be removed to thin down a little. After this weekend, again, just feed and monitor. So looks like I was just being a bit of a drama queen, the plants are doing superbly as I near wk 3, lots and lots of colas. I will be thinning these as needed whilst I prune by taking out any stragglers. I've also added back in some boost nutes just to help overcome any stress I may have caused. I've also raised the lights slightly to reduce stress at this important stage. Last one for this week, all plants fully defoliated which I'm stoked about, no problems, I think I'll need the odd support cane since a binned the scrog, but apart from that not much else left to do other that monitor all aspects to make sure of no silly mistakes.
Likes
17
Share
📋 Die Strawberry Banana von Fastbuds ist jetzt in Woche 5 der Blüte, insgesamt schreiben wir Woche 10. Die Pflanze steht stabil im Futter und zeigt eine gesunde, sattgrüne Farbe. Die Blütenbildung schreitet gut voran, die typische Struktur ist bereits klar erkennbar. 💧 In diesem Zeitraum gab es 2 Bewässerungen. Dabei habe ich mit 16.5 ml S&R Organics 5in1 und 10 ml BioTabs Bio Pk 5-8 nachgeholfen, um den Phosphor- und Kaliumbedarf in dieser entscheidenden Phase abzudecken. Die Lichtperiode habe ich konstant bei 18 Stunden pro Tag belassen. 📸 Die Bilder zeigen ein sauberes Blattwerk ohne Anzeichen von Mängeln oder Stress. Die Blütenstände bilden bereits ordentlich Harz aus, auch wenn die Stigmen noch überwiegend hell und aktiv sind. Die Struktur wirkt kompakt und vital, das passt genau zum Zeitplan für eine gesunde Entwicklung. 🔍 Die Pflanze ist voll auf Kurs. Jetzt heißt es, die Blütenmasse weiter aufzubauen und das Harzprofil zu fördern. Ich behalte die Luftfeuchtigkeit im Blick, damit bei der zunehmenden Dichte der Buds am Ende nichts schimmelt. Nächste Woche geht es wie gewohnt weiter mit der Nährstoffversorgung.
Likes
74
Share
Gracias a @James, Royal Queen Seeds y MarshHydro sin ellos no sería posible hacer este diario. La Tropical Mirage es la última creación de los maestros de la cría de Royal Queen Seeds. Trabajando mano a mano con el DJ y productor Henry Saiz, nuestro equipo se propuso crear una variedad que sirviera como chispa de inspiración para las personas creativas de cualquier ámbito de la vida. Y ahora, por fin podemos presentar el resultado. La Tropical Mirage desciende de la todopoderosa Zkittlez, uno de los híbridos más populares del mundo. Es el resultado de un cruce entre un esqueje seleccionado de la Forbidden Zkittlez y la Melonade, y es afrutada, edificante e inspiradora. Sus flores densas, alargadas y resinosas desprenden intensos aromas y ejercen un subidón energizante capaz de impulsar cualquier proyecto creativo, desde la música y las artes visuales hasta la escritura, el baile y mucho más. En el cuarto de cultivo, la Tropical Mirage es rápida, fiable y muy productiva. Con una serie de cuidados básicos, esta variedad tan resistente te dará suficientes cogollos para mantener tu flujo creativo en acción durante todo el año. 🌻 🚀 Consigue aquí tus semillas: https://www.royalqueenseeds.es/semillas-feminizadas-de-marihuana/647-tropical-mirage.html 💡 Mars Hydro TS 3000, como la lámpara de cultivo LED más grande de la serie TS, ofrece suficiente cobertura para un área de 4 × 4 pies con un precio asequible y rendimientos de calidad; a cambio, se puede aplicar tanto al cultivo doméstico como al cultivo comercial. Potencia - 450w Cobertura Vegetal – 5×5 pies Cobertura de flores - 4 × 4 pies La opción abrumadora para la mayoría de los productores que la aplican en tiendas de campaña. Consigue aqui tu lámpara: https://marshydro.eu/products/mars-hydro-ts-3000-led-grow-light/ 📆 Semana 8: Creo que va a ser la última semana que aplique nutrientes, los cogollos se han hinchado mucho esta semana. Finalmente quedaron cargadisimas de resina y con unos tonos morados que impresionan, el lavado de raices va a ser facil, estoy deseando cosechar esta variedad 😁⛽ Me hubiera gustado cubrir mas la carpa pero debido a la mudanza y posterior adaptación no ha sido posible.
Likes
9
Share
@Budzalot
Follow
Day 49 Everything stayed same. They really starting to sink.
Likes
4
Share
@CalGonJim
Follow
7/14 4AM MONDAY MUST DEFOLIATE!!!!! I HAVE 4 INSTEAD OF 2...BECAUSE OF MY LITTLE ACCIDENT EARLY ON.. I WILL TAKE ONE OUT OF FLOWER AND RE-VEG TODAY!!! 7/15 420am They are great cutting I took last month or week is great. Amino and mb today!! 230pm spectacular results today heavy defoliation I removed branches. I prefer a four cola grow in small spaces. It’s just better for airflow better for the plants and they responded so great. It’s like they’re jumping straight up now. I’ve never seen this. They’re just so vibrant that means all the amino’s. Everything is working perfectly. 👍👍👍🚨🚨🚨🌿🌿🌿 7/16 320am 🌿🌿🌿🌿🎊🎊🎊🎊💥💥💥💥👍👍👍👍 7/18 3am NOTICING Elongated Sepals!!!! from Search Ai "Elongated sepals in plants refer to sepals that are longer than average, often appearing narrow and pointed. This characteristic can be a defining feature of certain plant species, such as the long-sepal beardtongue (Penstemon calycosus). The length and shape of sepals can vary significantly between species and even within the same plant, influencing the overall appearance and potentially the function of the flower. Elongated Sepals: More Details Definition: Sepals are leaf-like structures that form the outermost whorl of a flower, typically green and protecting the bud. Elongated sepals are simply those that are noticeably longer than the typical sepal length for a given plant or group of plants. Examples: Long-sepal beardtongue (Penstemon calycosus): This plant is named for its elongated sepals, which are a key characteristic. Berberis (Barberry): Some Berberis species exhibit elongated sepals, with variations in shape and length among different sepal types within the same flower. Significance: Identification: Sepal shape and length are important features used in plant identification and classification. Pollination: In some cases, elongated sepals might play a role in attracting pollinators or influencing how they interact with the flower. Protection: Sepals, even elongated ones, still function to protect the developing flower bud. Morphogenesis: Studies on Arabidopsis have shown that the shape of sepals, including the presence of elongated tips, can be influenced by mechanical feedback within the plant and the arrangement of microtubules."""🚨. THIS IS ON 2 OF THEM, SO I MAY HAVE 2 STRONGER THAN AVG. PLANTS. I WONDER IF THE MB, AMINOS ARE HELPING WITH THIS TOO??? 7/19 I GOT A MAGNETIC STIR THING. 150pm they didn’t need a lot of attention today. They do need to be trimmed back down to four colas. I’m running out of space they are very perfect and if I had more space the leafs would be bigger, but that’s limited by mine condition so there’s nothing I can do but they are absolutely incredible🎊👍👍
Likes
Comments
Share
Final weight after trim: (B) pheno (on the right side, 2 plants): top: 96.97g mid: 102.96g small: 32.65g trim: 54.45g Total: 287.03g (143.51g each plant) (A) pheno: top: 47.44g mid: 65.65 small: 21.62g trim: 29.6g Total: 164.31g (C) pheno: top: 37.19g mid: 60.6g small: 39.17g trim: 40.04g Total: 177g Total yield 628.34 dried grams. 1.45 grams/watt. great sucsess!
Likes
43
Share
@nonick123
Follow
En este caso es un diario un poco distinto... Tengo en mi terraza (outdoor) una maceta de unos 25 litros, con sustrato reciclado de todos los ciclos hechos con BIOTABS este invierno pasado Durante todo el invierno / primavera, he ido añadiendo a esta maceta los "restos" de estas macetas del indoor, cargados de vida, sustratos y materia orgánica Cada vez que añadía sustrato reciclado, añadía / renovaba la capa de mulch (heno) para proteger la micro-vida Además, ha estado protegido por un techo de metacrilato todo el invierno, para evitar que las lluvias torrenciales de mi zona se llevasen los nutrientes He mantenido este sustrato húmedo con Agua RO A principios de mayo, planté una tomatera (tomate canario) en esta maceta Alrededor del 26 de mayo, decidí dejar caer aleatoriamente una semilla de Gorilla Z Auto que me regaló mi amigo StackFarms Unos días después, nacía con fuerza y vigor una pequeña plántula! 😍💥 Esta maceta se mantiene hidratada con un sistema de riego por goteo (TEMU) muy ingenioso: Utiliza un gotero medico como se usan en los hospitales! Este sistema ha demostrado (en mis pruebas) ser bastante consistente en el riego diario! La maceta con la tomatera + Gorilla Z Auto se mantiene hidratada con 1 Litro de H2O diario (RO o agua declorada, depende como me pille) A divertirse con este experimento! 🚀 FastBuds 15% DISCOUNT code "NONICK" 2fast4buds.com @fastbuds.official 💦 BioTabs 15% DISCOUNT code "GDBT420" biotabs.nl/en/shop/ @biotabs_official 🌱Substrate PRO-MIX HP BACILLUS + MYCORRHIZAE @promixmitch @promixgrowers_unfiltered
Likes
57
Share
Hey everyone :-) We arrived in the last week before the harvest 😍😍😍. I can hardly wait because both are beautiful and smell extremely good 👍😃. Let's start with the weekly overview: Flowering day 56 Both were poured with 1.2 l each and checked for their health. Flowering day 57 Today the tent was cleaned and the humidifier refilled. The trichomes have been checked and are about 80% milky and 20% amber. Flowering day 58 Both were checked, and the technology was checked for functionality. Flowering day 59 Today both were checked and fresh osmosis water was left in the tank. Flowering day 60 Again, both were poured with 1 liter. Flowering day 61 Today was a pure control day. The trichomes are now 30% amber and 70% milky (a few days until harvest). Flowering day 62 Today the whole tent was cleaned. And got the darkroom ready. In the next few days we will go to the darkroom. Of course, there will be a harvest update before the last update. Until then, I wish you all the best, stay healthy 🙏🏻 and let it grow 🍀 You can buy this Strain at : https://sweetseeds.es/de/red-mandarine-f1-fast-version/ Type: Red Mandarine F1 Fast Version ☝️🏼 Genetics: Red Poison Auto®️ (SWS39) X Tangie (California Orange x Hybrid Skunk) 👍 Vega lamp: 2 x Todogrow Led Quantum Board 100 W 💡 Bloom Lamp : 2 x Todogrow Led Cxb 3590 COB 3500 K 205W 💡💡☝️🏼 Soil : Canna Coco Professional + ☝️🏼 Fertilizer: Green House Powder Feeding ☝️🏼🌱 Water: Osmosis water mixed with normal water (24 hours stale that the chlorine evaporates) to 0.2 EC. Add Cal / Mag to 0.4 Ec Ph with Organic Ph - to 5.5 - 5.8 .
Likes
18
Share
~ FASTBUDS TESTER #2204 ~ Well friends, here we go on another 'canna-venture' together! The grow room has had a complete remodel and some upgrades done to it including brand spanking new 4x8 and 4x4 tents and a Trolmaster Hydro X controller along with a new Control Panel. This tester strain is one of six tester strains that FastBuds has graciously provided me with and I'm looking forward to seeing what this girl has to offer when she's grown to her full potential! One drawback of 'testers' is I have little to no information on it other than its number and that it's an autoflower... 🤪 But, it's ALWAYS a blast growing them for me because not knowing a lot allows me to just concentrate on the essentials: Light, Environment, Water, Nutrients and possibly a bit of LST... not complicated, just basics like keeping a constant temperature and RH in the tent at a level that gives a good VPD, watering when almost dry and maintaining proper light levels according to their stage of growth. ____________________________________________________________________________________________________________________________________________________________________________________________________________________________________________________________________________________________________________________________________________________________________________________________________________________________________________________ ~THE SETUP~ ~Initially seeds were lightly scuffed, then soaked for 3 hours in 78℉ distilled water after which they were transferred to moist paper towels laid out in a Jiffy Pellet plastic starter tray with lid. Underneath the tray was placed a Vivosun Heat Mat with Controller that was set to 78℉ where they stayed until their tap roots emerged. ~Planted into Jiffy Peat Pellets that were hydrated with distilled water warmed to 78℉ with a 7.0 ph. ~Once roots emerge from the Jiffy Pellet they're transferred to their fabric pots. ~Grown 100% organic in a 4g Gronest fabric pot and a 3g fabric pot by Wraxly filled with Mother Earth 70/30 Coco/Perlite medium and initially amended with Dr. Earth 4-4-4 / Earthworm Castings / Dr. Earth Flower Girl 3-9-4 and Coast of Maine Stonington Blend Organic Plant Food 5-2-4. ~19/5 light cycle for the entire run with supplemental UVA added during flower. Lights are controlled by a Trolmaster Hydro X controller set for a 15min Sunrise/Sunset simulation. ~Top dressing every 3-4 weeks with slow release dry amendments and Earthworm castings. ~Straight water ph'd @ 6.2-6.8 when needed and bi-weekly Compost Tea's. ____________________________________________________________________________________________________________________________________________________________________________________________________________________________________________________________________________________________________________________________________________________________________________________________________________________________________________________ Weekly Updates: 12/1- I soaked both seeds for 3 hours in 78℉ distilled water after which they were transferred to moist paper towels laid out in a Jiffy Pellet plastic starter tray with lid. Underneath the tray was placed a Vivosun Heat Mat with Controller that was set to 78℉ where they stayed until their tap roots emerged roughly 24 hours later. 12/3- Today their tap roots were about 1/2 to 3/4" so at 11 am I transferred them into Jiffy Peat Pellets that were hydrated with distilled water warmed to 78℉ with a 7.0 ph using a tine off of a plastic fork as a 'mini trowel' to make a hole in the pellet and to gently cover the tap root, leaving only the seed head slightly exposed. This method accomplishes most of the initial work the seed has to do by eliminating having to orientate itself, push it's root down and head up. By 10pm the #1 seed had her cotyledon leaves opened and the #2 isn't far behind! 12/5- Well this is the full Day One for the #2 FBT #2204 and the second day for her sister! I'll keep them in the covered/heated Jiffy tray until I see their roots beginning to emerge from the peat pellet, then I'll transfer them gently into their respective fabric pots. The #1 will be going into the 4g Gronest pot from FastBuds and the #2 will reside in a 3g pot by Wraxly, which I'm trying out for the first time. 12/7- Yesterday I checked the #1 tester and she had roots starting to emerge from her pellet so I transferred her into her 4g Gronest pot. After making a hole in the medium for the peat pellet, I coated the entire surface with Xtreme Gardening Mycos then placed the pellet in the hole and planted her in. Lastly, I watered her in with about 4oz of de-chlorinated water with 3ml/g of FishShit added which was then ph'd to 6.4 @ 75℉ after which I placed a humidome over her for 24hrs to ensure that the humidity stays constant. The #2 tester is doing great and I'm confident that she should be ready to transfer into her fabric pot in the next couple of days! 😎💚 Thank you for checking out my passion in life! Please visit as often as you wish and I hope you enjoy this journey as much as I know I will! Grow Strong! 💪😎🤙
Processing
Likes
7
Share
FASTBERRY (Fastbuds) 28 days from sprout. Easy nutrient feed at about quarter strength recommended dose. Tried some leaf tucking and pony tailing. She seems to respond well.