Likes
Comments
Share
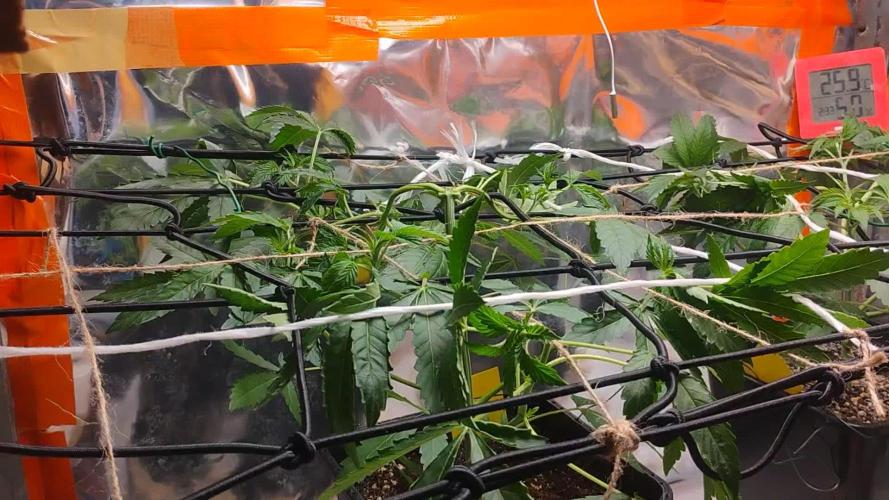
Entramos en la 9 semana y seguimos con heladas en el exterior , las mínimas con luces apagadas son de 15º y las máximas con luces encendidas
Likes
23
Share
@Piorkeed
Follow
Week 9 (11/05 - 17/05) D57: - D58: - D59: added 0.5 ml of Calmag, 1.5 ml of Bio-grow, 3 ml of Bio-bloom and 1ml of Top-Max to 1 liter of tap water @ pH 6.2 D60: - D61: added 0.5 ml of Calmag, 1.5 ml of Bio-grow, 3 ml of Bio-bloom and 1ml of Top-Max to 1 liter of tap water @ pH 6.4 D62: - D63: -
Likes
31
Share
Oh my goodness! I had a 12 hour harvest session and I am so burnt out x.x I might have a few weeks before I germinate again haha I had so dang much to harvest it was getting concerning. I had to use the trellis net in the tent. I have It nicely controlled using the exhaust fan and the humidifier to keep it between 0.7-0.9 kPa I also have two Ac units running to fight the summer heat and keep it as cold as possible! Those were the fattest and most prime buds. The B-grade heads were thrown in a paper bag amd into the fridge for an old school lotus inspired dry. And finally everything lower down that wasn't an apex bud and also the apex buds that were small were put into 8 Ziplock bags and thrown in the freezer. Fresh frozen bubble hash is in my future! I still need to aquire a rainbarrel spigot and two food grade buckets but I've got most everything else. The B grade buds will be either given away or made into more bubble hash because i am estimating about a pound of top-shelf flower and a pound for everything else. I've always disliked the hanging net drying racks but maybe I'll look into for the B-grade heads next time. This has been the longest cycle I have ever done and geez it's probably the biggest. I really hope it's the most enjoyable smoke! I'm locked in on the drying/curing process hoping to finally get something that can beat the dispenserary stuff. I am so excited! My next cycle plan is to do a rotating perpetual harvest every 3 weeks in the four 40 gallon containers using the last of my Strawberry gorilla and Gorilla Cookies from FastBuds. These plants and genetics far surpassed my expectations so far, I'll be back to update soon and I'll get a weight from each of the Top and Mid buds as well as the bubble hash yield. The bubble hash will be using Bubblebagdude 5 gallon zippered mesh bag, their 5 pack of 20-220 micron and some hand style agitation. It will be my first try! Thanks for reading, and please take care of yourself! No one can take care of you, like you can take care of yourself.
Likes
10
Share
Hi guys, What's up? Welcome back to Queen Peaky's Flower Gardens here I am again with you to tell a little about my experience and obviously learn from yours as well 😉 I hope you enjoy the content and if you feel like ... follow us on ig
Likes
10
Share
@Jerrza
Follow
Plants doing all well, few more weeks to go
Likes
7
Share
3 weeks of flowering remain. Some start to fade, dont fight the fade. Lights are on 100% dimmer, go Sparkles go! Carbthefckup! Again shoutout to welcometothegrowtent, check him out on YT! Peace
Likes
11
Share
@Bluemels
Follow
Tag 39: Nicht mehr lange dann hat die Chocolate Haze das Netz ausgefüllt. Heute habe sie ein wenig entlaubt, so kann ich sie gleich besser gießen. 😁
Likes
30
Share
@Naitik
Follow
This week, the pre-flowering began, slowly began to give fertilizers for flowering, I water every other time, first with fertilizers then with clean water, 2 liters, every 2 days, as the top layer of the earth dries.PH hold 6.5-6.3, PPM 643 last watering, 2 ml per liter. The plant drinks a lot .The week passed without problems, ahead of the long-awaited flowering.
Likes
13
Share
@Paultemp
Follow
Hi all👊🤗 Week5 veg Auto pot system + air dome 7gallon pot In coco Remo nutrients Vivosun Mh 600w 4x8 grow tent 96x48x72 Please give a like if you want and follow for more update 🙏🤗
Likes
Comments
Share
- Luz: Bestva Pro 1000W / 18 h/d -FloraNova Grow G.Hydroponics: 0.6ml/l - Armour SI G. Hydroponics 0.4ml/ - Rhizotonic Canna : 4 ml/l - Everest: 0.5 ml/l -Sustrato: 2 partes de JIFFY fino con perlita + 1 parte de sustrato universal FLORAGARD - Diatomea y aguande grifo
Likes
7
Share
Apart from the bud rot problems towards the end of the grow, wich in this plant were actually small comparing to my other plants I had at the time, it all went really well! I even broke the main branch in half around week 5-6 but the plant recovered really fast and developed two main branches like in a topping and in a few days was back growing and stretching a lot!! From a 3L vase I got about 40g of dried weed wich I considered really good!
Likes
6
Share
@dank604
Follow
Well ambers have been popping up and I've started the flush about 5 days ago, planning to chop day 72/73. I need to make room for my other 2 girls who need higher humidity etc so I might be chopping a week earlier than I would like but I'm happy how far she has come. One thing I noticed with my USB microscope - use your PC instead of your phone, I could see considerably more amber on my PC monitor then I did on my iPhone but I need a longer Micro-USB cord so these trich pics are from my iPhone.
Processing
Likes
3
Share
Likes
51
Share
@Hashy
Follow
Notes Week 18 (week 11 flower) Light settings 12/12 on at 9.00am off at 9.00pm Viparspectra Light power= 75% 165w VPD aim 1.0-1.2 DLI aim 35 Extractor settings temperature 23c with 0c steps Humidity 30% with 0% steps Max speed 10 Min speed 4 Monday 17/7/23 Day 120 (day 74 flower) Looking good. Tuesday 18/7/23 Day 121 (day 75 flower) Defoliate Wednesday 19/7/23 Day 122 (day 76 flower) Harvest all 5 plants. #1 377g Thursday 20/7/23 Day 123 (day 1 dry) Removed some fan leaves. Friday 28/7/23 Day 132 (day 9 dry) #1 FBPHP12, dry 40g. Larf 4g. Friday 11/8/23 Day 146 (day 14 cure) Stop using auto burping system now and burp less frequently for a bit. Saturday 26/8/23 Day 161 (day 29 cure) Sampled. Stats for the grow #1 377g #3 338g #4 276g #5 393g #6 312g Total wet weight =1696g #1 FBPHP12, dry 40g. Larf 4g. #3 FBPHP14, dry 38g. Larf 4g. #4 runtz, dry 29g. Larf 2g. Rot 5g. #5 Pink Rozay, dry 38g. Larf 6g. #6 Candy Rain, dry 34g. Larf 0g. Total dry weight. 179g Total dry larf weight 16g Loads of trim so going run some hash.
Likes
4
Share
Thursday 16th march day 59 Harvested a couple days earlier then planned as my humidity was getting a bit high and worried about risking mold I decided to chop, have to get a good dehumidifier soon, everything looking lovely, nice and dense with very strong fruity potent smell definitely the best looking plants I have grown to date not the biggest buds but they look quality, chopped plants whole gonna do my best to keep the temp and rh% in the dry room as close 60/60 as I can to get a nice slow dry, 🍁😎 I only took the wet weight from 1 plant back left plant was 270g with large fan leaves removed
Likes
52
Share
@Martian_D
Follow
-Seeds were germinated directly in soil 2cm deep with 60ml of pH'd mineral water and covered with cling wrap for humidity. -Lights cycle: 18/6 - Seeds popped after 3-4 days, 100% germination -Cling wrap removed after germination -Day 1 of grow is 8/10/2020 -Day 1-4 seedlings were feed pH'd mineral water -Seedlings received their first nutrient feeding on day 5 -Nutrient water pH'd at 6.3 and oxygenated with air pump + air stone -Mycoroot was fed via top dressing Struggled to get the pH with in range, I had to mess around with pH up and down to get it in the range of 6.3. The growth looks good so far just a bit worried up about the colour of the leaves. Temp varied from 26C-28C and humidity ranged between 42-52%. I had to play around with the oscillating fan speeds and positioning as well as the amount of air inlet vents. I found that just having one opened helped get the humidity up and the temp had only a slight increase. I let the oscillating fan run on its lowest setting and put off its rotating function, I also made sure the fan was not directly hitting the plants which assisted with the humidity micro-climate. The distance of the HPS was at 90cm from top of plants after the popped out of the soil, this was readjusted to 60cm once true leaves were showing. They got the first nutrient feed on day 5.
Likes
35
Share
Info: Unfortunately, I had to find out that my account is used for fake pages in social media. I am only active here on growdiaries. I am not on facebook instagram twitter etc All accounts except this one are fake. Flowering day 43 since time change to 12/12 h. Hey guys :-) The buds are developing really well :-). They slowly get thicker and thicker and smell better and better the closer we get to the end :-). She has completely stopped the stretch in order to transport the remaining energy into the buds 👍. This week it was poured 3 times with 1 l each time (See table above for nutrient addition). In the coming weeks, the nutrients will be reduced more and more. The tent was cleaned and everything checked. Fresh osmosis water has been treated for the past few weeks. have fun with the update. Stay healthy 🙏🏻 You can buy this Nutrients at : https://greenbuzzliquids.com/en/shop/ With the discount code: Made_in_Germany you get a discount of 15% on all products from an order value of 100 euros. You can buy this Strain at : https://greenhouseseeds.nl/ ☝️🏼☝️🏼☝️🏼☝️🏼☝️🏼☝️🏼☝️🏼☝️🏼☝️🏼☝️🏼☝️🏼☝️🏼 Green House Seeds Company Cup Clone 🏆 Type: Wonder Pie ☝️🏼 Genetics: Wedding Cake x OG Kush 👍😍 Vega lamp: 2 x Todogrow Led Quantum Board 100 W 💡 Flower Lamp : 2 x Todogrow Led Cxb 3590 COB 3500 K 205 W 💡💡☝️🏼 Earth: Canna Coco Professional + ☝️🏼 Nutrients : Green Buzz Liquids : Organic Grow Liquid Organic Bloom Liquid Organic more PK More Roots Fast Buds Humic Acid Plus Growzyme Big Fruits Clean Fruits Cal / Mag Organic Ph - Pulver ☝️🏼🌱 Water: Osmosis water mixed with normal water (24 hours stale that the chlorine evaporates) to 0.2 EC. Add Cal / Mag to 0.4 Ec Ph with Organic Ph - to 5.8 - 6.4
Likes
9
Share
@Headies
Follow
So this week after I gave it under nutrients I apparently gave it too much nitrogen while having a potassium deficiency. Shiney dark leaves, So i fixed that, but some didn't bounce back, and I tried nitrogen. I think they are doing pretty good considering everything I've put them through SO FAR. lol. Nutrients are NPK Raw's total lineup, follow their instructions at first, Fastbuds adjustments as of this week.
Likes
155
Share
@deFharo
Follow
Bienvenidos cultivadores de marihuana clandestinos y también a los que tienen la fortuna de no serlo!🖐️👨‍🌾👍 Este es un diario semanal de técnicas de cultivo y Bio preparados orgánicos caseros, los cuales llevo experimentando dos años en cultivos de marihuana interior. Esta semana dos en uno: 1) ELABORACIÓN DE AUXINAS EN POLVO EXTRAIDAS DE ALUBIAS NEGRAS GERMINADAS. La primera vez que hice este preparado y lo publiqué en GD fue en Octubre de 2019, lo volví a hacer en Junio de 2020 y llevo dos años usándolo, me ha costado el precio de 2kg de alubias negras. INGREDIENTES: - 1kg de alubias o frijoles negros, porque son las semillas que más concentración de auxinas contienen, comparándolas por ejemplo, con lentejas o cualquier otro tipo de leguminosas, también se puede usar granos de maíz. Preferentemente, se deben usar semillas de alubias nuevas y cultivadas cerca de tu zona. - Agua pura. PROCEDIMIENTO: - Se cubren las alubias con agua y se dejan a remojo durante una noche. - Al día siguiente se separa el agua. Esta agua la puedes usar para riegos, contienen varios minerales. - Se mantiene la humedad en el recipiente de las alubias por unos días, hasta que germinen. Se pueden cubrir con un paño húmedo y compensar la perdida de humedad rociando agua. Se debe observar que la mayoría de las semillas hayan germinado. - Cuando las alubias, en su mayoría estén germinadas, se añade unos dos litros agua pura y se bate todo. - Ahora filtramos con malla y escurrimos los restos sólidos. (Reservamos esta materia para un segundo lavado) - Dejamos reposar el líquido durante dos días, hasta que se vea acumulación de materia en el fondo. - Retirar la mayor cantidad posible de agua clara. - Dejar al sol cubierto con una malla, hasta la completa deshidratación del producto. - Moler y guardar en un sitio seco y oscuro, en estas condiciones puede ser efectivo durante años. -- A los residuos sólidos recuperados del primer filtrado, les añado agua, los bato y los filtro con doble malla, lo embotello y guardo en el frigorífico (no más de 15 días, pues fermenta), lo uso para mezclas de riego. Los residuos finales se aprovechan, para aquellos que tengan tierra en exterior o hagan compost. QUE SON LAS AUXINAS Y USOS: - Las auxinas son un grupo de hormonas vegetales naturales, que regulan varios aspectos del desarrollo y crecimiento de las plantas, en la marihuana sobre todo en el periodo de crecimiento vegetativo y en el comienzo de la floración, después no hacen falta. - Uno de los aspecto más característicos es el efecto que causan en el desarrollo del crecimiento radicular, promoviendo sobre todo la formación de raíces secundarias y adventicias gracias a la estimulación celular que provocan las hormonas. - Otro aspecto de las auxinas es que distribuye su energía principalmente al ápice primario, reprimiendo el desarrollo de las ramas laterales, lo que provoca dominancia apical, pero esto es en el caso de plantas de marihuana sin corte apical y donde se quiere conseguir un cogollo principal monstruoso, su uso puede dar muy buenos resultados en cultivos SOG... pero ¿Qué pasa si hacemos un corte apical para promover el crecimiento de ramas laterales y que por ende, de buenos cogollos en cada una de ellas? Cuando se hace un corte apical al ápice principal las hormonas se reorganizan por la planta, ahora para mandar energía a todas las ramas y sus ápices, promoviendo el crecimiento!.. es un buen momento, después de un corte apical, aplicar auxinas para potenciar el proceso. - Finalmente os dejo un gráfico de la actuación de las auxinas en las diferentes etapas de un cultivo, también se ve la importante relación con otras hormonas (Citoquininas o Ácido Giberélico) y los nutrientes claves que no deben faltar para finalizar todo el proceso hormonal. Las Citoquininas y el ácido Giberélico naturales se encuentra en el agua de coco, y es muy interesante conocer como actúan, en la quinta semana de este diario hablo sobre las propiedades del agua de coco. Bien, una vez dicho lo anterior, yo uso las auxinas en polvo de las siguientes formas. - Como mezcla del sustrato donde germino las semillas y donde mantengo las plántulas hasta el trasplante a la maceta definitiva, para potenciar el enraizamiento. - Por la misma razón, lo espolvoreo sobre el cepellón de raíces de la plántula, en el momento del trasplante a la maceta final. - Lo uso como enraizante de esquejes, impregnando el tallo de polvo antes de enterrarlo. - 10 días después de realizar el producto, todavía tenía en la nevera un litro de auxinas líquidas, provenientes del segundo lavado de los restos de las alubias molidas... y entonces pensé que sería buena idea incorporarlo a un fermentado, y de aquí vienen esta segunda parte... 2) LACTO FERMENTO DE AUXINAS ENRIQUECIDO CON NUTRIENTES Y MINERALES En esta ocasión, para la fermentación anaeróbica, elegí hacerlo con suero de leche como base de microorganismos (Ácido láctico, Bacterias Acidolácticas BAL y Lactobacillus) que harán el trabajo de solubilizar los nutrientes y quelatar los minerales, es un preparado muy eficiente para riegos y aplicaciones foliares, en este caso lo hice enriquecido, mezclando diversos materiales orgánicos con otros minerales. Puedes ver la lista arriba. Sobre esto tengo que decir que después de dos años haciendo diferentes lacto fermentos, ahora los hago más específicos, sin mezclar tantos nutrientes, por ejemplo, si quiero solubilizar guanos, harina de huesos o algas, lo que hago es crear un lacto fermento con cada uno de ellos, en el caso de lacto fermentos con minerales, sigo preparándolo mezclando varios, este preparado es muy eficiente en quelatar minerales, y sobre todo en solubilizar fósforo. PROCEDIMIENTO: A veces consigo suero de oveja de un vecino que hace quesos, a veces hago suero de leche cruda de vaca y cuando no tengo ninguna de estas fuentes, hago suero a partir de leche pasteurizada, como el caso de este. - Mezclo el suero (1l) con la melaza y la miel, lo caliento a unos 30°C. - Peso los ingredientes. Como regla general, en el caso de componentes orgánicos usar del 8 al 10% como máximo, respecto a la cantidad de líquido. En el caso de minerales del 4 al 5%. - Añado la levadura al suero con la melaza y la miel. - Añado los componentes secos al barril. - Añado el suero con la melaza y la levadura al barril y agito. - Añado el litro de auxinas líquidas y agito bien. - Lo cierro hermético con válvula de gases. - Guardo el barril a oscuras al menos durante 30 días, pero cuanto más tiempo lo mantengas cerrado antes de abrirlo por primera vez el resultado será mejor. La fermentación comienza violentamente a los pocos minutos dura varios días así y después se hace más lenta. USOS: Este es un preparado que uso como complemento a las auxinas en polvo, lo uso para hacer riegos o aplicaciones foliares de disponibilidad inmediata. - Hago aplicaciones foliares en plántulas, en las primeras semanas de vida. - Lo uso al comienzo de la etapa de crecimiento vegetativo en conjunto con agua de coco. - Riego con este preparado después de hacer cortes apicales. - Lo vuelvo a usar en riego en conjunto con el agua de coco al comienzo de la floración, y esta es la última vez que lo uso en un cultivo. Una señal inequívoca de la actuación de las hormonas, es que las plantas son más susceptibles al fototropismo, esto se traduce en una respuesta mayor a la incidencia lumínica, las plantas, sus hojas y brotes se inclinan y se dirigen hacia la mayor fuente de luz. Yo lo he visto muchas veces después de aplicar auxinas. y esto es todo por hoy... 😅 Hasta la próxima semana... GRACIAS POR ESTAR AHÍ, CULTIVADORES!!🖐️👨‍🌾💧💦🌞💡 =================================