
Likes
Comments
Share


@Fefa128
Follow
Hey there again! Just a couple of videos of the week, the treatment has been going for over a week now and it's almost over.

Likes
17
Share


@Elpicor
Follow
D65
Just a few days until the harvest, I'm checking the evolution of the trichomes and buds, we'll see what happens, I spent a lot of energy and hours I hope it will be worth it, meanwhile in my house there is the scent of ripe oranges and strawberries I hope to find the same aroma in the smoke.
D68
Tomorrow early morning I will harvest Purple Lemonade, no words for describe this magnificent plant!
D69
Tomorrow early morning I will harvest Banana Purple Punch and Cream cookies


Likes
9
Share


@VIPgrower
Follow
Week 8 four days in flushed the girls big time got tds too 255 for final 7 to 10 days the look great except 1st flush water I used clear and two plants some got rusty spots on leaves and yellow and die but did not affair bad i learned a lot about a proper flush from my neighbors thank god I took his advice on flushing took tons of ph water but should have flushed all unwanted nutrients and salts away and drink nothing but water for its last 7 two 10 days tricombes are almost all cloudy a few Amber and a few not quite cloudy I watch daily now on those I use to wait for hairs to turn 75 percent but that’s not good way to do it invest in microscope or jewellers loop


Likes
27
Share


@Smokwiri
Follow
Almost finished
Amazon: http://url-9.cn/0y9i
Amazon US: https://amzn.to/3e0P2bk
Amazon CA: https://amzn.to/3bTnEJC
Amazon discount Code:
it10smokwiri XS1000 10%
XSsmokwiri XS1500 8%
it20smokwiri XS2000 5%
it40smokwiri XS4000 5%
ViparSpectra 8% DISCOUNT CODE on the viparspectra websites (.com/.eu)
RUFFSELEKTAH

Likes
152
Share


@Roberts
Follow
Well 46.5 grams from a solo cup grow seems pretty good. It was my first attempt at doing this. Was a personal challenge, and glad I experienced it. I did move the cup around the room during grow. The herb is very fruity smelling and is a very pleasant aroma. Thank you again Amsterdam marijuana seeds. Was a excellent autoflower, and a beautiful solo cup grow. Thank you grow diaries community for the likes and follows. Special thanks to my YouTube channel subscribers. 💪🤜🤛🌱
DON'T DRINK AND DRIVE, SMOKE AND FLY
Www.amsterdammarijuanaseeds.com
Thank you grow diaries community for the 👇likes👇, follows, comments, and subscriptions on my YouTube channel👇. ❄️🌱🍻
Happy Growing 🌱🌱🌱
https://youtube.com/channel/UCAhN7yRzWLpcaRHhMIQ7X4g
Be safe out there👍

Likes
5
Share


@Deli_Weed
Follow
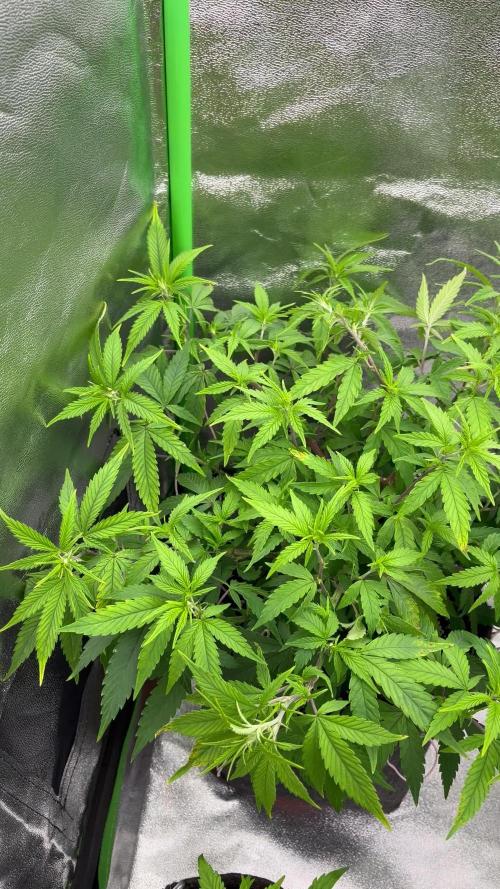
Va increíble, a pesar de que tardo para entrar en floración, nunca detuvo su crecimiento y logré hacer un LST super chingon de modo que logre que todas las puntas estén masomenos a la misma altura, así todas recibirán bastante luz y crecerán muy bien 🤤 ya me las imaginó 💪🏻🌲

Likes
2
Share


@Roster
Follow
Setted up this cutting of Skywalker. Having some initial problems with air and humidity. Hopefully is going to rain soon so humidity will rise a bit. Planning to do some LST and ScrOG. I'm helped by a friend because my skills are not good enough yet.
Let me know if you liked the sequences! I'm trying to do some timelapse research as well. Raspberry is running the timelapse and compiling the video I'm trying to update every day or two.
😷7/12 Changed water due nutrients deposit. Clean start as the roots have touched the water. EC 1.5 Ph 6.2
😵Ps. light was set with VEG and BLOOM BOTH ON! Lol, hopefully this is the 5th day 😂
Likes
23
Share


@RazzleMatazzle
Follow
We have successfully made it through week 5. The Runtz genetics continue to show strong growth—this plant literally grows before your eyes every day. As soon as some shoots are removed, the plant starts developing even more vigorously.
The only one that seems a bit neglected is the third plant in the last row. This week, I’ll try to weave the main shoots into the net more effectively. I suspect that due to the varying plant sizes, it’s not getting enough light.
None of the three plants have shown any pistils yet, which I personally think is a good sign, as it allows them to focus on growing in height and width first. There are still slight mineral deficiencies visible in the leaves, but I am counteracting this by increasing fertilizer and using foliar spray.

Likes
4
Share


@Jay84lawrence
Follow
This week my focus now finding sex of plants as it may be week 3 in veg this has been growing for six weeks from seed five nodes tall still looking healthy. If anyone has kind words of advice or just wants to kindly contribute that will be appreciated.
Happy growing all.
Likes
2
Share


@ProlificGrowth410
Follow
Day 100 from seed by far the healthiest most stacked plant in the tent, very dense nugs, strong citrus and berry smells kinda like blueberry lemonade, I'm very impressed to say the least.
Likes
1
Share

@Lvnsource
Follow
Feed Log:
#1 D:52 - 5.5L - Si,[0],Vega[18ml],Ca/Mg,[2g & 1.5g],INPUT: [pH 6.1],[1.684 EC], OUTPUT: [1.892EC], pH [5.9] 2.1L ,Previous irrigation: D:46
#2 D:52 - 5.5L - Si,[0],Vega[18ml],Ca/Mg,[2g & 1.5g],INPUT: [pH 6.2],[1.654 EC], OUTPUT: [1.74EC], pH [5.9] 2.2L ,Previous irrigation: D:46
———————————————————————————
Around day 50, the plants began showing nutrient deficiencies: likely potassium and magnesium, due to the soil having lost its nutrient charge. Two days after their first feeding, they are already looking healthier


Likes
45
Share


@Natrona
Follow
Sour Jealousy Auto FastBuds 2025 Outside Grow
April 13-19 Veg week 2
Well, my little girl survived the drop in temperatures last week but the cold slowed her growth and development. The weather is returning to our seasonal temperatures this week. Low of 39 at night and high of 87. Looks like Spring has come to stay.
4/19 pics taken, including a garden visitor. No, he did not crawl into the pot, I put him there, then put him back into the garden.
Your likes and comments are appreciated. Thanks for stopping by.
Growers love 💚🌿
💫Natrona💫
Likes
34
Share


@Gorrilla420
Follow
Still getting abit attacked by slugs, got to go down tomorrow with some copper tape and slug pellets. Lost few inner nodes and the 2 tops 1 is lagging behind the other. But gave a big feed so hoping will help and once these slug deterrents down they won’t endure anymore stress.
That’s all this week. Happy growing🌱

Likes
19
Share


@Dunk_Junk
Follow
She grew 9cm this week.
Doing her thing, no input from me other than watering/nutrients.

Likes
27
Share


@Theia
Follow
Lovely big chunky lady. 80ccm across colas that are thick as a babies arm.. and a delightfully zesty sweet smell when she wobbles in the breeze.
My queen this run for sure. Such an imposing girl...
Feeds are down to 1.6ec as I remove the more pk from her diet. She just gets greenbuzz nutrients organic bloom for the duration now.
Lights are at 60% giving 1100umols average across the canopy.
Just a pleasure to grow..
Thanks for passing.
Grow well 🌿💚🌿🙏🏼

Likes
15
Share


@Crwfz1
Follow
I love this strain i got it from them a long while back and some reason. It made seeds every time but gives me a female every time also so cant complain and i love the smoke really great taste grows easy all around good buds!


Likes
12
Share


@most_dope
Follow
the week has been smooth the leaves are fading / dying and i fed 1ml in a liter of water twice in the last 10 days but thinking about starting a flush now its been about 62 days and fastbuds site says 9 weeks. the hairs are mostly white still besides on a few buds its 25% and like 80% orange on 1 bud. trichomes are starting to look amber on sugar leaves about 10-15% amber trichs i need a better loupe to see close up tho. the buds just keep fattening up slowly but surely. im trying to be patient and let them get juicy even if its taking longer than the website advertised, (probably due to me dropping her in veg and overwatering in seedling stages) either way, super happy with the results so far and im thinking about getting another light. im going to try growing 2 plants under the 1 light until then but i think i could fit 3 or maybe 4 if i had a 2nd light. hopefully getting a 2nd tent soon too.