The Grow Awards 2026 🏆 


Likes
31
Share
@Canna96
Follow
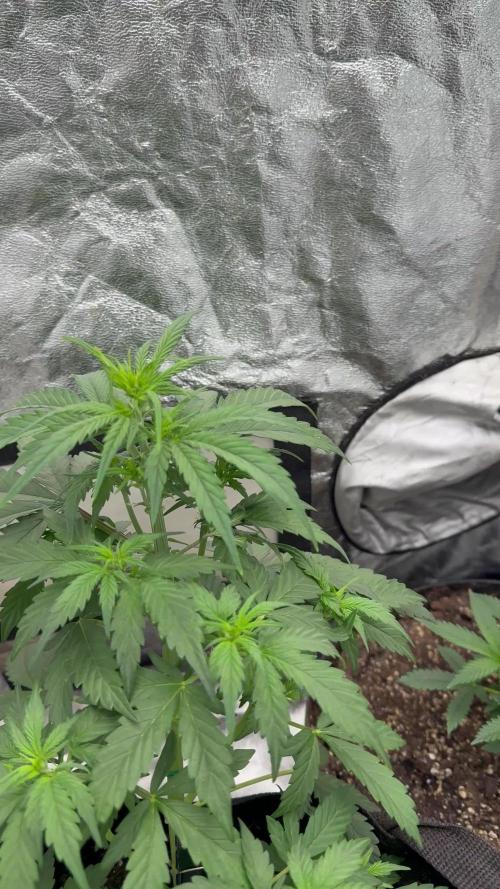
Hey now, hope everyone is having a great weekend. The Strawberry Banana Auto is doing well, she is almost done stretching and I have almost fully transitioned her to flower nutrients. She is currently getting silica, cal mag, and 75/25 veg and flower nute mixture of GH maxigrow/maxibloom.
I did change the Medic grow spectrum to the F1 spectrum this week which is the flower spectrum. I am also running the UV/IR bar for about 75 minutes every day before lights off, and I now have the light cranked up to 100%. I will also increase the exposure to the UV/IR light as flower progresses.
As she is almost done stretching, there is not much to do this week except keep the reservoir clean, full, and in the proper PH range. If any colas get crazy higher than the others I will correct, but other than that she can do her thing from here on out.
Thanks for stopping by, Stay Safe and Blaze On!!! 💪
Website: https://medicgrow.com/
https://growdiaries.com/grower/medicgrowled

Likes
11
Share
@StonedandSteady
Follow
Hang Drying 7-14 days before the #TotalDryYields $ #SmokeSesh's! 63rd Day #HarvestTime 9th week of Flower Update of my Fastbuds 2fast4buds.com Genetics looking Great, Gorgeous, Magnificent, Phat and Finishing out Super Strong! I Applied the #AncientArtofStemSplitting for more #FrostedTerpyBuds on 3/19/22 #Trichomes are Ripened and Ready for Steady! #ChopCity is underway! #FadeTime I Can't wait to Blaze Up these Beauties! I started thier #FlushingPhase on 2/23/2022 with Declorinated Tap Water Ph'd-6.0! I #Lollipopped the Lowers on Sunday 2/6/22 after posting to #GrowDiaries They received thier 5th #Feeding of #DivineSeeds #DivineGrow but this is thier 1st #Feed of #LongFlowering 3.0G. Mixed into a Gallon of water, Ph'd to 6.5 on 2/20/22! #BudzForming into Frosted #ChronicColas w/ #PistilsPoppin everywhere looking Pristine!!! I've been implementing some #LSTtraining at the beginning of 10 week's back by bending them over with #PipeCleaners to the sides of thier pots, pulling down thier side branching and #LeafTuckin the Biggest leaves under each other to Expose the Bud site's and Branches to more lighting w/ some #LiteDefoliation 9 weeks back as well! I introduced the #SpinningStemzStrengthing technique a few weeks ago to thier main Stocks and Side branching to make them Stronger and more Sturdy! They popped in under 24hrs in the wet paper towel method and now that they've busted out of thier ProMix potting mix medium, I've been watering them when dry with around 4 cups or 32 fluid ounces 64 Tbsp 192 tsp 948ml of Declorinated Tap water that's Ph'd to around a 6.4-6.3 using TNB ph Up$Down and watering thier whole pots these past couple of weeks! They're Growing under our Bodacious #BloomPlus1500w with the 150w Done driver in our 2×4.5×7ft. GrowTank Grow Closet with the 18/6 lighting schedule cause Everything needs a little rest! Team #Fastbuds recommends the 20/4 schedule as well!!! Our Grows also get Enhanced with #TNBNaturals The Enhancer with my Special Steady'z mix in their bottles!
Yo!!! Top-Notch and The Finest in AutoFlowers indeed! Let's Grow and Get it In from Team #Fastbuds @fastbuds_genetics on Instagram!!! Check it Out my fellow Growmies and Growmets! I'm very Thankful, Grateful and Appreciate these Fantastic, Famous, Fast-Growing, Flavorful and Fiery genetics! Spectacular and Superb Sponsorship package from my Broski Sir #Santi as I like call him and thier Award-Winning Company full of Great Growers, Bodacious Breeders and Pleasant People from All over the World! Your Strains are Phenomenally Pristine and Perfectly Priced! I Can't wait to Try, Test and Review these Crafted Cannabis Cup strains!!! Thanks Again Everyone and Everybody! I've also learned All sorts of Growing Tipz, Tricks, Techniques and Methods from you and your Detailed- How to Grow Instructional categories on your Website SeedBank! Your a Fantabulous Family and Terrific Team!!! It's my Pleasure and I'll do my Best!!! With the Help of my Broski #GallowGlas420 making my original Masterpiece's! I Made, Perfected and Hope Everyone Enjoys these New Introductions, Mail Call and Outros! I also Hope that Everyone will and Go Spread That Love to you Guys on your other social media's! I'll most definitely have their Link's posted Below⬇️! BudBrothers4-L!!! Cheers Famz!!! Much Props, Topz and Much Love!💯
https://youtube.com/c/FastBudsGenetics
https://instagram.com/fastbuds_genetics?utm_medium=copy_link
https://www.facebook.com/FastBudsMedia/
https://mobile.twitter.com/fast_buds
https://www.reddit.com/r/FastBuds_Family/
https://t.me/fast_buds_genetics
https://es.linkedin.com/company/420fastbuds
Remember "it's 4:20 Somewhere"!!! Bloom Plus BP-4000
CA:https://www.amazon.ca/dp/B08DTDP5FF/ref=cm_sw_r_cp_awdb_imm_86Q7H2D5BGFYB9B6PR9K
US:https://www.amazon.com/dp/B08DTN3B84/ref=cm_sw_r_cp_awdb_imm_4B7XWCAS09M4V3W0AFJH
Bloom Plus BP-2500
CA:https://www.amazon.ca/dp/B08DTCYV9Y/ref=cm_sw_r_cp_awdb_imm_YDNA8G16PH3TB002VKGE
US:https://www.amazon.com/dp/B08DS53THM/ref=cm_sw_r_cp_awdb_imm_SX3AEDKRVAYQECF32BE4
Bloom Plus BP-1500
CA:https://www.amazon.ca/dp/B082XYLHRJ/ref=cm_sw_r_cp_awdb_imm_XEBFV7790EHT53B2J9B5
US:https://www.amazon.com/dp/B082XYLHRJ/ref=cm_sw_r_cp_awdb_imm_MB3PYZEVSQRZY096AB79
BloomPlus Instagram Link:
https://instagram.com/bloomplusled?utm_medium=copy_link
Thanks Again Broski #SmokinPlantaz for Hosting your Bright and Tight Amazon Prime Day #BloomPlus-1500w Giveaway! I'm still Blinded by the Light!!! Lol (Song Pun) it's Ultimately Lit, Extremely Powerful and Brilliantly Bright! I also Love and Appreciate Everyone out here! Please! Go Over and Spread That Love to my Bro's YouTube Channel and Team #BloomPlus on their Instagram! I'll have thier Links posted ⬆️⬇️! BudBrothers4-L!!! Cheers Famz!!! Much Props and Much Pars!💯
SmokinPlantaz YouTube Channel Link: https://youtube.com/channel/UCDKJthWoS6-miAhq_lLb_-w
Likes
17
Share
@OrganicChronic
Follow
GMO (Garlic mushroom onion) was slow to flower but came on strong weeks 8 and 9 to produce some dense heavy sticky buds. The dry weight of the plant material is unsure, but I’ll report the weight of various bubble microns when dry. Pictures of the dry bubble and maybe a melt shot impending! To dry, I decided to microplane into pizza boxes lined with parchment. It’s been fun growing along with everyone on grow diaries. Awesome
Likes
42
Share
@Dunk_Junk
Follow
Trichomes are milky but the pistils have too many white ones still.
Flowers have slowed down in their growth.
Another week to go maybe.

Likes
1
Share
@NAG420
Follow
Did a little defoliation on her and some pulling down just stared to flower it’s her 5 day into it I’m trying to get the lower buds site to grow up to try to get some type of yield off her. Looks like it’s going to be a short run hopefully she really get bigger I can put her in my 4x4 mars hydro tent.
Update she is doing good feed her the last week of veg and next water will be regularly water then start the flowing week feeding after updated with pictures and a short video.
Likes
2
Share
@cozzalenco51
Follow
At this point she was drinking more then 4L a day and due to the root mass that was about all i could fit in the res at the time so I had to mock up a external res and convert the system to RDWC
K.I.S.S.

Likes
12
Share
@Lysidious
Follow
Was bummed out plant got red mites at the end but that’s fine, it didn’t not impact the grow (or at least I didn’t notice.)
Harvested at the end of the 6th week of flower. Trichomes had already started turning amber due to heat degradation (couch lock party) what trichomes that were not dust ridden or amber was milky so I’d say it’s ready.
Choosing the best time to harvest is still puzzling for me due to the fact that this is my 4th time harvesting cannabis.
Thanks for reading... more info to come ...TBC
Likes
52
Share
@UnorthadoxDude
Follow
Hello all and welcome to the much anticipated beginning of vegetation for these five Epsilon F1 Autos from Royal Queen Seeds.
Allow me to introduce Ally, Normani, Lauren, Dinah, and Camila. All five girls have pushed put their 2nd node (3 fingers) and node 3 is on the way out. I expect all five girls to take off from here, and so the next seven days are going to be big.
I will start fertigation today.
For comparison purposes the Day 1 here means Day 1 of veg. For Ally, Normani, and Lauren this is day 11 since breaking ground, for Dinah day 10, and for Camila it is day 9. For the rest of this grow I will increment days from here but it's really easy to work out days since breaking ground as it is a simple matter of day + 10, 9, or 8 respectively.
Day 1: Fertigated 2l.
Day 2: Right ok. Can you actually believe this response in 24h? The poor girls were STARVING. Wow look at the change in color! Wow look at the growth!! Ally is most advanced, Camila least. It is fascinating so see them develop! They are growing faster and faster now.
So let us talk about the elephant in the room a little bit. Phenotypes. At the moment there is absolutely no evidence to suggest that this crop will be anything other than uniform. Nevertheless there are some clear differences in some of the girls. So let's have a look shall we:
Ally (center), Normani (closest to the middle purple basil), and Lauren (opposite side to Normani): These three girls are not quite identical, but it is a pretty challenging game of spot the difference.
Dinah: Okay so Dinah is coming in noticeably darker than her sisters, with a little more tendency to claw, and with quite a bit larger and more angular serrations. Her first leaves are also a different shape.
Camila: Little Camila had a twin, but I killed her with some overzealous tweezing before I realised what I had. She came in with only one cotyledon, and she came in last. Her first leaves are quite different to the rest of Fifth Harmony. She is also showing slighty more narrow leaves. She is lastly also very slightly more pale than her sisters.
Are these phenotype differences? I mean in terms of the environment, feeding, watering, substrate, temperature, light, airflow... well these girls are all in the same pot, so unless I am particularly haphazard in my mixing and fertigation (which I can assure you I am not) I do not think it likely that these ladies have significant enough environmental difference to account for these quite clear visual differences. I am absolutely fascinated to continue to witness this, and it has only now occurred to me what a great privilege it is to be able to grow the world first F1 cannabis hybrids, and what an astounding honor to be one of the very first hobby growers to do so! The fact that RQS made this happen by not only supplying the seeds and other merch and goodies, but also sending expedited international shipping so as to fit within my arbitrary timescales is almost unbelievable. When these guys (on their website) say that it is their belief and mission to forge the path to worldwide legalisation, they are not hollow corporate whispers, it is their core of being. Cannabis everywhere is truly blessed to have such a worthy and proactive ambassador. Bravo RQS!
I have adjusted the timer such that the main tent is now getting 20/4 upped from 18/6. After monitoring DLI at 18/6 for a week I am unhappy with the overall level but because of the varying heights of the plants I am limited in what I can do in adjusting the light height. Some areas were only getting 20 DLI. So I have rearranged to have the taller plants on the edges and the lowest in the middle and doing it this way all plants are getting between 35 and 50 DLI at 20/4 - although one or two cola tips here and there are getting 55. Will monitor for a week.
Day 3: Well look at this growth again!! These ladies have responded to feeding really well. Fertigated 3l.
Day 4: Growth is accelerating fast, these ladies will be ready for their first training soon. I am starting to formulate an idea what to do. I am thinking of topping Ally and LST on the rest.
Day 6: Fertigated 3l. Ladies growing fast now. Will soon be time to start training. However! The secondary nodes are developing strongly. Hmmm
Day 7: Fertigated 3l. Defoliated the three fingered leaves from Ally and tucked the five fingered under other plants.
End if week summary: Well when they said "hybrid vigour" they were not joking. Look at day 1 and day 7 side by side after approx 6 days into veg growth. Wow.


Likes
14
Share
@Cannabot
Follow
Getting there,glad to see the one pheno seems to be side branching decently.Will just carry on tieing down side branches and main.Weathers been great but definitely getting cooler.Looking foward to their first fully saturated fertigation to runoff during the week if the good weather persists.

Likes
120
Share
@DogDoctorOfficial
Follow
Welcome back to another thrilling update on our Lego Ninja Tropical Tangie Run. Week 7 has been an exhilarating journey of rapid growth and breathtaking canopy development. Our Tangie is proving to be an extraordinary ninja superstar!
Last week, we embarked on an exciting transplant adventure. Our fearless Tangie had outgrown her previous home, so we bravely transferred her to a spacious 25-liter fabric pot. With the assistance of Aptus Holland Mycor Mix, we ensured a smooth transition, providing her with beneficial mycorrhizal fungi. These underground helpers are like her very own ninja squad, supporting her root system and establishing a strong foundation.
To continue supporting her growth and development, we incorporated the incredible Aptus All-in-One Pellets into the soil. These pellets act as potent ninja power capsules, packed with essential nutrients. Each watering session delivers the perfect dose of nourishment, fueling our Tangie's journey to greatness. She's thriving with optimal health and vitality.
And let's not forget our loyal companions, the trusty Lego Ninja buddies. They have remained steadfast by our side throughout this green adventure, offering both moral support and an unwavering display of ninja vibes in the grow room. Who would have guessed that little plastic warriors could be such fantastic companions?
After the successful transplant, it was time to introduce our Tangie to the art of scrogging. We skillfully installed a scrog net, creating a framework for her to weave her way through. This setup resembles a challenging ninja obstacle course, encouraging her to grow horizontally and maximize her bud production. It's truly remarkable to witness her impressive moves as she gracefully and sexily fills up the space.
Of course, proper nutrition remains crucial for our Tangie's ninja training. Instead of using Aptus Holland Veg Watering Mix and All-in-One Liquid separately, we have now transitioned to solely relying on the pellets. These convenient premixed pellets integrated into the soil eliminate the need for additional liquid NPK. This simplification allows us to focus on other essential aspects of her training.
To ensure she remains pest-free, we have been diligently conducting leaf picking sessions, which also serve as an opportunity to check for any unwanted visitors. So far, our Tangie has passed with flying colors, and her vibrant 9-fingered leaves are a fantastic sign of her overall health.
As our Tangie continues her epic ninja journey, she basks in a PPFD of 600. These photons act as her loyal ninja training partners, stimulating robust photosynthesis and fostering explosive growth. With each photon absorbed, she becomes increasingly formidable, ready to take on any challenge that lies ahead.
In summary, Week 7 has been an absolutely exhilarating chapter in our Lego Ninja Tropical Tangie Run. The successful transplant, the magic of Aptus products, the support of our Lego Ninja buddies, and the installation of the scrog net have all played vital roles in our Tangie's remarkable progress. We owe a tremendous SHOUT OUT to Aptus Holland, Dutch Passion, and Grow Diaries for their continued support and exceptional products for the love and for it all, without them nothing we see here wold be possible.
Join us for the next update, where we will delve deeper into the fascinating world of ninja training techniques and witness the unfolding of our Tangie's extraordinary ninja powers. Until then, continue cultivating with joy, embrace the indomitable ninja spirit, and remember that every plant has the potential to become a botanical ninja superstar!
As always thank you all for stopping by, for the love and for it all , this journey of mine wold just not be the same without you guys, the love and support is very much appreciated and i fell honored and blessed with you all in my life<3 <3 <3
#aptus #aptusplanttech #aptusgang #aptusfamily #aptustrueplantscience #inbalancewithnature #trueplantscience #dutchpassion #dogdoctorofficial #legoninjago #growerslove
With true love comes happiness <3 <3 <3 Always believe in your self and always do things expecting nothing and with an open heart , be a giver and the universe will give back to you in ways you could not even imagine so <3 <3 <3
Friendly reminder all you see here is pure research and for educational purposes only
<3 <3 <3 Growers Love To you All <3 <3 <3
Likes
68
Share
@715creeks
Follow
looking really good now. i removed some of the larger fan leaves at the top and trimmed the bottom to tidy up :)
still loads of white hairs, a few have turned brown but not too many.

Likes
16
Share
@Dunk_Junk
Follow
Wow she's took to the skies this week!
Grown another 27cm vertically!
💪
Absolutely marching through flowering! Very fast!
Buds are developing well.
Likes
9
Share
@AustinRon
Follow
2 Week AC3Q - Seedling
Ambassador Cartwright by IRIE Genetics
(Clementine X Arise) X Arise
((Tangie X Lemon Skunk) X Arise) X Arise

Start of Week 2 - 16 July 2022 AC3Q 15:S:2:1 to 22 July 2022 AC3Q 22:S:2:7
Environment:
EC Targets: #
rel.
|
abs (rel + source)
ECseedling:
[0.4, 0.5]
[ 0.7, 1.0]
ECearlyveg:
[ 1.1, 1.4]
[ 1.4, 1.7]
EClateveg:
[ 1.2. 1.5]
[ 1.5, 1.8]
ECearlybloom:
[ 1.1. 1.4]
[ 1.4, 1.7]
EClatebloom:
[ 1.3, 1.6]
[ 1.6, 1.9]
ECripen:
[ 0.9, 1.2]
[ 1.2, 1.5]
ECflush:
[ 0.0, 0.0]
- Seedling (Week 1-2)
- Temp: 78-82°F
- VPD: 0.85 ± 0.05
- Photoperiod: 18/6
- Light Strength Start: 200-300 PPFD
- EC: 1.0
FertigationFoliarMonday:
Solar Wind: [ 2.5, ml, 500, ml]
Silica Skin: [ 1.25, ml, 500, ml]
FertigationFoliarWednesday:
CalMag Fuel: [ 2.5, ml, 500, ml]
Lush Green: [ 1.25, ml, 500, ml]
FertigationFoliarFriday:
Solar Wind: [ 2.5, ml, 500, ml]
Peak Bloom: [ 0.675, ml, 500, ml] # Cease Begininning Flower Week 5
Rooted Leaf:
Primary: # Mix and store for week, not
Primer A: [ 2, ml ]
Primer B: [ 2, ml ]
Silica Skin: [ 1, ml ]
# Mix with Base AT Feeding
AtFeeding:
Root Anchor: [ 1, ml ] # Sprout
Lush Green: [ 1, ml ]
# at Seedling (3 Nodes)
Cal Mag Fuel: [ 1, ml]
Sat 16 July 2022
AC3Q 15:S:2:1
- Remaining Plants , 1,3 - 7 (6 Total)


#7 (The Last One) was a potential Lost-Cause - HOWEVER - Her damaged leaflets were praying this morning. It provided sufficient material for Sex Testing.;
Sex Testing
- [x] Form Filled Out
- [x] Clip #3
- [x] Clip #4
- [x] Clip #5
- [x] Clip #6
- [x] Clip #1
- [x] Clip #7
- [x] Package assembled & Mailed (1400)
- [x] Install Oscillating Fans (2)
- I should have done this LAST WEEK - Wondering why we were growing floppy plants - NEED Light Mechainical (AirFlow) Stimulation to build STRONG MERISTEMS.
#6 After Clip

- Mixed up Sat Night/Sunday’s nutes - Full Panel ~ EC: 1.0
Sun 17 July 2022
AC3Q 16:S:2:2
0800: 30 ml full 0.8 EC
- Wow - Every time I open the tent after extended close - I’m arrested by the Size change in the leaves. Right now - I see hybrid Vigor!
- Installed supports for two leaners, should be ready to come off Wed/Thus
ec 0.3
0.4 ml a
0.4 EC + 0.1
0.4 ml b
0.7 EC + -.3
0.2 si
0.7 EC + 0.0
0.2 cm
0.8 EC + 0.1
0.2 lg
0.8 EC + 0.0
2130: 20 Ml Full 0.8 EC
- [x] Add Fans to Cabinet for plant strength
- [x] Removed supports from 1 & 4 (Flopping Meristem) - Took 6 hours w/ fan for them to stand up!
Mon 18 July 2022
AC3Q 17:S:2:3
0900 - 30 Ml Full 0.8 EC
2030: Mixed up Fresh Full @ 1.05 ± 0.05 EC
2100: 30 ml Full Fertigation
Tue 19 July 2022
AC3Q 18:S:2:4

0800:30 ml Full EC: 0.8
- [ ] Mix up 1.05 ± 0.05 EC FULL
2100 Mixed up Full - EC: 1.05 ± 0.05
Raised ppfd
Wed 20 July 2022
AC3Q 19:S:2:5
o730 ec 1.0-1.1, 30 ml per
adjusted fans
Foliar:
- lush green
- calmat
Thu 21 July 2022
AC3Q 20:S:2:6
- Though fixing’ to harvest - she could use a little water (500 ml) w a littl Rooted Leaf Resin Bloom
Fri 22 July 2022
AC3Q 21:S:2:7
Foliar: Solar Rain

Likes
14
Share
@BushDoctor740
Follow
The Papaya Cookies are smelling great and developing nicely.I gave one last dose of recharge today and just going to give plain water until they finish.Some are developing faster than others so I won’t harvest all at the same time.The buds are getting really dense and full of trichomes.Around half of the pistols are turning bright orange giving this buds an awesome look.Ill update some pictures later on this week as they getter closer to the finish line.
Day 64 removed the bamboo scrog and decorated for the fast buds Halloween contest.These girls smell so amazing and the buds are super dense loaded with trichomes.I will be harvesting one of the plants in a few days I’ll let her dry out and sit her in the dark for a day or two in another tent.Most of the trichomes are all now cloudy 🔥🍪.
Likes
12
Share
@gr3g4l
Follow
estos últimos dias estiraron bastante los apicales aumentando la distancia entre nudos.
para bajar el PH utilizo ácido cítrico . El agua de grifo de base sale a 8,2 Ph y voy añadiendo hasta bajar a 6,7 áprox.
A los 25 y 26 dias estas plantas poco deberian de crecer más y todas ya han elejido por donde crecer y engordar. Llegados a este punto quité alguna hoja y algún chupóptero y até algunas de las ramas a los tutores como buenamente se pudo. El fin no es otro que mirar de acomodarlas por donde seguir creciendo y no tengan que soportar ellas solas el peso que se les viene encima cuando engorden los cogollos.
Como puede verse a una de ellas le salió una mutación genética llamada fasciación. una modificación cromosómica .
Likes
3
Share
@Ninjabuds
Follow
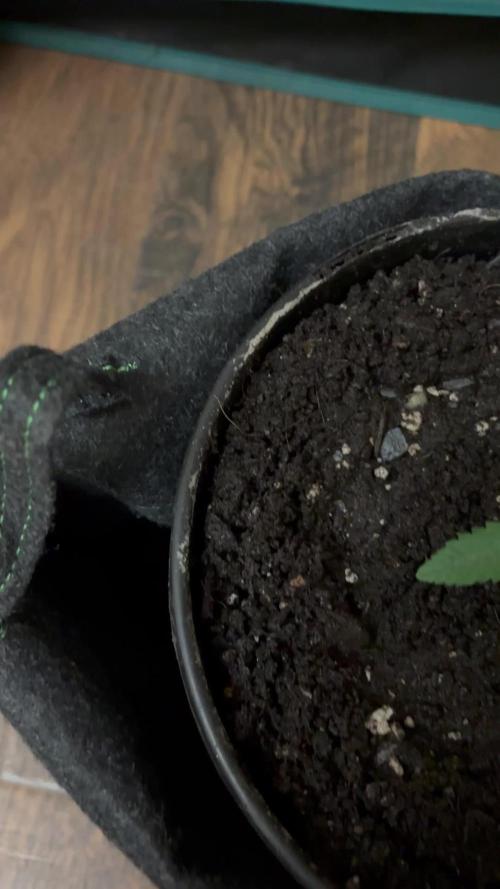
Trasplant day! Nothing special going on. Im excited to see how these turn out. Not to much visul difference between the LCR and the Papa at this point.


Likes
4
Share
@Erich2025
Follow
I did some trimming this week. The plant grows well and healthy. I didn‘t use any nutrients because of the slight burn last week.
Next week I am going to transplant the plants in their final pot and prepare them for flower at week 6.
🌴🍪