The Grow Awards 2026 🏆 


Likes
Comments
Share
@SolitudeCorners
Follow
MintLickz »»» Unknown Strain Mintz x Lickz
It's a 2-year-old clone(probably an f4-f5 clone can't remember how many times I take a cut and grow a new one) I selected from 9phenotypes this one was the best bag appeal for sure.
The last time THC test was 19.30% I hope to get better THC and also flavors
At first, I just kept her veg for years and didn't bring her to flowering but after I got into Wolfpack Discord and showed her up. Jay Wolfpack and some people came through my inbox and offered to exchange my clones with their fire breeder after just seeing the live flower.
So this is why I decided to flower her again
Light and Enviroments💡💧
Light 18/6 (06.00 AM - 12.00 PM)
Aim VPD around 0.7-0.9
Temp26-28 RH70-80
DLI 16-18 PPFD 200-300
22/2/24
Water 15L+Silica m/ fulvic 16ml(half) @0.1ec
+V1 130ml @1.2Ec+V2 125ml @2Ec
Ph 5.4 +Silica m/ Fulvic 25ml @PH6 Ec2.1
@11.00PM -Up to 6.2 @08.00AM
Feed 5min - around350ml per cubes
23/2/24
Last batch mix @ph5.7
2.30min shot 180ml
25/2/24
Tray
Water 5L+Silica mix Fulvic ml+Bushdoctor 5ml @0.3Ec
+V1 40ml @1.3Ec +V2 35ml @1.9Ec +Root Exceluration @2Ec
Ph 5.8
200ml per cube
26/2 Veg Foliar last 5min before lights off
28/2/24
Water 16L+Rhino Skin 15ml @0.1EC+Calmag 15ml @0.3EC PH6.9 + V1 125ml @1.2EC+V2 120ml @2EC PH6.2 adjust to PH5.6
Tray
FEED 1min(60ml) @27/2 at 11.50PM
28/2 Feed
11.00 AM 30Sec (30ml) WC from 52% goes up to 59%
02.42 PM 30sec
Dryback right now is 15% for 24hrs
⛺ Feed
08.50 AM 1.30Min
02.25 PM 1Min
04.50 PM 1Min hand watering to adjust any underwatering
Defoliation most big fans leave in tents
Likes
8
Share
@pegas
Follow
El olor es cada vez más dulce y afrutado, 3 semanas y estarán listas para la cosecha.


Likes
37
Share
@RFarm21
Follow
Hello growmies!
25/08 - Alimentação Royal Gorilla # 1 : CE = 1,39; pH = 6,3
O gráfico representa a nutrição da RG#1 misturada com 2,5L de água.
25/08 - Alimentação Royal Gorilla # 2 (2,5L): CE = 1,33; pH = 6,1
-BioGrow - 3ml; BioBloom - 5,5ml; TopMax - 2,5ml; BioHeaven - 6ml; Activera - 5ml;
25/08 - Alimentação Queijo Royal # 1 (2L): CE = 1,36; pH = 6,2
-BioGrow - 3ml; BioBloom - 6ml; TopMax - 2ml; BioHeaven - 6ml; Activera - 6ml;
21/08 - Alimentação Queijo Royal # 2 (2L) - CE = 1,54; pH = 6,3
-BioGrow - 3ml; BioBloom - 5ml; TopMax - 2ml; BioHeaven - 6ml; Activera - 6ml;


Likes
31
Share
@TheStrainAlchemist
Follow
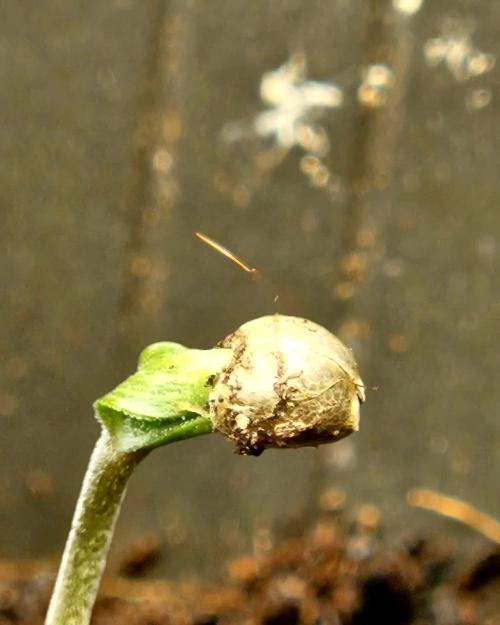
This is my first induced flowering growth.
I always grow weed outdoors with big satisfaction on yield and nature contact, But I have to say that training plants is real fun and I can’t wait to see the buds first appear and then fatten up.
On day 5 of flowering she started to appear a little stressed, I think is a little overfeeding because her leaves are a little burned on the tip and a little underwater too but this morning end of day 6 appear to be recovering has the timelapse show on the end.
Happy growing to you all brothers and sisters ☮️☮️☮️✌️🏼
Processing
Likes
10
Share
@Reaper
Follow
day 15: flowers start to appear
day 16-17: temps go 24 celcius, i throw ice bottles in the res
day 25: insane stretch stops flowers fatten up, even crystals around the young budz.


Likes
21
Share
@20SYL
Follow
The beginning of flowering is going well. They were left alone for three days with temperatures that were too low (17–21°C); I fixed that today. The leaves are a bit heavy and droopy, nothing serious in my opinion! 🌱🌱🌱🌱
Likes
61
Share
@Hou_Stone
Follow
✌️👨🚀🍊
C'est partis pour la floraison ! Mes lemon orange se développe excessivement bien, je croise les doigts pour que ça continue en espérant avoir de gros bourgeons savoureux dans 2 mois 🤞🍊
J'ai ajouté environ 25gr de poudre BioBloom par pot de 8L soit environ 3gr/L.
J'arrose chaque pot avec environ 1.5L tout les 5 jours. J'ajoute du biohenhanceur 1 fois sur 2
Intensité de la FC3000: 90%
Ventilation : 2 ventilateur oscillant ( ON 12/24H) + Extracteur pouces mars hydro power : 2/10 (24h/24h)
👋👨🚀🍊
Venez me voir sur instagram ! 🤩
https://www.instagram.com/hou_stone420/

Likes
19
Share
@BoboLacetti
Follow
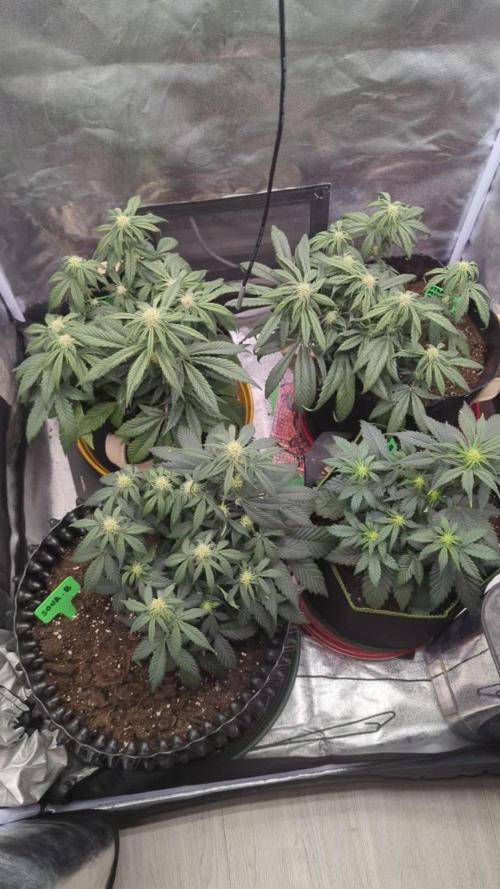
This is my biggest and healthiest plant I've ever had!
I'm so incredibly amazed by Deepwater Culture that I'm thinking about not growing in the ground anymore and instead setting up 6 DWC systems in the tent.
Tody i defoliate the plant :)

Likes
59
Share
@Insaniac_0
Follow
(11/25-12/01)
Hope everyone enjoys the daily progressions of overhead and side profile (Organized Chaos) Unfortunately they have too much of a toll for me to keep up with with 3 sets of grows going now, so this was the last week I am doing them on this set. I will try to add a video and black back or cover pics by end of week every week.
Week 3 Notes & Observations:
As mentioned last week, Plant 1 remains the supreme plant now and is producing nice stretch in the node spacing but is still showing a different type of leaf shape than plant 2. No issues from the mainline topping and they seem to be going okay. I will be topping again this weekend for the second of 3 total topping sessions. This topping will be 2 tops off the ends of the last and will produce 4 main colas.
**OOPS**
was being a little too aggressive in my HST while trying to set the mainline on both plants today. P1 was just a little rip of the skin, I taped her up and suspect she will be fine. However, on P2, I nearly snapped the whole branch off. I taped it and crossed my fingers hoping it works out in a week or two, but have serious doubts it will be able to mend such a large break. We'll see because I am posting ALL of the grow, the good and the bad.
VPD and PPFD:
This week I will hold the humidity in the tent to about 70-75% and temps will be monitored for 70- 75F daytime and 66-71F overnight. Im not adjusting my lights and look to control them 350ppfd max. Meaning slight increase over last week but mostly just growth increase.
Feed & Monitor:
***All feeds with nutes use either a whole ratio or combination of "Veg Mix" and "Bloom Mix"concentrates DILUTED in water until a total ppm of add-in is reached using a (Total Dissolved Solids) TDS Meter measured in PPM (parts per million). The "Veg Mix" concentrate will eventually be added in smaller ratios and "Bloom Mix" concentrate will eventually replace the "Veg Mix" concentrate entirely. The ppm and ratios of each feed will be listed when I feed. Veg mix recipe is on week 2. Bloom Mix recipe will be noted in this top message of the week that I make it.***
Day 28 (last feed was day 22)
Tested and Calibrated my ph pens. Starting weight from each pot was 18 lbs and 8 oz, P1 weighed 15lbs 12oz and P2 was 15lbs 4oz before feed. Each plant got 1 gallon of de-chlorinated tap water with 300ppm Veg Mix concentrate added (recipe on week 2 and makes 1 gallon at about 3600 to 4000ppm concentrate to dilute each feed, i.e. I only fed 300ppm above the purified water ppm this feed) The ph on this feed was balanced to 6.0ph to combat the original higher runoff ph from the first runoff feed. After feed P1 weighed 22lbs 3oz (21lbs 2oz after last feed) and P2 weighed 21lbs 14oz (20lbs 14oz after last feed). I got about 5cups of runoff on P1 (9 cups last feed) and 5 cups on P2 (7 cups last feed) . Runoff for P1 ph was 6.45 with 1170ppm (6.45ph with 980ppm last feed) and P2 was 6.45 with 1230ppm (6.45 with 1130ppm last feed). Top soil tested at: P1 6.35,6.3,6.33,6.33 for an avg of 6.327 (6.497 avg after last feed) and P2 tested at 6.47,6.37,6.26,6.51 avg 6.402 (6.46avg after last feed) - next feed will be 6.3ph as Im liking where the ph is so I dont see any issues, but will continue to monitor this way.
Day 34 (last feed was day 28)
Tested and Calibrated my ph pens. 1st Starting weight from each pot was 18 lbs and 8 oz. Before feeding this time, P1 weighed 14lbs 14oz (15lbs 12oz before last feed) and P2 was 14lbs 7oz before feeding (15lbs 4oz before last feed). Each plant got 1.5 gallons of de-chlorinated tap water with 98ppm Veg Mix concentrate added to flush any salt builds in the soil (recipe on week 2 and makes 1 gallon at about 3600 to 4000ppm concentrate to dilute in each feed, i.e. I only fed 98ppm above the de-chlorinated tap water ppm this feed) Due to this soil showing a possible calcium deficit, I am starting a 1ml per gallon add-in to test on all plants using this soil, so I added 1.5ml of CaliMagic (General Hydroponics 1-0-0) to each plant's feed then I ph balanced before feeding. The ph on this feed was balanced to 6.3ph. I used knitting needles to help both aerate the soil and create new water pathways for the roots. (a practice I may consider a new feeding standard) After feed, P1 weighed 21lbs 9oz (22lbs 3oz after last feed) and P2 weighed 21lbs 7oz (20lbs 14oz after last feed). I got about 11cups of runoff on P1 (5 cups last feed) and 11 cups on P2 (5 cups last feed). Higher runoff volume was expected with the feed volume increase for flush this round. Runoff for P1 ph was 6.65 with 838ppm (6.45 with 1170ppm last feed) and P2 was 6.60 with 879ppm (6.45 with 1230ppm last feed). Top soil tested at: P1 6.58,6.57,6.58,6.67 for an avg of 6.600 (6.327 avg after last feed) and P2 tested at 6.47,6.61,6.64,6.64 to avg 6.590 (6.402 avg after last feed) - next feed will be 6.0ph as I'm still liking where the ph is, but rather see it closer to 6.3 or 6.4 top and bottom. I dont see any issues with the feed's data other than the possible calcium deficit and I will continue to monitor runoff ppms as I expected this to be higher with more runoff.
Hope everyone enjoys the daily progressions of overhead and side profile (Organized Chaos) Unfortunately they have too much of a toll for me to keep up with with 3 sets of grows going now, so this was the last week I am doing them on this set. I will try to add a video and black back or cover pics by end of week every week.


Likes
28
Share
@m0use
Follow
Left these ones out a bit to long and not nearly enough love, so they suffered a bit but that's ok. I am going to experiment and try water curing the buds. First time ever using this method and I think it will make a good little project. No idea how to it will turn out, been reading it will remove most of the smells and that sucks but the smoke is very clean and light. Only time will tell. take about 7 days to fully water cure. bud washing helped get rid of a lot of extra that stuck to them outside.


Likes
Comments
Share
@All_about_420
Follow
Auch hier nochmal eine Erholungsphase vor dem letzten Topping
und dem finalen schneiden und trainieren vor der Einleitung der Blüte.
Die Eingriffe hat sie bisher gut weggesteckt und die Canopy ist dicht und vital.
So kann ich sie ideal vorbereiten,
um dann am Ende eine stabile Pflanze mit hoffentlich dicken und schweren Buds zu haben...😉
Likes
7
Share
@CanarianGrow92
Follow
The 22nd and 23rd of of july nothing important happened, we provided some water and the plant was looking quite good
The 24th of july a heatwave started, reaching 40C° outside, i needed to move the plant to my balcony, she continued outdoors but with some more shadow as the direct sunlight for such a long time would have fulminated the little plant
25th of july we provided bioenhancer from green house and some synergy mycorrhizae
26th of july nothing
27 of july water
28th of july nothing
29 and 30 of July starting week 2 veg. Temperature seems to start getting better, next couple of days we will move the plant to the roof again, gave only water
Likes
10
Share
@MrGrowthSpurt
Follow
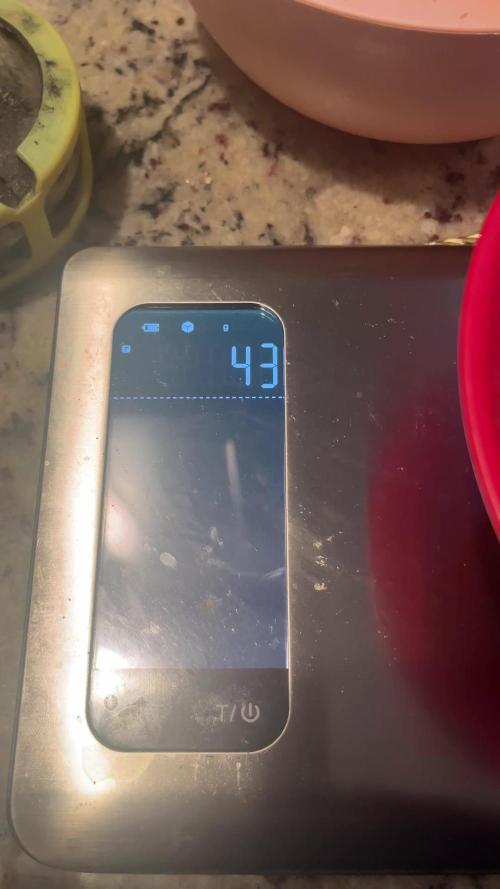
I really slacked at the end of this grow, my schedule changed drastically in the last month and I was unable to really take care of her the way I wanted. She yielded a 56 grams exactly.

Likes
5
Share
