


Likes
Comments
Share


Likes
12
Share


@chronicon
Follow
i should had defoliated plant 2 (one on left) a lot more in earlier stages, a lot of the canopy is leaf that is blocking airflow and light
there is a video there which you need to flick through the pictures to see it

Likes
10
Share


Processing
Likes
8
Share


@eldruida_lamota
Follow
Bueno, aquí están estas candy caramelo de Zambezaseeds, la verdad que esta genética me está gustando tienen bastante densidad y son algo chatas , los nudos están muy juntos y eso me gusta porque el cogollo compacta más a mi parecer.
Sigo regulando las condiciones del ph en cada riego en 6,2 y actualmente no supera el 50% de humedad ni sube de 26 grados.
Estando a finales de mayo not bad por las condiciones climáticas pensé que sería algo más complicado 🤷♂️.
Gracias a Mars hydro y a Zambezaseeds por hacer posible estos proyectos.
.
Www.mars-hydro.com
web: http://bit.ly/2uJAjgy
ts600: http://bit.ly/3cnv0Ev
code: an420
.
Buenos humos fumetillas , las semanas que viene más y mejor 💪🖤.

Likes
70
Share


@Black_Magic
Follow
Gelato got good yield about 30 g per plant
Got some problems with mold on gelato
Because the form of the buds , could not handle it
Some colas are over 30 cm
Don’t like the creamy taste ( banana was better)
It’s definitely day stuff
Density 7 out of 10 fluffy0

Likes
21
Share


Likes
27
Share


@Dunk_Junk
Follow
I note this strain is super frosty!!!!!!!!!!!!!!!!!!
Still weeks to go!
Likes
Comments
Share


@Lynx_361
Follow
16.06.2025
The Plant's had a ruff time with me recently! I lost one branch from Number 1 (the short one in the middle). And I had no Time to give them the needet attention. And I did my last Topping. So from now on it's just waiting till flower.

Likes
20
Share


@Ginger_gnome
Follow
Well the last week the plant has started to show some amber trenchomes and as of today I'm seeing roughly 25% amber on the lower section of the plant. So today I start flushing. I know a lot of people say you don't have to flush but I disagree when it comes to hydro systems. Soil I get it trying to flush out all the nutrients is technically "impossible", I still do. But with hydro your plant has been directly absorbing the nutrients from the water with zero buffers like soil or coco and I find you can really taste it when you smoke it if you don't do a proper flush. I use the grotek final flush blueberry myself. The 500ml bottle I picked up a year ago when I did my blueberry has lasted a long time lol. My aerogarden grow box is going to be down for 2 weeks when this is done this grow. Got to make a few minor tweaks and then it'll be back up.
Happy growing everyone

Likes
28
Share


@MrGrowthSpurt
Follow
What's up Growmies 🤟🏽. Today marks the start of week 7 overall and week 2 flowering (week 1 flowering for Caramelicious).
I love indoor growing during the winter because the humidity is easy to maintain at optimal levels.
My babies are thriving and all are very healthy, I am keeping an eye on Caramelicious making sure she doesn't Hermie on me and pollinate my entire tent ( it happened before). I switched to a 12 light schedule about 10 days ago and she is just now starting to preflower.
I am feeding them just 1 liter of water every 3 days and they seem to do well with that schedule. Every 3rd watering I feed them plain water and give them about 1-1/2 liters (or until I see run off)
I notice how the first 2 to 3 hours after watering the leaves all droop and kind of claw, I believe it's due to the plant being saturated with water and sucking up the water so it can breath o2 again.
I am giving them all the "bloom and riping" mix of General Hydroponics which calls for 1/2/3 mil/gallon mixture. I mix the recommended dosage into a 3 gallon sprayer so like always they are getting 1/3 of the manufacturer's recommended dosage.
I have never lollipopped any of my grows, hell I don't even defoliate, I use the tuck method and remove fan leaves as the plant matures and sucks the nutrients out of them. However just for experience and experimentation I am going to defoliate the bottom 3rd set of leaves, and get rid of some of the lower bud sites of one of my white LSD plants. Since I have 2 growing I figured I really have nothing to loose.
All in all everything is going very well🤞🏽it is getting so crowded that it is difficult to take the type of pictures I want, however that is a good thing in my eyes.
That is all for this week, nothing really new or exciting going on, just business as usual.
I hope everyone is having a stress free grow this week, and like always, may the plant goddesses bless you all with a bountiful harvest 💪🏾

Likes
21
Share

@Hempface86
Follow
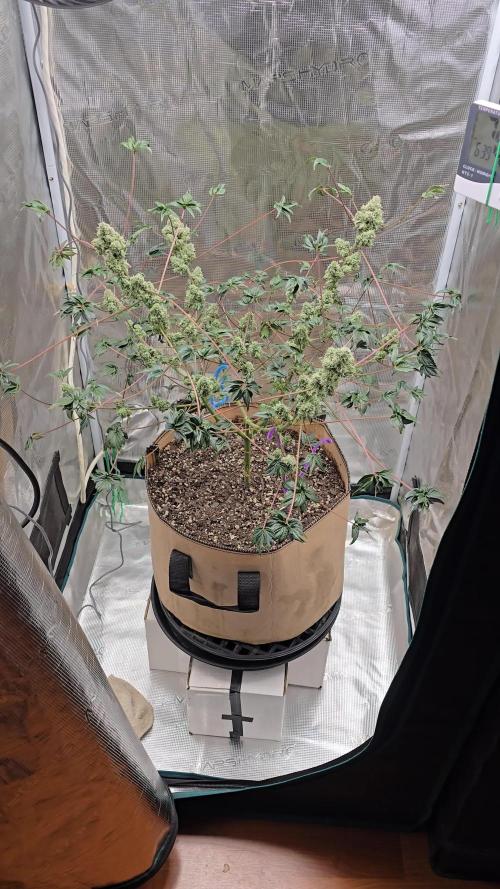
Ladies and gentlemen, as you can see, this is going to be the easiest post harvest to date... it's crazy how the buds are able to grow with how little leaves there are for photosynthesis.. Anyway, she is a very it's different but in a good way smell..terps are awesome thank you again @Grow4Releaf... God bless and happy growing 🙏

Likes
6
Share


@Aleks555
Follow
42Fast Buds - Gorilla Cookies Auto - Day 60
At 65 cm tall and 60 days in, our Gorilla Cookies Auto from 42Fast Buds is deep into the flowering phase, and we couldn’t be happier with the progress! The buds are developing an irresistible aroma—sweet and earthy, with a rich complexity that fills the room. What’s even more exciting is that, day by day, we’re seeing the cones swell and get coated in a thick layer of sugary trichomes, giving that frosty look we all love.
We’ve been feeding her with Xpert Nutrients throughout the entire cycle, ensuring she has all the right elements for powerful growth and healthy bud development. The results are incredible, and the anticipation for harvest is building!
Climate: 25°C, humidity 60%
CO2 Boost: Enhancing the size and resin production of these stunning buds!
Stay tuned for more updates as I document this beautiful grow and get closer to harvest. Excited to share the final results soon!
#42FastBuds #GorillaCookiesAuto #CannabisCommunity #GrowDiaries #FloweringPhase #XpertNutrients #MarsHydro #CO2Boost #CannabisCultivation #420Grow #GrowLife #FrostyBuds #SugaryTrichomes
Likes
9
Share

@eldruida_lamota
Follow
Vamos familia vamos actualizar la segunda semana de floración de estas Kritical.
Es una variedad sencilla amarillean un poco por una carencia de magnesio que solventare con los productos de Agrobeta ya veréis cómo recuperan.
En las fotos podréis comprobar que 3 de 6 sufren bastante la carencia de magnesio.
Agrobeta:
https://www.agrobeta.com/agrobetatiendaonline/36-abonos-canamo
Mars hydro:
Code discount: EL420
https://www.mars-hydro.com/
Las maximas de temperatura no superan los 26 grados y las mínimas no bajan 20, así que no me puedo quejar.
Los niveles de humedad también son los correctos van entre 50%/65% de humedad relativa.
Por supuesto el Ph lo estamos dejando alrededor de 6.
Hasta aquí es todo, buenos humos 💨💨💨

Processing
Likes
11
Share


@grower1212
Follow
A partir de esta semana se agrega a la alimentación bac boost y top candy.

Likes
6
Share

@DogDoctorOfficial
Follow
💚 Amnesia Haze Auto by Zamnesia – Pheno B
Week 6 | Quiet Confidence Begins to Bloom
Welcome back to another chapter of the 8×8 Adventure!
Growing multiple phenotypes side by side is one of my favourite parts of this project because every week nature reminds us that there is no such thing as a "correct" way for a plant to grow.
Pheno B has chosen a completely different rhythm from her sister.
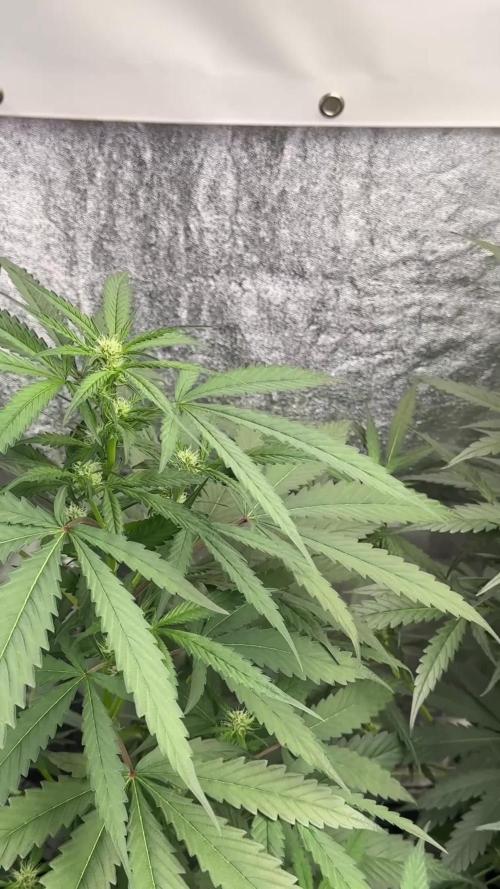
While Pheno A stretches toward the ceiling with long internodes and a very expressive narrow-leaf structure, this lady prefers patience. She's shorter, more compact, and slightly behind in her overall flowering development, yet she's thriving under exactly the same conditions.
Same room.
Same lighting.
Same nutrients.
Same watering.
Same training.
The only thing that's different is the genetics expressing themselves in their own unique way.
And that's exactly why phenotype hunting is so fascinating.
🌱 The 12/12 From Seed Journey
For anyone joining this diary for the first time, welcome!
Every plant in this project has been grown under a 12 hours on / 12 hours off light schedule from the day the seeds germinated.
Rather than extending the vegetative stage, this method allows every phenotype to reveal its natural growth habits much earlier, making it easier to compare structure, stretch, flowering speed, and overall efficiency.
Watching sisters grow into completely different plants while sharing the exact same environment is one of the biggest rewards of this experiment.
Pheno B is proving that slower doesn't mean weaker—it simply means different.
🌿 A Compact Personality
Standing at around 69 cm, she's noticeably shorter than her sister, but she's beginning to develop a personality all her own.
Her internodes remain tighter.
Her branching is beautifully balanced.
The canopy is naturally organised, giving every future flower plenty of access to light without requiring much intervention.
The overall impression is of a plant that's taking her time, investing in structure before committing fully to flower production.
The first pistils are now multiplying across every growing tip, and although she's still stretching slightly, it's clear that flowering has become her main priority.
Sometimes genetics prefer to build slowly before rewarding us later.
This may very well be one of those plants.
🌸 Flower Production Is Taking Over
This week marks an important shift.
The explosive vegetative growth is beginning to slow, while clusters of fresh white pistils continue appearing across every branch.
Instead of producing dramatic vertical growth, she's now directing more of her energy toward building the framework that will eventually support her flowers.
Watching this transition happen is always exciting because it's the point where each phenotype begins revealing how it intends to build its harvest.
Every week, her own personality becomes a little clearer.
🍃 Gentle Training, Natural Development
Training continues to be intentionally minimal.
Low Stress Training performed earlier in the grow has already created a balanced structure, so this week only occasional leaf tucking was needed to keep developing flower sites exposed.
Rather than removing healthy leaves, I prefer allowing them to continue acting as efficient solar panels while simply repositioning them whenever necessary.
Healthy leaves mean more energy.
More energy means stronger flowers.
Sometimes the best decision is knowing when to leave the plant alone.
💧 Feeding the Transition Into Bloom
As with the rest of the room, Pheno B is now receiving a flowering-focused feeding program while still supporting the final stages of stretch.
This week's nutrient schedule includes:
• Plagron Terra Bloom
• Plagron Power Buds
• Plagron Sugar Royal
• Plagron Pure Zym
• Plagron Green Sensation
• pH adjustment using pH Plus and Lemon Kick
This week also introduces one of my favourite bloom additives: Green Sensation.
Rather than simply boosting phosphorus and potassium, Green Sensation is designed as a complete flowering enhancer, supporting flower development, nutrient efficiency, resin production, and overall plant vitality during the final weeks of bloom.
I like introducing it gradually as the plants begin committing fully to flowering, allowing them to transition naturally while preparing for the heavier bud-building phase that's still to come.
So far, she's responding beautifully.
🌡️ A Stable Environment
Every phenotype in this room continues sharing the exact same environmental conditions, allowing genetics—not environmental fluctuations—to tell the story.
Current conditions include:
• Day temperature: 29°C
• Night temperature: 25°C
• Relative humidity: 60%
• pH: 6.0
• EC: 1.78 mS/cm
• Root zone temperature: 21°C
• Nutrient solution temperature: 21°C
• CO₂ concentration: 639 ppm
Consistency remains one of the most valuable tools in any grow room.
When the environment stays stable, the plants can dedicate their energy to growing instead of constantly adapting.
📸 This Week's Gallery
This week's photographs perfectly capture the personality that's beginning to emerge.
The full-plant portraits showcase a compact, balanced structure with excellent branch spacing and a strong central leader that's quietly taking command of the canopy.
The close-ups reveal fresh clusters of white pistils forming at nearly every growing tip, signalling that flowering is now well underway.
One detail I particularly enjoy is how organised her architecture feels.
Nothing appears forced.
Every branch has found its place naturally, creating a canopy that's both easy to manage and full of future potential.
She's not trying to compete with her sister.
She's simply becoming herself.
And that's exactly what makes phenotype hunting so rewarding.
🔮 Looking Ahead
Over the coming weeks I expect Pheno B to continue slowing her vertical growth while shifting more and more energy into flower production.
If her current structure is any indication, she could develop into one of those wonderfully manageable plants that quietly surprises everyone at harvest with dense, beautifully stacked colas.
Every week her confidence grows a little more.
Now it's time to watch those flowers do the same.
💚 Thank You
Thank you so much for following another chapter of this 8×8 Adventure.
Watching two sisters grow side by side, sharing the exact same environment while expressing completely different personalities, continues to remind me why growing from seed never stops being exciting.
A huge thank you to:
💚 GrowDiaries for providing an incredible platform where growers from around the world can learn, inspire one another, and document every stage of their journeys.
🌱 Zamnesia for providing the outstanding genetics that make this phenotype hunt possible.
💜 Plagron for supplying the nutrition supporting these ladies from seed to harvest.
💡 Future of Grow LED for delivering the consistent light powering every day of this grow.
🌿 TrolMaster for helping maintain a stable environment where each phenotype can express its full genetic potential.
And finally, growers love to everyone following these diaries, leaving comments, sharing knowledge, and joining me on this adventure.
Every phenotype has its own story.
Pheno B may be telling hers a little more quietly...
...but she's making sure it's worth listening to. Growers Love 💚🌿

Likes
9
Share


@Krautbauern
Follow
those nugs are getting bigger and bigger each day. They‘re just soaking up the fertilzers. We have to water them every second day 2l per plant

Likes
8
Share


Likes
170
Share


@Tropicannibis_Todd
Follow
👉Alrighty Then👈
This plant finished out just around 90 days from seed
👉Puffed a bunch of it , and its exactly what i had hoped for i love the WC 👈 the buds are tight and smoothered in resin 👌
I have done at least 50% of the FB Catalog and this has become one of my favorites of there's.......
Would definitely grow this one again and would recommend 😳
Persian Pie from Greenhouseseeds
Full Gas from Greenhouseseeds
Babba Kush from Greenhouseseeds
Rainbow Melon from Fastbuds
Papaya Sherbet from Fastbuds
Weddingcheesecake FF From Fastbuds
Purple Oreoz F1 From Seedsman
Slurricane From Premium Cultivars
Soil by Promix
Nutrients by Cronks
This was a crap ton fun 🙃
Thanks to all my growmies out there for stopping by its much appreciated 👈
👉Happy Growing👈


Processing
Likes
9
Share


@Nookandplant42o
Follow
Earlier watering was fed with nutrients, and my temperature is not low so I should go with minimum to medium quotas with more water avoiding burns, without much runoff mixing with soil compounds and mycorrhizae for better performance I know they need a calcium magnesium for better performance the problem is money I will continue with the use of salt Epson the option I have at the moment, direct sulfur in the soil mix has helped me hear a noticeable change.
watering ph 6.2 solution temperature 20 ° - 0.50 g of large white microreceptor 2 days earlier sprayed with ppm-free water via leaves - lights off to serve as a cool-down shower is great for stomata .
Simple led panel added as main light source 260watts being divided to 3 plants in the fullspectro tent model, did not get much difference in temperatures compared to HPS, is more the same spectro ratio and UV to reach more directly in the trichomes and terpenes. Moc medium leaves look more like Indica while larger leaves bring one more sativa a set a nice strong sweet smell, I prefer to conclude in the end the true tone I feel, she drinks more water than others the soil is easier to drain So I see in her an ability to take more quotas of nutris, slowly being able to take if necessary always try to avoid burns ...

Likes
17
Share


@BLAZED
Follow
W18 (29-5 to 4-6)
29-5
Temperature: 26.7 degrees (lights on) 21.3 degrees (lights off)
Humidity: 56% (highest) 46% (lowest)
Watering: Both 750 ml.
30-5
Temperature: 24.7 degrees (lights on) 21.8 degrees (lights off)
Humidity: 57% (highest) 46% (lowest)
No pictures.
31-5
Temperature: 26.5 degrees (lights on) 22.1 degrees (lights off)
Humidity: 57% (highest) 49% (lowest)
Watering: Chemdog #1: 500 ml. Chemdog #2: 1500 ml.
1-6
Temperature: 25.8 degrees (lights on) 21.4 degrees (lights off)
Humidity: 58% (highest) 50% (lowest)
No pictures.
2-6
Temperature: 22.1 degrees (lights on) 18.2 degrees (lights off)
Humidity: 57% (highest) 45% (lowest)
Watering: Both 1000 ml.
3-6
Temperature: 25.5 degrees (lights on) 18.8 degrees (lights off)
Humidity: 56% (highest) 47% (lowest)
No pictures.
4-6
Temperature: 25.9 degrees (lights on) 18.8 degrees (lights off)
Humidity: 56% (highest) 45% (lowest)
No pictures with the lights off for this week, i will harvest them in about 2 days, so the last day i will shoot some nice pictures.

