
Likes
Comments
Share


@Hroma
Follow
Segunda planta en ser cosechada tras 62 días floreciendo.
Muy fácil cultivo y muy buen resultado.
Puesta a secar el 10 de Marzo.


Likes
3
Share


@High_Class
Follow
A lot of stretching happened the first week. Week 2 so far so good. I will lollipop at the end of week 2. Thanks for watching.
Likes
4
Share


@Lazuli
Follow
She finally stopped the stretch and now this tree is going in full flower under the spiderfarmer sf-2000
Likes
18
Share


@CanarianGrow92
Follow
I think that in around 1 week this girl is ready, nice plant to grow, i like the bud structure, the calyxes vs leave proportion is great, a very nice and sweet smell and an easy to grow plant! 😋 🍰🍰🍰

Likes
228
Share


@StarLorr
Follow
Welcome to my Pablø Ęscøbar diary.
In this diary:
Seeds: sponsored by Ðivine Șeeds
Media: Promix HP
Nutrients: Advanced Nutrients, Diablo Nutrients, Gaia Green Power Bloom.
Light and Weather: Şun☀️and Mother Earth.🌎
___________________________
Feeding:
Tue 17Sep: 8L water not pH'd
Thu 19Sep: 4L Flawless Finish not pH'd
Fri 20Sep: 4L Flawless Finish not pH'd
Sat 21Sep:4L water not pH'd
___________________________
*please note that watering are from the top.....since i smashed the saucers with the weed wacker*🤦🏻♂️
______________________________
Amazing weather throughout the week! Again☀️Sunny 26°C 😎"Except for today Monday 23-Sep-24 as per cloudy☁️photoshoot🙃😄
______________________________
Did my flushing thing, it's happening😉
______________________________
Thanks for stopping by, likes and comments are appreciated!👊🏻😎
Keep on growin!
Keep on tokin!!!
😙💨💨💨💨💨

Likes
14
Share


@Quintall
Follow
Hallo lieber Grower,
hier mein erster Grow^^
Nach 3 Tagen Wasserbad alle in die Erde gelegt mit der Wurzel nach unten zeigend.
Bis alle aus der Erde kommen 24/7 Licht. Dann 18/6
Luftfeuchtigkeit auserhalb des mini Gewächshäuschens 60-70 %
Temperatur 20-25 grad

Likes
8
Share


@DeepRootsGrowTrees
Follow
Week #9 Baby Boom/Kannabia Seeds
Week #9 Dec.23rd-Dec.30th
Baby Boom Week #9 plant is looking good buds are continuing to grow and get dense thricomes have started to become more visible. She's just a nice looking plant. She grows like a sativa with her stretch and bud structure. Thank you for taking a look!!
Stay growing great Medicine this year!!

Likes
23
Share

@Pblc_10
Follow
11.12.25
Heute wird die blüte eingeleitet und ein paar Fotos folgen noch. Zu sagen gibt's nicht viel nur das sie sehr gut aussehen, alle Tops auf einer Höhe sind und die seitentriebe auch bereits neue seitentriebe bilden. An 2 Stelle ist mir vor n paar Tagen ein trieb abgebrochen aber innerhalb der paar Tage sind schon 2 dafür nachgewachsen aus dem Stück was noch hing.
13.12.15
Hab erstmal nur die Bilder hochgeladen hab im moment nur wenig zeit ✌️
Wie immer würde ich mich über Tipps freuen ✌️🍀


Likes
35
Share


@eldruida_lamota
Follow
Venga familia, va la séptima semana de floración de estas Frosted Guava de Zamnesia.
Hay una carencia poco avanzada en varias plantas de calcio pero nada que no mojes a solventar , sabiendo ya lo que queda…
La humedad está en su punto, y por fin puedo controlar la temperatura en 22 grados.
Ph estable entre 6.2 y 6.5
Las flores están tricomando bien y desprenden aromas bastante llamativos.
Ya vamos viendo cómo progresan estas últimas semanas.
Os comento que tengo un descuento y para que compréis en la web de Zamnesia de un 20%, el código es ZAMMIGD2023
The discount 20% and the code is ZAMMIGD2023
https://www.zamnesia.com/
Mars hydro:
Code discount: EL420
https://www.mars-hydro.com/
Agrobeta:
https://www.agrobeta.com/agrobetatiendaonline/36-abonos-canamo
Hasta aquí es todo, buenos humos 💨💨💨

Likes
67
Share


@Ageddd
Follow
Whats up GD !!!
------------- GROWTH-------------
They keep growing without problems, but added more micro vita and microbes are eating nutrients too fast, but does not matter as tomorrow im transplanting both plants. I hope taller cheese can eat more, as you can see, lower leaves are yellowing a bit.
Wether is not good... cloudy days..
Started the training season !!! :)
Used threads to bend the plants.
You have to check the roots !! This combination works flawless..
They are more stinky this week, when you touch a plant smells like lemon skunky notes ...
------------- IRRIGATION-------------
Watered both ladies, around 0.2-0.3l each one with nutrients.
------------- NUTRIENTS-------------
Deeper underground (2ml/l) + Bio-Grow (2ml/l) + Micro Vita.
New soil, mixed with Micro Vita + 1 ml/l Green Explosion + 1 ml/l Biogrow + 1ml/l Deep Underground
7l aprox pot
---------------------------------------
Good vibes !!
_24/04/2018_
Likes
36
Share


@pifflestikkz
Follow
Day 172
21/10/24 Monday
I had 1.5 Litres of feed left, and she was top dry this morning so she finished that off today.
Picture update 😎💚
I'll get one later with lights off 🙌
Day 174
23/10/24 Wednesday
De-chlorinated tap water pH 6 only today.
Finally update pictures and videos 📸 💚
She is developing awsome colours, and buds are now starting to stack weight 💪🙌
Day 177
26/10/24 Saturday
De-chlorinated tap water pH 6 only today, noticed a few tips burning.
She is stacking !! This week she has developed a really floral aroma is sweet and tantalising like a perfume almost.
She is glistening with trichomes, and buds are taking the dark 🌑 colour with purple/pink calyx tips.
Super duper sticky!!
Likes
15
Share


@Oetelando
Follow
One of the Zakes ( topped one)get Harvest today.
In 2 Weeks i can say more but she looked very very nice
Eine Zake (Getopped) wurde als 1. geerntet da sie den Trichome Chek bestand.


Likes
28
Share


@JiggleBudz
Follow
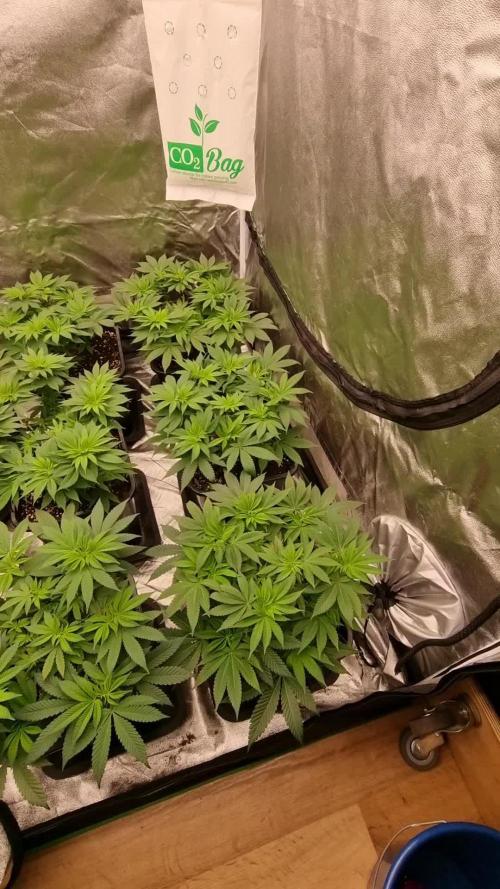
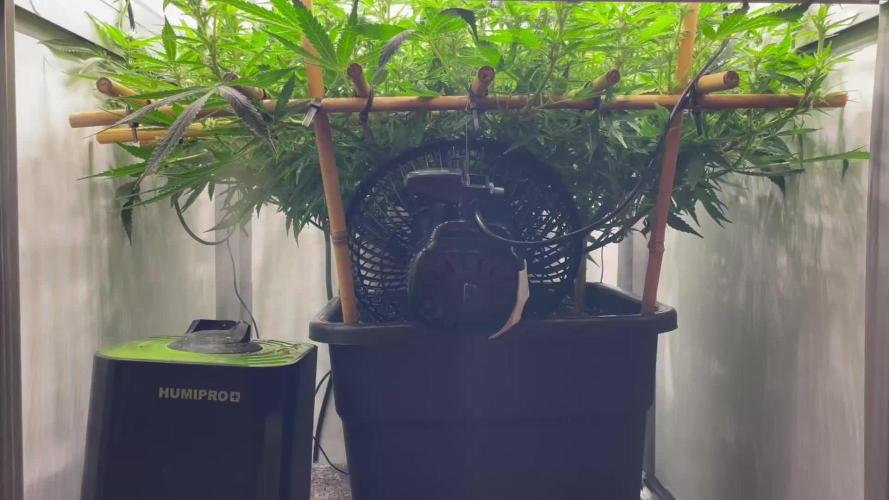
Day 50 - The entire tent is now filled up. Humidity is slightly higher than ideal but she looks happy. Moved the fan a bit higher to get more top canopy air circulation.
Day 51 - Keep on growin'
Day 52 - Pot was pretty light and dried out this morning after a couple of windy warm days in my area. Watered the usual 2L with run off of 170ml (9%).
After gaining 3.5cm per day over the last 3 days, she was getting a bit too close to the light. - I moved the light up with 13cm today to be 30cm above the top most flower.
Day 53 - Run off today was only 150ml(7.5%). I did some bottom defoliation removing small flower branches and leaves coming to the end of life. This cleared up some of the bottom for better watering access and definitely better airflow.
Day 54 - Humidity in my area has dropped a bit leaving the room around 47% and inside the tent around 52%. Still a bit high but with her being so big in the 2x2 I pretty much have to keep the tent open at all times.
Installed a second fan today to increase ventilation and try lower humidity. I've got one blowing over the top canopy and one circles around off the walls.
Day 55 - Had both fans running overnight, seems to have gone ok. I have each fan pointed at a wall now this seems to make for the best all over ventilation without too much direct blow on the plant.
Day 56 - That's the end of Week 7! The flower stretch this week has been pretty crazy. After raising the light she's exploded in height. Run off was 120ml (6%) today - this might be because of the double fans drying her out a bit more but also her size of course needing more water.
Processing
Likes
58
Share


@Dahoola
Follow
---------------
Start week 3
--------------
We started week 3 as we ended week 2, which is great. She continues strongly at the beginning of this week and seems almost unstoppable. She clearly enjoys her surroundings and looks very healthy. She has started preflowering and seems to be gearing up for another explosion in growth. She is very good at leaftucking and has already developed a good number of shoots. On to more! A new update at the end of this week.
-----------------
Update Week 3:
-----------------
End of another fantastic week for MBAP. This week was all about pre-flowering and you can see that she is preparing for an explosive bloom. She has benefited enormously from the LST that I applied and has a good number of shoots ready to explode during flowering. In addition to leaftucking, have also removed the lower shoots so that she can concentrate her energy on the upper shoots. I also did the biotabs in the ground in the middle of the week. We have opted for 3 biotabs in 20-25l soil. Have waited several weeks before putting the tabs in the ground because we work here with aitoflowers. And they prefer a light feeding regiment for the first few weeks. We are going to gradually lower the humidity and get ready for flowering and week 4! Until next update

Likes
21
Share


@Kirsten
Follow
18.5.25:
I watered with 3ltrs of dechlorinated water PH'd to 6.4.
I added Per 6.5 litres;
♡ 1Tsp Sea K(elp)
♡ 1/2 Tsp Bud Explosion PK booster
♡ 7ml Trace
PH: 6.4
PPM: 780
I added the PK booster this feeding, just to provide some phosphorus without risking an excess. Next time, I won't use it.
19.5.25. Northern lights had got quite bushy, and there were a lot of extra leaves covering up some prime budsites.
So I went ahead and Defoliated some of the larger fan leaves that were covering and blocking out other buds.
The plants are growing very fast. The buds are getting very nicely structured.
Northern Lights is drinking about 3 l per day, and I will continue to use the Greenleaf nutrients sea kelp and Ecothrive Biosys, along with the Ecothrive trace For the calcium, magnesium and trace elements.
She has indeed stopped stretching now and is focusing on the bud formations.
It's a very lovely smell, too! 😋
I use these all the way through.
☆ Xpert Nutrients PH down, up to 1ml.
☆ Ecothrive Neutralise 1 drop per litre from the 1ml pipette, which is attached.
This is my dechlorinator.
21.5.25:
I defoliated today again. This time, I took a little more off than I did yesterday as things had become congested, and the buds in the centre weren't getting any light.
I got covered in sticky...ness?! I forgot to wear gloves, but for some reason, my non dominant hand got covered in resin and the other, not at all.
Anyway, I hope I've managed to include the before defoliation and after videos/photos.
I think it's much better after, there's so many buds I couldn't even see in the centre! I probably should have done it sooner, but I was trying hard to take as little as possible this run.
Anyway, this is the prime bud building period. So, taking the leaves covering all the centre colas will not only provide equal light penetration but also get rid of some of the nutrients stored in the leaves.
So, any nutrients available in the remaining leaves can deplete to a happy medium.
That being said, we're coming close to the end of mid flowering.
I'm really hoping to produce some good sized colas!
🤞💚😉🍃😃🌱
I'm certain I won't be disappointed, she's looking 🔥😍😀😋
24.5.25:
I watered with Ecothrive Biosys 3ltrs each.
The plants are still drinking at least 2 litres per day. They are increasingly thirsty, and it's important that I don't let them dry out.
The soil is mostly coco and perlite, so it can dry out quicker. There are plenty of worm castings, too, so that definitely helps.
The buds are developing and progressing very nicely, keeping up with the flowering nutrients and alternating between Ecothrive Biosys, Trace, and Greenleaf Nutrients.
24.5.25:
I watered with 2.5 ltrs of dechlorinated water PH'd to 6.3
I added Per 6.5 litres;
♡ 1Tsp Sea K(elp)
♡ 1/2 Tsp Bud Explosion
♡ 7ml Trace
PH: 6.3
PPM: 840
SOLUTION TEMP: 30°C
SOIL PH: 7
SOIL TEMP: 21°C
AMBIENT TEMPERATURE: 23-26°C
RELATIVE HUMIDITY: 58%.
Thanks for stopping by 😊🌱🤞💚✌️🍃
Likes
16
Share

@LST420
Follow
Week 15
Added another Biotab attached to a wire so in case the plant gets too much Nitrogen I can pull it out. 😎
