


Likes
Comments
Share


@GanjaFarmar
Follow
Day 50 from seed and this plant has exploded compare to the slow growth at the start. I doubt its ready for harvest by week 8 like it states on the brand. But a few more weeks and should be good.
I hope i can get a few ounces of this.
Ill update by week 8!
One love

Likes
13
Share

@MrNiceGuy332
Follow
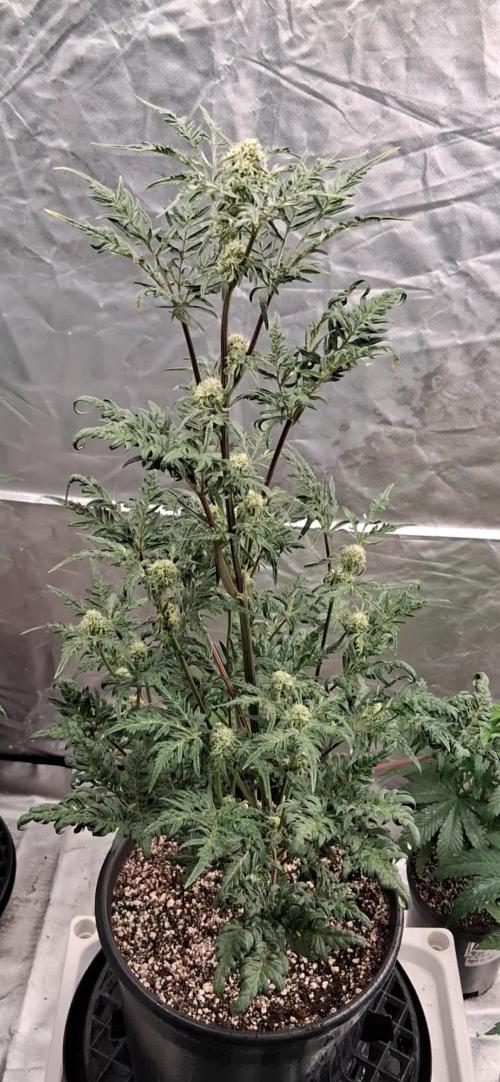
She is done stretching started to pack on buds cant wait to see what she can do i grew the photo this is 1st freak auto...

Likes
20
Share


@MeaCulpa
Follow
Day 51.
2 ladies are a little too yellow for me. Otherwise I like everything quite well.
"Iris' had another defoliation today. It was just a mess of leaves.
Have a nice weekend @all.

Likes
12
Share


@EZGrow
Follow
Two of them are at max height i guess.
04/05 - Day 36 : 2L/plant (1g/L Flo)
I'm going to flush them one more time at next watering.
07/05 - Day 39 : 4L/plant (clean water)


Likes
23
Share


@DedicatedJOKER
Follow
So got my SOG up, the right side was topped and the left side was fim'd on one side. Preparing for flower in a few days.

Likes
6
Share

@RBG
Follow
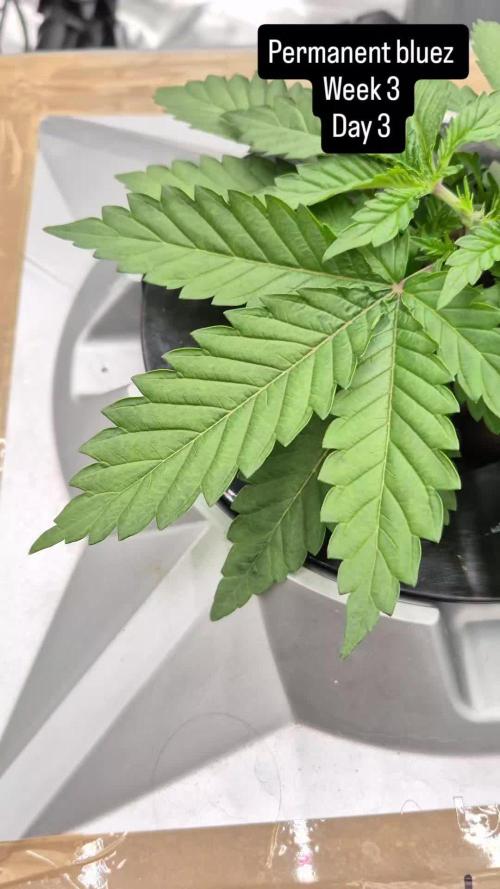
Absolute godsend of a start, just have to keep it up, seems like the perm bluez is loving the alien system.
No water change needed yet, holding strong.
E.c 1.1-1.2. Continue to let her bring herself up to 1.3-1.4 and keep her around there. Ph 5.8-6
Light will be going up to 60%!
Will be topping her but won't be doing too much else and just let her do her thing
10/2/26
Doing lovely, let her keep going, topped at 5th node
13/2/26
Defoilation, shes compact as. Risen light to 80/90cm, on 60% now. Hopefully stretch her up a bit, week 3 day 6 is before and after.
Leaves as big as my hand! Nice nice

Likes
67
Share


@AsNoriu
Follow
Day 29. No feed still. I spray them with Bio Heaven and CalMag light mix, sometimes adding a bit of Silica acid too. All not higher than 1ml/L.
Think this week I will try to push best ones, smallest coming up too, but very slow, droped them to the shade and don't put any hopes into them.
Day 33. Did little repositioning, space looks better now I think, plus big plants should be happier.
Spray spray spray ;))))
Happy Growing !!!
Likes
40
Share


@Totogrowuk
Follow
All ticking along nicely and I’ll find it difficult to select just 9 for the final pot
Likes
21
Share


@MrWolfe
Follow
This was round 3 so I had some notes going in for finish time and schedule and have some more after this one for the next. Stay tuned.

Likes
70
Share


@Roberts
Follow
Big Fat Wedding Cake is growing great under the Spider Farmer G5000/UVR40 lights. She should be coming up on reaching maturity here soon. She is due for a solution changed before long. Everything is looking great at the moment. Thank you Spider Farmer, Athena, and DutchFem Seeds. 🤜🏻🤛🏻🌱🌱🌱
Thank you grow diaries community for the 👇likes👇, follows, comments, and subscriptions on my YouTube channel👇. ❄️🌱🍻
Happy Growing 🌱🌱🌱
https://youtube.com/channel/UCAhN7yRzWLpcaRHhMIQ7X4g
Spider Farmer Official Website Links:
US&Worldwide: https://www.spider-farmer.com
CA: https://spiderfarmer.ca
UK: https://spiderfarmer.co.uk
EU: https://spiderfarmer.eu
AU: https://spiderfarmer.com.au
G5000 Light Amazon Link:
amzn.to/4643esa
UVR 40:
https://www.amazon.com/dp/B0BR7SGTHS
Discount code: saveurcash (Stackable)

Likes
Comments
Share

@MrGanjah
Follow
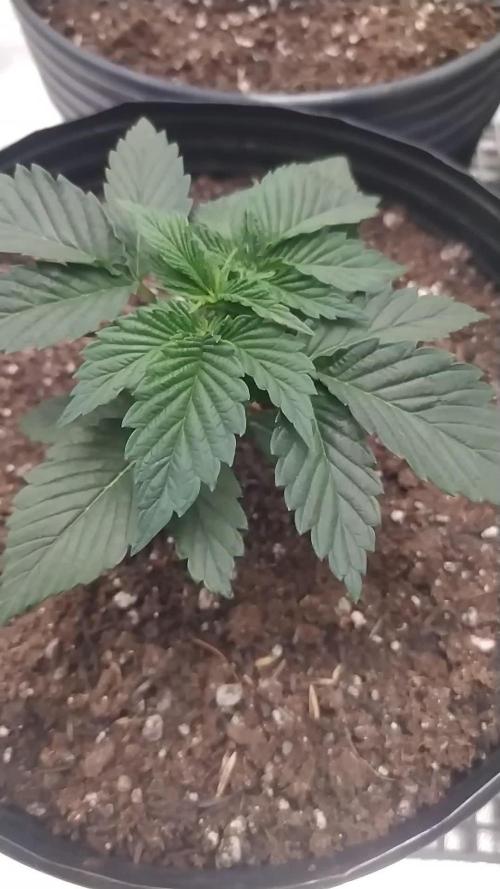
This week I transplanted them into moist, inoculated soil that I had matured for 40 days, so I didn't water them this week. The soil hasn't dried out yet. I put mycorrhizae in the transplant hole. Next week my oil heater will arrive to raise the temperature a bit in the dark, because there were days when it reached 14°C. I noticed some leaves looked wrinkled; I believe it's because the soil is cold and I'm feeding them 300 ppfd. But otherwise, it's growing, just slower.

Likes
22
Share


@Selkot
Follow
result for the first one: after 7 days of drying, a cleaning of the last leaves, and by removing the branches, I obtain 51g dry;
for a first session in cocot, I hoped 100g with my 2 plants; this one thus made its job. just barely. 😉
2 weeks to go before I know if the other one will do better 👌

Likes
10
Share

@Chucky324
Follow
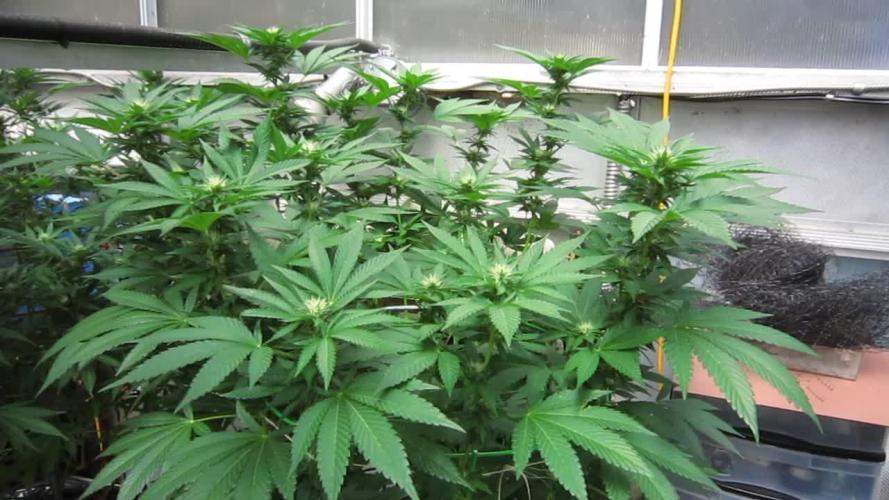
Hello. This is the end of week 3 and the beginning of week 4 of flowering.
This plant is doing great. I've made clones of this plant. I see the resin is just starting to come out.
Hope it turn out extraordinary, and probably will be coming UKHTA Seeds.
Froze some pollen from this years summer run and I'll pollenate a branch on this plant this week.
According to an article I read years ago, this plant can stay out at night, if I've forced it to flower after the summer solstice.
The article was written for the Netherlands latitude. It said if a plant is forced to flower for 3 weeks it will stay in flower if you do it after the summer solstice. So if you force a photo plant to flower early you can also harvest early and hopefully avoid the WPM and Bud Rot.
I live on the 48th latitude just a little south of the Netherlands latitude, so it will work.
OK Keep Growing Straight.
Chuck.
Likes
29
Share


@Myrcene_Dream
Follow
-Pretty close to being done but trichomes are not ready yet. I usually like about 70% cloudy and 30% amber.
Likes
39
Share


@DjDaveAtHome
Follow
Timing seems about right. The current flowering plants are finishing so these will be in flower within two weeks. From all that I've learned this grow (being my first DWC), I plan on carrying on with a combination of organics and synthetics. Along with GHE products below, I'll be using the organics right along side. Mainly for the microbes and fungi.
I plan on keeping my water about 1-2" below the basket with heavier pumps. Will be using the EcoPlus Eco Air 4 Four Outlet air pump divided into 2 buckets/2 air stones and using the 2 Marina 200 Air pumps for clones. That will more than double the airflow to the roots.
When I change the res and even when I transfer over to the larger flower DWC bucket (3 gal - 5 gal) I'll be keeping a litre of the veg solution to add to the fresh new res, thus 'inoculating' it with the already stable microbial and fungal environment that it's been used to. As well, I'll continue with Hygrozyme on a 'maintenance' dosage when changing the res and adding a liter of the microbial and fungal tea listed below as well as a dose of Tarantula from Advanced Nutrients. Adding organic Alaskan veg and bloom fertilizer (some 'Fulvic acid' as well, like seaweed liquid. Plants uptake Fulvic better than Humic. Root fungi eat the Humic and poop out Fulvic!) in 'moderation' to help bring PH back down and feed microbes and fungi. Once the plants start really stacking, I'll add more synthetics to compensate and to lower PH. The organics can really mess with the EC so I'm not going to be freaking about high levels. Found that it didn't effect the plants health that much if at all.
Dinamed Plus from Dinafem Seeds (1) and Blueberry Headband (1)from Humboldt Seeds.
https://www.dinafem.org/en/dinamed-cbd-plus/
https://www.humboldtseeds.net/en/blueberry-headband/
Lighting
https://www.horticulturelightinggroup.ca/products/260w-qb-v2-led-kit
DWC Nutients
https://generalhydroponics.com/floraseries
FloraGro 1 ml/l
FloraBloom .5 ml/l
FloraMicro 1 ml/l
Diamond Nectar: N/A
https://generalhydroponics.com/diamond-nectar
Cal Mag: 2 ml/l
https://generalhydroponics.com/calimagic
SuperThrive: .5 ml/l
https://superthrive.com/
https://hylineproducts.com/products/hygrozyme/#one
Grozyme: 2.5 ml/ltr
Tarantula
https://www.advancednutrients.com/products/tarantula/
Epsom salts
Root Rot Tea
8 liters RO water
5 ml (1 tsp) organic sulphur free molasses
5 ml Alaskan Organic grow fertilizer (or something comparable)
5 ml Alaskan bloom fertilizer (or something comparable)
5 ml Seaweed or kelp fertilizer
Handful of composted horse pucky
Worm castings, sea soil, Gaia General Purpose and Bat Guano Phosphate optional
* add after brewing
2-4 ml Advanced Nutrients Tarantula


Likes
3
Share


@greencity11
Follow
cut on the 41st day from the first flower. it resisted 99% humidity without water or light for a week.
it went into overfertilization 3 times up to 2.8 of ec the plant reacts great above this data the plant stops. I used Biobizz organic products not following the table. The plant was never drained until harvesting, by watering with little water and rich in salts the run off was 8.4 brought to 1.9 as the final harvesting figure.
the plant smells like big babol, smoking it fresh incense flavor hits the nose like monk and strawberry candies

Processing
Likes
7
Share


@IAmTheMoravianGrower
Follow
Hi, Royal Gorilla is all right. I did LST and topping a few times at the week.
29.5.2019
CalMag – 0.4ml/l
Fish Mix – 2ml/l
Bio Heaven – 2ml/l
RootJuice – 4ml/l
2.6.2019
RootJuice – 4ml/l
Likes
44
Share


@Cogollo_eu
Follow
**Encontrarás la traducción a español al final de la descripción**
From/Desde: 10/05/19 || To/Hasta: 16/05/19
From day/Desde día: 78 || To day/Hasta día: 84
You can find the Money Maker Diary here:
** Podéis encontrar el diario de las Money Maker aquí:**
https://growdiaries.com/diaries/25667-gorillamakingmoney-gorilla-vs-money-m
-----IMAGES & VIDEOS-----
5 - HomeMade Organic & Cheap CO2 generator (more info in week summary)
9, 10, 11 & 12: The bud on the right is a Gorilla one, the buds in the left or/and in the middle are Money Maker ones.
15 - Same Gorilla plant buds, one affected by CO2 in the roots and the other not.
-----WEEK SUMMARY-----
The smell is more sweet and intense every day, friends that came home turned them eyes into crystals when they see this little babys. The size isn't awesome, but the high ammount of buds full of crystals plus the strong sweet aroma makes them awesome. Buds are growing and fattenning very very well.
This week i added a boost of HomeMade CO2, i never measured the results of this invention so i can't give CO2 measurements. This method is widely used in home aquariums and there is where it comes from. For those interested i'm going to write here more detailed instructions. The 4 liters i've made will last for about 2 weeks.
---NEEDINGS---
- 250 ml Bottle
- 6~10 l Bottle
- 400 g Sugar / l water
- 1 Envelope of organic baker's yeast / l water (CHEMICAL WILL NOT WORK)
- 3 mid plastic tubes 40~50 cm
- 1 short plastic tube 5~6 cm
- 4 tube adapters
- Hot glue to seal adapters
The process of creating CO2 is simple, mix water, organic yeast and sugar in a bottle, and the sugar will free CO2 in the process of fermenting to alcohol due to the yeast.
1. Make a hole in the center of the big bottle cap, insert an adapter and secure it with hot glue
2. Make 3 holes in the small bottle cap and glue the other 3 adapters
3. Link both caps with one of the mid tubes and insert the other tubes on free adapters
4. Insert a short tube in the bottom of the small cap in the adapter that came from the big cap
5. Watch the Video!!
-----WATERING CALENDAR-----
Plants are beginning to drain the pots a bit faster so from now on i will raise the water ammount on each watering day 0.25 l.
11/05/19 - 1,5 l with All week nutrients -(Nirvana & Blombastic) also Big Bud half dosed @ PH6.4 & 2 E.C.
14/05/19 - 1,5 l with Bud Candy, Big Bud, Nirvana, B52, Bud Factor-X, Sensizym & Blombastic @ PH6.4 & 1.5 E.C.
*****ESPAÑOL*****
-----IMÁGENES Y VÍDEOS-----
5: Generador de CO2 casero, barato y orgánico (más info en el sumario semanal)
9, 10, 11 & 12: El cogollo que sale a la derecha es de una Gorila, el de la izquierda y/o el de en medio son de una Money Maker
15: Dos cogollos de la misma planta, uno afectado por CO2 en las raíces y el otro no
-----SUMARIO SEMANAL-----
El olor es más dulce e intenso día a día, los amigos que vienen a casa a verlas se quedan ojipláticos al verlas. El tamaño no es una maravilla, pero la gran cantidad de cogollos llenos de cristales añadido al aroma que entra por las fosas nasales las hacen increíbles. Los cogollos crecen y engordan de maravilla.
Esta semana he añadido un boost de CO2 casero, nunca he hecho mediciones de los resultados por lo que no puedo darlas. Este método es ampliamente usado en peceras caseras y de ahí saqué la idea. Para aquellos interesados dejo aquí instrucciones más detalladas. Con los 4 litros de agua que he preparado yo da para unas 2 semanas.
---NECESITAMOS---
- Botella de 250 ml
- Botella de 5 a 10 litros
- 400 g de azúcar por litro de agua
- 1 sobre de levadura de postre orgánica (LA QUÍMICA NO FUNCIONARÁ)
- 3 tubos de plástico de tamaño medio 40~50 cm
- 1 tubo de plástico de tamaño pequeño 5~6 cm
- 4 adaptadores para los tubos
- Cola caliente para pegar y sellar los adaptadores
El proceso de generar CO2 es simple, mezcla agua, levadura orgánica y azúcar en una botella, y el azúcar liberará CO2 en el proceso de fermentación a alcohol.
1. Haz un agujero en la tapa de la botella grande, inserta un adaptador y séllalo con cola caliente
2. Haz 3 agujeros en el tapón pequeño y haz lo mismo con los otros 3 adaptadores
3. Conecta los 2 tapones con uno de los tubos y conecta los otros 2 tubos a los adaptadores restantes
4. Conecta el tubo pequeño en la parte libre del adaptador del tapón pequeño que viene del tapón grande
5. Mira el vídeo
-----CALENDARIO DE RIEGO-----
Las platas comienzan a secar los tiestos un poco más rápido, asi que de ahora en adelante incrementaré 250 ml de agua adicionales en cada riego.
11/05/19 - 1,5 l con todos los nutrientes semanales -(Nirvana & Blombastic) BigBud mitad de dosis @ PH6,4 & 2 E.C.
14/05/19 - 1,5 l con Bud Candy, Big Bud, Nirvana, B52, Bud Factor-X, Sensizym y Blombastic @ PH6,4 & 1,5 E.C.
Likes
11
Share


@4_Pro2Bono_0
Follow
Harvest 2 weekend ago and dried at ~60° at 60 RH. Took about 12 days total.

Likes
3
Share

@captaincondor
Follow
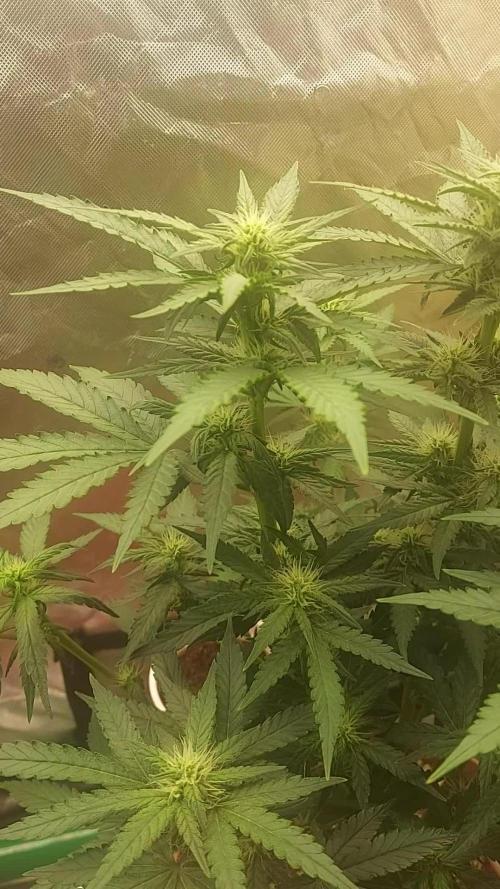
sadly some of the other seedlings didn't make it though i am blaming myself on this occasion as the coco i used was too hot for them . I checked the ec and it was way too high around 2 so its no wonder I've had issues.