
Likes
Comments
Share


@Mom74
Follow
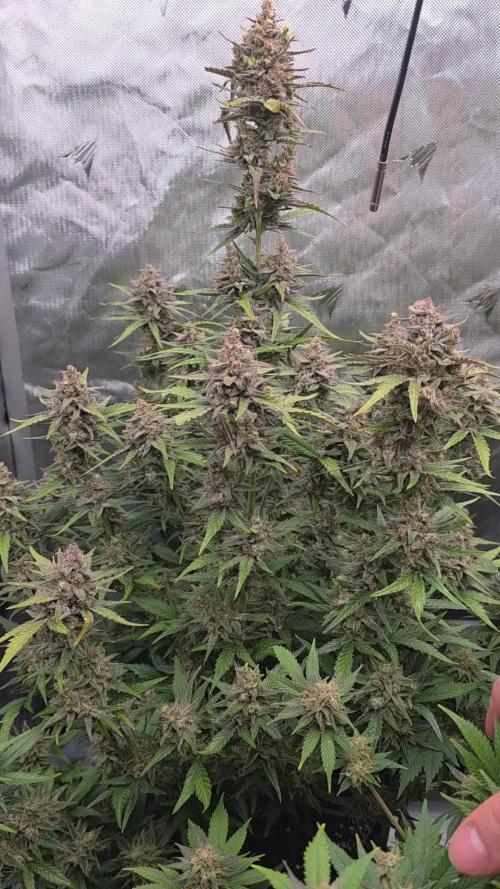
Heute habe ich mich getraut mit Blitz zu fotografieren. Habe viel von Lichtverschmutzung gelesen und gezögert. Man kann nun die kleinen Unterschiede der Damen sehen. Berry Bomb am ehesten.Seine Buds erinnern an die Fülle einer Himbeere. Ich hoffe es ist so fruchtig wie beschrieben. Dann habe ich begonnen meinen eigenen Biodünger selber herzustellen aus Kaffeesatz,Bananenschalen und Eierschale. Bin gespannt wie es den Mädels schmeckt. Auf jeden Fall ist es um einiges günstiger und schnell verfügbar da ich Hühner habe und immer frische Eier. Hühnermist habe ich auch und abgelagerten Pferdemist.Nur das beste für die Süßen. Bald geht es zur Ernte zu.Habe mir Canna Flush bestellt und werde es zu gegebenen Zeitpunkt anwenden. Zumindest habe ich alle gegeben und hoffe die Damen tun es auch.


Likes
19
Share


@A_Rolling_Stoner
Follow
Good grown Plant, dense and big buds.
And damn the smell is crazy !!
It has a really strong kushy smell to it and it has a really nice color also.

Likes
22
Share


@Njaak
Follow
pH was important as expected and a bit of light burn later on in the grow but ultimately it was pretty smooth sailing. I used a very common nutrient (GHE) and not overly strong.
Buds were thick, dense, and moderately pine smelling. The plant did not grow excessively tall thanks to LST, and the LST did not seem to have any ill effects at all. Foliage was thick, and I let it go for a very long time before doing any sort of defoliation. Even then it was modest and just to get light to the lower colas.
Still in trimming mode and will continue to update :)
Also, other plants in the house got spider mites. Not this one. Could have been that it was in hydro and others weren't but hard to say.

Likes
6
Share


Likes
30
Share


@Stkz420
Follow
No more upwards growth. Buds fattening up now very dense already.
Has a little smell to it at this point its quite fruity and sweet not the usual gassy smell just yet.
Likes
8
Share

@Greybeardbud
Follow
Changed to automatic watering 3 litres per 24 hours on drip hose. Everything going really well
Each plant is getting a slow feed at 118ml/min in 30 minute intervals spaced evenly over a 24 hour period
Only 2 weeks till turning, smallest plant is 23cm but in the last week has started growing well, largest is 40cm
Likes
20
Share


Processing
Likes
14
Share


@CommanderCannabis
Follow
Roots continue to grow the older roots are stained from the color of the solution. I also topped her. no problems this week. This is my first time trying the TOP technique. I topped her two days ago and am seeing good growth. I think the 5 gal bucket is better than the crappy Rainforest 66 reservoir I used in the first grow. I have gotten good at controlling the A.B.L.E. Grow Chamber's Air and humidity using different settings for the ventilation or humidifier. I currently have humidity at @48%. and temps go from 21 to 24 C.

Likes
Comments
Share

@Canabisseurs
Follow
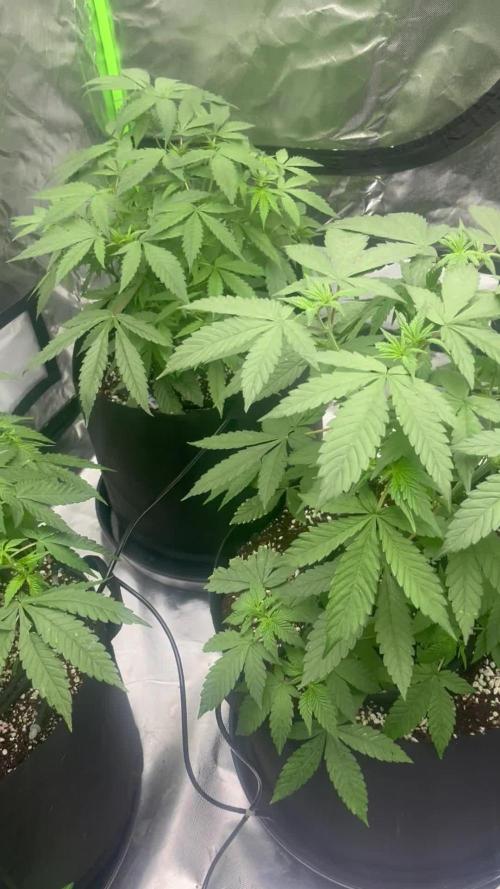
Tart Pops is entering week 6 of veg and she's stacking up beautifully! Been training the top heads using plant bends to open her up and keep that canopy nice and level. She's responded like a champ — lower sites are reaching for the light, and the main tops have been topped again to push even more branching. Structure is looking strong and symmetrical, and she’s taking the training like a true tart with attitude
Keeping an eye on node spacing and dialing in those nutrients — this girl is prepping to blow up in flower! Let’s see what she’s got in the next stretch

Likes
2
Share


@Olduffybastard88
Follow
Really up with the bio bozz fees was showing signs off under feeding there hungry girls ans just keep guzzling away I'm.so happy how these f1 are turning out there bigger and better than I ever expected tbh so over the
Likes
52
Share


@MadeInGermany
Follow
Flowering day 44
since time change
to 12 / 12 h
Hey guys :-)
The buds are becoming incredibly beautiful and smelling better and better ☺️.
Today there was again the full load of food and will be slowly driven down as soon as it comes to an end :-)
Was watered 3 times a week with 1.2 l each (nutrients see table above)
Otherwise everything was cleaned.
Have fun and stay healthy 💚💚💚
👇🏼👇🏼👇🏼👇🏼👇🏼👇🏼👇🏼👇🏼👇🏼👇🏼👇🏼👇🏼
You can buy this Nutrients at :
https://greenbuzzliquids.com/en/shop/
With the discount code: Made_in_Germany you get a discount of 15% on all products from an order value of 100 euros.
👇🏼👇🏼👇🏼👇🏼👇🏼👇🏼👇🏼👇🏼👇🏼👇🏼👇🏼👇🏼
You can buy this strain at :
https://www.ripperseeds.com/en/feminized/kmintz-feminized-cannabis-seeds
Water 💧 💧💧
Osmosis water mixed with normal water (24 hours stale that the chlorine evaporates) to 0.2 EC. Add Cal / Mag to 0.4 Ec Ph with Organic Ph - to 5.8 - 6.5
MadeInGermany

Likes
9
Share


@Ieiogrow94
Follow
Eccoci di nuovo qui!!!
Super eccitato per questa nuova collab con Seedsman, team davvero al top, che mi ha dato l’opportunità di testare questa nuova genetica e di condividere i progressi con tutti voi!!!
Come sempre partiamo nei bicchieri per poi travasare.. Questa volta verrà svolto tutto sotto la Lumatek Zeus 465 ProC, mi aspetto molto da questo ciclo!!
WOOOOOOOW
Grazie a tutti per il supporto ❤️🍀🔥

Likes
7
Share


@Pistil_Whipped
Follow
Flipped it to 12 12 schedule. now I am seeing more pistil hair on the bud sites. Noticing stems are getting more rigid and wood like.

Likes
7
Share


@OceanGrownLoc
Follow
Buds getting some swell on them now. Reek of sweet banana and some sour under tones.
Weather as usual has gone a bit shitty on the final week or so but other wise going well.
0 bugs issues, a few signs of dying leafs. Can't wait

Likes
8
Share


@artems
Follow
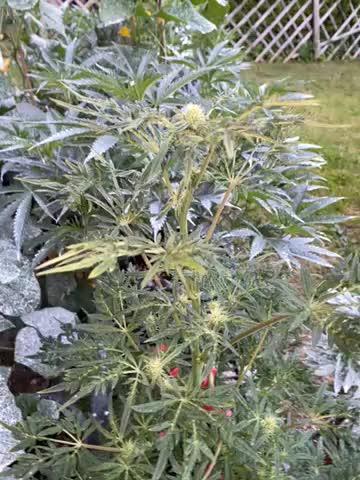
In the first week after switching to a 12/12 light cycle, the plant appears healthy and hasn't shown rapid growth yet, but its green mass is increasing rapidly 🌱. All seems promising for the flowering phase ahead! 😊

Likes
93
Share


@OrganicNature420
Follow
Germination date 🌱 28/11/2021
Day 78 16/02/2022
Strain 🍁 SinCity seeds Frosted Biscotti
(Biscotti Sundae x Whitenightmare)
THC% • Unknown
💡 Mars Hydro FC-E6500
• Power draw 650W + 5%
• Max coverage 5 x 5
• LED 3978 pcs high quality chips
• Max Yield 2.5g / watt
• Noise level 0 DB
• Removable Driver & Light bars
• Daisy chain
• Fast cool system
https://marshydroled.co.uk/ 🇬🇧
PROMO CODE • (organicnature420) DISCOUNT
https://www.mars-hydro.com/ 🇺🇲
PROMO CODE • (ORG420) DISCOUNT 👍🏻
⛺ Mars Hydro 150 x 150 x 200cm
📤📥 AC infinity 6inch
💧 10lt dehumidifier
❄️ 3.1kw air con system
💉 Nutrients GreenBuzzLiquids 🇩🇪
⭐⭐⭐⭐⭐
Organic Grow Liquid • 1-4ml until 2wk flower
Organic Bloom Liquid • 2-4ml flower stage
Organic More PK • 2-4ml +wk3 of flower
Organic Calmag • 1-2ml/lt whole grow
Fast Plants Spray • first 2wks at night lights off
More Roots • 2-5ml veg +2wks flower
Fast Buds • 5ml 12days before flower until wk1
Humic Acid Plus • 2-5ml whole grow
Growzyme • 2-5ml whole grow
Big Fruits • 2-5ml flower stage
Clean Fruits • 5ml flush 1wk
Ph powder
Root Gel
Living Organics
https://greenbuzzliquids.com/
PROMO CODE • organicnature420 15% off ✌️🏼
🥥 Growing Media • Coco Coir
Notes 📝
Loving life. Very happy with this grow. No complaints at all 🌱💚👊🏻
Go and give PharmaZ a follow and GreenBuzzLiquids and check out their grows and the future of nutrients.. Organic 💚
Discount codes in bio for Mars and GreenBuzzLiquids 👍🏻


Processing
Likes
26
Share


@GrowGuy97
Follow
All of the ladies are now starting to flower except the NHL I think it’s a little behind but all in all they are growing great!
Day 31 - Everything seems to be going great, fed the ladies yesterday havnt had any more issues yet (Thankfully) thanks for following & happy growing friends✌️🏼🌱
Day 33- A few of the ladies have some dead leaves not sure if it’s normal or if something is wrong.. they all seem pretty healthy other wise!

Likes
17
Share


@Paultemp
Follow
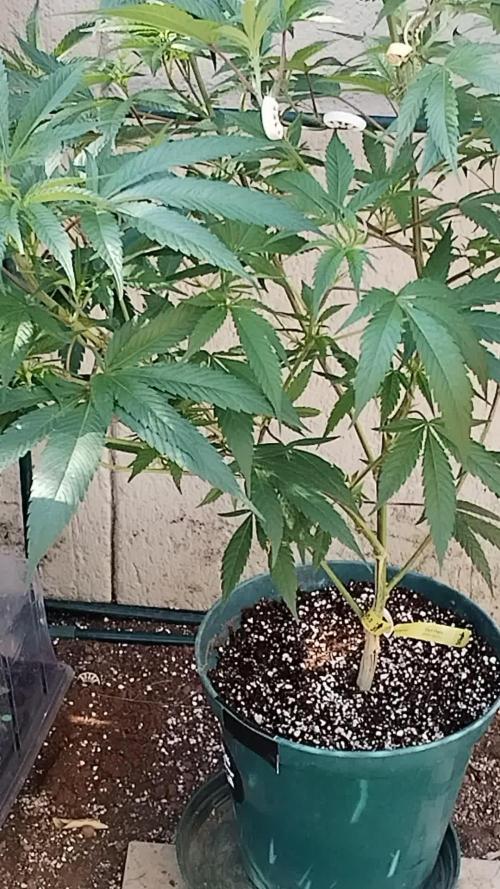
Hi all! 😊👊
Week 1 flower
Remo nutrient
Hp promix soil
7 gallons smart pots
Aelius led 300gh
Huge Defoliation 1 week before flower
1gallons water every 2 days