
Likes
Comments
Share


@CommanderCannabis
Follow
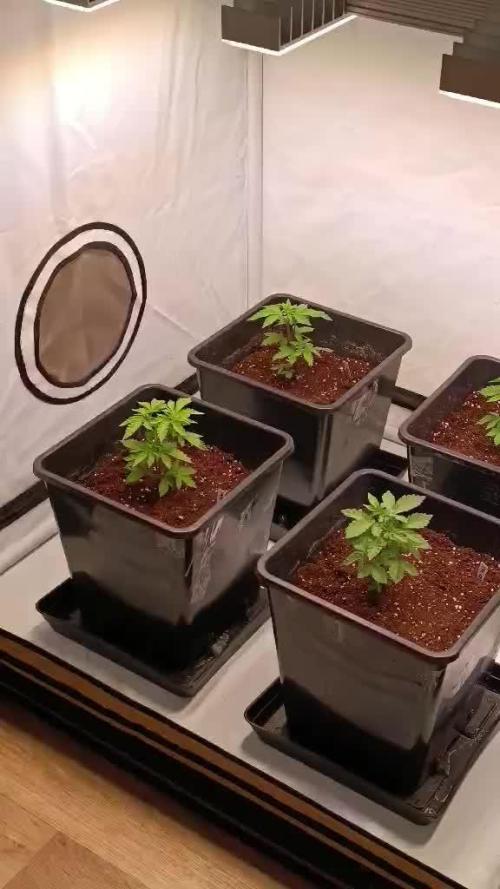
Great week of overall growth: Branches getting a good stretch over sun leaves canopy. Pistil growth has kicked in with branches having many nodes. The canopy now takes up the diameter of the grow chamber. I tweaked the solution because leaves were growing light green and after a week of new solution mix they seem to have taken to it. Have been playing Fugazi and Nirvana on interior speaker and also raised the light 6". They also have a beautiful scent and I am wondering if the chamber will still handle covering the smell. The living room is right above my basement grow room and you could always smell it in the past but I had no problems the last to times because I used the ABLE Grow Chamber and the plants were small. The plants from this grow are twice the size I was able to achieve in my last two grow due to the upgraded COB LED and the CO2. I water them in the morning with .5L of solution and another L when I get home from work. Will keep this watering schedule till time to flush. Have counted 20 mini colas from two plants. Will defolite one final time today to clear sun leaves that are shadowing potential bud growth.

Likes
6
Share


Likes
Comments
Share


@UkCaliGrower
Follow
Beautiful Lemon Kush by female seeds😍all of the airy buds went in with trim to create some CannaButter😍 there is 5oz from wetness, hopefully cure 2oz. Next ones are purple lemonade by fast buds


Likes
7
Share


@420DeepGrow
Follow
Semana 8
La Swag MDC sigue destacando con su forma inusual y cogollos cada vez más densos y cubiertos de tricomas. Las hojas anómalas brillan aún más con resina, dándole un look muy particular 🌿✨.
La nutrición con XpertNutrients se mantiene ajustada y efectiva, sin excesos. El riego ha sido afinado para favorecer la maduración y mantener un sustrato bien oxigenado 💧.
Las luces Adlite continúan aportando una cobertura excelente, permitiendo un desarrollo homogéneo incluso en las zonas bajas 💡. El clima permanece estable (21-24 °C, 50% HR) y sin señales de problemas.
El aroma evoluciona con fuerza: base frutal madura, notas herbales más intensas y un perfil más complejo cada día 🌱.
Una planta muy curiosa, distinta en todos los sentidos.
¡Seguimos creciendo fuerte! 💪

Likes
140
Share


@MrJones
Follow
mrjones - Slurricane #7 S1
🌱Slurricane #7 S1
@inhousegenetics_official
👨🌾🏽GD Grower: MrJones
🔹🔹🔹🔹🔹🔹GOALS🔹🔹🔹🔹🔹🔹
🌞Environment - 75/80℉ and 55% Humidity
💧 Feeding - Advanced Nutrients Organic
⚗️Soil - 50% Ocean Forest / 20% Tupur Royal Gold / 10% Earth Worm castings / 10% lobster Compost / 10% Additional Perlite
🍃Training / HST, Will be topping, Cloning, and creating larger plants, and placing to flower under a trellis
🕷️ IPM - Will be using Green Cleaner" 1 OZ per Gallon, and CannControl from Mammoth alternating between product each month for Integrated Pest Management.
💡Mars Hydro LED / Veg Geeklight Monster Board 480W V4 / Flower 480W FC 4800
🔹🔹🔹🔹🔹🔹🔹🔹🔹🔹🔹🔹🔹🔹🔹
📜 Rambling - Week 16 / Plants are in full flower and stretch - they are looking great! Moved the final Slurricane #7 S1 outside.
🔹🔹🔹🔹🔹🔹🔹🔹🔹🔹🔹🔹🔹🔹🔹
▶️ Sunday - 05.23.21 / Feeding with 1/2 Gallon in each plant, the flowers are forming and they are all just looking so good!
▶️ Monday - 05.24.21 / No watering today - these ladies are looking great
▶️ Tuesday - 05.25.21 / Fed with half a gallon of above-mentioned nutrient / started defoliation will need to focus this down, I am going to start a Bloom Tea this evening as well.
▶️ Wednesday - 05.26.21/ No watering today - these ladies are looking great
▶️ Thursday - 05.27.21 / Fed with half a gallon of above-mentioned nutrient / started defoliation will need to focus this down, I am going to start a Bloom Tea this evening as well.
▶️ Friday - 05.28.21 / Continued to defoliate the ladies, still another hour or so to go, hard to get to them without fudging with the buds, I let the lady on the left side of my tent get away from me!
▶️ Saturday - 05.29.21 / Just a quick feeding and pictures, have places to go and people to see today, still need to put more time into my defoliation!
🔹🔹🔹🔹🔹🔹🔹🔹🔹🔹🔹🔹🔹🔹🔹
Likes
11
Share


Likes
66
Share


@Hashy
Follow
Week 9 5th week of flower.
Light settings
12/12 on at 9.00am off 9.00pm
Light power= 75% 184w
Radiator settings
LIghts on
Turn on if temp drops below 23c
Turn off if temp goes above 23c
Lights off
Turn on if temp drops below 18.5c
Turn off if temp goes above 18.5c
Dehumidifier settings
LIghts on
Turn off if humidity drops below 60%
Turn on if humidity goes above 60%
LIghts off
Turn off if humidity drops below 62%
Turn on if humidity goes above 62%
Extractor settings
temperature 25c with 1c steps
Humidity 50% with 2% steps
Max speed 10
Min speed 7
VPD aim 0.8-1.2
DLI aim 30
Wednesday 22/3/23 Day 57 (Day 29 flower)
Nothing
Thursday 23/3/23 Day 58 (Day 30 flower)
Autofeed 4 20 minute runs
(last weeks nute schedule)
Feed 12L Ec=1.93 Ph=6.6/6.5
4.5L left
Roughly 2.5L each.
#1 run 0.15L Ec= Ph=
Pump wasn't submerge properly.
Friday 24/3/23 Day 59 (Day 31 flower)
Moved light more over towards the cheesecake.
Big defoliation
Saturday 25/3/23 Day 60 (Day 32 flower)
Autofeed 4 20 minute runs
Slightly less powerful pump
Calmag 0.5ml/L
4 drops ph d
Feed 10L Ec=0.4 Ph=6.1/6.2
1.5L left
Roughly 2.2L each.
#1 run 1.25L Ec=2.14 Ph=6.1
#1 Height= 46CM Dist= 45CM DLI=25.1
Sunday 26/3/23 Day 61 (Day 33 flower)
Nothing
Monday 27/3/23 Day 62 (Day 34 flower)
1.00pm alter heater settings to 22.5c
6.00pm
Extractor settings
temperature 24c with 1c steps
Humidity 50% with 0% steps
Max speed 10
Min speed 4
Tuesday 28/3/23 Day 63 (Day 35 flower)
Feed
(This weeks schedule)
Autofeed 4 15 minute runs
Normal pump
4 drops ph d
Feed 15L Ec=1.75 Ph=6.4
8.75L left
Roughly 2.08L each.
#1 run L Ec= Ph=
#1 Height= 47CM Dist= 46CM DLI=25.
Another week done for the grow. Things are going great.
#1 Wedding Cheesecake FF is pilling on the pistils and is looking good. I can't see her getting much taller now.
Power used for week
Light
(2.22+2.21+2.21+2.21+2.22+2.21+2.22)=15.5Kw
Extractor
(0.57+0.57+0.57+0.54+0.57+0.53+0.54)=3.89Kw
Fans
(0.5+0.53+0.52+0.69+0.9+1.08+1.06)=5.28Kw
Dehumidifier
(1.49+0.34+0.71+1.48+0.0+0.0+0.0)=4.02Kw
Radiator
(2.42+2.47+2.74+3.62+5.24+2.1+1.45)=20.04Kw
Water pump.
(0.0+0.01+0.0+0.01+0.0+0.0+0.01)=0.03Kw
Total for the week=48.76Kw
Back in a week.
Thanks for stopping by.


Likes
5
Share

@psychonaut420
Follow
As December is near the growth is slower than would like but is still thriving with more stretching happening for the side branches and the mini side branches start to stretch as well one side branch I recently topped is recovering and can see development at a decent rate hoping for some start of pre flowering signs within the week or 2 she’s really been stretching outwards I lollipop some of the weaker underdeveloped branches so can focus more energy on the healthier parts of the plant


Likes
7
Share


@n1kl24
Follow
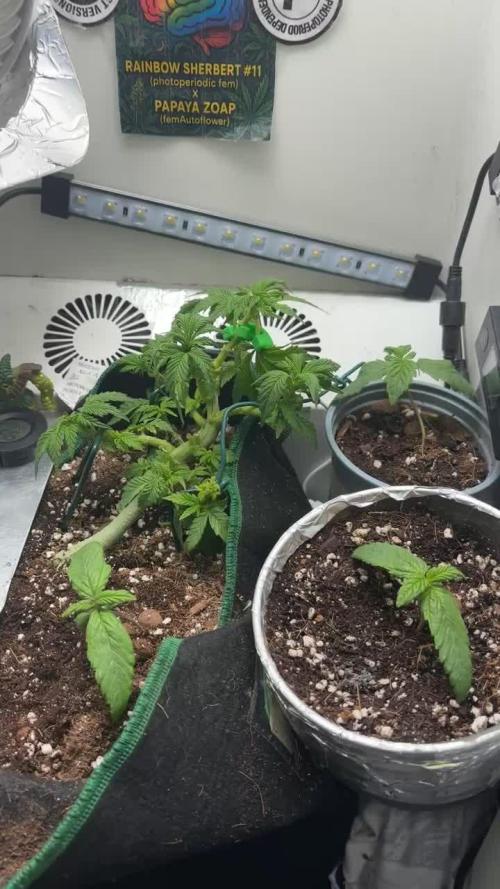
Seems to BE alright so far. Banana Kush plants are Like 1-2 ahead of the Skunk XL I guess.


Likes
70
Share


Likes
13
Share


@ytOracle
Follow
Hallo Growmees, kommt mir so vor als ob Sie jetzt so langsam in Fahrt kommt. Mir gefällt zwar das Sie so kompakt wächst, da Ich aber noch Toppen will gehts mir zu lansam. Den Tee verfüttere Ich noch, ab dann nehm ich Bio Bizz Bio Grow. Bis ich in der Blüte bin organisiere ich noch das Bloom Paket von BioBizz.
Edit. 13.06 Stamm doppelt so dick 5cm Sprung im Wachstum.
Likes
8
Share


@Kingseeds
Follow
Another powerful strain form in-house genetics (OGKB V 2.1 x Platinum )
pure gassy flavour and aroma which will have all the Kush lovers out there going crazy
Absolutely frozen cola


Likes
2
Share


@Elmike
Follow
Excellente odeur, beau givre bien collant et de belle grosse cola bien dur. Je suis jusqu'à présent satisfait du rendement de cette superbe génétique 👍👈👌

Likes
21
Share


@BushDoctor740
Follow
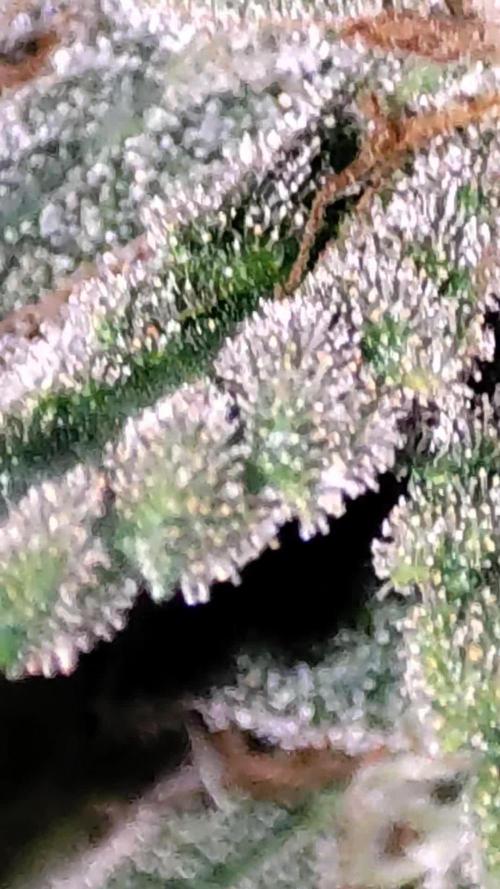
Well I have harvested 3 of the 5 Runtz ladies at day 78.The other two took to the training a bit better and have a lot more colas and atleast another week to go.I will post outcome after they dry and I trim.It is rainy season for my area so humidity will be high but I can control it with a dehumidifier.Nice slow dry for these ladies shooting for low 60s in temperatures and humidity Plant.
420 2025 Easter Sunday I have harvested the last 2 Zamnesia Runtz these girls are loaded with trichomes smell amazing and pretty big producers for an autoflower.Thank you Zamnesia and Plagron for sponsoring this journey happy Easter/420 :)