Likes
Comments
Share


@gr3g4l
Follow
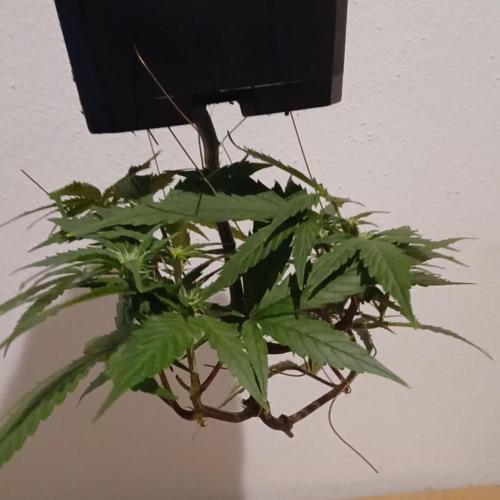
timelapse de los últimos 35 dias a 12/12h.
SECANDO . Durante los primeros dias las temperaturas en exterior eran aun fresquitas y el secado se hizo con un calefactor de 80W, deshumidificador y ventilador para que corriera el aire , una semana áproximadamente , luego se quitó todo y se dejó sin nada para que siguiera secando poco a poco dentro del armario de secado.
pasados 21 dias secando y las plantas estaban ya bién secas y crujientes, igual demasiado , las puse ahí dentro y más adelante sin prisas en botes herméticos para curarlas y salgan aun más ricas.
Bueno gente, ahora si que puedo decir que hemos teminado con este seguimiento y espero que os haya gustado y sobretodo que pueda ayudar a alguien que se inicia en este mundillo.
Nos vemos en otros seguimientos. Salud.

Likes
9
Share

@SkunkyDog420
Follow
Hallo zusammen 🤙.
Habe sie heute geerntet.
Wir hören uns in 3 Wochen mit dem Erntebericht.
Rabattcode für den BIOTABS-Webshop https://biotabs.nl/en/shop/ GDBT420, damit erhalten Sie 15 Prozent

Likes
19
Share


@GoldenWeedGrower
Follow
Legend
Timestamp: 📅
Measures: 🛠️
Water: 🌊
Actions: 💼
Thoughts: 🧠
Events: 🚀
________________________________
📅 D22/V20 - 14/09/23
🛠️ EC 0.8, pH 5.8
🌊
💼
🧠 CO2 Dispenser is working good, it should deliver some CO2 trough the pipe
🚀
________________________________
📅 D23/V21 - 15/09/23
🛠️
🌊
💼 Added some workers to bend her down
🧠
🚀
________________________________
📅 D24/V22 - 16/09/23
🛠️ EC raised up to 1.2, pH trend is down
🌊
💼
🧠 I'm going to change the water in the next days
🚀
________________________________
📅 D25/V23 - 17/09/23
🛠️
🌊
💼 New workers at work to let her stay down and down 💼 💼 💼
🧠 Now Capitan America and his bike is bending the main bud and the CO2 is provided by NASA 😋
🚀
________________________________
📅 D26/V24 - 18/09/23
🛠️ EC is 0.9 and pH is 6
🌊
💼 Added LST with men at work and made some defolation
🧠
🚀
________________________________
📅 D27/V25 - 19/09/23
🛠️ EC 0.9 pH 6.2
🌊
💼 LST and new bending
🧠
🚀
________________________________
📅 D28/V26 - 20/09/23
🛠️
🌊 RES Changed 💦💦💦
💼 Added very little bit of silica powder to the water
🧠 I let the plant absorb it along the night and changed the water again in the morning. It's the first time I add a silica to my grows, waiting to see what is going to happen 😉
🚀

Likes
80
Share


@Mrs_Larimar
Follow
May, 18th
The last remaining Plant keeps on Budding and smelling
Trichomes are mixed, still afew clear,, but alot of milky ones and some amber, too
So she gets more Tme to maturate

Likes
16
Share


@Ale1000
Follow
Una planta espectacular , le di 20 litros de sustrato
30 días de crecimiento y 60 de flora . 8 semanas de flora


Processing
Likes
37
Share


@MG2009
Follow
Happy gardening.
07/21/2018
Wow unseasonably cold last night got down to 48° brrrr. No signs that the cold bothered the girls posting photos in a min.. And video. Phew took me awhile to upload.
07/24/2018
Mid week update
Back to hot and, steamy summer weather.
#1, tops are just about 39.5", going to try to get all super cropped to about 30", I expect that they will be double their size at harvest.👍.
On a side note hours of light will soon be at 14.5 hope they initiate flowering,as it will give me almost 3 months of flower!👊
#2 is 43.5" looking like a Christmas tree,still some supercropping to spread out the lower layers.
#3, is 35.5" And no training just picking her dead,yellowing leaves
#4, is 41.5" also no training #5, is 30" , and still stinkiest 😎 of all gonna take a clone today.
Likes
13
Share


@Slurpy_Terpy
Follow
Stretching nicely!
A bit long internode distance and small buds and slightly more stretch than the rest, but I bet the quality of the resin will make up for it!

Likes
2
Share


@Xpie77
Follow
Kweekverslag – Startfase
Soort: 24 Gold Kush (Weedseedshop)
Aantal zaden: 3
Datum start: 13 mei 2025
---
1. Ontkieming
Methode: Keukenpapiermethode
Benodigdheden:
2 bordjes
2 vellen vochtig keukenpapier
Plastic zakje of folie (tegen uitdroging)
Donkere plek met kamertemperatuur (± 20-25°C)
Verloop:
Op 13 mei 2025 zijn 3 zaden geplaatst tussen twee vochtige keukenpapiertjes.
De bordjes zijn op elkaar gezet en in een lade geplaatst.
Dagelijkse controle op vocht en kieming.
Resultaat: [vul in zodra bekend, bv. 3 van de 3 zaden ontkiemd op dag 3]
---
2. Zaailingenfase
Huidige status: Ontkiemde zaden overgezet in 9 x 9 cm kiempotjes met luchtige zaai- en stekgrond
Verlichting: Spider Farmer LED – 100 Watt
Lichtcyclus: 18/6 (18 uur licht, 6 uur donker)
Afstand lamp tot plantjes: ca. 40-50 cm
Temperatuur & luchtvochtigheid: ± 22-26°C | 60-70% RV
---
Soortbeschrijving – 24 Gold Kush
24 Gold Kush is een feminized indica-dominante soort met een rijke genetische achtergrond, bekend om haar ontspannende effecten en krachtige aroma.
Genetica:
Waarschijnlijk een kruising van OG Kush met een soort met verhoogde harsproductie en een kortere bloeitijd.
Eigenschappen:
Type: Feminized
Soort: Indica-dominant
THC-gehalte: Hoog (20% of meer mogelijk)
CBD-gehalte: Laag
Bloeitijd: ± 8-9 weken
Opbrengst:
Binnen: 400–500 g/m²
Buiten: robuuste, harsrijke oogst
Effect:
Sterk ontspannend, kalmerend en licht euforisch. Geschikt voor stress, pijnbestrijding en slapeloosheid.
Smaak & Aroma:
Aards, kruidig en licht zoet met een hint van citrus of den. De geur is doordringend en typisch voor kush-soorten.
Kweekgemak:
Geschikt voor beginners en gevorderden
Compacte en stevige planten
Goed bestand tegen schimmels bij goede ventilatie

Likes
6
Share

@GERGrowDesigns
Follow
Welcome to Flower Week 6 of Divine Seeds Auto Fractal
I'm excited to share my grow journey with you all as part of the Divine Seeds Autoflowering Competition 2025. It's going to be an incredible ride, full of learning, growing, and connecting with fellow growers from all around the world!
For this competition, I’ve chosen the Feminized Automatic strain: Auto Fractal
Here’s what I’m working with:
• 🌱 Tent: 120x60x80
• 🧑🌾 Breeder Company: Divine Seeds
• 💧 Humidity Range: 50
• ⏳ Flowering Time: 60 Days
• Strain Info: 23%THC
• 🌡️ Temperature: 26
• 🍵 Pot Size: 3
• Nutrient Brand: Narcos
• ⚡ Lights : 200W x 2
A huge thank you to Divine Seeds for allowing me to be a part of this amazing competition and Sponsoring the Strains. Big thanks for supporting the grower community worldwide! Your genetics and passion speak for themselves!
I would truly appreciate every bit of feedback, help, questions, or discussions – and of course, your likes and interactions mean the world to me as I try to stand out in this exciting competition!
Let’s grow together – and don’t forget to stop by again to see the latest updates!
Happy growing!
Stay lifted and stay curious!
Peace & Buds!

Processing
Likes
79
Share


@DudeGrowsWeed
Follow
Happy Birthday! One week old today and looking good. Stretched a little more than I hoped, but maybe that will help when I bend her in a few weeks. MA is front-center in the group shots.
Likes
7
Share


@Marbanya
Follow
2024-12-04 to 2024-12-10
The girls have recovered from the last defoliation. They are starting to eat more, and the aroma is getting stronger: it smacks you in the olfactory when you first open the tent.
12-04 Day 25/79
Bottom feeding of .5 gal each
12-06 Day 27/81
Top feeding .5 gal each
12-09 Day 30/84
Bottom feeding .5 gal each
SCROG net added to spread the canopy out and get light to the most flowers possible.
Likes
18
Share


@Gropadawan
Follow
Day 113, Flower Day 57.
Harvested Bubba Kush today as I felt nervous with it from last week's powdery mildew. It is hanging on hangers in the small tent drying now.
GSC is going to get 1-2 more weeks.


Likes
8
Share


@Kirsten
Follow
6.4.25:
FastBuds Mystery Seed #1:
She has been topped twice and is looking pretty strong 💪 She has grown vertically, and leaves are always praying. Possibly too much light, so I have turned the dimmer down to about 90%. There are slight bleached tips on a couple of top leaves.
I'm hoping to do the same LST with garden wire here very soon.
Overall, the plant has nice big, fat leaves. Seemingly lush colour and vigorously growing since the double toppings. Very nice plant so far. 👌
13.4.25:
This week has been so busy in the garden!
I forgot to take any notes, so I'll see what I can do from memory! 😅
14.4.25:
I have been super busy with all the other harvests in the past several days, so this is a little late.
FastBuds Mystery seed #1 has been topped twice and the growth has been thick and lush.
I watered several times this week, and I used Ecothrive Biosys with dechlorinated water PH'd to 6.4.
I watered about 2 litres to each plant.
I have been using wire, clips, and Bio stretch fabric plant ties to LST the plant.
The plant has reached the 8 Gallon pot perimeter. The plant is in the first week of flower. I'm hoping to keep the canopy even with my RQS Northern Lights grow as I need to be able to compare the plants accurately for the experiments.
I did snap off a branch, again the day after I said I'd be very careful 😖
The plant is very resilient though, and you wouldn't know anything happened at all, minus one of the first tops is missing. Thankfully I topped twice, so I still have 5 tops.
Training Techniques used this week are LST and defoliation.
I watered on 13th and 14th with the following solution;
4 litres of dechlorinated water PH'd to 6.4 which contained:
♡ 8 ml Xpert Nutrients Cal-Mag amino acids
♡ 1/2 Teaspoon Mega Crop Part A by Greenleaf Nutrients.
PPM: 1000.
2 litres were given on two consecutive days. I watered in a top dress, which I will add what I used here, but it was another mess up, I'm sure you'll be surprised to hear 😅
Top dress:
4 gallons containing approximately:
50% Canna Terra Mix soil
25% Worm Castings
23% Perlite
2% Organic Dry Amendments, which were;
☆ Ecothrive Life Cycle
☆ Ecothrive Charge
☆ Diatomaceous Earth
☆ Ground Cinnamon
☆ RHS Mycorrhizal Fungi granules
I used the top dress amount for established plants for a pot size of 30L / 8 Gallons.
I'm not keen on the soil. I was supposed to get Canna Coco but I got sent Canna Terra in error.
It was overdue for a top dress and I had nothing else to use. I don't like it in comparison. Coco is best for my needs. It's much fluffier, lighter, and easier to work with.
Thanks for hanging out 🍃 ✌️ 💚 🙂
Likes
3
Share


@HowtoBubatz
Follow
This week has been a mixed bag for my two plants. #1 is really taking off now, showing strong growth and picking up speed!🌱
It’s looking healthy and vigorous, which is great to see. Towards the end of the week, I also noticed the first signs of flowering—exciting!
Unfortunately, #2 is still struggling.😩
It has barely grown and remains very small compared to #1.
If it doesn’t start making progress soon, I might consider replacing it with another plant.
I’ll give it a little more time, but let’s see how things develop in the next week. Fingers crossed!🤞
Likes
39
Share


@KitaKush
Follow
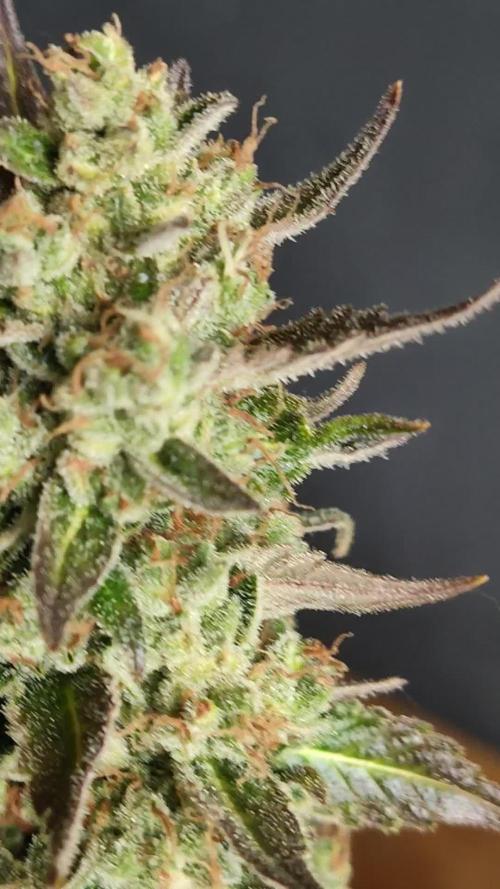
Week 13 harvest! The girls are getting 12 hours of darkness before the hang! I can’t control my humidity yet when it’s completely dark otherwise I would’ve gone for a bit longer.
My stinkiest frostiest prettiest plants yet…very excited to jar them up!!!
And i’ll clean my fan soon too hahaha
Likes
9
Share


@Krissci
Follow
Day 2 - LST and topping if possible before transition to flower.
Slow for separate branches to grow


Likes
25
Share


@FriendlyNeighbor
Follow
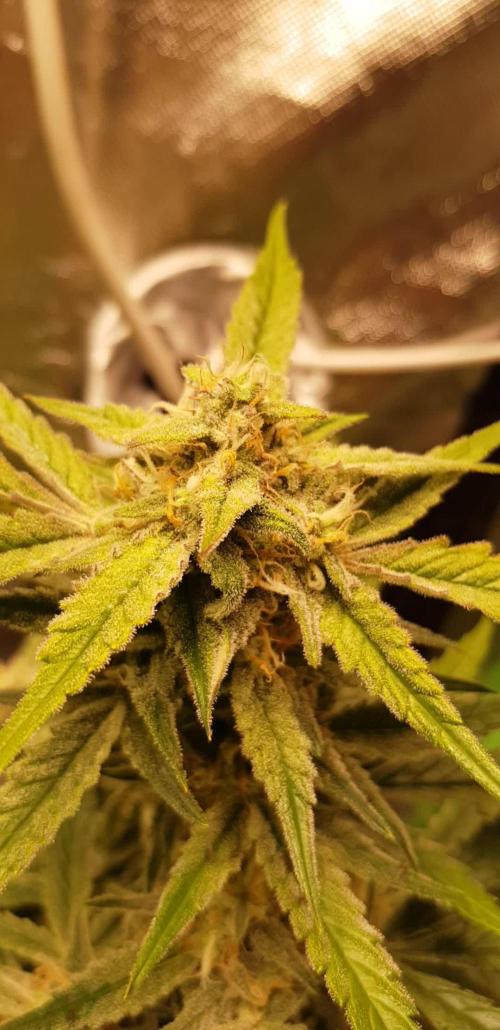
Day 59
Finally Fruit Spirit is going into 48 of darkness after 6 days of flushing....
She smells and looks just tasty cant wait to chop those girls in 2 days!!!!! 😬😁🙌