The Grow Awards 2026 🏆 


Likes
Comments
Share
@HIAZ_urbanbudfarmer
Follow
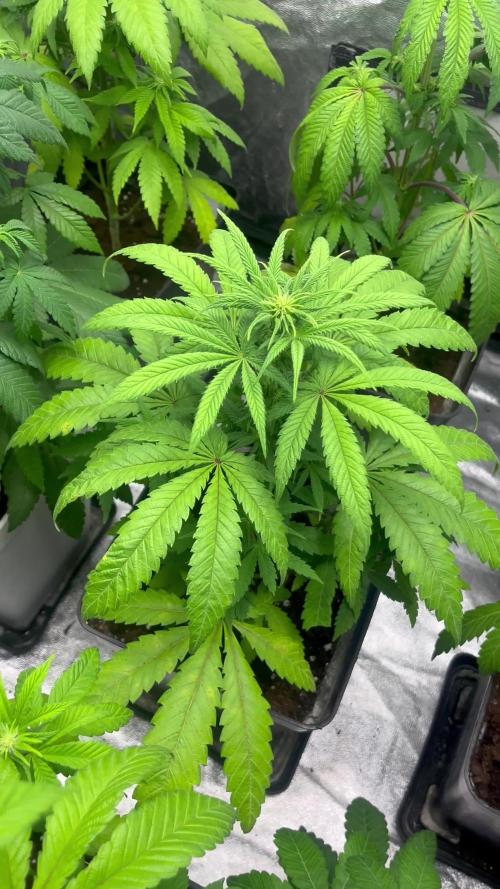
Plant at the front #3 has had slowed growth but buds are filling out pretty well now, pretty sure she is a Orange sherbet. Back 2 are on week 3 day 17!!! & Are going Awesome, buds stacking up & down every branch! Going to get some really good Cola's of them! They are loving the 730watts!’ of light, back left plant looks like a Tropicana Cookies, going to do some defoliation on her & tie branches down a bit to open up middle of plant to allow more light & air to lower bud sites.

Likes
14
Share
@BudgetGrows
Follow
So as you can see she is now foxtailing, trichomes almost there, she will probably be took done at some point in the next week
Thanks for stopping by 👍
Likes
102
Share
@Roberts
Follow
Ztrawberriez auto is growing great. She is on the end half of her bulking. She has about 2 weeks left. Everything has been going great. She dud good for a 1 gal perlite grow. Thank you again Fast Buds. 🤜🏻🤛🏻🌱🌱🌱
Thank you grow diaries community for the 👇likes👇, follows, comments, and subscriptions on my YouTube channel👇. ❄️🌱🍻
Happy Growing 🌱🌱🌱
https://youtube.com/channel/UCAhN7yRzWLpcaRHhMIQ7X4g
If anyone needs to purchase fastbuds here is a link for my affiliate program
https://myfastbuds.com/?a_aid=60910eaff2419
Likes
11
Share
@eldruida_lamota
Follow
Que pasa familia, vamos con la segunda semana de floración de estas Gomu Gomu Mango feminizadas de HighBreed.
Vamos al lío ,se colocaron en macetas de 7 litros definitivamente.
El ph se controla en 6.0 , la temperatura la tenemos entre 24/20 grados y la humedad ronda el 50%.
El ciclo de Floración puse 12 horas de luz, el foco está al 50% de potencia.
De momento va creciendo, tiene buen color y va progresando.
Comentar que esto sufriendo estrés hídrico porque bajo par de grados por la noche y no chupo bien , pero esto al tanto, solo espero recuperarlas esta semana.
Gracias a Agrobeta por el kit para la temporada, unos jefes, siempre apoyando 💪.
- os dejo por aquí un CÓDIGO: Eldruida
Descuento para la tienda de MARS HYDRO.
https://www.mars-hydro.com
Hasta aquí todo, Buenos humos 💨💨💨
Likes
8
Share
@imSICKkid
Follow
Watching her get frosty as hell. Besides her great structure, the trichome production this girl has is insane. She would be a great plant to press.

Likes
15
Share
@eppeep42
Follow
Gorilla Cookies & Papaya Cookies: 25L Pot with Biobizz All Mix, they get 1ml/L
Lemon Cherry Cookies: 19L Pot with Biobizz Light Mix, so she gets 4ml/L
- to clear up any possible confusion, there is no specific reason as to why i have the Lemon Cherry in the smaller pot with another soil mix, it just turned out that way-
04.09.2024:
So the initial firs try at LST turned out to be okay, but i lost a pair of leafs and realized its pretty annoying to do it with the garden wire, since the fabric pots are moving alot if i try to move them a little, resulting in too much pulling at the connected parts, so need to be careful about that.
Also i used the LST clips the first time. i think i will continue the kind of spiral shape its taking on, sounds good, at least as a novice, in my head.
The Lemon Cherry Cookies is still too small in terms of height for me to try some LST, also i cannot fill up the pot with more soil cuz shes too small. on my next grow will also definetly keep that in mind to fill the pots up all the way.
Kinda creeped out that after 3 days the soil still is not fully dry, its slightly moist still, just a little. but i will keep following the advice rather to little than too much. i think latest tomorrow morning i will water them finally. must also be the high humidity in the last 2 days. edit: i did end up watering her the same day at night, was the right choice at least by the way they looked after watering.
06.09.2024:
Damn when i looked into the tent today and took a closer look i got a little paranoid because its the first time seeing the pistillons! So at Week 4 Day 3 showing the earliest signs of Flower, just like the Lemon Cherry Cookies, which is still very small in terms of height, which makes me a little sad- but then again, they had a rough start.
I just would have liked for them to have one more week of pure growing, as i fear they will end up not that big. But for my first grow i will be very happy with minimum 40g per Plant.
07.09.2024:
went a little crazy with the LST clips, but very satisfied overall especially at the top its nicely spread now.
08.09.2024:
sadly one of the branches snapped on one of the LST clips, as i saw in the morning. it was barely hanging on the last flop of skin. i carefully reattached it and put a bandage around it, not long after i also added garden wire tightly wrapped around it. i hope it will recover in the next few days.
09.09.2024:
happy with the growth and look of the new Papaya Cookies. Still worried about the Lemon Cherry though. she has to get taller!! also one of the leafs on top is covering a lot of new branches, so im thinking removing it will help to boost her. the most LST i can do on her so far is bend her a little to the side with wire at the top to open it up at least a little bit. The temps are finally dropping more so its around 26 Grad Celsius during the day, 22-23 at night
10.09.2024:
the Gorilla is growing nicely by now for sure. just worried she will get way too tall compared to the rest so it will be hard to give each plant the light it needs. also finally removed the one pair of leafs and all the little new growth can feed on the light now! Temps cooling even more, summer is slowly over here in my part in Germany. Tent temps around 22-23 Grad Celsius.
Maybe i will make a second grow diary for the Papaya Cookies, since the older two are already pre flowering and i cant keep the correct week-settings for the Papaya.
Likes
18
Share
@bono420
Follow
DAY 53
Had to take out of the room the Amnesia XXL hermaphrodite; cant take the risk of turning the rest into males too.
DAY 54
FUUUCKKK!! The wind dropped a piece of heavy wood onto the plants!!!
1 of the Moby Dick was totally broken. Some branches of the neighbour plants were affected too.
So that's 2 plants lost at the moment (the hermaphrodite and the broken one).
Day 56
Two days after the tragedy. Had to reorganize the room to prevent similar accidents in the future 🖤😢 Saved the most I could but definately this stressing event will influence the plant’s development.
Also, considering taking out the claw leaved plant, which has signs of hermaphroditism (FML again 😫).
Hope these 7 make it till the end.
PS: Also, there’s 1 Moby Dick which has no signs of flowering at day 56, cant figure out what’s happening with it. I’m starting to think that it’s an Regular Feminized seed instead of an autoflowering.


Likes
17
Share
@mcjordan
Follow
Week 8 started okay, after lots of defoliation, I think light penetrates a bit more lower parts, flowers now started to turn into longer bud sites, looks nice. Hard to notice issues with plants, because most of the bigger leaves are removed, and usually leaves are the first ones to show issues I guess. Also plant no 1 has grown lots of stems past lightning :D Its growing strong. Still are a bit behind with flowering than other 2 plants. But overall all plant buds look amazing!
Still adding flowering nutriens, perhaps I should stop at end of week to flush it?
Seems like harvest could be in next two weeks, I'd say 10 days, but i have no idea.
Mid-week I removed plants first time from grow box, did lots of defoliation, and moved light to very top of box, took them back inside, now lightning is very good and space issue kinda solved, plant no 1 had grown very tall and already had burnt top buds, had to do something. few lessons learned.

Processing
Likes
7
Share
@HylianGrass
Follow
Starting week 3, this strain grows like crazy!! The conditions are looking good, i am now giving her full nutes since she took more than well the last half-dozed nutes. Very nice lush green with no signs of deficiencies! One the root found its way to the tank wich surprised me be how fast she broke through the bottom hole


Likes
20
Share
@Canadian_Bud
Follow
4-2-2021
Now starting 2nd week of flower.
Look at her grow would you expect anything less from a Crop King Seeds seed No Way!.
She is far behind the others but doing great just the same. So easy so far to grow this strain so not sure what the fuss is all about.
I did manage to bend her under the string so technically she is a Scrog. I just did that so to spread her out might get a few more larger buds out of her.😎
Love how she is doing so far.
Keeping the PPM'S Steady for now and added some Seaweed stuff for root growth. We will see how she reacts.💪

Likes
4
Share
@Kekkonen
Follow
It looks like the powdery mildew wont go anywhere with the spray I am using. Maybe cause it's been raining a lot lately and quite cold weather also. Had to remove some flowers and leafs cause they were infected.
One of the plants seems to have some kind of deficiency as you can see from the picture. Is this potassium or is it a fungi, what do you guys think?

Likes
4
Share
@XoticGROW666
Follow
DAY 4 In flowering for This big bushy pheno gelato 41
Feed compost tea & SST tea Only no bottles no Nutes


Likes
132
Share
@rhodes68
Follow
11/1 In the water - bottled 6.0 - under the eye of the vicious Woodstock on the heated seedling mat.
2 Green Crack going into 5 gallons of washed and buffered coco 60% and perlite 40% using cocotek A and B nuets
No nuets of course
11/2 On the paper towel, all look cracked on quick inspection
11/3 Cracked no tails ... at all... getting nervous... hate this part
11/4 Still no tails, the two Fastberry have already sprouted and been planted. Nervous again lol
11/5 Still no tails, going to drop two more later though Ive no confidence in them at this point.
update:
Holding off dropping two more, getting some activity (not breathing easy yet) from the first two.
Seems my last ditch effort of a 3% peroxide solution soaking the seeds MAY be working.
Wait one more night
11/7 Planted to very very sad germs out of habit more than hope on em.
H2O2 works just wasnt much more to be done on em.
Dropped two more into the water from the second pack of seeds, maybe it matters.
11/9 Tails on both, planted in coco. Looks like that first set of seeds is ... questionable :)
11/12 Finally some green! One is up nothing from the others yet. At least I have a grow now :D
11/13 One is up fairly strong the other is up but not looking as well may be a problem here just watching and waiting.
Calling this Day 1 , will name later if things go well
11/14 New pics, both up looks like I have a grow
Ladies of SciFi... Meet Ripley and Tara
Going to carefully poke around in those first two pots that didnt sprout. See If I can learn anything.
Need to figure out how to prevent that kind of thing.
11/15 New Pic. They growing well now.
Found on the two other pots the seeds never did anything after planting which is what I expected to be honest. Afraid that seed pack is a no-go
Feeding mix - 2 cups at 5.9 of each, .6ml CocoTek A & B, Fish Sh!T to runoff until transplant
11/16 New Pic and Vid The GC is playing a game of catch-up with the Fastberry
Feeding every day now will go to twice daily when large enough.
11/19 Day 6
Really liking the coco coir. two feedings a day at 5ml cocotek A&B and 4 ml Fish Sh!t / gal at 6.0
Meter got in - TDS of the above feed is 575 with tap water being 210 giving a nuet level of 365 well within seedling and early veg limits, so plenty of room down the road.
Will be working it up as I feel right
11/20 End of week 1 ... heh finally :)
Put a lot of thought and study into this and adjusted the feeding. This in response to some slight lightening at the leaf tips suggesting nuets too high.
Water TDS 220 ( gonna have to get a filter soon) so subtracting that I have the solution at 230 ppm (@2.5ml/gal cocotek AB with 2ml Fishsh!t which has little impact on TDS ) PH to 6.1. 450 ppm without adjustment which was my real target here.
Fertigating twice daily to 5% runoff, transplanting when roots start poking out.
Gentlest way I can think of to try and catch these babies up a little.


Likes
8
Share
@Monkeyboy
Follow
OK so we are at day 57 and wer flowering. Looking nice and tall and green. Can't wait for the buds to come.
Not bad just tap water and watered down coffee grounds once a week.
https://home.howstuffworks.com/green-living/use-diluted-coffee-to-fertilize-plants.htm#:~:text=A%20weak%20solution%20of%20coffee,on%20the%20left%2C%20is%20perfect.&text=Don't%20just%20pour%20it,green%20growth%20and%20strong%20stems.

Likes
25
Share
@Kush_queen
Follow
So my beautiful babies have had a busy week they had a trim got rid of the big fan leaves covering new bud sites and today they had monkey nutrients bloom A and Bloom B plus stress, rootshoot and calmag and they had there first day of 12 hours light and 12 hours dark I added another fan so they are loving life and the humidity is finally lower
The smell is amazing inside the tent and the filter is keeping the smell inside the tent thankfully


