


Likes
43
Share


@PEAKYPLANTERS
Follow
Hi everyone, farmers friends!
We have come to the end of another arduous company ERI of all this fantastic plant

Likes
88
Share


@DogDoctorOfficial
Follow
🌾 Harvest Day — The Grand Finale of the Eternity Grow Cup 🌾
Days 72–73 | Trimmed on May 25 | Posted May 27
What a journey this has been — and what a finish. These five incredible Runtz phenos have now completed their cycle, and today, we celebrate the final stage of their flowering life: the Harvest.
We sent the girls into darkness on Day 70, allowing them a full 48+ hours of rest and reset. The dark period was just a bit longer, truth be told, because time… it flows as it must. This extended dark time helps increase resin production, allowing the trichomes to mature just that final bit more.
On Days 72 and 73, we harvested them with care and reverence.
Each plant was hung upside down, whole, in a perfectly controlled 60% humidity environment for 13 full days. Before hanging, we gently removed only the fan leaves, leaving all trichome-rich sugar leaves in place — a natural armor for the delicate resin glands during drying. Why do we do this? Because those sugar leaves help protect the essential oils and terpenes, preserving potency, flavor, and aroma for the smoothest experience later on.
🌿 The Dry Room & The Trichome Guardians
Throughout the drying, we used a moisture meter to monitor the moisture content in the stems. Once it dropped to around 12–13%, we knew it was time. This tool is a simple but game-changing ally in ensuring a perfect dry — not too fast, not too slow.
We then trimmed everything by hand over a 6.5-hour focused session. Armed with trim bins and good energy, we collected an abundance of glistening trichome heads in the process — a golden bonus from these resin-packed beauties. The leaves themselves told a story: deep purples, near-black shades, autumn fades and metallic tones — just stunning.
Each girl was trimmed in order:
#5 → #4 → #3 → #2 → #1,
revealing dense, chunky buds all the way from top to bottom. Not a single pop-corn bud among them — only rock-solid nugs, heavyweight champions in every sense.
📦 Cure Begins – Grove Bags & Glass Jars
Once trimmed, the buds were tucked carefully into Grove Bags and glass jars, each stabilized at around 61% RH. The Grove Bags handle the microclimate beautifully, keeping humidity between 58–61%, perfect for preserving all that hard-earned quality.
We’re now opening the jars daily, monitoring aroma and feel. This part of the process — the cure — is where the soul of the flower truly comes to life.
☀️ UV, Reds & The Perfect Run
Part of what made this run so special was the precision in light spectrum. 40% whites, full reds, UV and IR, and the girls responded like royalty. The UV pushed trichome development to the max. The deep reds gave us thickness, color, and weight. All of it under ThinkGrow Model Ones powered through the Trolmaster ecosystem — everything syncing in harmony.
This run was stable, lush, expressive — a grower’s dream. To my eyes, this was a perfect run.
⚖️ Final Yield: 1,302 Grams (1.3 kg)
In a 4x4 tent — that’s just 1.2m x 1.2m for metric friends — we pulled in 1,302 grams of flower, not even counting the buds that were taken for filming, photos, or “quality control testing” along the way. 😉
Dense. Loud. Sticky. Resinous.
🌿 The Hidden Half: A Tribute to the Roots
In every grow, there’s a part we don’t always see — a part that lives underground, quietly holding everything together. The roots. And this time, I wanted to honor them too.
When we unpotted the plants after harvest, we were met with massive, dense root systems, completely filling the Autopot trays. These roots were vibrant, white and healthy, looking like noodles in a thick herbal soup — a true sign of vitality. The Autopots system, combined with the Aptus Holland Clean Program and Plagron Green Sensation, made sure they had the perfect environment to expand, absorb, and thrive. The PRO-MIX soil was the perfect foundation — light, fluffy, with excellent aeration. It all worked in harmony.
After unpotting, I carefully washed every root system, removing all soil to prepare them for the next chapter of their story. Now, they’re hanging and drying — and will be left to cure for at least one month, possibly more, in a dry, dark, and well-ventilated space.
But why keep the roots?
Because cannabis roots hold ancient value — both medicinal and ritualistic. Though they don’t contain cannabinoids like THC or CBD, they are rich in alkaloids, triterpenoids, sterols, and other therapeutic compounds that can be anti-inflammatory, analgesic, antifungal, and calming.
Medicinal Benefits of Cannabis Roots:
• Friedelin – known for liver protection and anti-inflammatory effects
• Pentacyclic triterpenoids – believed to support immune and anti-tumor functions
• Alkaloids – some studies suggest pain-relief and muscle-soothing properties
• High levels of fiber and tannins – excellent for digestive and skin applications
🍵 Root Medicine — Ways to Use Dried Roots:
Once fully dried (they should snap like twigs, not bend), they can be gently crushed, powdered, or infused:
🌿 Cannabis Root Tea
Soothing & Detoxifying
• 1 tablespoon of dried, ground roots
• 3 cups of filtered water
• Simmer gently (do not boil) for 20–30 minutes
• Add a bit of ginger or lemon for taste
• Sip warm, especially good for menstrual discomfort, inflammation, and general relaxation
🍲 Healing Root Soup Base
Brothy & Nourishing
• Add a handful of dried roots into a veggie broth or bone broth
• Simmer for 2+ hours
• Strain before serving
• This adds a subtle earthy tone and allows the healing properties to infuse your meal
Topical Root Cream or Balm
Great for sore muscles or irritated skin
• Infuse roots in olive oil or coconut oil (low heat, 2–3 hours)
• Strain and mix with beeswax to form a balm
• Add essential oils like lavender or eucalyptus
• Apply to temples, joints, or sore areas
🛁 Root Soak Bath
Perfect for grounding and full-body relief
• Bundle dried roots in muslin or cheesecloth
• Steep in hot bathwater for 15 minutes before entering
• Let the soak draw out toxins and ease tension
⸻
The roots are more than just the anchor of the plant. They are its memory, its foundation, its quiet miracle. By using them, we honor the entire lifecycle — nothing is wasted, and everything has a purpose.
This part of the process is new for many growers, and I truly encourage anyone reading this to try saving and reusing the roots. Dry them, process them gently, and let them offer you one final gift.
Much love to Aptus Holland, Plagron, Autopots, and PRO-MIX — this wouldn’t have been possible without their harmony working underground while the beauty bloomed above.
🌱 The Gift That Keeps Giving: Reusing the Soil
As we say goodbye to one incredible season, we begin quietly preparing for the next. But not everything gets thrown away. In this garden, nothing is wasted. Just like the roots, the soil gets another life.
After each harvest, I carefully remove the remaining roots and break up the soil. I inspect it, rejuvenate it with compost and beneficial microbes when needed, and most importantly, I repurpose it — giving it a second life in my outdoor veggie garden.
Why do I do it?
Because this soil has already done something extraordinary. It has supported life, held moisture, breathed air, balanced nutrients, and fed plants that became medicine. It’s not just dirt — it’s a living ecosystem. And to throw it away would be to ignore its potential.
In my veggie garden, this recycled soil now nurtures cucumbers, tomatoes, courgettes, and so many other little miracles waiting to unfold. It’s a beautiful way of continuing the cycle, taking all the energy and intention that was once used to grow cannabis and transferring it into growing food. 🌞🍅🥒
🌾 The Benefits of Reusing Soil:
• Sustainability — less waste, less environmental impact
• Cost-effective — no need to constantly buy fresh medium
• Soil memory — rich in organic material, microbial life, and structure
• Nutrient potential — amended soil still holds value for many plants
• A deeper connection — a way to honor the entire cycle of growth
When we reuse our soil, we’re not just being resourceful — we’re believing in tomorrow. We’re trusting that what we’ve built can be rebuilt. That what has been used can become useful again. That from what seems like an ending, something new can always emerge.
And maybe that’s the most powerful message of all in this journey:
Planting is believing in tomorrow. 🌍🌱
Every seed in the ground is a little act of faith.
So as this season comes to a close, the first tomatoes have been planted. The cucumbers are reaching for the sun. The courgettes are settling in. And the same soil that once gave us dense, resinous flowers is now feeding the vegetables that will grace the table.
From harvest to hope — the cycle continues. And it’s beautiful.
🎉 The Final Touches
Fun fact:
• Trimmed on May 25
• Photo shoot on May 26
• This report: May 27
• Dry Bud Exclusive Photo Set: Coming soon
Stay tuned — the next upload will be something special, just in time before the Eternity Grow Cup closes on May 31st.
⸻
💚 Thank You
To Zamnesia — your genetics were nothing short of extraordinary.
To GrowDiaries, for hosting such a powerful space for community.
To everyone following this journey, your support, love, and kind words fuel this project and keep the spirit alive.
Let’s keep pushing boundaries, together.
With roots deep in the earth and eyes on the stars — the next chapter begins soon.
Much Growers love always,
🌱 Dog Doctor Official 🌱
Genetics - Runtz https://www.zamnesia.com/6000-zamnesia-seeds-runtz-feminized.html
Nutrients - Plagron https://plagron.com/en/hobby
- Aptus Holland https://aptus-holland.com/
Controls - Trol Master https://www.trolmaster.eu/
LED - https://www.futureofgrow.com/en
LED - https://www.thinkgrowled.com
Soil - https://www.promixgardening.com/en
Germination - Cannakan https://cannakan.com/?srsltid=AfmBOopXr-inLXajXu3QFgKXCXXos4F1oEvScjMKIB5MR5dk8-GJ-F49
DOGDOCTOR 15% off
Smoking Papers - https://ziggioriginal.com/
Terpene saver - https://grovebags.com/
As always thank you all for stopping by, for the love and for it all , this journey of mine wold just not be the same without you guys, the love and support is very much appreciloved and i fell honored with you all in my life
With true love comes happiness Always believe in your self and always do things expecting nothing and with an open heart , be a giver and the universe will give back to you in ways you could not even imagine so
As always, this is shared for educational purposes, aiming to spread understanding and appreciation for this plant. The journey with nature is one of discovery, creativity, and respect. Let’s celebrate it responsibly and continue to learn and grow together!
Growers Love To you All 💚
#EternityGrowCup #RuntzHunt #GrowersLove #CannabisCommunity #AptusHolland #ProMixSoil #TrolMaster #Zamnesia #Plagron #ZiggiPapers #Grovebags

Likes
9
Share


@Headies
Follow
So Friday will be day 70. I messed up a lot, did lst and used big pots so I'm thinking these might go 3-5 more weeks. They smelled so amazing a few times today though. First the purple punch, then the sour diesel, then the girl scout cookies, each gave off aromas one after the other a few times today. The purple punch smalls so sweet and delicious.

Likes
22
Share


@Coopmc
Follow
One starting week 3 the other is starting week 2 of Flower both looking great!!
I love these seeds seams only thing not consistent is tall or short and I need to Test to confirm CBD to THC ratio!
Likes
51
Share


Likes
38
Share


@Homegrown93
Follow
I tried a new germination method this time. I wasn’t happy with the peat pellets I was using. They couldn’t handle the moisture and would mess with my balls. So this time I used small coco pots with coco substrate and dynomyco mixed in. Covered and labeled each one with a ziplock baggy and boom, 3 days later all of them were up and moving. Solid 4/4. Don’t mind the AvT finishing up in the middle.


Processing
Likes
21
Share


@LittleBigTrees
Follow
Put a selection of my own seeds s1's apart from red/purps red Russina Cross straight into soil and mist sprayed them with ph 6.5 water it took them 3-4 days to pop up but all popped up with 12 hrs of each other 🍾.
Processing
Likes
4
Share


@Skillgrower
Follow
Semana 6 quinto dia, as mais pequenas um pouco atrasasdas em relação mas nada de grave simplemente atrasou devido ao stress!
Boa semana no geral cheiro forte, muitos tricomas, as mais pequenas estao super frosty!
Ultima semana a levar big bud no inicio da proxima vou intoduzir o over drive na maior para dar um ultimo pump antes do flush!
Ancioso que chegue a hora para sentir os fumos destas meninas 🤤🤪

Likes
23
Share

@GERGrowDesigns
Follow
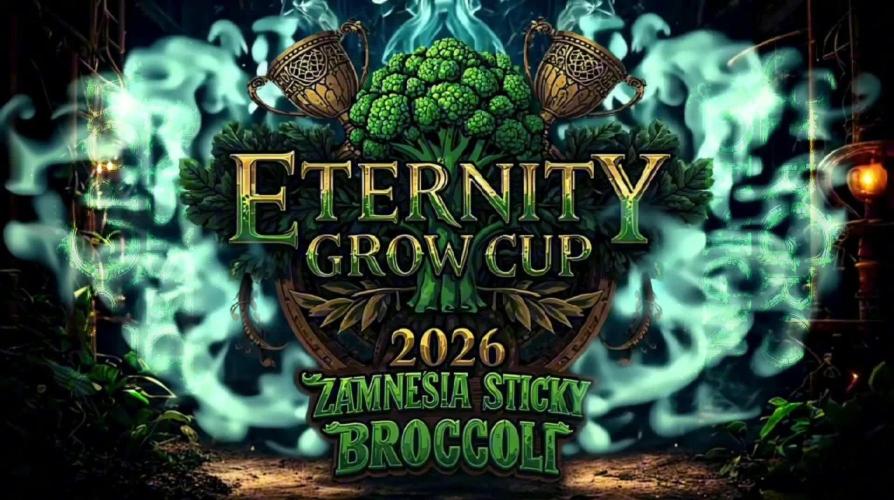
🥦 Vegetative Week 3 Structural Expansion & Root Transition
Eternity Grow Cup 2026 Sticky Broccoli Feminized
Stage: Vegetative Phase Week 3
Day: Day 21
🌡️ Environmental Stability
-Temperature: ~26°C stable
-Humidity: balanced for vegetative vigor
-Light Schedule: 18/6
-Light Output: controlled to maintain steady growth
-Airflow: consistent, supporting stem strength and recovery
The environment remained stable this week, allowing the plants to fully focus on structural expansion.
🍵 Feeding & Root Support
- Base Soil: Narcos Organic Mix
- Hy-Pro Spraymix
- Hy-Pro Terra Rootstimulator
The foliar application was used to support micronutrient balance and strengthen overall plant vitality.
Rootstimulator continued to promote root mass expansion, especially important before the final transplant.
🌱 Strain Specific Observation
-Strong stress tolerance
-Compact but vigorous branching
-Excellent structural integrity
The strain handles topping and defoliation confidently, which is promising for the upcoming flowering phase.
⭐Final Environment Upgrade
In addition to the transplant into the final 30L container, the plants were also moved into their final flowering tent at the end of Week 3 for:
-Maximum vertical and horizontal space for expansion
-Optimized airflow and environmental control
-Stable conditions for the upcoming pre flower and stretch phase
Vegetative Week 3 marked a significant structural milestone.
With topping, major defoliation, foliar support, and the final transplant into 30L container completed, the foundation for a powerful flowering phase is now firmly established.
Thanks for following the journey , feedback and discussion are always welcome.
See you in Veg Week 4 🌿✨


Likes
5
Share


@eldruida_lamota
Follow
Que pasa familia, vamos con la octava y floración semana de floración de estas Papaya Zoap F1 de Sweetseeds.
Vamos al lío, me quede con 3 por espacio, siempre pongo alguna semilla de más por si no abriese alguna por no perder ese hueco del indoor.
También se trasplantaron a su maceta definitiva, en este caso de 7 litros.
Y también superaron el shock por el trasplante se recuperaron 100%.
El ph se controla en 6.2 , la temperatura la tenemos entre 20/22 grados y la humedad ronda el 50%.
El fotoperiodo esta a 12/12 para floración. Las jodidas estiraron bastante, y es algo que no me gusta de todas las F1, que cultive hasta ahora.
El olor que desprende es muy peculiar es muy dulce y empalagoso, a mi parecer, no pinta nada mal, las flores están muy prietas y la tricomada es bestial.
Hasta aquí todo, Buenos humos 💨💨💨

Likes
13
Share


@TPBzh
Follow
This week been quite busy. I had to be very careful to my bending clips, because I had left them too long on some branches and they were very hard to take off without breaking everything. It was very stressy for everyone in this story...but i manager to limit the damages and took off all of them. The final result is not bad, i think they are having a good shape, even if it is still quite a job to maintain all those branches
They are very strong, and making nice big leaves.
I had to defoliate them, but i don't want to do it too much, not so easy to judge.
They are now flowering and look healthy, will increase a bit their cocktail this next week.
I've started to give them 4 hours of night time this week, will see if that got an effect.
Feel free to let me know what u think about it.
Likes
Comments
Share


@Andrew_sy
Follow
I tooked some leaves I want a bigger bud because ther are not that big and i think its almost done so im not going to feed them any more and i will start flushing


Likes
9
Share


@EhCndGrower
Follow
Day 3 so after mites and a mishap with the wrong detergent. We are back with my next try at growing Sugar Breath, which has to smell better then new puppy breath. As of Saturday Fozzy Bear (we wanted it Fozzie but official paper work says otherwise) joined the family and his new big brother Buddy. He has already grown a few inches since we got him but god is he ever cute, and god bless Buddy for taking his playful shit since

Processing
Likes
3
Share


@Ogbangbang2981
Follow
this week was a lil challenging, had to get out of LST due to the fact that I broke a branch and that just tripped me off and I took off all my ties , apart from that i started giving her bloom products because I noticed a few hairs. I started applying tiresias mist to one of my branches so I can get pollen sacks to produce my own fem seeds, as I plan on crossing my fortune cookies autoflower with my ak48 autoflower and creating a new strain called "DRAKO" AUTOFLOWER well till next update . O.G. Bang Bang !! out.....

Likes
29
Share


@Libanese
Follow
The last week for all, i can harverst the pineapple for last but i don’t have space to manage the others cutted plants. I will put all togheter in the grow room to dry, i will stopped for the summer.
I posted last photos, Saturday I’m going to harverst.
I can wait one more week beacouse the tricomes are not at the perfect stage but i satisfieted, i need a break 😅.

Processing
Likes
92
Share


@Penguin
Follow
Day 64. Another week on the calendar! Time is flying but also feels like an eternity. Still can't tell if there is any signs of light stress from swapping to the QB this late in the grow. I do think the bag seed in veg sharing the tent is possibly showing signs of trouble (https://imgur.com/a/9Sn0gEZ) and would love if someone reading this could take a look and let me know. Other than that, nothing new today, won't water again until tomorrow maybe the day after. I've noticed the environment in my tent has become very consistent since swapping out the blurple. Not sure if it's connected but the RH has dropped to a steady 44% ish and the temp never climbs over 25. Loving it so far!
Day 64 update, my loupe and PPM meter arrived. Tested the run off and found it was over 2200 PPM. Flushed her with around 5L of pH'd water, got the run off to 1000. Leaving it there for now as it seems to be a recommended amount for late flower. Will probably only give her plain water for the rest of her time, maybe one more light feeding, then continue to flush it down in the next couple of weeks. Took some test shots with the loupe but sadly I don't think the magnification is strong enough to clearly identify the stages of individual trichomes. Maybe I can play around with it when I take her out of the tent again but that won't be for some time. Let's see how it goes!
Day 65. It's almost been 24 hours since the panic flush. She seems to be doing fine other than showing stronger signs of yellowing in the fan leaves. Not sure if its something to worry about or part of the end of life fade? Tried to get a few different trich shots from various flowers but again, the loupe is probably not strong enough to accurately tell. Wondering whether I should try to treat the yellowing or leave it.
Day 66. The yellowing continues but at this point there is probably not much to do about it. Gave her a small feeding PPM'd to 300 to see if it helps get her over the finishing line. Tried checking trichomes and can't really tell if some are cloudy or all still clear. Definitely no amber yet though. Hoping for a couple more weeks at most before the chop! She puts off different levels of smell day to day as well. Was a bit more pungent today, very nice smelling.
Day 67. She hasn't lost as much leaf as I was expecting considering the last few days progress. Trichomes still look a while away from turning and mostly looking clear. Still has lots of white pistils too. Humidity has been a bit higher than I'd like since watering but I try to keep good air movement and a negative pressure in the tent which will hopefully reduce risk of bud rot. Smelling good but wish she'd have covered herself with some more trichomes!
Day 68. All the yellowing/dying leaves have given up and fell off. Not worried as I think I have spotted the first signs of amber trichomes on the main cola and one other. Would love someone to take a look and let me know!
Day 69 (nice). Going along fine. The fading seems to have slowed a bit and haven't noticed it spreading to the remaining sugar leaves. Definitely going to give her another 7 days and assess then if she needs to be chopped. Thank you to everyone who replied to my question regarding that. As someone said, if I had already started flushing, the timing was perfect, and luckily I had already been flushing her, so I will continue to do so. I gave her a heavy watering today with some runoff and I might do once more before she finishes? She isn't the frostiest bitch out there but she's mine and she taught me a lot. Hopefully some of what I've learned with her will transition well to photoperiods and the bag seed that is vegging next to her. I'll flip her into flower once this girl is done.
Day 70. All her leaves are starting to fade now. There are still a lot of white pistils that concerns me about the timing. I feel like the plant will fade and yellow before it fully matures. The trichomes still look the same to me but I need to get better close ups really. She doesn't seem too frosty in recent days, not sure if it's in my head or not though. Still, hoping for a chop at the weekend if she finishes up, otherwise I might be forced to due to how fast she is fading. I think I also see some purpling on the leaves? Is that from the temps or from the nutrients being used up?
Likes
1
Share


@Ultraviolet_
Follow
Remember that, however you are played, or by whom, your soul is in your keeping alone. Even though those who presume to play you be kings or men of power, when you stand before God, you cannot say, 'But I was told by others to do thus,' or that virtue was not convenient at the time. This will not suffice. Remember that.
Day:18
84°F and 65% RH (VPD) for the vegetative stage. Approximately 1.15kPa(assuming leaf temperature is about 2°F cooler than the air), which falls right into the ideal vegetative sweet spot (0.8kPa to 1.2kPa). At 1.15kPa, plants can draw water and nutrients efficiently without risking stress or wilting. It keeps the leaf pores (stomata) open, allowing for ideal carbon dioxide intake and maximizing vegetative growth. VPD is determined by the leaf's temperature, not just the ambient air. Because leaves usually run 1° to 3°F cooler than room air under bright grow lights, my actual VPD will be slightly lower, closer to the 1.0kPa mark. As she transitions from vegetative growth to flowering, one can gradually lower the humidity (to around 45–60%) and drop temperatures slightly to prevent disease from settling inside dense buds when they appear.
Night:6
At 70°F and 60% relative humidity, Vapor Pressure Deficit (VPD) is 0.86 kPa. This is right on the cusp of whats optimal for the vegetative stage. During the nighttime, plants generally close their stomata and undergo cellular respiration rather than photosynthesis. Transpiration slows to a near stop, making VPD less critical at night than during the day. However, maintaining a nighttime VPD between 0.8 and 1.0 kPa is highly beneficial in that it ensures the air is dry enough to prevent powdery mildew or bud rot, but moist enough to keep the plant from undergoing unnecessary stress. This range keeps the environment comfortable for cellular processes and prevents large atmospheric swings. Keeping it all flowing.
(Not pushing them yet, these are photoperiods)
The optimal soil (root zone) temperature for cellular root respiration and nutrient uptake in cannabis is between 68F & 72F This narrow range balances biological energy production (cellular respiration) with the dissolved oxygen levels in the soil, maximizing plant growth and health. Warmer soils hold significantly less dissolved oxygen. When soil temperature exceeds 74F oxygen depletion occurs, inhibiting cellular respiration almost entirely, At 68-72F root cells generate optimal adenosine triphosphate (ATP) via respiration to power root-tip elongation and the active transport of water and nutrients.
Too Hot (Above 78F) Root respiration increases, demanding more oxygen, while the water's oxygen-carrying capacity drops. This creates a prime environment for anaerobic pathogens and Pythium (root rot).
Too Cold (Below 60F) Root metabolism and cellular respiration slow to a crawl. This severely impairs nutrient and water absorption, leading to yellowing, wilting, and phosphorus deficiencies.
A lot depends on whether it's automatic or photoperiod; with photoperiod, there is not as much of a need to push "hard" as the real countdown only begins once the flower is initiated. Automatics, on the other hand, the chronological "clock" begins ticking the moment the seed germinates. It is of critical importance that the seedling growth gets off to the races, understanding that early growth is like compound interest, which will pay off come harvest. This reality is why getting autoflowers "off to the races" early on yields such exponential benefits. The "compound interest" is directly related to the surface area of the leaves. Larger, faster-growing seedlings process more light and build bigger root networks early on, which translates into an explosion of vertical and lateral growth during their short vegetative window.
The margins for error are so thin with autoflowers; this early-stage momentum depends on several critical practices. Seedlings exposed to increased atmospheric CO2 levels early in life will develop at an increased rate. To effectively "extend" or optimize the capacity of Photosystem II (PSII) for increased photosynthetic efficiency. In standard oxygenic photosynthesis, Photosystem II (PSII) is naturally limited to the red-light spectrum, peaking at 680nm. Extending its light-harvesting capacity past 700nm into the far-red region requires bypassing the natural limits of standard chlorophyll a. Adding 730 nm (far-red) LEDs alongside standard red/blue lights has been shown to increase canopy photosynthesis by 20–30% in several crops by acting synergistically with shorter wavelengths. However, the limitation is that excessive, pure IR/Far-red light (without accompanying red light) can trigger the "shade avoidance response," causing plants to grow tall, weak, and spindly rather than robust. Utilizing infrared light (specifically the 700-750 nm far-red range) is a viable method to boost photosynthetic efficiency. It acts as a bridge to allow PSII to utilize a broader spectrum of light, breaking the traditional 700 nm barrier. UVR8-mediated signaling (often in conjunction with CRY proteins) triggers protective mechanisms that maintain the stability of the photosynthetic apparatus (including LHCII and reaction center proteins), thus ensuring that the efficiency of Photosystem II remains higher in UV-B-exposed plants compared to plants lacking this receptor. ΦPSII indictates the rate of electron transfer from water to plastoquinone, which drives the production of ATP and NADPH. There is a close link between ΦPSII and the true rate of CO2 fixation (Φ*co2).
ETR stands for Electron Transport Rate. It measures the speed at which electrons are moved through the thylakoid membranes in a plant's chloroplasts during the light-dependent reactions of photosynthesis. Infrared light (particularly Near-Infrared or NIR) improves cellular energy by interacting directly with the electron transport chain (ETC) in mitochondria. This process boosts adenosine triphosphate production, which acts as a metabolic coefficient multiplier by accelerating enzyme activity dramatically.
Extend then multiply.
Far-Red photons interact with plant photoreceptors to accelerate the plant’s biological "clock" or trigger a shade-avoidance response. Autoflowers don't use the plant's biological clock, although the IR will initiate a shade avoidance and make them stretchy. You can just add equal measures of 660nm-680nm to negate the shade avoidance effect. Replacing nights' "darkness" with a combination of IR+ and 660nm. Because autoflowers don't require a dark period to flower, many growers just blast them with light. 18/6 24/0. However, this ignores the plant's metabolic rhythms, where daytime photosynthesis (light reactions) must be perfectly balanced with nighttime carbon fixation and assimilation (Calvin cycle) to avoid bottlenecking plant development. Cellular respiration is a 24/7 process, but it can only function while the plant has the free oxidative capacity to do so. A 100% photosynthetically active leaf cannot perform cellular respiration. The viral trend of defoliation of every leaf that isn't "getting enough light" is of great detriment overall, putting 100% of the cellular respiratory "workload" and responsibility on the 0/4/6 hours of darkness in sub-optimal conditions for enzymatic activity. Photosynthesis captures nearly 100% of the initial energy as carbon, while cellular respiration is the process that unlocks 90% of that captured energy into usable ATP so the plant can use it. Respiration is considered roughly 30% to 40% efficient. It captures enough of the potential energy in glucose to synthesize around 30 to 38 ATP molecules per glucose molecule. The remaining 60% to 70% of the energy in the sugar is not captured in ATP; instead, it naturally escapes into the environment as heat, which helps regulate plant temperature. In plants, the primary enzymes of the Electron Transport Chain (ETC) and the ATP synthase complexes are typically adapted to function optimally in warmer temperatures (roughly 25°C to 35°C depending on the specific plant strain). As temperatures rise within this physiological range, molecular collisions increase, speeding up respiration and ATP production. The cannabis plant has a branched respiratory pathway. During heat or cold stress, plants activate Alternative Oxidase (AOX). AOX burns sugars to dissipate energy as heat rather than coupling it to ATP production. This pathway actually functions optimally at elevated temperatures to help protect the cell from the damaging build-up of Reactive Oxygen Species (ROS) during heat stress. Enzyme activity generally scales with heat; there is a strict biological limit. If canopy temperatures in a grow room exceed 40°C, the enzymes and their supporting lipid membranes lose stability. Not saying you need to go crazy, just optimize nights the same as we optimize days.
Phosphorus is the driving force behind early seedling development. It acts as the "energy hub" of the plant, directly driving cell division, robust root growth, and the creation of DNA. Without an adequate, easily accessible supply early on, the plant's overall growth potential and final yield can suffer permanently.
E=MC2 looks like a simple multiplication problem; it describes a fundamental physical truth: mass and energy are the same thing. The equation doesn't just calculate a value; it reveals that mass is effectively "congealed" energy. Energy is just numbers. Energy isn't a physical "substance" you can hold or touch. It is essentially an abstract, calculated number that we assign to a system to predict how it will change, interact, or move. A numerical label we attach to matter to track how it behaves. Because the universe runs on laws of symmetry (specifically, that the laws of physics don't change over time), a single global number must be conserved. We call that number "energy".
We don't grow; we facilitate energy conversion.
How well a seedling grows is essentially down to how much knowledge one can acquire to increase the level of conversion to occur. Applying knowledge effectively requires intuition, which comes from hands-on experience. A seasoned stoner learns to read subtle signs—like a slight change in leaf turgor (stiffness), subtle color shifts, or the specific texture of the soil—before a textbook diagnosis can be made. Ultimately, growing is the application of botanical science blended with active observation. Knowledge dictates your potential, but adaptability and attentiveness to the plant's immediate environment determine your results.
1.618 nature mathematically optimizes quantum energy transfer and light absorption efficiency within the photosynthetic machinery, as it naturally dictates energy scaling hierarchies and resonance dynamics. External vibration or electromagnetic wave that perfectly matches a plant's natural frequency directly influences plant growth. Low-frequency sound waves and targeted electromagnetic fields stimulate cellular processes and boost photosynthetic efficiency
Does it produce better yields?
How long is a piece of string? As long as you cut it. But isssss the juice worth the squeeze? The quantum framework of the IVM seems to think so. Good enough for the quantum firmware, good enough for the DNA software. Genetics are not dictated; they are expressed; the rate of that expression is dictated by the environment in which growth occurs.
Quantum Coherence in Photosynthesis occurs When a photon of sunlight strikes a leaf, the energy it carries must travel to a reaction center to be converted into chemical energy. This process operates at nearly 100% efficiency. If the energy moved in a traditional "bunching" or random hopping manner, a large portion of it would be lost as heat. Instead, plants utilize quantum superposition. The energy particle (exciton) doesn't just take one path; it exists in a wave state and explores multiple pathways simultaneously. It essentially "chooses" the most efficient route to the reaction center simultaneously. Research shows that molecular vibrations and the specific network arrangements of chlorophyll molecules (like the naturally evolved Chlorophyll A & B ratios) actively protect against energy overflow, optimizing light capture across different light intensities. Enzymes are the biological catalysts that speed up chemical reactions within a plant's cells, allowing them to grow, metabolize, and repair. Rather than relying solely on the classical kinetic energy of molecules colliding, plants use quantum tunneling. Subatomic particles like electrons and protons (hydrogen ions) can literally "teleport" through energy barriers that they normally wouldn’t have the energy to climb over. This makes vital metabolic reactions happen far faster than classical physics could ever explain.
Chloryphyll b has peak absorption at 460nm (Blue) and at 647nm(Red). If we take the blue peak wavelength 460nm and a UV-B, UVR8 peak absorption wavelength 285nm, Tryptophan-285 (W285) Sensing protein. 460/285=1.618 Φ If we take chlorypyhll b's Red absorption peak 647nm and a UV-A of 400nm, we get 647/400=1.618 Φ. "Structure of light". The cryptochrome photoreceptor (CRY) is a UV-A/blue light receptor that shares this dual sensitivity with several other biological structures and functions, including significant sequence similarity and a common evolutionary ancestor with DNA photolyase enzymes. These are light-activated enzymes that use blue/UV-A light to repair DNA damage caused by UV-B radiation in plants. Synergistic. But Shhh, it's a secret.
Effective quantum efficiency of photosystem II, often denoted as ΦPSII, represents the proportion of light absorbed by Photosystem II (ΦPSII) that is actually used in photosynthetic electron transport. It is a key indicator of how efficiently a plant is using light for photosynthesis, as opposed to losing it as heat or fluorescence. ΦPSII (effective quantum yield of photosystem II) functions primarily as a "multiplier" (a coefficient of efficiency) rather than an additive factor when estimating the overall photosynthetic electron transport rate (ETR). Multipliers are considered far more beneficial than additions because they generate exponential growth, leverage existing resources to their full potential, and create sustainable, self-multiplying capacity, rather than just incremental, linear increases. This fascinating observation is rooted in the intersection of subatomic geometry, fractal scaling, and quantum dynamics. In specific molecular arrangements—such as in conjugated polymer networks or biomolecular architectures—the Golden Ratio (PHI) naturally dictates energy scaling hierarchies and resonance dynamics. Mathematically tied to the fine-structure constant, which defines the strength of the electromagnetic interaction. The Golden Ratio can be mapped geometrically as the Golden Angle (137.5 degrees) in atomic structures, linking the charge of the electron to fundamental quantum constants like Planck's constant.
Electromagnetic.
The Golden Angle (137.5): This angle is derived from the Golden Ratio (1.618). It is the smaller of two angles created when a circle is divided such that the ratio of the arcs equals the Golden Ratio.
