


Likes
3
Share

@Grasshopper96
Follow
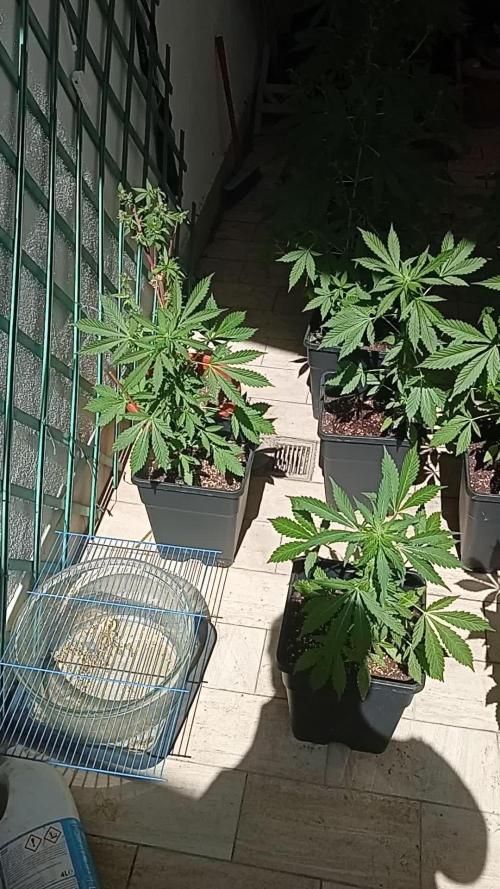
Welcome back here on the coast of central Italy, the b.purple punch continue the strech while at the same time they develop the flowers, they have a very promising smell to scratch the stem........ These RF3s are proving to be valid and so far with a very good quality / price ratio. The week started in the best way, heat and sea breeze during the day and in the evening temperatures around 19°c/20°c which in my opinion give breath to the plants after the heat of the day

Likes
8
Share


@NuttyYeti
Follow
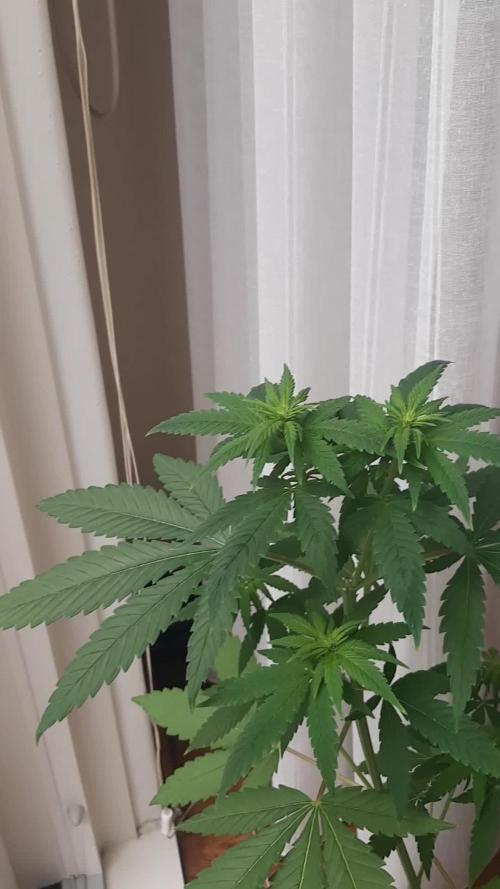
Looking beautiful. The pot is just big enough that I don't have to water too much, for now anyway.

Likes
42
Share


@MrJoint
Follow
🍁Dicas e sugestões? As meninas agradecem!
📸Update de fotos, vídeos e informações diariamente.
DAY 22
Estudado muito para ver se aprendo algo sobre NUTRIÇÃO DAS PLANTAS e consigo fazer um bom schedule. Daqui 3 dias começo alimentá-las com nutrientes minerais. Infelizmente preciso esperar os medidores de pH e TDS/EC chegarem. O pior é que acho que elas estão pedindo comida. Ainda bem que são só 3 dias até os medidores chegarem.
DAY 23
Amanhã os medidores de EC e pH chegam! Minhas meninas finalmente vão ser alimentadas, estão famintas com certeza. Cresceram muito e comeram o “quase nada” que tinha no substrato. A deficiência de Nitrogenio (N) já pode ser vista nas folhas enroladas 90°.
DAY 24
😃 Os medidores de pH e EC finalmente chegaram!! Já podemos começar a alimentação das meninas. Todos muito felizes.
DAY 25
Todas meninas devidamente alimentadas. Muita expectativa para saber se elas gostaram dos nutrientes. Elas estão crescendo bem, mesmo com fome (até 1cm/dia).
DAY 26
😍Minhas meninas estão crescendo maravilhosamente! Hoje reguei só com água, mas amanhã vou dar mais comida de novo. Escolhi dar alimentação 2 vezes na semana.
COP está cada dia mais bonita.
C4 foi removida do growbox e agora está na varanda aproveitando a luz natural.
Agora são 4 plantas, as 2 mais fortes irão para a floração na barraca.
DAY 27
As meninas receberam a segunda alimentação da semana e ficaram muito felizes. Aumentei a rega para 500ml/planta.
DAY 28
✂️ Para aprender e entender um pouco melhor como funciona e como elas se comportam fiz hoje poda de cobertura e defoliation nas plantas C1 e C3.
Na C1 eu deixei 4 fan leafs, na C3 eu deixei 2 fan leafs. Espero que elas gostem do novo penteado.
🎃Obrigado por verificar meu cultivo.

Likes
15
Share


@Uwish
Follow
3rd week of 12/12, all is well.
The flowers have already a lot of trichromes.
I add the Athena KP on the 23rd day of 12/12, in two days.
I made a defoliation, it breathes, it grows...
With the pythium I had growing, it slowed my stretch, with so much growth, it should have been more important.
See you on the 28th day of 12/12
Likes
53
Share


@Schnabeldino
Follow
end of week 7.
-----------------
the last week for the Honey Cream and i give her only Water...maybe 1-2 days and i will chopchop...
The gorillas have to stay for at least another week, if not for 2 weeks, but i gave them only water.
week average
RH: 55,3 %
Temp: 22,9 °
VPD: 1,27 kPa
---------------------------------------------------------------------------------------------------
Controller AC Infinity Pro
- connector for the external light control, RJ-12
- 2 plugs with which I can control dehumidifier and humidifier on automatation.
- 2 fans run 24/7, 1 Oscillating from spider farmer
Light - 12/12 h | 2 x 200 Watt
PPFD - 900-1000 µmol


Likes
1
Share

@Wierie
Follow
I added some more plagron supermix
Took the lower nodes off....
Will start givin plagron pk 13/14 tomorow (3th week of flower)
Sun is coming this week ....lady will be happy 👍🌴


Likes
10
Share

@ThatsmyGrow
Follow
That Master recipe from advanced nutrients is very special, i think you can see how good and strong they get.
In the next week we will start lollipopping and see how the buds start.


Processing
Likes
14
Share


@Bluntblazer66
Follow
Oct 25th
Plant is now sharing the 30 l res with only one other plant Cement Shoes
Both plants are doing very well but they remain stunted
Oct 30th
Moved plants around
Intalled new 1000W iluminar DE (HPS) set at 600W
Now I can use the full grow room
Green Crack should love it

Likes
16
Share


@IncognitoGreenThumb
Follow
Week 19 and it happens to be a rainy week with on and off cloud coverage which was actually beneficial to my plant but the humidity has been up due to the fact I also use a swamp cooler and if it's gonna be this humid for another couple days then I'm worried about mold developing on the buds so i think I'll break out the AC to get rid of some of that moisture in the air and maybe alternate between the two.
The AC hasn't been used once the whole grow cycle so far but living in AZ we get random storms from the monsoon season not to mention tons of dust, high winds, flash flooding which could be used to flush my plant because it needs it now if rain builds up around and gets under the green house, j/k lol. I've been thinking about buying lady bugs to get rid of all the white flies, any experience anybody, would that work?
After writing the above, I could hear the wind picking up outside and remembered that a storm was coming so I ran outside to prepare and it punched it's way through Phoenix with extremely high velocity hurricane type wind, gusting up to whatever it takes to bring large trees down or make a wooden shed door fly off with a wall of dust to the sky and then finally finishing with heavy rain. I was outside the entire storm from beginning to end, well at least until the wind died down and it was just light showers by then. Even with having my greenhouse tied down I had to hold onto it for dear life or it would have taken off like in the wizard of OZ.
Honest to god I was almost pulled off the ground or several times more onto my greenhouse when the tsunami type wind would hit, pounding me and the greenhouse from behind having to pull down while leaning back with all my weight and strength.The whole time I'm screaming for my brother who was inside to come out and hold the greenhouse so I could tie it down better because it was just coming apart trying trying to fly away or be ripped apart as storm hit us I was holding on for Amy's Green Drop's dear life. It was pretty insane and wish I had video of me doing it but just have a video a friend sent of his backyard getting hit so you can imagine that wind hitting my greenhouse.
The after math was bad 😭 the wall of the greenhouse was getting hit so hard by the wind making it press inward towards plant it snapped off in the middle one of the lower branches making the two buds on the end half hanging there from a 90 degree angle from branch so I knew there was no way to support it back in place enough to heal itself so I clipped it off and started drying it. One other next to it got bent up pretty bad so I'm trying to LST it back to place. The storm also killed my swamp cooler somehow, I guess it's because it has a lot of electronic components on top that was soaked from the wind the rain came from the side, I know, you'd think a swamp cooler could get wet.
Now I'm stuck using only my A/C and a humidifier to control moisture and temp and I'm worried it's gonna be pretty hard only using AC in such a small greenhouse as it takes time to find the right ratio of intake and outtake air but can only open greenhouse to mix in so much hot dry air, so starting it was getting down into the high 60's, and I have to figure something out because I can't let it get that cold in there for the last few weeks. I'm almost ready to call it quits If I can't find an equilibrium with AC and humidifier, and if there are anymore storms on the way.
Next time I'm getting a bigger sturdier greenhouse that goes into the ground and has hard clear walls and roof, other than the recent storm and excessive sunlight finding the right shading it's been very beneficial doing the indoor/outdoor combo grow and would recommend it as you can live in any weathered extreme hot/cold climate and still grow outside,

Processing
Likes
20
Share


@PureMedicin
Follow
They are growing really well. Added a humidifier at day 9. I have a seedling in rockwool still it is growing super slow. Root still not sticking out even tho it have been in the cube for 7 days now. Im feeding very light 40% strenght. I see how light green the leafs are and thats what im going for. I will up the strenght abit the following days. I been watering almost everyday. Started the first week with 0.1 liter now upped it to 0.2 liters per plant. I had the HPS light just a bit too close to the plants so i have some very slight curling on a few of the leafs. No problem i just move the light up 5cm. So far im very pleased with the growth rate

Likes
37
Share


@FlavoursUk
Follow
There’s a few things I’d personally change if I was to grow fat Banana again. But this time round she was very resistant to high temperatures and humidity during Flower. She holds on to nitrogen so I’d definitely feed her less on the nutrients as she is a light feeder.
Likes
5
Share

@spacetimeman
Follow
To many leaves, despite the several defoliation attempts.
Some mildew was detected but the anti muldew spray was used. Flowering is going on

Processing
Likes
59
Share


@Island
Follow
Week 4 has arrived
She its more thirst with each passing day.
OG Kush hv 8 weeks of flowering probably.
Waiting for next days, brazilian summer will be great.
Cheers.

Likes
4
Share


@MaestroBud
Follow
The journey of a legend begins: Acapulco Gold.
Carefully selected seeds, allowed to hydrate in water for 12 hours, then transferred between two sheets of absorbent paper in a propagator heated to 25°C.
After 48 hours, the first roots break the shell: a sign that life has won once again.
At the time of the transplant, a light and draining Light Mix bed awaits you, enriched with Cellmax Rootbooster, Extreme Garden and Dynamyco: a welcome designed to immediately stimulate a strong, vital and mycorized radical structure.
A simple but fundamental start: here the foundations are laid for healthy and productive plants
Likes
2
Share


@Autower
Follow
Bubba cheese #2 very different smell to the first one. The first one has that cheesy blues smell to it where as this one has a cheesy but fruit at the same time

Likes
2
Share


@Trinidad
Follow
21th.05.2025. Day 21
Moved the two survivors into 2x2. The roots are getting big. I need to put them in final bucket soon.