


Likes
Comments
Share


@ROY4L_GU4RD
Follow
Week 7 is ending today. I decreased my Macro nutrient by half. This week will probably be my last week using it. I took the Armor Si out of the regimen completely. I started using terpenz at 5ml per gallon. No issues still. Keeping my fingers crossed for everything to continue on cruise control. The rainbow cake and London mint cake is super frosty. They all have a pretty strong smell. I have clones and will continue to run the strain I like the best.


Likes
2
Share

@hassehujasse
Follow
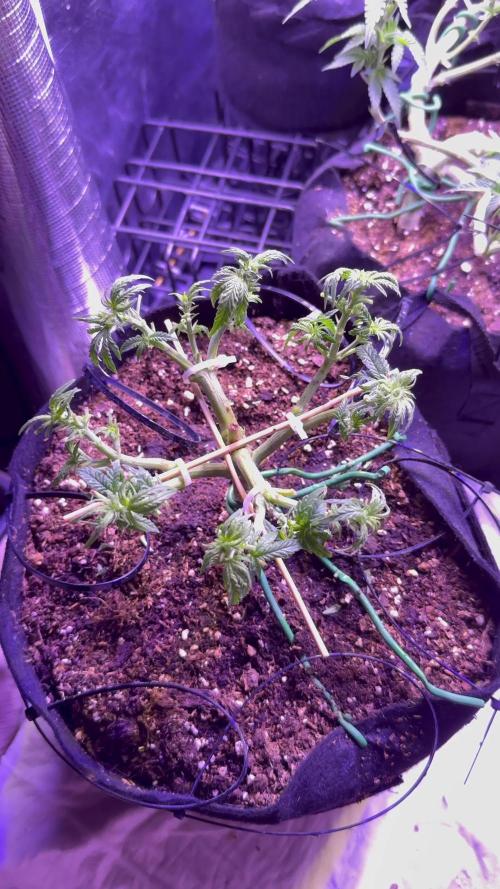
Have you ever been exceptional? 24/7/52/365/48??!!
With every new plant in my box bringing something new in my techniques
Likes
9
Share


@Belivitez
Follow
Today i chopped all plants, top of the plants are already dried i try out buds 👌 nice taste, sativa high 😎
12.7. Buds are ready and 90% dry. I pack them into jar to get yummy taste and high 🤤

Likes
14
Share


@MaxMo8
Follow
I transferred it to a half-gallon pot and I mixed the organic fertilizer with the soil.

Likes
25
Share


@Herbz_Unkraut
Follow
i accidently bought some unbuffered coco and mixed it with my ussual earth, had major calmag problems in mid-flower but i´m still pleased with the results...also had a little trouble with mold at the end due to bad weather and high humidity in the final weeks of the grow, had to remove a few buds and harvest early @ day 55 of flower....but there's still alot of great looking buds left for me to enjoy and all look mostly done...
Just harvested and hung them upside down, currently drying them at constant 19.5-20.5°C and 50-60% RH..will update as soon as they are dry

Likes
34
Share


@Gassedupfromthemaskup
Follow
So at the end of last week I put two of these girls into the dark for two days before I chopped. This week In the tent it wreaks of sweet fruity dankness. Two of these are maybe a week behind and have dark purple leaves and one of them are a few weeks behind with purple calyxes. On the two plants pulled from the tent, both look like I will have next to 0% larf almost all buds are bigger than the golf ball size buds that fastbuds boasts. Idk what to expect on the yield but I'd be happy to have 2 oz a plant if the buds are as dank as they look and smell.
Happy growing 👊

Likes
6
Share


@GanjaDjarin
Follow
Things are now advancing smoothly, having effectively weathered the majority of the challenges encountered. It's a truly uplifting experience to watch the process unfold, seeing how the plants are developing and thriving. Each day brings new progress, and I am continually enthusiastic about maximizing the sunlight that each plant receives as they continue on their growth journey.
In addition to the hands-on cultivation aspect, I'm also diligently working on expanding my clones collection. The plan for the next week or so is to cultivate and ready these clones for transplantation. It's an exciting aspect of the process that helps me stay committed to my ultimate goal.
That goal, of course, is to maximize my supply chain and provide high-quality cannabis. This involves more than just horticultural efforts. I am also persistently studying and researching the relevant laws to familiarize myself with the legal process. Navigating the licensing phase is a vital part of this journey, and I am committed to understanding and adhering to all legal requirements to ensure success in this venture.
Diary Entry for Growth Project: Day 24 - Today, a slower-growing plant was effectively moved from its soil environment into an idle hydroponic system. With this transition, the count of prospering plants stands at eight, with a couple more still being monitored due to uncertain growth. Significant discoveries include the paramount importance of light distance to the plants, which was underestimated initially. Further, it has been found that genetically modified seeds hold no superiority over the prevalent autoflower seed market. Additionally, the positioning of the plant and the volume of medium placed between the plants and the water source have been recognized as key determinants in accelerating early stage growth.
Welcome to the Day 25 update of our grow journal. I must apologize for the slight confusion - although the video says it’s day 23, today indeed marks the 25th day of our journey. I’m thrilled to announce that we’ve had a successful transplant. The plants are now settling nicely into their new environments. The question now at hand is, should we introduce stress training?
As we move into days 26 and 27, I have been pondering on this. High-stress training can sometimes stimulate growth, but in our current situation, it might not be the most prudent course of action. This time around, we are expecting all our plants in the grow tent to blossom concurrently.
In light of this, I’m leaning towards letting nature take its course rather than intervening with stress training. By doing so, we will allow our plants to focus their energy solely on flowering. The goal here is to encourage the production of dense and frosty buds, the hallmark of a successful growth cycle.
Rest assured, we’ll continue to provide the plants with the care and nutrients they need. Remember, every cycle is a learning experience, and we’re on this botanical journey together. Keep checking back for more updates on our garden’s progress.


Likes
150
Share


@RussianGrower
Follow
I welcome you from Russia my friends from different parts of the world. The end of 16 weeks has come. Plants already fully show their ripeness, and buds SAG from their weight. Soon I will be harvesting, as soon as I get the final dry product I will make the last update of this diary.


Likes
20
Share


@ukterpdoc
Follow
Been going so well plants looking amazing they're going to find bigger pots by next weeks update and be in the veg room under there new lights and out of the tent lots more space and lots more light


Likes
16
Share


@Mr_Motalovah
Follow
Hello Growers and Tokers! 👋 👩🌾 🧑🌾.🔥💨
They're looking a bit better than last week.
Really loving being in the tent, there's no comparisson to the conditions they had in the balcony.
Roots are starting to show through the cups so next week i'll be transplanting them into their final 8L fabric pots and move them outside for good.
I'm doubtful on whether transplanting next week or not because of the climate, but as they're autos.. I can't wait any longer. Whatever will be shall be.
One of them got a bit of a mutation.. the one I was rooting for the most! 😪
You can notice in the pictures.. there's a node with three leaves. It seems as if she tried to top herself. Quite curious.
The girl that's been in the tent since day one has great color and leaves but is much smaller in height than the others.
Stay tuned to see how these ladies progress.
Have a good day!
One love!

Likes
9
Share


@Kushizlez
Follow
Harvest:
Everything dried up to 347 grams + 96 grams of super high quality trim. Overall I am not too pleased with the smoke of the product. Although the bud size, bag appeal, smell and taste are pretty much all there, the shitty burn is a deal breaker for me and the majority of this weed is quite frankly useless. Another downside is while smoking I’ve found 4 seeds in an ounce from almost every strain. Light leaks? At least I learned a ton, including how to get super good burn for my next crop. I’m hoping that curing for a month or so will improve the burn but I wouldn’t really count on it. I have seen weed dried for 4 days with no cure and no flush smoke clean and not go out once. I have been told that the key to white ashes/clean burn is proper mineral content in the soil and there is tons of scientific studies on cigar ash going back 100 years. Plants grown in a medium with high levels of decomposing organic matter, phosphorus, magnesium, chlorine and heavy metal ratio tend to produce black/grey ash. Whereas plants grown in a medium with a higher ratio of trace minerals like calcium carbonate and potassium in the form of wood ash, rock dusts, oyster shell flour and lower levels of decomposing organic matter will produce a dense, uniform white ash that rarely goes out. But this is still all theory until I test it to confirm for myself a few times. My last few outdoor harvests did not improve with curing at all so I’m hoping this will be the missing link. Plain peat moss and coco clearly lack essential minerals that help burn. If said theory is correct I should find a synthetic nutrient line with more trace minerals. Makes me wonder if growing if rockwool/basalt rock could improve burn in a hydro setup.
I think I did a fairly decent job for my first grow. I went wrong in a million different places but I still stuck it out and got some decent herb. Things went wrong early when I got black spot mold, nitrogen/magnesium deficiencies and powdery mildew. I corrected most of it but things didn’t get really bad until mid veg when I intentionally skipped a few feedings and defoliated quite heavily stunting the plants. I also didn’t even top or start LST until the 6-9th node which was really stupid and hurt my yield. My temperatures were all over the place from the learning curve. I was severely overwatering without realizing it. 100% peat moss is a shitty medium. I also fed way too late in flower (not what caused shitty burn). I also used synthetic nutrients in soil.
Zkittlez bonsai
Yield: 1.9g
Smell: 7/10 - sweet, candy, berry, gassy, piney hints
Bag appeal: 7/10 - slightly leafy/stemy
Crystal coverage: 7.5/10 - very impressed
Ash: 6/10 - flaky, mostly white/grey
Fire holding: 4/10 - stays lit for 10-30 seconds
Smoke: 6/10 - taste is decent, needs curing
High: 6/10 - indica dom
Comment: looks nice, smells nice, tastes nice, burns like shit.
43.5/70 = 62% 👎🗑️
Black Garlic #1
Yield: 53.6
Smell: 8/10 - gassy, piney, earthy, skunky
Bag appeal: 7/10 - slightly leafy/stemy
Crystal coverage: 7.5/10 - very impressed
Ash: 8/10 - thick, uniform white ash
Fire holding: 7.510 - stays lit for 45+ sec
Smoke: 7.5/10 - taste is good until the end
High: 7/10 - sativa dom
Comment: looks nice, smells nice, tastes nice, burns great but quite leafy.
52.5/70 = 75% 👍🔥
Black Garlic #2
Yield: 42.3
Smell: 7/10 - woody, earthy, tea
Bag appeal: 6.5/10 - slightly leafy/stemy
Crystal coverage: 7/10 - impressed
Ash: 6/10 - flaky, mostly white/grey
Fire holding: 4/10 - stays lit for 10-30 seconds
Smoke: 6/10 - taste is decent, needs curing
High: 8/10 - sativa dom
Comment: looks nice, smells nice, tastes nice, burns like shit.
44.5/70 = 63% 👎🗑️
Zkittlez
Yield: 39.4
Smell: 7/10 - sweet, candy, berry, gassy, piney hints
Bag appeal: 6.5/10 - slightly leafy/stemy
Crystal coverage: 7.5/10 - very impressed
Ash: 8/10 - thick, uniform white ashes
Fire holding: 8/10 - stays lit for seconds
Smoke: 7.5/10 - taste is decent, needs curing
High: 7/10 - indica dom
Comment: looks nice, smells nice, tastes nice, burns great but smalls didn’t fill out.
51.5/70 = 73% 👍🔥
Blackberry Breath #1
Yield: 57.5
Smell: 9/10 - sweet, grape, berry, gassy, earthy, hashy
Bag appeal: 8.5/10 - dense, sparkly buds
Crystal coverage: 9/10 - super impressed
Ash: 5/10 - flaky, mostly grey/blackish
Fire holding: 4/10 - stays lit for 10-30 seconds
Smoke: 5/10 - tastes like chalky shit
High: 6/10 - indica dom
Comment: looks amazing, smells amazing, tastes like shit, burns like shit.
46.5/70 = 66% 👎🗑️
Blackberry Breath #2
Yield: 76.1g
Smell: 6/10 - musky, tea, berry, herbal
Bag appeal: 8/10 - slightly leafy/stemy
Crystal coverage: 7.5/10 - very impressed
Ash: 5/10 - flaky, mostly grey/black
Fire holding: 4/10 - stays lit for 10-30 seconds
Smoke: 5/10 - taste is shit
High: 6/10 - indica dom
Comment: looks nice, smells shitty, tastes shitty, burns like shit.
41.5/70 = 59% 👎🗑️
Slurricane #4
Yield: 34.5g
Smell: 8.5/10 - gassy, deep piney, fuel, earthy,
Bag appeal: 8.510 - slightly leafy/stemy
Crystal coverage: 7.510 - impressed
Ash: 6/10 - flaky, mostly white/grey
Fire holding: 4/10 - stays lit for 10-30 seconds
Smoke: 6/10 - taste is decent
High: 6/10 - indica dom
Comment: looks amazing, smells amazing, tastes nice, burns like shit.
46.5/70 = 66% 👎🗑️
Badazz OG Cheese
Yield: 43.5g
Smell: 6.5/10 - musty, woody, cheesy, piney hints
Bag appeal: 6/10 - slightly leafy/stemy
Crystal coverage: 6/10 - very impressed
Ash: 5/10 - flaky, mostly white/grey
Fire holding: 4/10 - stays lit for 10-30 seconds
Smoke: 6/10 - taste is decent
High: 6/10 - sativa dom
Comment: looks like shit, smells decent, tastes decent, burns like shit.
39.5/70 = 56% 👎🗑️

Likes
24
Share


@Mathew
Follow
First week of flower just lollipoped, minor pruning, selective defoliation. Changed tea brew for flowering, top dressed w/ local raw worm castings

Likes
14
Share


@m0use
Follow
***Sponsored Grow*** = Medic || https://medicgrow.com || Grow = ***Sponsored Grow***
Been a bit since I posted to these diaries, Lost track of time with work and personal events but the harvest did happen and this was the week just before it all went down.
Till next week.
***Sponsored Grow***
Official Website:
https://medicgrow.com/
+
https://www.emeraldtriangleseeds.co.uk/
Facebook:
https://www.facebook.com/medicgrowled
+
https://www.facebook.com/OriginalETS/
Twitter:
https://twitter.com/medicgrow
+
https://twitter.com/emeraldseeds
Instagram:
https://www.instagram.com/medicgrow420/
+
https://www.instagram.com/emeraldtriangleseeds/
YouTube:
https://www.youtube.com/channel/UCNmiY4F9z94u-8eGj7R1CSQ
Growdiaries:
https://growdiaries.com/grower/medicgrowled
https://growdiaries.com/grow-lights/medic-grow
+
https://growdiaries.com/grower/emeraldtriangleseeds
https://growdiaries.com/seedbank/emerald-triangle-seeds

Likes
4
Share


@TiRobotProds
Follow
Cette souche es en forme de sapin, pour l'instant c'est l'une de mes préférée que j'ai faite pousser. Dernier rempotage le 16/10/22 en contenu de 19L.
Likes
6
Share

@Tropicalsalt
Follow
Hello everyone!
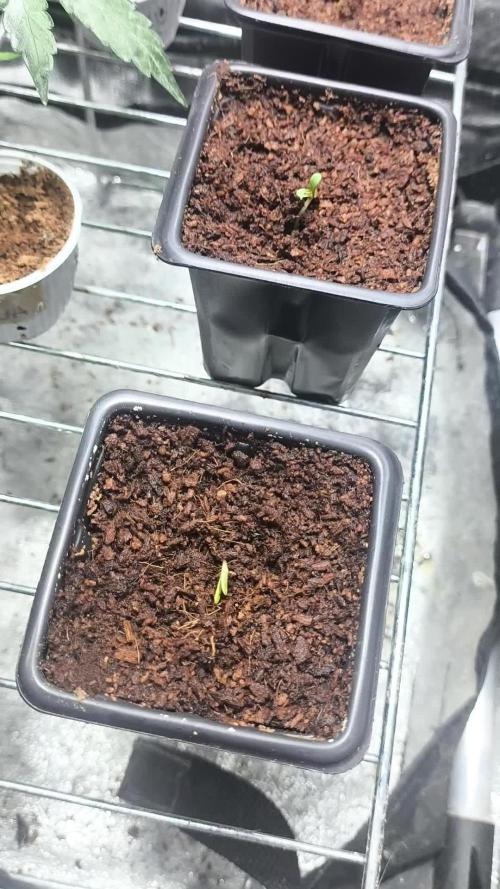
I used to post here under @tropicalstorm, but I lost access to the account and the e-mail, so here I am again!! After many failed attempts growing organic outdoors, I decided to switch to indoor growing and had a looot of help from a friend who uses mineral fertilizers in his grow. I've been growing like that for a year with amazing results, and now I want to try my first small pheno hunt!
I don't have much space so I can only do 3 big plants at a time, this is why I only started with 3 seeds. I don't mind if it takes two years to grow the whole pack, I just want exotic terps and a nice washer for extractions.
Likes
22
Share


@Slobasian
Follow
You walk into the back yard and it’s a straight face punch of smells. Looking like some indoor rn moved all plants to safer place in case storm hits so now I atleast have a wind break


Likes
16
Share


@HegauHillsFarmers_M11
Follow
Die Pflanze wurde Mitte letzter Woche an Tag 66 geerntet. Getrocknet wurden die Blüten 6 Tage lang bei einer Luftfeuchtigkeit von 53% bevor sie nun ins Glas kommen.
Getrimmt wurde die Pflanze trocken.

Likes
26
Share


@CannaBoy7
Follow
#myseed.ge
#soil-N1
#mysun.ge
#GROWROOM
#MYSEED-GROWROOM
it was the transplant week, everything is going perfect <3

Likes
6
Share


@E5Jackalope
Follow
When I popped these seeds I was so excited. I first started off putting the seeds in a shot glass of RO water and once I seen the seed pop open I transferred them to a wet towel. After a few days I seen the sprout and I was so excited!! I transferred the sprouts into the baskets and started on my way using a small dose of clean grow a/b ppms were 200 for the first few weeks. These photos were from week 1-2


