
Likes
Comments
Share


@Jimmy89
Follow
All looking happy, photos taken day 33 of flower. Never got around to defoliating this week, been locked in trim jail
I take the photos with the lights dimmed right down, not sure how some of you get such good photos..
Happy growing ✌️

Likes
37
Share


@Mr_Motalovah
Follow
Hello Growers and Tokers! 👋 👩🌾 🧑🌾.🔥💨
Alright so... she's still growing! 😂
I sure hope this week she'll stop and she can actually start to grow out those bud sites..
Good thing about this final stretch is that the bud sites are growing along with the stretch.
Glad I stopped giving her grow nutes or else she could be stretching even more.
Every 10 days or so I feed them with only water and enzymes to help out with the roots.
Funky smell is starting to come out.
Isn't that strong yet but it's nice. OG Kush type of smell.
Pictures taken on day 42.
Hope you like what you see, if so check out the other diaries of the strains in the tent.
Take care out there.
One love!

Likes
11
Share


@TerpyTears
Follow
Hi, nice to have you here😊✌️
The FatMonkeyAuto is doing well 👍
Unfortunately, it has grown really tall.
Which unfortunately leads to slight chlorosis on the upper leaves! Hope she can handle it without drying out at the top 🙈
We'll see 😅✌️
Thanks for your time 😊👍💚

Likes
5
Share

@Marijuanaut
Follow
Finally these long legs are getting some leafs! 😅
First week of veg went smooth and the ladies seem to be recovering well 😌
Bumped the led power, reduced the distance to plants and applied the first feeding with a leftover from a previous grow so it doens´t go to waste... proceeding next week with the aptus premium line! 😉

Likes
8
Share


@WeeDay420
Follow
Good Day i think check my profile!! Like4like 🤙😜 Merry Christmas & Happy new year !!! BIG BUD for you !! Thank you i Learn and text me all 😅💚
Processing
Likes
2
Share


Likes
3
Share


@Ogfredd
Follow
Creo que falta poco. Cometí un error en unos riegos los cuales no verifique pH y bueno demostró carencia de calcio y magnesio por lo que creo
Likes
55
Share


@Ganjagrandaddy
Follow
Day 63 flowering:: Hi grow buddies. All is well and ripening in the fast buds frenzy right now.
The Strawberry Pie is close to finishing now I thought but the new flush of pistils on all of the lowers has changed that a little. The main tops could be harvested 1st and possibly the lowers later in the week but I haven't decided which way to go with that yet. The lowers are really substantial in comparison to the tops so i think they need to rule the timing more.
Mexican Airline also looks ready to rock now with only a few pistils to start browning off up top but her lowers are also gaining sone serious size ( on video) . They burst into action a couple of weeks ago and I never expected them to get the size they have so low down. A very pleasant surprise. They are in process of maturing like the tops did with spiky white pistils among the darkening orange ones A very unique looking flower. She smells very sweet with a citrus tang too now.
Six shooter is a different matter , she looks happy to continue on and is only really putting out fresh pistils still. not many browning has are visible yet and her trichs are now starting to appear more. her density is good if not a little leafy but generally she looks like a good yield to come. her sides are very dense too so should all add to the finished totals well.
another Week i think. catch you soon growmies

Likes
10
Share


@Jbcultivates
Follow
Week 10 of flower, looking to chop next week. The trichomes are about 70/30 cloudy/amber. Doing a few days of darkness and really cold night temps to hopefully push out the colors and resin production here towards the end.

Likes
Comments
Share


@BruWeed
Follow
El 20 de septiembre entro en su segunda semana de flora.
Ya le agregue el bud candy.
Se encuentra muy bien, los cocos ya se pueden apreciar mas. Su olor es bastante fuerte.

Likes
Comments
Share


@all_about_420
Follow
Eine enorme Streckdynamik prägt die aktuelle Phase des Junky 99 Projekts von Brothers Grimm Seeds, während die zweite Blütewoche voranschreitet. Beide Pflanzen schießen extrem in die Höhe und legen im Verlauf der Woche einen gewaltigen Zahn zu. Dabei wird die morphologische Vielfalt dieser Genetik immer deutlicher, da sich die beiden Damen in ihrer Wuchsstruktur sehr unterschiedlich entwickeln: Während das eine Exemplar ein sehr homogenes Bild abgibt und seine neuen Blütenansätze wunderschön gleichmäßig über die gesamte Krone verteilt ausbildet, bündelt die Schwester ihre Energie ganz anders und lenkt die Hauptkraft primär in zwei dominante Hauptspitzen, die deutlich herausragen. An den Triebspitzen sind bereits die ersten feinen weißen Härchen zu sehen, die den erfolgreichen Übergang in die Blütenbildung markieren. Die Nährstoffversorgung läuft weiterhin absolut fehlerfrei, die Blätter zeigen ein sattes, gesundes Grün und beide Pflanzen strotzen vor Vitalität, während sie den Raum optimal ausnutzen. Es bleibt extrem spannend zu beobachten, wie sich diese zwei unterschiedlichen Wuchstypen in den kommenden Wochen unter dem Licht weiterentwickeln werden.


Likes
6
Share


@Kinary
Follow
After germination i putted into a 200 ml plastic cup and watered only with water, 20 ml/day.
Day 1 = 20ml water
Day 2 = 20ml water
Day 3 = 20ml water
Day 4 = 20ml water
Day 5 = 20ml water
Day 6 = 20ml water
Day 7 = 20ml water

Likes
18
Share
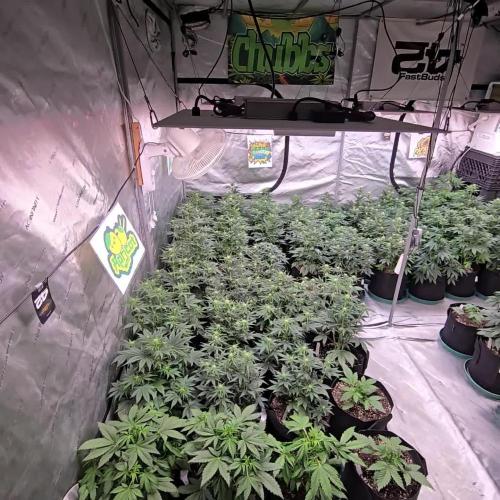

@Chubbs
Follow
Weekly update:
Crazy how time flies when your having fun. Seems like yesterday I did last week's update. I did some defoliating and lollipoping on them this week and switched from grow nutes to bloom. Wild how fast the preflower sites grow as it looks like they're everywhere. I'm still feeding 16oz per day, some are drinking more then others but overall Happy Growing.
Likes
2
Share


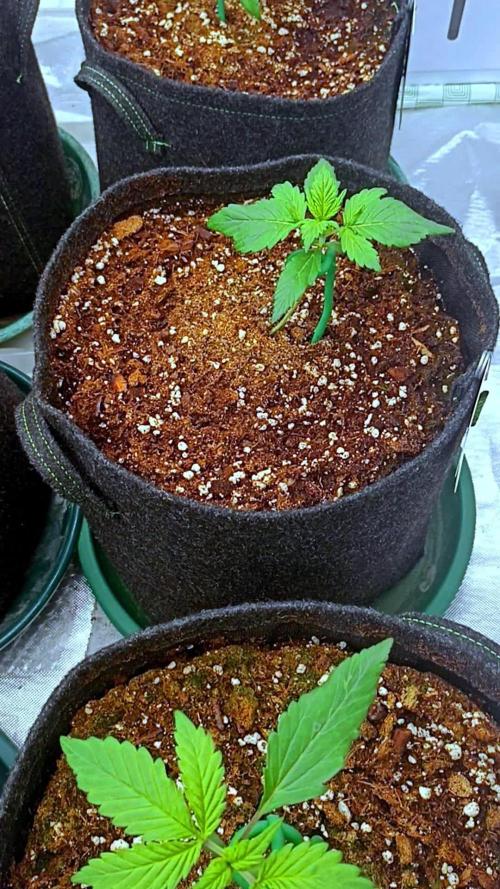
@LittleBigTrees
Follow
New growth is fast soon I will put into a 20 litre pot and give her more space to spread out.

Likes
2
Share


@regionallystoned420
Follow
Didn’t record footage of veg stage but it was in veg for just over 7 weeks and flowered at just spot on 8 weeks . Nice tight buds. Heavy stone but won’t make you too lazy to get about your day like a cheese almost

Likes
22
Share


@Afterglow
Follow
Тупанул с удобрениями. Первую неделю растиха еще чего-то жрала, но под конец вижу, что чего-то не так: ну медленно растет, не должно быть так.
Потом понял, что кокос промывал двое суток, а растиху поливал через раз чистой водой, хотя по сути нужно постоянно проливать слабым компотом. Чуток словил хлороз.
На второй день после хорошей промывки растишка очухалась и начала развиваться. Хлороз остановился.
PH понизил с 6.5 до 5.6.
В целом неделя закончилась положительно. Растишки оклемались после жестокой голодухи, снова позеленели и начали расти дальше. Отставание от графика примерно на 4 дня из-за стресса.
В следующий раз надо не забыть заправить кокос под 1500-2000 PPM и потом неделю поливать чистой водой.

Processing
Likes
13
Share


@Grownewgenetics
Follow
We add here the videos and pictures of the last 2 week's, because of problems with the app we are slowly getting videos and pictures uploaded, please follow our YouTube channel for the full Videos.
Epical widow the two are getting ready to blooming and the Epic Spigol Field is also after the topping and L.S.T. getting she's nails out and big cola's are growing.


Likes
33
Share


@microgrowshow
Follow
One of my favourite plants to grow so far. I learned a TREMENDOUS amount, especially all the ins and outs of supercropping. Although I did end up breaking my stalk, she turned out quite nice! I can definitely see myself supercropping plants in the future just to play around. The terpenes are also really nice on this girl. I can't wait to make some bubble hash and rosin. And I generally can't wait to grow this girl again knowing what she needs now in terms of training. Will also be nice to see the difference with organic dry amendments vs the FF wet nutrients I used.

