
Likes
Comments
Share


@420lor
Follow
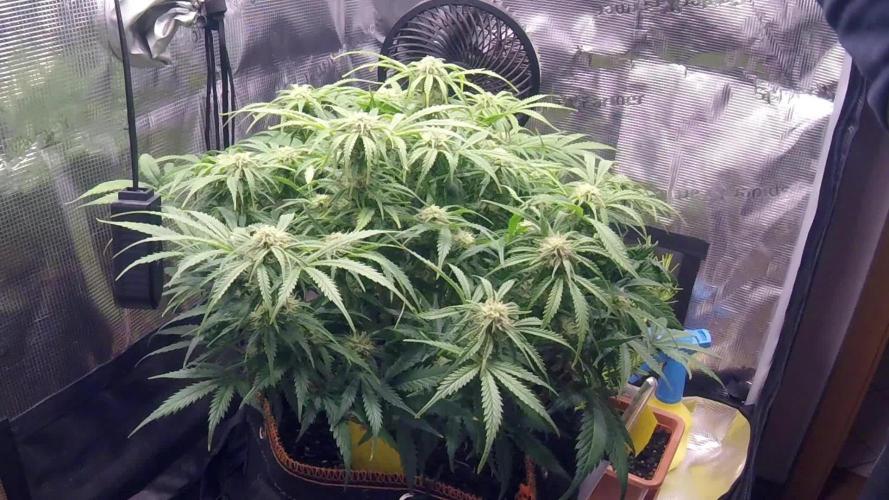
¡La fiesta verde está en su mejor momento! 🎉🌿 Con 27 días desde el cambio de fotoperiodo, mis Moby Dick de @kannabiaglobal están en su apogeo, bañadas por una humedad perfecta (40-45%) y abrazando un rango de temperaturas que las hace bailar entre 18 y 29°C. ¿El secreto de su éxito? Un cóctel nutritivo de Top Bloom, Top Candy y Top Bud, ¡la fórmula mágica para potenciar su crecimiento y sabor!
Hoy les he dado un mimo extra con un clareado de hojas, asegurándome de que cada cogollo reciba la luz que merece para brillar. Y ya están mostrando signos de resina, ¡una garantía de su potencia y calidad! Con la confiable luminaria PureLed de @thepurefactory guiándolas en su camino, estas semillas Moby Dick prometen una cosecha que hará las delicias de cualquier cultivador y amante del cannabis.

Likes
115
Share


@DogDoctorOfficial
Follow
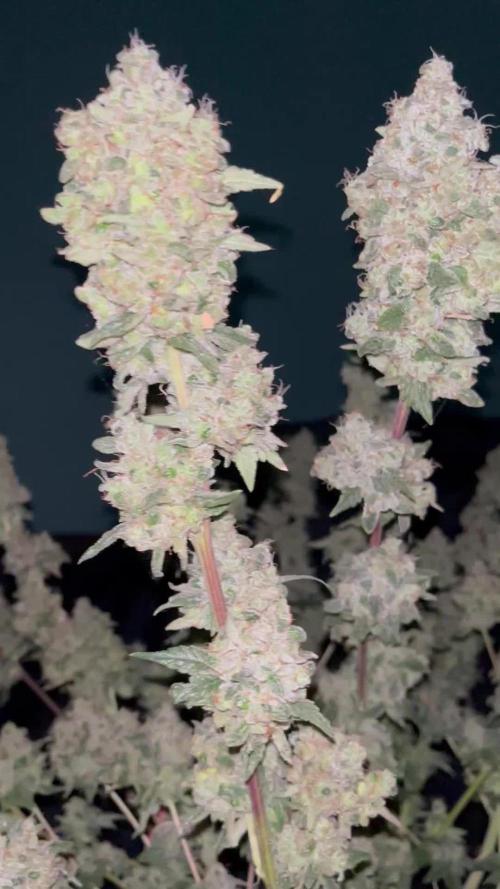
Cherry Cola's Grand Flourish in the Floral Symphony
Greetings, fellow cultivators! Week 4 has unfurled its petals in the mesmerizing floral journey of our beloved Cherry Cola Auto. The tent is now a stage for a grand botanical opera, and our green queen stands as a testament to the wonders of cultivation. Let's dive into the details of this flourishing spectacle!
As we venture deeper into Week 4, the floral elegance of Cherry Cola Auto takes center stage. What was once a lush bush has evolved into a breathtaking beauty, a true testament to the success of our horticultural endeavors. The topping technique and the release from training supports have paved the way for a regal display of colas and buds.
The decision to set our Cherry Cola free from the constraints of training supports continues to be a triumph. The tent is now a realm of bushy brilliance, and our green queen stands tall, a majestic presence commanding attention. It's a living masterpiece in perpetual motion.
The echoes of our topping tales from previous weeks resonate in the structure of Cherry Cola's colas. Each topped branch has evolved into a flourishing bud-laden entity, contributing to the overall grandeur of our green canvas. The decision to embark on this topping journey has truly paid off.
Our nutrient symphony, now joined by the magical touch of Potassium (K), continues to fuel the botanical brilliance. P-Boost and Topbooster, with their orchestration of phosphorus, organic grace, and now potassium magic, create a harmonious dance of blooming processes. The buds are becoming robust, laden with fibers, resins, and sugars, promising a top-tier end product.
Every day, the visual majesty of Cherry Cola unfolds with new growth, showcasing the resilience and vitality she possesses. It's more than a plant; it's a living testament to the artistry of cultivation.
As we conclude Week 4, Cherry Cola Auto stands as a botanical opera in full swing. The tent is alive with the grand flourish of a floral symphony. Stay tuned, fellow enthusiasts, as we eagerly await the next thrilling act in the Cherry Cola Chronicles!
Genetics Cherry Cola Auto @Fast_Buds @fastbuds_genetics_official @fastbuds_official @fastbuds_espana
Nutrition: @aptusholland @aptus_world @aptus_
Love, Care, and Attention: @dogdoctorofficial
As always, thank you all for joining me on this journey, for your love, and for it all. My horticultural odyssey would never be the same without you. Your love and support are cherished, and I feel both honored and blessed to have you in my life
Friendly reminder all you see here is pure research and for educational purposes only
Growers Love To you All 💚 💚 💚

Likes
422
Share


@Crashoverite
Follow
Hi everyone 😁
Welcome back in another week update!
Thank you all for this amazing support on this bananas journey💚💚💚
Uploading and updating each week content on daily bassis so please revisit this diary if week not over yet.
So far all going great. Girls looking very healthy and happy. Due to my short trip had to leave my 🍌💜👊 girls unsupervised for 3 days. Was stunned when opened my cabinet on the Dec 5th. Athena stretched like crazy. Good 3 inches. She better slow down as not much roof space left for her. May tie some taller branches to netting if necessary. Introducing blooming nutes for the first time this week on December 6th at smaller dosage and on the second watering as listed.
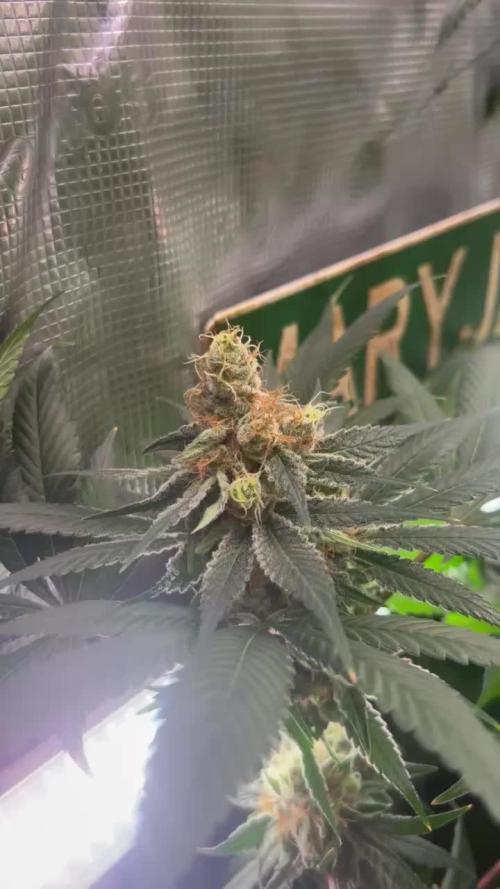
Week 8
Dec 4 - Dec 10
Dec 5
Leaves tucking
Dec 6
Heavier selective defoliation on both girls. Athena fully lolipopped and Xena at 75%. Watered with 8 ltr beetwen both with perfect runoofs PH 6.4. Girls were very thirsty 🤤
Dec 7-8
Just enjoying how my girls developing. Frost has landed and they are start showing colours. All is looking great.
Dec 9
Second watering for this week 7 ltr beetwen both. Runoffs PH 6.4
Even with so much difrence in size of my 🍌💜👊 girls it seems that they are drinking my juice almost equally.
Dec 10
Applied selective defoliation and tied 3 tallest branches of Athena to netting to avoid any potential burns on these beautiful baby colas.
It's the end of the week!
Thank you all again for such a great support, all the likes, dm's, comments and follows 💚💜💚💜
Stay tuned for coming week update 😁✌️💚
Likes
5
Share


@I_Identify_As_A_Dan
Follow
She went for way longer than i thought! I really do think yeild wise she would have been a monster if she stayed under 18h of light instead of the 15h of light outdoors.
Likes
44
Share


@SooSan
Follow
13 jours de 12/12
OK il y a du changement !
Dans la partie du scrog vertical le stretch n’a pas été assez fort
J'ai donc abandonné la culture verticale pour cette fois
J'ai donc fusionné le bas de la tente pour avoir un espace de 90x60x90
Le ts1000 a été retiré pour laisser la place aux barres du FC-E 4800
Et bien sur gros LST pour gagner en surface et gagner 20 à 30cm de hauteur
Vu qu’il y a 16 plantes mais que sur growdiaries on ne peut mettre que 8 variétés j'ai divisé en 2 diaries pour le bas de la tente
1️⃣
🏠 90x60x90
☀️ FC-E 4800 => puissance a 20%
🍁
1x Black Bomb / Philosopher Seed
2x Amnesia Lemon / PEV Seeds
1x Blueberry / PEV Seeds
1x Blueberry / 00 Seeds
1x Wappa / Paradise Seed
1x Dark Phoenix / Green House Seed
1x Quick Sherbet / Exotic Seeds
1x Mango Cream / Exotic Seeds
1x Banana Frosting / Sensi Seed
1x Hindu Kush / Sensi Seed
4x Fast Mix / Sweet Seed
📎 https://growdiaries.com/diaries/122084-grow-journal-by-soosan
📎https://growdiaries.com/diaries/124052-grow-journal-by-soosan
2️⃣
🏠 30x60x50
☀️TS1000 => puissance a 50%
🍁 4x Quick Sherbet - Exotic Seed
📎 https://growdiaries.com/diaries/122080-grow-journal-by-soosan


Likes
4
Share


@Cannabot
Follow
Definetly the tallest of my current plants,but that's what u expect from a 100% sativa.Long ass flowering times but well worth the wait.She likes the nutes ,one of my favourite strains of all time

Likes
55
Share


@Max1973
Follow
Well, this was a interesting first journey.... the buds finished drying today, 5 days drying, added pics and vids.
Just curing to go.... ah nice buds :)
Edit: i forgot to mention i went over the buds when i harvested them, and checked / removed any impurities, like
gnats caught in the sticky bud.... picked em clean with tweezers... 👍
Edit: needed to air/dry out the buds abit more, and get some Boveda Humidipak for curing.... it's looking good...
i'll update with some pics of trimmed, cured buds 😎
The buds turned out beautiful, pungent, pine, berry, citrusy, daytime, medical..... this has theoretical 1:1 - 21% THC, 19% CBD, so it's not going to give u a knockout high.... its medical grade 1:1 ....... side effects - happy, relaxed.
haha :)
I weighed it dry and came up with about 123.32g (4.35oz) ... i used abit of guesswork in the weight, not to concerned with weight, as to
quality.... (that weight is with the test buds added in, +-15g.) .... you can guess the weight from the pics and vids, haha
I really enjoyed growing this.... i found the website by looking up the seeds, decided to start a grow diary,
it's my first grow, i made alot of mistakes and growdiaries really helped alot, joined a chat group with some other really good growers.
Edit - Day 111 - added vid/pic, Been curing for a week, burp and roll em abit twice a day....... smell and taste nicer each day, 👍
Edit - Day 112 - added good vid of trimmed up test bud, beautiful ......
I hope You enjoyed the Diary..... Good Buds 😎


Likes
11
Share


@Jays_Not_Here_Man
Follow
A good week for the pink lady, no issues, the heatwaves have subsided a bit and there is a cold front that moved in. The RH has been steady, between 50-55%. I have decreased the nutrients further to just a bit of micro and cal mag. I have begun my process of “flushing” where I increase the water volume to allow for a 10-15% runoff. I find that this does not strip or shock the plant of nutrients it is still needing to fatten up. I do this for the last 4-5 feeds ending with straight phd water.


Likes
19
Share

@Rangaku
Follow
Time for this permanent bluez to get the chop , she was ready at 10% amber . This girl turned out well , really sweet smelling sticky buds prolly end up with around 10oz dry . Smokes great. I didn’t know what to expect with IZI but they’ve proven to be pretty good hey .

Likes
74
Share

@Schnabeldino
Follow
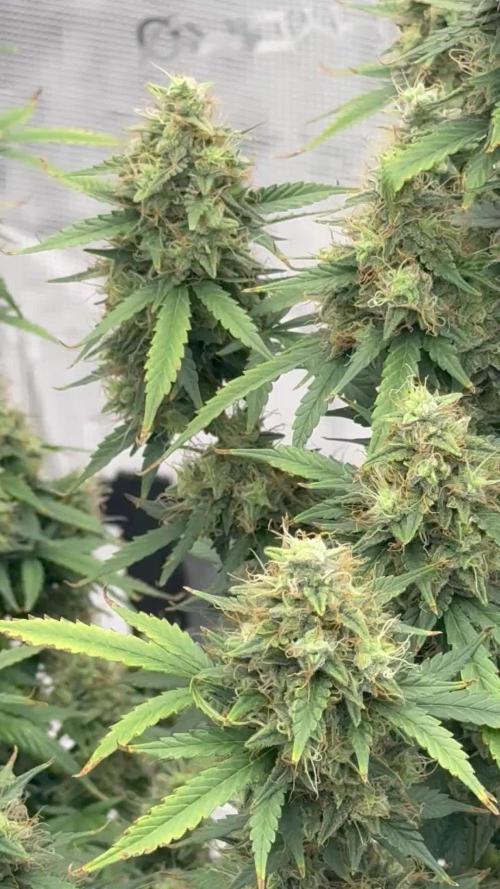
_____📅 Week 9 | 📅 🌼🌸🌺flower🌼🌸🌺 ______
🔸Our lady is now entering her third week of flowering – and she's doing so with elegance! The buds are slowly developing volume, the white pistils stand proudly and are beginning to appear denser. The trichomes are becoming increasingly visible and already give her that fine, sugar-like shine. The leaves remain narrow and elegant, typical of sativa-dominant genetics. The reddish stems add beautiful accents – everything points to a healthy plant in full bloom. A real dance begins! 💃.
🔸The dehumidifier now maintains a constant relative humidity of 50-60%, which I am very satisfied with. It does make it 2-3 degrees warmer in the tent, but I can live with that.
🔸Now gets big bud from AN, becomes thirstier
______________________________________________________________________________________
📈 Current Conditions
🌡️🔆 = 27°C
🌡️🌜 = 20°C
💨 VPD Target = 1.4 - 1.6
💨 Humidity = 63% → Target: below 60%
🔦 PPFD = 900 µmol (12/12)
🔦⌚ DLI = ~38
🛠️ Setup (unchanged)
💡 Lights: 2 x Sanlight Evo 4-120 @ 90%
⛺ Tent: 120 x 120 x 180
🍯 Pot Size: 18 liters
🌱 Medium: Bio-Bizz Light Mix
💊 Nutrients: Advanced Nutrients
💧 Water: Tap water (EC 0.5)

Likes
3
Share

@NAG420
Follow
Wow it’s coming to an end soon she has gotten so much bigger she is the last one in her tenet. Soaking in all the light she is showing signs of fading. No food just water this week.This was the last feeding for sure here last run from here on out only 6.5 PH water temperature been little higher due to her being the only one in the tent.
Likes
8
Share


@Ieiogrow94
Follow
Eccoci qui...
Tutto va per il meglio, questa settimana non ho applicato stress alla piccola, ma ho guardato l'evoluzione che ha avuto dando i nutrienti.
Ora ha un odore davvero intenso ed uno strato di resina pauroso, vediamo come si riprende dalla defogliazione che ho fatto settimana scorsa.
Seguiranno aggiornamenti, grazie a tutti per il supporto🔥🌲❤️

Likes
30
Share


@Stick
Follow
Last week in the vegetative stage for these OGs, they're already tall and full of nodes so I'm flipping into flowering light schedule NOW! Let's see how they will flower 😍 I'm expecting fat and sticky buds but my room is quite overcrowded, I may encounter trouble managing the RH and airflow. Thanks for stopping by! 👊


Likes
21
Share


@CanadianFillmore
Follow
Tonight on growfessor theatre, 4x4 edition, 4 ladies get fed and defoliated!
Green Crack, LSD and Mandarin dreams are in the home stretch, this is their last feeding before flushing. Do-si-dos will get another feeding next week and flush a week later.
Thanks for stopping by growfessors, tune in next time for another episode of growfessor theatre! 👽🌳💚

Likes
2
Share


@High_Grade_Dadli
Follow
Took the cut as I said I would got 6 off the galato and 4 off the MCMOG....it amazing how 2 becomes more would have more tree of the same to cut nxt cut🔥🔥💨💨💨

Likes
20
Share


@Elysian_gardens710
Follow
This is week 10 for our AK-47 Auto Goxuak by Genehtik. She is finishing out great! For the most part she yellowed out but some sugar leaves and caylxs have purple in them.
Her buds just keep stacking! Ashoka is already way past her estimated period and still showing white pistils(stoma?) And clear Trichomes.i tried to get some shots.failed mainly lol. When that changes we will chop her.
Taking advantage of the longer flower I decided to pull a few of her branches back down to expose the buds to more light. Thicken them up I hope!
I flushed her again. This time just in the sink with running tap water(our water is horrible too!) I didn't pH the water or add any Kleanse this week. I also stopped giving her Real Growers recharge.
She smells great! Like Pepper and a little skunk.

Likes
39
Share


@King_Green21
Follow
Day 47 - I topped, defoliated and flushed with plain ph’d water 10 days before switch to 12/12
These led lights keep the plants really short with a lot of middle bushy growth have already taken 2 bags full of leaves and all look healthy still🤞👍
Day 48 - Looking good day after topping and defoliation :) good sign will update end of week 8 flip to 12/12
