
Likes
Comments
Share


@BLAZED
Follow
Week 21 (30-11 to ?????)
30-11
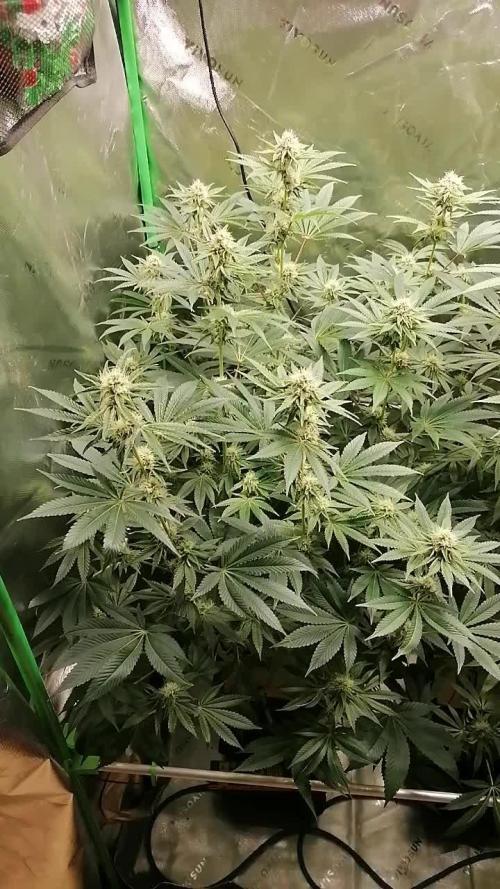
Today i harvested her! I removed all the fan leaves and left the buds on the branches to dry.
1-12
Temperature: 16°c to 19.5°c
Humidity: 50% to 56%
2-12
Temperature: 14.7°c to 18.5°c
Humidity: 54% to 57%
3-12
Temperature: 16.1°c to 18.9°c
Humidity: 54% to 59%
4-12
Temperature: 15.5°c to 17.5°c
Humidity: 57% to 62%
5-12
Temperature: 15.2°c to 17.7°c
Humidity: 60% to 71%
6-12
Temperature: 16.5°c to 17.8°c
Humidity: 60% to 66%
7-12
Temperature: 16.4°c to 17.9°c
Humidity: 57% to 63%
8-12
Temperature: 16.6°c to 18.5°c
Humidity: 56% to 60%
9-12
Temperature: 16.9°c to 19°c
Humidity: 57% to 62%
10-12
Temperature: 17.4°c to 19.5°c
Humidity: 60% to 64%
12-12
Temperature: 17.9°c to 20.1°c
Humidity: 61% to 76%
14-12
The buds felt dry enough and ready to get their final trim before they go into the jar for curing!
Trimjail it is!
16-12
Today i finished trimming everything.
This is the end result:
Dried bud: 116 grams.
Dried trim: 23 grams.
Thats over 1 gram per watt, and i am very happy with that!!
In the curing jar they go!
Let me know if you liked my diary and see you all in the next one!

Likes
28
Share

@Brujha77
Follow
Start 5. Blütewoche
Der Strech scheint langsam fertig zu sein und bisher machen sich die 3 recht gut.
Heute gab's für jede noch 1l Wasser mit 1g/l Greenhouse Feeding BioEnhancer. Ende dieser oder Anfang nächster Woche bekommen Sie dann nochmal nen Composttee.
Hin und wieder werden paar Blätter entfernt. Ansonsten ist nur zuschauen angesagt🥀🥀
Likes
21
Share


@cadur
Follow
Still going, a few amber thrichomes but no way near 30%....
Just gonna have to wait....

Likes
18
Share


@Grower_Of_Persia
Follow
week intel:
everything is perfect!
stresses :
just a little E.C stress around 1.7 once a week
feeding:
i feed them 3 times this week with this order :
day 1 : i feed them heavy with silicate +base nutrients(calcium & micros + Bloom) about 818 ppm - 1.7 e.c to cause a little stress.
day 3 : i feed them low dose of Feeding Booster + Karbo Boost around 382 ppm - 0.7 e.c to let them recover a little but not fully recover still a little stress will caused.
day 5 : i feed them with low dose of Top-Max + B-52 around 250 ppm - 0.5 e.c to let them recover the stresses to get ready for another stress next week.
guide of the week :
know your plant tolerance limit of E.C stress once you saw the very very little yellowing on tips of leaves , that's the sign to don't go further , never reach that limit if you want a high quality buds, in my case tolerance is 1.8 and i'll reach to that level only once a week to cause precision stress , love your plants and have a happy growing!

Likes
100
Share


@MadeInGermany
Follow
Hi growers :-)
It smells better every day, and looks more delicious 😍.
There is not much to say this week.
They are still blooming 10 to 38 days. The 3 Victory Kush F1 and the Zkittlez in front were rinsed, and are still around 10-14 days.
The rest needs a bit :-)
Until then everyone have a nice weekend and let it grow 😎


Likes
16
Share


@DogDoctorOfficial
Follow
🌸 BlueBerry – Week 5 Flower Report
Grower’s Journal | Zamnesia BlueBerry
⸻
🌱 The Girls in Full Bloom
Both BlueBerry #1 and #2 are absolutely stunning this week:
• Size: Towering beauties, full presence in the room.
• Bud Formation: Large, well-stacked flowers building from bottom to top, showing the real effect of the ICL 300 inner canopy lights.
• Pheno Difference:
• Pheno #1 is forming a dominant central cola, reaching tall and thick — a real spear.
• Pheno #2 is slightly more balanced across branches, but still bulking fast.
• Hairs (Pistils): Beautiful white pistils everywhere — vibrant, strong, and reaching out like nature’s way of saying, “I’m ready to bloom.”
This early hair explosion is a promise of dense, resinous flowers soon to come.
⸻
💡 ICL 300 – Fruits of the Light
The inner canopy lights are proving their worth:
• Buds aren’t just forming at the top, but all the way down the structure.
• No wasted shadow zones, no underdeveloped sites.
• It feels like the plant is blooming in 360°, thanks to the way the ICL spreads light deep into the canopy.
The difference between a regular top light and this combination is day and night, and now it’s visible in every flower forming.
⸻
Nutrition Update – Bringing Back All-In-One Liquid
This week we reintroduced the Aptus All-In-One Liquid into the feeding mix. Why?
• To give the plants a broad-spectrum nutritional push right at mid-flower.
• Ensures no deficiency or slowdown during this critical bud development stage.
• Works hand in hand with Top Booster and CalMag to support cell expansion and flower density.
At this stage, the girls are hungry and hard at work, so it’s the right time to fuel them properly.
⸻
🔄 Quick Recap of the Journey So Far
• Cannakan germination → soil prep with Aptus amendments → steady veg → training + defoliation → flower induction.
• Week 4 brought early frost and strong stacking.
• Week 5 now brings real bulk, pistil fireworks, and inner canopy buds rising.
This has been a textbook BlueBerry journey so far — stable, strong, beautiful.
⸻
🔮 What to Expect Next (Week 6 and Beyond)
• More Bud Bulk: Flowers will gain weight and density quickly from here.
• Pistil Transition: Some of those white hairs will start to orange and curl as new sets keep pushing.
• Trichome Explosion: Frost will build across leaves and flowers, giving that snowy BlueBerry look.
• Terpenes Rising: Expect the first real waves of that nostalgic, sweet-fruity BlueBerry scent.
What not to expect: major height gain. The stretch is over, from here, all energy goes into flower expansion and resin production.
⸻
💬 Final Thoughts
Week 5 is the moment where the BlueBerry girls are no longer just “plants” — they are flowering powerhouses. Frost, pistils, bulk, and balance.
With the ICL 300 feeding the canopy from the inside and the All-In-One Liquid giving them the push they need, these ladies are on track to become legends in their own right.
BlueBerry #1’s towering cola and BlueBerry #2’s even structure are both testaments to genetic quality and environmental harmony.
It’s a pleasure to watch them evolve — and even more to share their journey 🌸✨.
📲 Don’t forget to Subscribe and follow me on Instagram and YouTube @DogDoctorOfficial for exclusive content, real-time updates, and behind-the-scenes magic. We’ve got so much more coming, including transplanting and all the amazing techniques that go along with it. You won’t want to miss it.
• GrowDiaries Journal: https://growdiaries.com/grower/dogdoctorofficial
• Instagram: https://www.instagram.com/dogdoctorofficial/ • YouTube: https://www.youtube.com/@dogdoctorofficial
⸻
Explore the Gear that Powers My Grow
If you’re curious about the tech I’m using, check out these links:
• Genetics, gear, nutrients, and more – Zamnesia: https://www.zamnesia.com/
• Environmental control & automation – TrolMaster: https://www.trolmaster.eu/
• Advanced LED lighting – Future of Grow: https://www.futureofgrow.com/
• Root and growth nutrition – Aptus Holland: https://aptus-holland.com/
• Nutrient systems & boosters – Plagron: https://plagron.com/en/
• Soil & substrate excellence – PRO-MIX BX: https://www.pthorticulture.com/en-us/products/pro-mix-bx-mycorrhizae
• Curing and storage – Grove Bags: https://grovebags.com/
⸻
We’ve got much more coming as we move through the grow cycles. Trust me, you won’t want to miss the next steps, let’s push the boundaries of indoor horticulture together!
As always, this is shared for educational purposes, aiming to spread understanding and appreciation for this plant. Let’s celebrate it responsibly and continue to learn and grow together.
With true love comes happiness. Always believe in yourself, and always do things expecting nothing and with an open heart. Be a giver, and the universe will give back in ways you could never imagine.
💚 Growers love to all 💚


Likes
5
Share

@cadur
Follow
Some leaf tip burn, either lights or nutes. Measured TDS@900 and moved the lights away a few cm.
Likes
3
Share


@spankyxvi
Follow
Buds looks super dense and start to see resin, I’m so hype to see what she can produce.
Overall look great. Healthy plant.

Likes
Comments
Share


@Bpsb4_2
Follow
Дефки отрастили корни и переехали в горшки)
Тутанхамон начал активно набирать после увеличения базы до 3 мл/л.
Растем...

Likes
214
Share


@DevilsBud
Follow
Anesia Imperium X is small compared to the others will probably put here a week later into flowering. topping is done and doing some last LST on here
Probably come flowering time this one and black berry moonrock and headshot will be put in the 100X100X180 with the TS-1000 so they can veg some more
Imperium X is getting another home for couple weeks preparing the other room for flowering
More photos Tru the week
27/10/21
Transplant the imperium x in 11L fabric pots added 5gram Easy Roots - Mycorrhiza Mix to soil
visit www.marshydro.eu
for your best gear and use the PROMO CODE: DEVILSBUD
Fully marshydro supported Setup:
Marshydro GT100X100X180
Marshydro Ts 1000 LED lamp
Mars Hydro tent handy info
Lock All Light Inside: MARS HYDRO Grow Tent Interior is made of diamond mylar. Non-toxic to the environment, no harm to plants. High-quality 1680D canvas being double stitched, (ALL OTHERS BRAND grow tent is 601D canvas) which is tear-proof for perfect light locking, No light leaks or rips at all.
Durability Grow Tent :Stable Metal corner adapters and poles are the trustful supporters of the tent. No rusting nor paint-falling. Quick easy tool-free installation. Carries strong heavy-duty SBS zippers, double layer lining to create a light-proof seal.
Easy Observation of your Plants: Special peek👀 window made by double layers of cloths. Observe the growing conditions of your plants without opening the tent and avoid disturbing plants. The peek window also serves to dissipate heat and ventilate air.
Removable Tray Keep Clean: The package includes a removable waterproof floor tray to hold soil and fallen leaves. The tray can be taken out easily to wash. Removable and water-proof cleaning easy.
Good Ventilation&Fast Assembly: Circular double-sleeved vent holes with adjustable nylon strap for air circulation by exhaust fan, ducting, carbon filter, or reflector. Better allows proper light, heat, and airflow. Quick tool-free installation. Reinforced by a sturdy metal frame to ensure security and stability, supports up to 140lb. Perfectly safeguard your plants to thrive even in winter.
Likes
3
Share

@PhinolaGreen
Follow
7. Woche
Tjoa es geht langsam voran, mittlerweile habe ich sie in etwa so, wie ich sie haben möchte. Denke sie switcht demnächst in die Bloom, dann hat sie jetzt 4x Topping hinter sich. Ich habe es leider beim 2. mal verkackt, weswegen es am Ende sogar 4 Topps geworden sind. Aber dafür hat sie sich gut gehalten. Sie bekommt jetzt noch ein bisschen Training und dann bin ich gespannt, ob sie zur Bloom richtig explodiert oder so klein bleibt, wir werden sehen 🤷🏻♂️🤭
Komm mir schon fast so vor, als würde ich mit ner Photo arbeiten, da ich sie solange in der Veg halten kann 😉😅😄
Ich habe gestern btw irgendwelches Viechzeug auf den unteren Blättern entdeckt aber ich glaube die kamen daher, dass die Blätter immer wieder Bodenkontakt hatten. Weswegen ich sie dann so Nackt gemacht habe. Zur Entwarnung, der Rest des Raumes ist Clean soweit ich das beurteilen kann. Ich werde das mal weiter beobachten 😊
Update zu den Viechern:
Entwarnung, sind entweder Nützlinge oder Trauermücken Larven. Konnte noch keine Zuname an Trauermücken auf den Gelbtafeln feststellen 🤷🏻♂️
Likes
10
Share


@Schnabeldino
Follow
Week 10...
This Girl is ready to Harvest...
Plant number 2 started flowering a week later and therefore needs another week...update is coming
Likes
6
Share


@Bd636
Follow
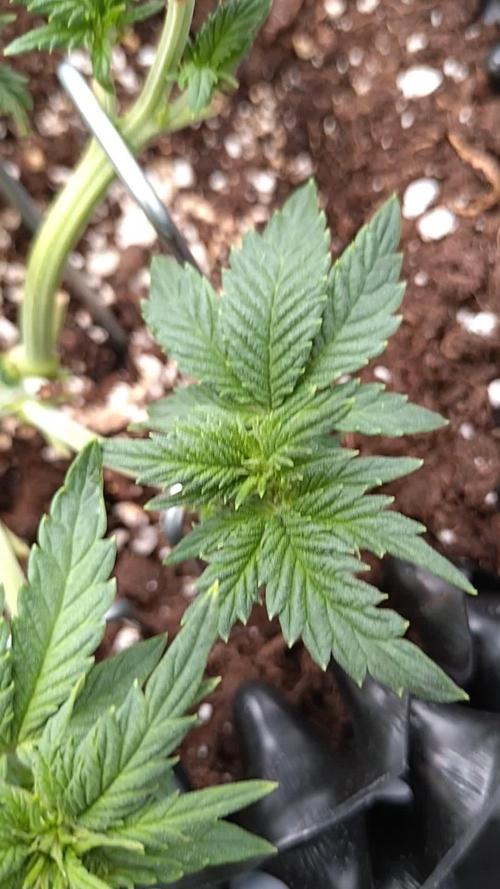
Every thing is foung as well I can hope for. First time growing autos..second grow of my life.very very happy with ethos gentics..genetics.. bought banana daddy seeds..they all popped and you can see are doing great..

Likes
27
Share


@RDWCGrowing
Follow
5/23/2023
Week 7- Day 1 of Flower (Day 110 overall) (Day 49 of Flower)
There was a couple of small super small sucker buds on the lower stocks that needed to be cleaned off but that was it. Just watching them Flower!!
5/24/2023
Week 7- Day 2 of Flower (Day 111 overall)
Tucked a few fan leaves below lower buds but didn't see any blatant offenders that needed to be removed. I typically do start my checks in Week 8 but since this is a new strain I decided to go ahead and do a Trichome check just to see what was what.. Just as I thought nothing but clear glassy Trichomes. I will check again in one week....
5/25/2023
Week 7- Day 3 of Flower (Day 112 overall)
Just letting them grow today!! Smell is getting stronger I would say it is a hint of Pine and a heavier fruity smell.
5/26/2023
Week 7- Day 4 of Flower (Day 113 overall)
I did Nothing but took some pics and I enjoyed it!!!! It is nice to be able to just sit back and watch them on auto pilot.. :-) Tomorrow Water Change Day!!
5/27/2023
Week 7- Day 5 of Flower (Day 114 overall)
I admit it.. I had to defoliate a little bit.. I looked in while changing the water today and there were just a couple blatant offenders blocking the light from lower bud sites and those leaves they just had to go. Other than that I changed the water and this week is where I drop everything and start preparing them for this last phase of the grow. Loving a few of these buds they are starting to beef out very nicely.
I added 36 gallons
Mammoth Silica = .5Mil/Gal= 18Mil
Root DRIP = 1Mil/Gal= 36Mil
CalMag= .5Mil/Gal= 18Mil
FloraMicro = 3.8Mil/Gal= 137Mil
FloraGro= 2.8Mil/Gal= 100Mil
FLoraBloom= 4.6Mil/Gal= 166Mil
LiquidKoolBloom= 2.5Mil/Gal= 90Mil
TPS SIGNAL= 4.0Mil/Gal= 144Mil
ORCA = .5Mil/Gal= 18Mil
Water Temp= 70.1
Tent Temp= 76
Humidity =64 ** I have two dehumidifiers running on Ink bird controllers to try and keep the humidity down, In late in flower I like to keep the humidity above 45 but below 60.
5/28/2023
Week 7- Day 6 of Flower (Day 115 overall)
Opened the back of the tent today and boy did she need some defoliation love in the back. Other than that I took off a few little sucker buds trying to form. I did start to setup my Dry space as well as did a Trichome Check today and the brown tips are coming in nicely.
5/29/2023
Week 7- Day 7 of Flower (Day 116 overall)
Found a few baby sucker buds trying to form so I removed them. Other than that I am enjoying watching her mature.
I also started my Reverse of the Clone I took 6 weeks ago in Apr from #3. I am uploading footage of the reversing process for your viewing pleasure.

Processing
Likes
10
Share


@StarletBud21
Follow
The week has been going very well plants are reacting good to nutrients and seem to be happily growing , haven’t fiddled around too much this week as starting to get the hang of things slowly ! The grow so far has been quite smooth And haven’t run into any Major problems all plants have been topped and will continue lst throughout I believe they look quite healthy haha ?
First timers luck 😉🤨 we hope so
Good end to the week next week I shall trim and see how that goes
Happy growing 💎


Likes
43
Share


@TheCannaProphet
Follow
~ FastBuds PAPAYA SHERBET Photoperiod~
Well here we go on another journey together through 'Canna-land' and this one's kinda special... forget that, it's VERY special because this is FastBuds newest surprise for the community, a FEMINIZED PHOTOPERIOD STRAIN!🤯
I was fortunate enough to score these seeds, of which only 1000 were available and can't wait to see what this strain can do! This Papaya Sherbet, according to FastBuds, is a hybrid with a 9-10 weeks flowering period. For a more detailed and accurate description of this strain the following from FastBuds says it best:
"Combining the massive stature of Papaya (Oni Selection) with the strength and resilience of one of our best keeper cuts (Sunset Sherbet), this strain develops into a big, expansive bush adorned with numerous bud sites that later transform into a generous harvest of medium-sized buds. Papaya Sherbet flowers deliver a signature flavor of premium cannabis with subtle citrus undertones that emerge upon inhaling. During growth, her aroma makes for a sweet yet pleasantly bitter fragrance, giving you an idea of what the smoke will taste like. Notably stress-resistant, Papaya Sherbet is a great choice for growers working in challenging environments. She is very forgiving and rebounds quickly from any adversity, allowing growers the freedom to experiment with confidence that she will take everything like a champion she is. This strain embodies resilience, flavor, and abundant yields in every grow cycle."
Sounds like an epic strain and I personally cannot wait for this lady to strut her stuff!😍
________________________________________________________________________________________________________________________________________________________________________________________________________________________________________________________________________________________________________________________
The Setup:
This is going to be an outdoor grow, but I have started the Papaya Sherbet photoperiod indoors as our weather is still a bit too chilly to put a newly sprouted seedling outside (nighttime temp's dipping regularly into the 40's℉).
The plan is simple... let her grow inside under a 19/5 light schedule until the nighttime temperatures are in the mid 50's℉, which shouldn't be long. After which, she'll be moved outside and transplanted into the soil which I have already setup and inoculated with beneficial microbes from BioTabs and slow release dry amendments from Gaia Green. Once she's established herself outside she'll be given periodic top dressings of Gaia Green 4-4-4 and 2-8-4 along with worm castings and Compost Tea's. Her grow area is approx. 5'x5' and I have posts and a trellis net set up already for when she gets bigger to aid in training her. Let the fun begin!🤪💚
________________________________________________________________________________________________________________________________________________________________________________________________________________________________________________________________________________________________________________________
Weekly Updates:
7/26- Week Eleven of veg is here and the FastBuds Papaya Sherbet photoperiod is getting taller by the day and is looking fantastic!
Our summer weather continues to be brutal with daytime high temperatures hitting over 90℉ everyday, and nighttime low temp's rarely going below 75℉ with super high nighttime RH in the 70-90% range.
7/28- I am continuing with my daily watering regime of 5-8g every afternoon after sunset, with the exception of days that we receive measurable rain.
7/30- The Papaya Sherbet photo is continuing her growth spurt and is at 6 1/2 feet tall now! She's got that wide node spacing reminiscent of Sativa's, and I'm just hoping that she doesn't wait too long to begin flowering which would run into our wet season when issues with fungus and mold become more of a concern.
8/1- The FastBuds Papaya Sherbet photoperiod is now 84 days since she first appeared, and she has really come a long way since. Hopefully in the next few weeks she will shift gears and begin to flower which will be a welcome sight to see!
Thank you for checking out my diary, your positive comments and support make it all worthwhile! 💚Growers Love!💚😎🙏
Likes
15
Share


@Litngrn
Follow
Harvest went great but couldn't be happier with 12 oz of off of this girl. I did take a clone that I'm going to try to reveg. I think it's awesome that she turned out to be a photo. At 50 days she was selling those signs of flour until I say River in to 1212 flower lighting and she took off
Likes
34
Share


@JonnoSA
Follow
Loads shearing is still on going. 2-4 hour of no elec!! Not ideal to say the least. All things considered the plants are doing fantastic. They are starting to put on some size. The smell coming from the tent it's crazy😍

Likes
Comments
Share


@Ogchemst
Follow
I like the structure alot I might be doing this with all me plants in the future.... I even got the whole kit ready for another grow and guess what we got next? Even bigger monsters. So far with this little beast I'm not getting g deficiencies or any signs of anything being wrong, I wanted the colas to stretch a little more so I added grow formula on day 5... today on 12th Feb I added Connoisseur Bloom for the first time to the mix, i will Try to use that scrog net but I might only be using it to support the pla ts other then that I need to flush them in about 2 weeks so I can Contiue on giving the full dose at a safe window which is after a flush.. they will be hungry i wonder how fat the buds are going to be..
Btw I got a seed from some cali pack my friend bought and I'm very curious what it's going to be... the bud we took it from locked so frosty we couldn't belive our eyes to I'm looking forward to seeing if the seed I got from the bud but do any good.
Happy growing!