
Likes
Comments
Share


@Wastent91
Follow
Eccoci ragazzi, qua sono passate già due settimane.. Ho voluto aspettare per vedere se la situazione della resina migliorava, ma purtroppo ci sono un sacco di fiori ma poca resina e odore.. Non capisco se il problema sia il fenotipo in se o forse sono i nutrienti che ho esagerato? Eppure la ragazza sembra mangiare nel giusto modo.. Speriamo nelle prossime settimane in un miglioramento altrimenti sarà destinata ad avere poca resina?! Staremo a vedere... Probabilemnte sarà stato qualche mio errore ma vorrei davvero capire cosa ho sbagliato.. Vabbe ragazzi mi dispiace xke la ragazza sembrava davvero promettente.. Alla prossima settimana un buon 420 a tutti voi! 🤞🍀💪😺


Likes
1
Share


@CremDeLaGanj
Follow
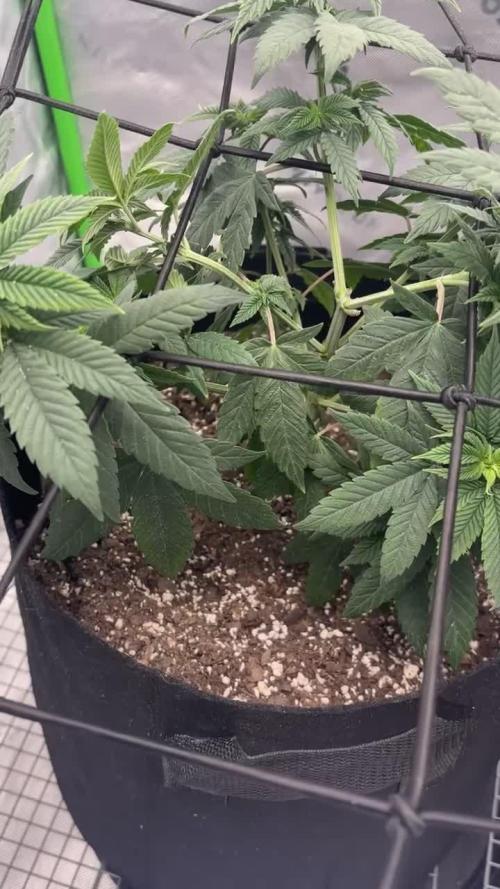
Everything was good they recovered well from training. Cranked the power up to 60 percent and raised the light.

Likes
57
Share


@DankeyeBeaverjuice
Follow
Staggered start to the 3 autos but that's only for breeding purposes. I plan on using sts spray to reverse the first one so I gave it a two week + 2 day head start. Full tutorial of the germination process is viewable on the video posted here and my youtube channel, link is on my profile if you care to watch it there, I found the loading screen for the video rather tedious on here.. Happy growing!

Likes
4
Share


@603grower
Follow
The terps are finally here all three Saturns have a similar citrus pine-Sol . Extremely loud. And both gas cream cakes have a sweet candy like aroma. Earlier in the week a did a small top dress with terp tea bloom. I wish I waited on it because they need their last big top dress now as well and I don’t want to over do it seeing how they are looking great. A lot of purple is comming out of the gas cream. I don’t believe it to be a deficiency . I think it’s just genetics. I think this will be my last run in small pots I think I’m going to move on up to ten gals. Now they girls are drinking everyday or every other. This week I will do there final top dress


Likes
23
Share


@NordicCropz
Follow
Day 60 flower on the two most developed. Should be right about done by now, but as you can see nute burn has been a pain lately. Anxious to find out how much longer they'll need to mature. Buds on the smallest one with the fattest flowers look thick, but they are waay too fluffy compared to the other equally developed plant.
I have only fed twice the last 10 days, to try to combat the nute problem. Thinking I should go down from half dose to 1/3 the rest of flowering, with a bit more normal feeding frequency, to avoid starving them in these last couple/few weeks.
Second video is of a small bud I cut off low on the smallest plant. Not mature at all, but it still blew me away. The high was wonderfully balanced. Most of all the taste, was incredible. Even after I dried it for 6 hours on my heating radiator on top of cardboard. Makes me think of how insane it will be when matured, dried and cured like it is supposed to. Just hoping it will fatten up a bit, at least the pistils are starting to come along.

Likes
5
Share


@alafmalaf
Follow
first day after a 12h night cycle, still have a big gnat problem. gonna go buy new bacteria, stickies and DT Earth. the grow shop just let me know that they got it back in stock but i haven't been able to find nematóides. doesn't seem to be a common practice here. i haven't watered them in a few days. the top soil is bone dry but the plants don't look like they're requesting water just yet so i think it's a good time to lay down the new dt earth and new yellow traps to see if we can kill the remainder. gonna grab some flowering ferts too while I'm at it.
Update:
got a bigger pot and some supergrow soil, only had time to transplant one of them today. but I decided to after them one more cycle before i do the DT earth.
update:
dt earth added, seems to be alright but not quite dry enough
Likes
2
Share

@Black_Widow
Follow
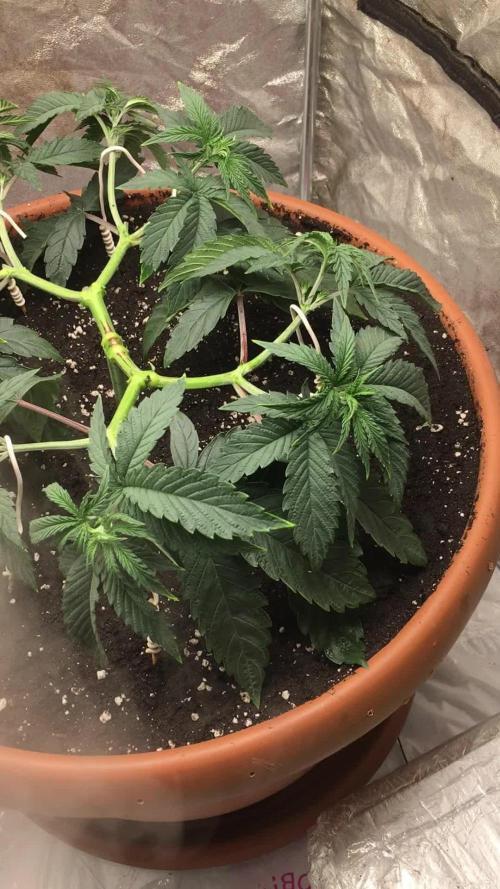
Привет садоводы !
уже середина новой недели , а я только приехал
за время моего отсутсвия растения подросли и окрепли
сегодня я пересадил цветок в большой 45 литровый горшок и подкормил удобрениями
кажется растение чувствует себя хороно .цвет листьев хороший
подержу ее еще пару недель на вегетации , посмотрю как пойдет дальше !


Likes
11
Share

@Enki_Weed
Follow
🌸 Woche 5 der Blüte
Die Early Skunks sind jetzt mitten in der Blüte und entwickeln sich richtig stark. Der Stretch ist so gut wie durch und die Pflanzen haben ein schönes, gleichmäßiges Blätterdach aufgebaut. Die Blüten werden von Tag zu Tag sichtbarer und setzen schon ordentlich Harz an.
Das DWC-System läuft stabil: frische Nährlösung, klare Werte und die Wurzeln strahlend weiß. Genau so soll es in dieser Phase aussehen. Die Pflanzen nehmen sehr gut auf und zeigen keinerlei Mängel oder Stress – Farbe, Struktur und Wachstum sind voll im grünen Bereich.
Das Klima bleibt konstant und das Setup arbeitet sauber zusammen. Licht, Luft und CO₂ greifen perfekt ineinander, wodurch die Pflanzen richtig Tempo machen.
Fazit:
Sehr starke Woche. Gesunde Pflanzen, satte Farbe, stabile Blütenentwicklung. Alles bereit für die nächsten Wochen, in denen die Buds jetzt richtig zulegen werden. 🌱🔥

Processing
Likes
15
Share


@eldruida_lamota
Follow
Que hay familia, ya estamos de nuevo, y es que estas crazy cookies estan engordando todavía, las seguimos manteniendo unas semanas más solo con agua , y a ver cómo avanzan estas semanas.
Ph controlado 6,5 humedad por debajo del 40% , lo único que no estoy puedo eso controlar es la temperatura que nos subió a 28,5 grados, por lo demás, sobre ruedas.
Para los próximos cultivos, cambiaremos la gama de nutrientes , más que nada por probar otras marcas.
Un saludo y buenos humos fumetillas.

Likes
18
Share


@MWHomegrow
Follow
Erste Blütewoche:
Tag 55: Ich spreche quasi aus der Zukunft weil ich recht wenig Zeit hatte in den letzten drei Wochen…aber es wird wild 😝 wir sind aus dem Urlaub zurück und die Pflanzen waren gut 65cm groß, höchste Zeit für den 12/12 Switch!
Und natürlich je 4l Wasser für jede Pflanze mit ph 6.2 und 1ml/l Calmag Agent.
Ab jetzt heißt es erstmal die Pflanzen in Ruhe zu lassen und die Beleuchtung der Lampe auf 270w von oben und 40w von unten, um das Defizit von 6 Stunden auszugleichen und evtl den krassen Stretch zu reduzieren.
Tag 56: heute 3l Wasser mit ph 6.1 und 0,5ml/l calmag agent (2von unten 1 von oben)
Tag 57: heute 2l Wasser mit ph 6.2 von unten
Tag 58: heute mal Ruhe 😊
Tag 59: 4l Wasser mit ph 6.2 und 0,5ml/l Calmag Agent (3 von unten 1 von oben)
Tag 60: tote Blätter abgepult und weggesammelt
Tag 61: 4l ph 6.1 von unten pro Pflanze
Ende Blütewoche 1


Likes
13
Share


@StickyFingah420
Follow
Planta hermosa, de estructura resistente y cogollos rocosos y repletos de resina.
Resistente bien el entrenamiento LST y topping, pide bastante alimentos y te recomiendo lavar bien las raíces antes de cosechar si has usado fertilizantes.
Los frutos desprenden una fragancia exquisita y muy dulce.
Likes
127
Share


@DreamIT
Follow
🎃👹👽MONSTERCROPPING RED MANDARINE 👽👹🎃
____________________________________________________________________________________________
💀 5.2 ...
💀 6.2 ...
💀 7.2 All regular, Today we add the latest product from hesi to fertilization and wait for the last few weeks, yeah !!!
💀 8.2
💀 9.2
💀 10.2 I love this plant 😍
💀 11.2
_______________________________________________________________________________________________________
📜👀 A look at the details of what I'm growing 👀📜
🍊💚 Red Mandarine F1 🍊💚 by 🌱🍭 Sweet Seeds 🍭🌱
📋 Details
⚧ Gender
▪️ Feminised
➰ Genes
▪️ 55% Indica / 45% Sativa
🎄 Genetics
▪️ Red Poison Auto (SWS39) хCalifornia Orange x Skunk hybrid)
🚜Harvest
▪️ 400 - 500 g / m²
🌷Flowering
▪️ 49 - 63 days
✨THC
▪️ 16%
✅CBD
▪️ 0,2%
🏡Room Type
▪️ Indoor
🌄Room Type
▪️ Outdoor
🕋Room Type
▪️ N/D
🎂Release Year
▪️ 2019
__________________________________________________________________________
👀📷🥇 Follow the best photos on instagram 🥇📷👀
https://www.instagram.com/dreamit420/
🔻🔻🔻Leave a comment with your opinions if you pass by here🔻🔻🔻
🤟🤗💚Thanks and Enjoy growth 💚🤗🤟
Likes
10
Share


@KannaKullektiv
Follow
Black Muffin Harvest Report
The Black Muffin Monster really impressed me. She grew into a beautiful and strong plant with dense, resinous buds and an amazing aroma.
Unfortunately, I suspect she developed a fungal infection, probably Fusarium, which forced me to remove about four side branches. Still, the rest of the plant stayed healthy and finished strong.
Overall, I’m very happy with the results and excited to see how she turns out after drying and curing. It was a great experience despite the challenges.
Likes
9
Share


@Tikush24
Follow
Mon kit
-tente horticulture 2x2x4 pied
-terre de rempotage promix
-lampe led AGLEX 1200W
-1fan pc rentre dair
- 1 fan sortie d’aire
-1 fan usb
Debut de la deuxieme semaine

Likes
26
Share


@Highgrade_Harvests
Follow
So week 4 is in the books. I'm really happy with how everything has been going. I've been busy and stressed these last few weeks so to see how good these girls are doing puts a smile on my face. The terpenes are strong now and everything is starting to fatten up. Won't be too long now. Follow my Instagram and YouTube for more pictures and videos! I would appreciate the support!

Likes
27
Share


@w33dhawk
Follow
Hi liebe growmies die Woche lief auch wieder gut das letzte mal für diesen Grow gab es Nährstoffe Anfang der Woche in Form von pk compost Tee von Bio tabs ansonsten war nur zu gucken und einmal am Ende der Woche reines Wasser ab jetzt gibt es auch nur noch Wasser denke mal das ich 2 wochen fertig bin und die angegeben Zeiten von Green house hin hauen werden. Bin echt begeistert was Bio tabs so leisten kann und werde definitiv einen nächsten Durchgang mit der Nährstoff Linie fahren um zu erfahren ob die Ergebnisse konstant auch auf anderen strain's funktionieren aber wie gesagt bin zufrieden mit dem was ich sehe und riechen kann. Euch noch ne schöne Woche und fette Glitzer Kugeln an euren Pflanzen wünsche ich euch. Bis dahin und bis nächste Woche ihr growmies und grow Kollegen

Likes
6
Share


@valiotoro
Follow
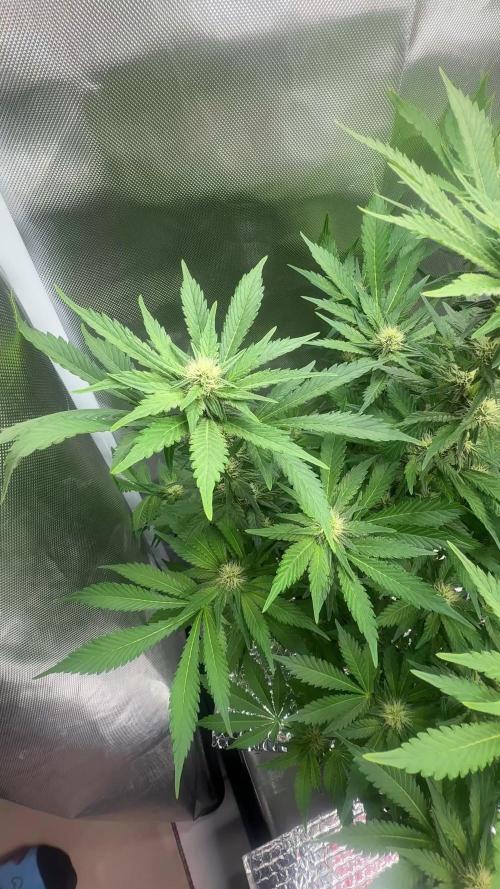
Hello everyone week 4 of flower has passed for this Mint Jelly auto ❄️
For the feeding schedule i stopped feeding Power Roots and Pure Zym and started feeding Green Sensation 0,5/l
Mars hydro FC-E6500 75%
have a great day and wish you all happy growing 😎👨🌾🏻

Processing
Likes
15
Share

@eldruida_lamota
Follow
Esa familia, otra cosecha más, no tan contento esta vez la variedad en si está buena pero su cultivo es algo complicado y no está estabilizada la genética, los días de floración son más de 55 días como dice el banco,más de 3 meses de floración con estos ejemplares...
Pero mereció la pena esperar el colocón es bastante fuerte, para mi que , sativa dominante a mi parecer, 24% de thc , cruzada entre cookies x OG Kush , muy productora en general. Así esto es todo , pronto más trabajos, buenos humos familia.