The Grow Awards 2026 🏆 


Likes
Comments
Share
@PanGrower
Follow
I think about the fact that it is no longer necessary to cut leaves. I cut it a lot, but I notice that many people cut a bunch of leaves at one time, although somewhere I read no more than 10% at a time.
When I gave fertilizers, I always diluted them with water even more to reduce ppm
Day 68: I added cal-mag to the diet because the leaves are really turning yellow from the bottom. 0.5 ml
Day 70: I added 1 ml cal-mag
Likes
56
Share
@Cannabeast40
Follow
Welcome back to yet another short update☺️
Transplanted and filled with tender care and love 🤗 A bit colder temperatures then inside the veg tent , but I’m not worried at all🤩
Videos show the process, hope you enjoy 💯💚
See you next week🤩
------------------------------------------------------------------------------------------
Light source:
Medicgrow SpectrumX
880W LED
Build in PPFD
4 controllable spectrums V1, F1, VS, FS
Visit https://medicgrow.com/ for more informaton.
Light measurement:
Apogee MQ-610 & Apogee DLI-600.
Fertiliser:
Organics Nutrients
https://www.organicsnutrients.com/en/
Green Buzz Nutrients
Discount Code: GD42025
Grants 25% with a minimum Order value at 75 Euro.
https://greenbuzzliquids.com/en/shop/

Likes
7
Share
@Krissci
Follow
Day 1 - LST mostly.
Will start using bloom nutrients this week.
And reduce humidity to 60-55%
Learnt from my last batch that 24hr light is best,
Likes
7
Share
@psychonaut420
Follow
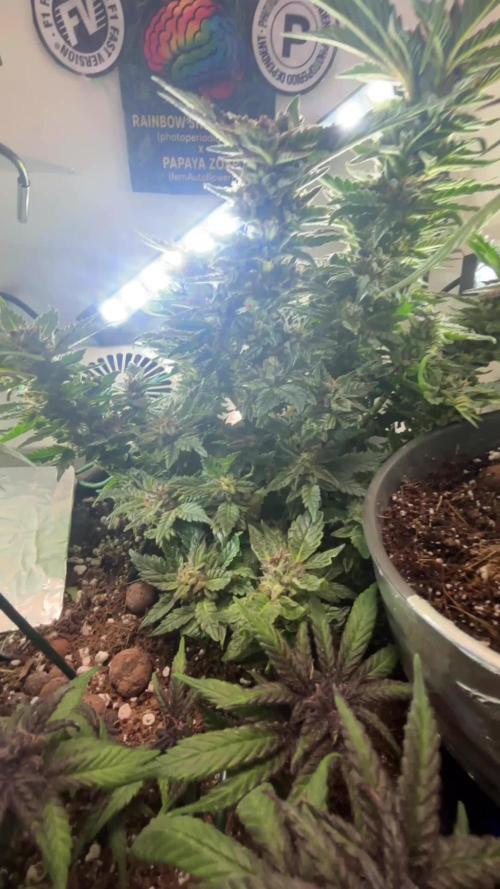
Mental rainbow F1 has come quite far she’s on 2nd week of flushing and she’s thickening up and has pretty much stoped stretching and just been focusing her energy on thrichome production and filling out the buds looking forward to harvest within a week or so

Likes
9
Share
@Kayotic
Follow
*Day 29
#1 is 3 inches
#2 is 6 inches
*1 tsp Trifecta Myco Supreme
*1 tsp Cal Mag
*Seem happy , going to LST #2 and leave #1 alone

Likes
Comments
Share
@LittleBigTrees
Follow
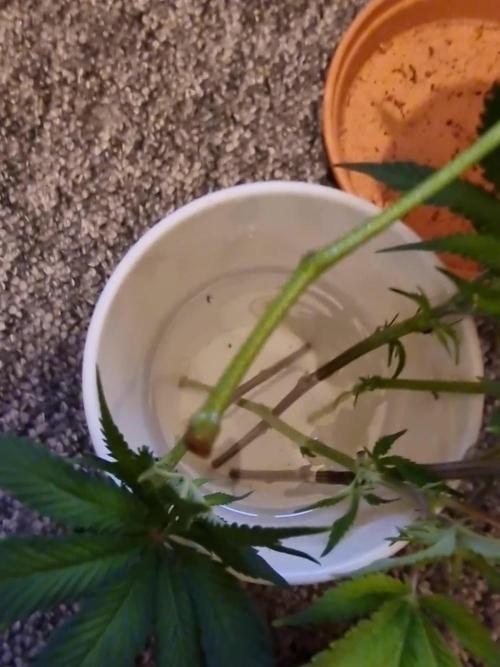
Defoliated this week, they don't seem to bothered. 😅 maybe they didn't even notice.
I will give them a week then Defoliated again if necessary.

Likes
15
Share
@Venabr96
Follow
Armario posto em fase de floraçao.
Rega de 4 a 4 dias com 2l de agua desmineralizasa.
Deixei a lampada cair sobre elas , piqueno incidente 😣😣
Mas esta tudo bem só perdi uma folha da piquena uma da grande e algumas queimaduras 😣😣

Likes
Comments
Share
@runtzpwn
Follow
Feels like it snowed on it over the last week, full of cristals. I think it needs about one more week and then it's ready for harvest.

Likes
10
Share
@Chubbs
Follow
These beauties are super super frosty and swelling amazing. From the nakedness eye one of them will be coming out this week as it finished fast, the other two still have a week or so. All in all Happy
Likes
8
Share
@mr3dontplay
Follow
They're really taking off this week. They're gonna start foliar feeding with Flowers Kiss and get trimmed topped and lollipop this week. There you have it all cleaned up!!!


Likes
33
Share
@Belverde
Follow
Welcome growers
First fourteen days of flowering ended for these two BLUEBERRY CHEESECAKE 🍰
The flowers are scattered and are more or less at the same ripeness for each 🌻🌻
Ten days ago the plants were suffering a little and now they show some difficulties..
But that's nothing too worrying !
In these cases there will be "problems" only at the level of final yield..
But I think I saved them in time 🏥
We will see in the coming weeks..
About nutrients 👇
I still giving their always organic/veganic nutrients..
A little bit of silicium (Bionova) / Activator (Biomagno) / Crescita (Biomagno) / Activera (Biobizz) / Grow vegan (Bionova) / The Missing Link (Bionova) / X-Cell (Bionova) / Bioheaven (Biobizz) , a little bit of P-K 3-5 (Bionova) {in spray solution } , Fioritura (Biomagno) and Bloom vegan (Bionova)
Like i usually do, a little bit of everything at any watering 💧
And that's all..
See you next 📆
Thanks for stopping by 😎👍👍
FC ✌️
🇮🇹

Likes
11
Share
@Professor_Daank
Follow
Herrrrro gang! Welcome to another week of Daank's grow!
8/2: Brought back the Great White. I was reading that it works well in conjunction with other root excelurators, like Rapid Start. I got 2 more temp/humidity sensors for the tent. It allows me to keep track of 100% of what is really going on, I find it to take away worry (b/c temps are very important!). Today was a "eureka!" moment in terms of understanding run-off pH and it's value to telling the grower how healthy the plant is and what nutes may, or may not, be needed. I also got some new LED glasses so I don't burn my fucking corneas when tending to the garden - they are phenomenal and I suggest them if you grow with an LED. Check the videos and photos. Pistils are growing rapidly and baby budlets are starting to form. I'm actually getting a nice subtle purple color - it's very neat.
Today's run-off pH was 6.3, and I gave it 6.3 for water - so that's a good sign (I bounce the pH all around from 5.5-6.3). I'll keep track of this moving forward in the diary. Minor defoliation.
***Pro-Tip: If you're wondering what the run-off should be... around +.5/-.5 of what you put in is good. But this also might not mean anything... so many different opinions on the web.
****: My Spotify Playlist for my plants: https://open.spotify.com/playlist/0ydAFulbzDlqFr5WIZdfM1?si=r5M5H83BSQ6tOE5pk9Bg4Q
Day 38 - 8/4: Lil'budlet's are poppin' up all over. By the end of this week I assume we'll be in full swing.
Day 39: I have ordered new nutes, Advanced Nutrients. The reviews, photos, and research all point to using this for the best results. I found them to be a bit expensive, but if I can always get perfect pH values without much of a hassle... I'm down. They will be here by end of the week and I'll transition that over this weekend. I can't wait.
Day 40: 8/6 - Advanced Nutrient nutes arrive today. Watering will be a pleasure. The plants look great. The buds are real. Small smell. Trimmed last night quite a bit for bud production. They love George Gershwin's "Rhapsody in Blue". It perks 'em up.

Likes
14
Share
@TheBulldozerSicily
Follow
Inizio un nuovo ciclo come sempre in ritardo, volevo iniziare a settembre e ho ritardato di un mese. Vediamo a questo coltivo cosa viene fuori! Peace✌️

Likes
32
Share
@MadeInGermany
Follow
Hey everyone :-).
This week she continued to develop very nicely 😍.
I started with topping 😊.
The training took it very well and after 1-2 days it grew again immediately 👍.
I decide spontaneously how often I will train it 👍.
It was poured once this week with 1.2 l.
Otherwise there is nothing to report this week.
I wish you all a lot of fun until the next update. stay healthy and let it grow 😀
You can buy this Strain at :
www.Zamnesia.com
Type:
Banana
☝️🏼
Genetics:
OG Kush x unkown
👍
Vega lamp:
2 x Todogrow Led
Quantum Board 100 W
💡
Bloom Lamp :
2 x Todogrow Led
Cxb 3590 COB 3500 K 205W
💡💡☝️🏼
Soil :
Canna Coco Professional +
☝️🏼
Fertilizer:
Green House Powder Feeding
☝️🏼🌱
Water:
Osmosis water mixed with normal water (24 hours stale that the chlorine evaporates) to 0.2 EC. Add Cal / Mag to 0.4 Ec Ph with Organic Ph - to 5.5 - 5.8 .

Likes
26
Share
@Ageddd
Follow
Last week, 2 irrigations, gave her plain water.
Beautiful colours, it was a pleasure to grow such a pretty plant, production is going to be like 10 grams i expect, Cloudy days and bad weather while growing and flowering, but quality seems pretty good, she is so frosty and smells like fruits.
1 week of drying, and curing at the moment.
Put the weed in jars with Boveda 62.
Im making a harvest post with the smoke effects flavour and all the stuff, so you can get more details about the high, flavour and quality.
Harvested 1/07/2018
Good vibesss
Likes
6
Share
@smoking_hills9
Follow
Top strain, very easy 2 grow with amazing results in the end. Smoked it many times, one of my favourite old school strains. Again loads of rock solid buds, wich is our main target apart from beautiful pics of course ✌️
💚
So final results are 580gr of quality solid buds🤩✔️ that's not include the bottom trim and small buds.
Total harvest weight of 54 trees is 5kg of quality solid buds and around 2kg of bottom small buds
Processing
Likes
13
Share


Likes
6
Share
@Mr_nugs_lover_David
Follow
I love this strain to pieces man! Another high quality genetic by original sensible seeds, very very hard dense nuggets like rocks, sticky, stinky as hell, high quality, as always by original sensible seeds. 100% organic grown

Likes
4
Share
@20SYL
Follow
Semaine de croissance/ début de floraison pour deux des autofloraison. La troisième est toujours en retard mais elle à l'air en très bonne santé !
Ajout de bio bloom et top max en petite quantité (1ml/L).
Une d'entre elle montre des signes de sur arrosage ou/et d'excès d'azote. (?) Je vais laisser le substrat sécher et l'arroser sans bio grow ou à l'eau claire.
Likes
9
Share
@Bafforr_autoflower
Follow
Se realiza transplante a maceta definitiva de 20 LT AIRPOT
Sigue el riego día por medio
